*** NOTE: ALL INFORMATION IS ACCURATE AT DATE OF PUBLISHING ***
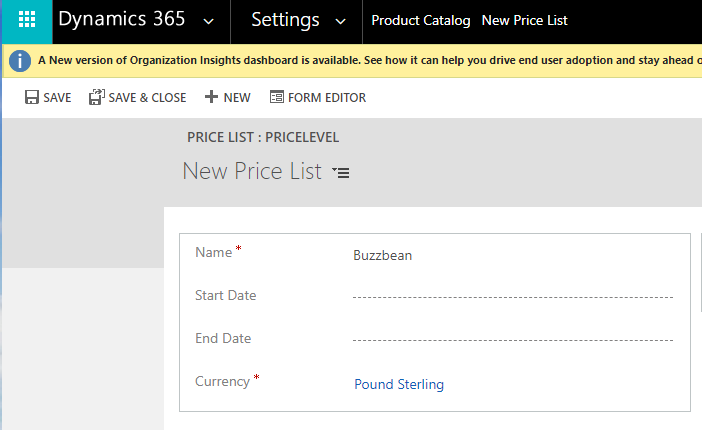
An organisation using Dynamics 365/CRM and selling products or services is most likely using price lists to do so. Starting off with a default price list gives you a set of prices to generate opportunities, quotes and orders effectively. This is fine if everything you sell is the same price for each client, but if you have a different set of prices for some of your clients you can set up a specific price list for them. To get started, create a new price list. If it’s going to be used by only one client, you can always use that as the name. Save and close the price list for now.
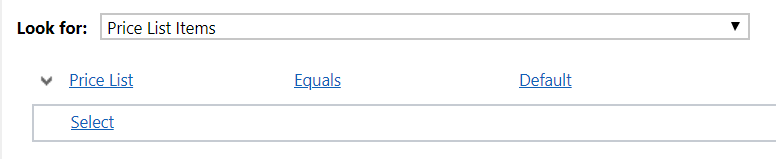
Next, create an advanced find looking for Price List Items where the Price List equals Default (or whatever the name of your default price list is).
Make sure you have all of the columns you need in the view, then click on Export Price List Items from the top right.
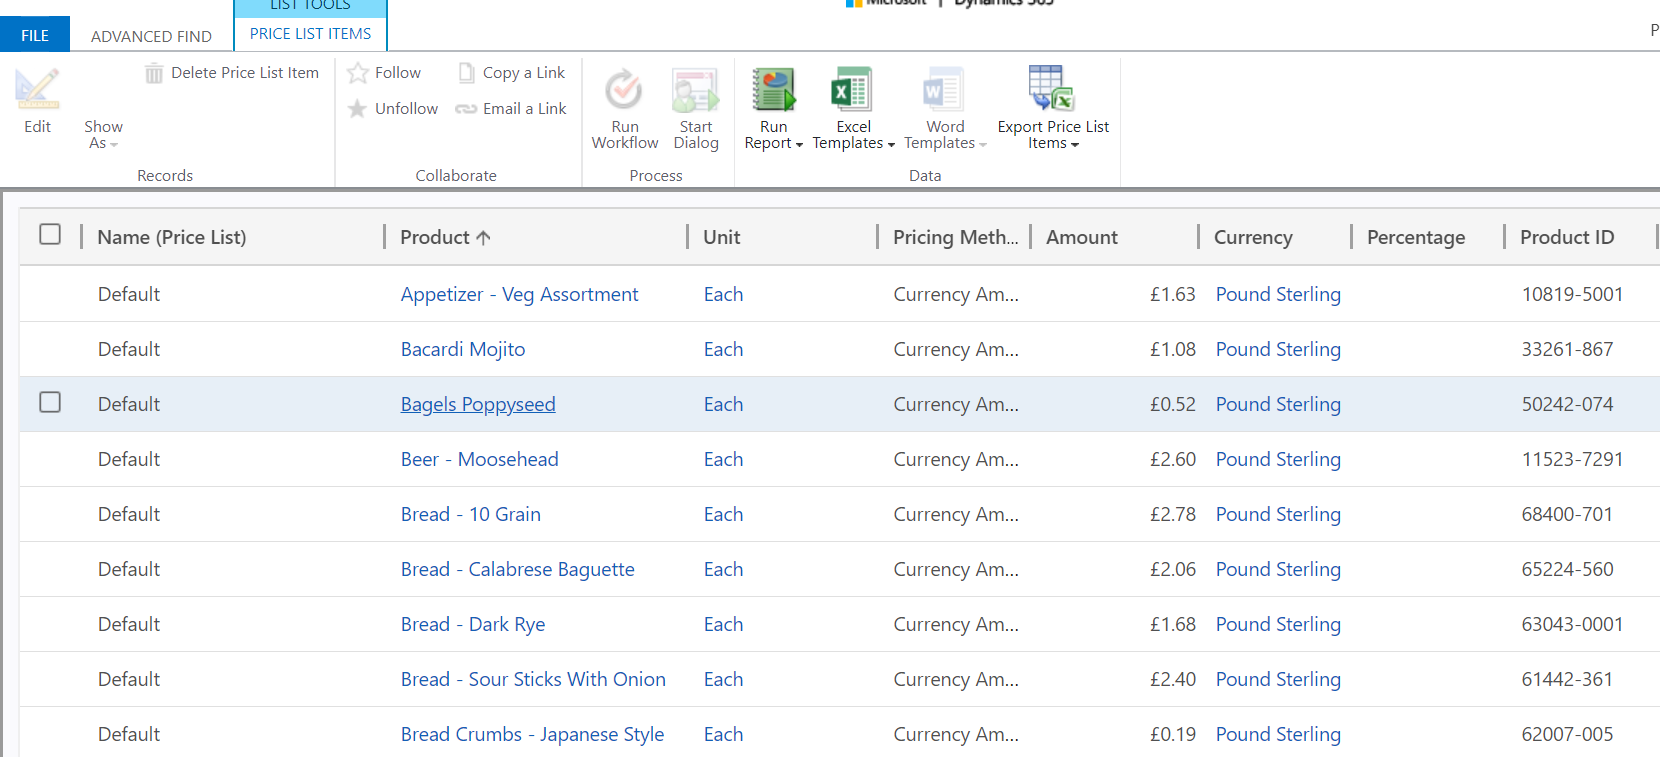
Now that you have the Excel file downloaded, find the Price List column and change the name for each row to the name of your new client specific price list. Use the Amount field and adjust the value as needed to reflect the pricing for your client. You can then delete any rows for products that might not ever be sold to this specific client. Save the file as a .csv file somewhere on your computer.

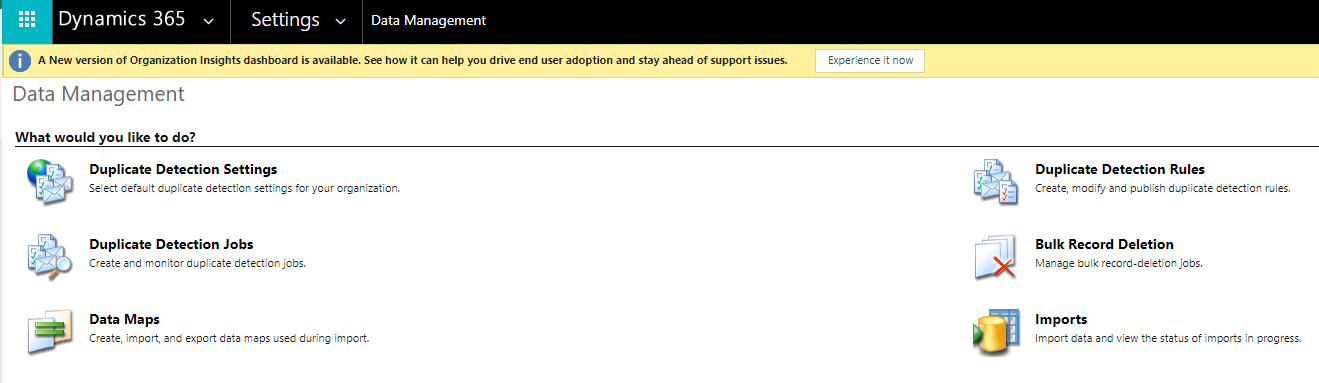
Next, go to Settings, Data Management and then click on the Imports option.
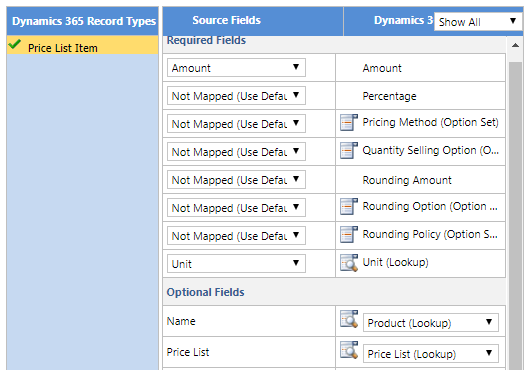
Browse out to find the .csv file. When you get to the Map Record Types screen, select Price List Items as the record type.

Map all of the fields necessary, and make sure the Price List is mapped to the Price List (Lookup) field, mapping on the Name of that record.
If you have any errors during the import you will need to check the error log and figure out what is causing the issue, then try again. Once it’s finished you can navigate back to your new price list. You should see all of the products as Price List Items with their new prices for this specific price list.

Now navigate to the Account record you created the price list for. If you don’t already see the Price List field (which is a standard field) on the form, you can add it then save and publish the form. Now use the field to lookup the new price list you created. Save the record.

Next time you create a new Opportunity (Quote or Order), the price list will automatically be populated with the one linked from the Account record.
Check out the latest post:
Removing Issues With Mobile Phone Numbers On Realtime Forms
This is just 1 of 447 articles. You can browse through all of them by going to the main blog page, or navigate through different categories to find more content you are interested in. You can also subscribe and get new blog posts emailed to you directly.