*** NOTE: ALL INFORMATION IS ACCURATE AT DATE OF PUBLISHING ***
If you have been using Dynamics 365 Marketing for any length of time, you know you can create perfectly customised emails, including things like your Contacts first name, job title, name of the company they work for and so on. This creates journeys that are timelier and more meaningful for your customers and prospects. Did you know you can also continue that personalised experience when those same Contacts visit your website? Using personalised pages in the app, you can then add code to your website to display data from their Contact record. Unfortunately, the documentation is not so great, and is certainly not even low-code. Hopefully this article will help you to implement it a little easier!
Marketing Website Script
First things first, this process is going to use some aspects within Outbound Marketing (the personalised page) and some within Real-time Marketing (the email and journey). If you have already added the tracking script generated under marketing websites and got it running on your website, you can ignore this part. If not, you will need to set this up. In theory, only the line in yellow is needed (note that they are the same for both the JavaScript code and the Form capture code. Do not add both blocks of code or you will end up with an error by defining the line in yellow twice.
Adding Your Personalised Page
Next, navigate to the Outbound marketing area. From here, go to the Personalized pages section and add a new one. In this example, I am going to have a page on my website with a form for people to access a (fake) whitepaper. From there, they will be sent on a Journey that will send them a thank you email with a link to get the download on a different landing page. The Personalised page will define which fields we might want to use on the landing page.
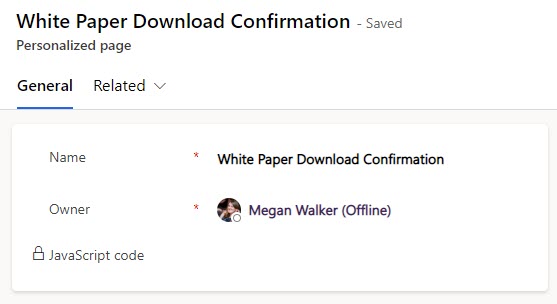
After giving the page a name, save it. Then you should have access to a subgrid to add fields from a Contact record that you wish to display on your website landing page.
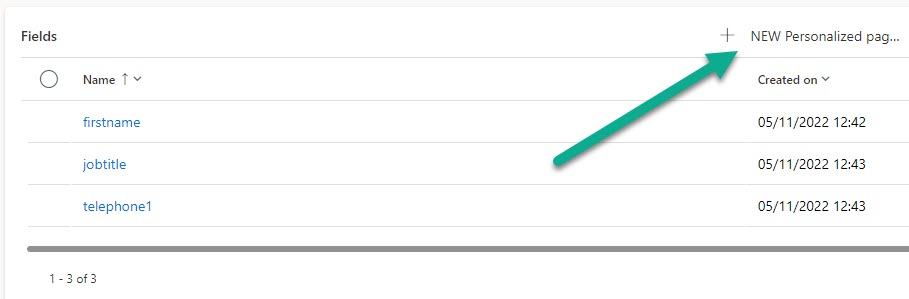
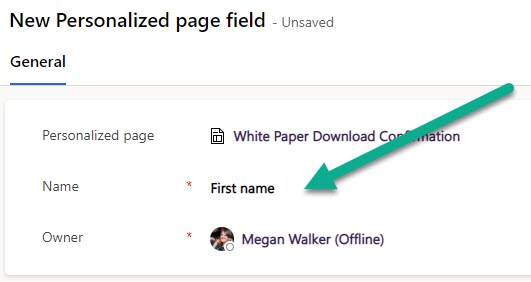
When you add a page field, you will see a long list in the name field which is a list of the Contact fields. Don’t pick many, only ones that would make sense to display on your landing page. Less is more! Save and close each one.
Once you’ve finished adding your fields, click on the Go live button on the personalised page record.
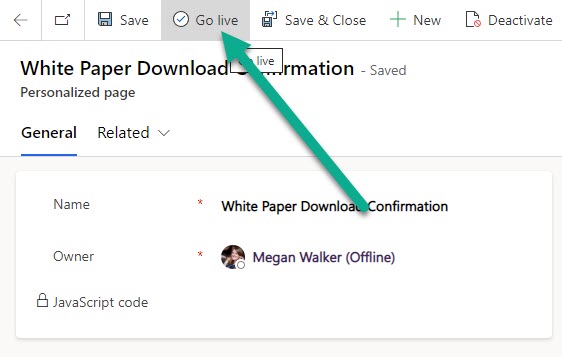
After saving the record, you will see a script. Seems simple right? Just copy and paste into a page on your website? Nope, nope and triple nope. This WILL NOT WORK. It doesn’t even give you anything accurate based on the fields you just added. This is where a developer is really needed. Luckily, I happen to know a few so had someone help me out with getting something that actually works. More on the script in a bit. Move on from the page and we will come back to it in a bit.

Create A Marketing Form
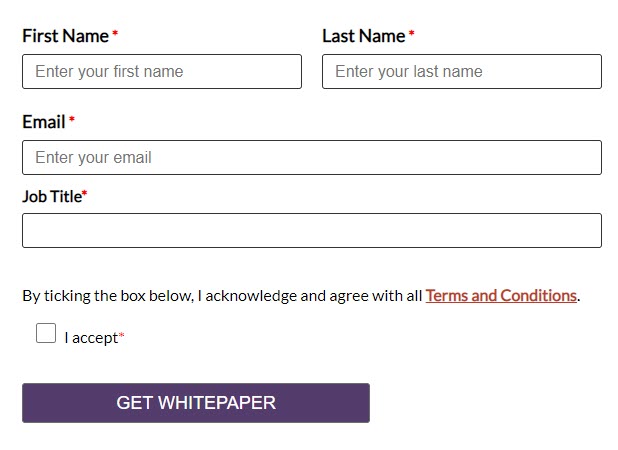
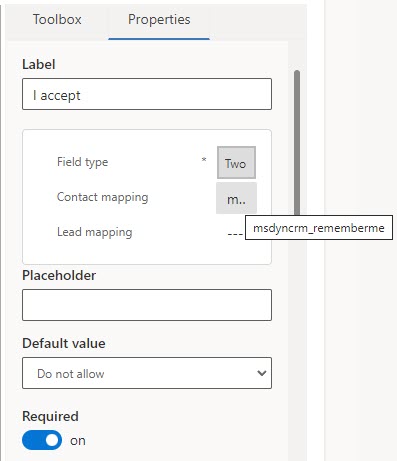
We will need a marketing form next. This example is just to show how you can get the personalisation on your website working. In theory you could add personalisation to your website WITHOUT the need for a Contact to fill out a form each time, but they MUST have filled a form out at some point and have ticked a box to allow prefilling of forms. This process shows you how it works. So here we have a marketing form asking for first name, last name, email and job title. The box where it has ‘I accept’ is the form field mapped to Remember Me. This is what will allow values to be displayed on your site from the Contacts record. I am not advising you legally what your terms and conditions should be, or what information you need to share with anyone filling out your form, but you must let them know what they are agreeing to when ticking that box. Consult your own legal team! 😊
The Remember Me field should already be mapped for you as a standard form field. I made it required but that’s more for demo purposes than anything else. However, if you have content that you only want someone to get if they agree to all your terms and conditions, you can also make it required. That way they cannot submit the form unless they tick the box.
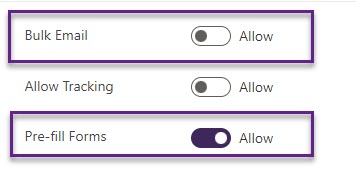
Likely in your system, the Remember Me field is shown as Pre-fill Forms… and annoyingly was set up so that Allow is turned on the opposite way of Bulk Email or Allow Tracking (grrrr consistency people!) but it is what it is. If the field is not already displayed on your Contact form, might be a good idea to at least show it on there (make it read only if that makes more sense).
Make A Real-time Marketing Email & Journey
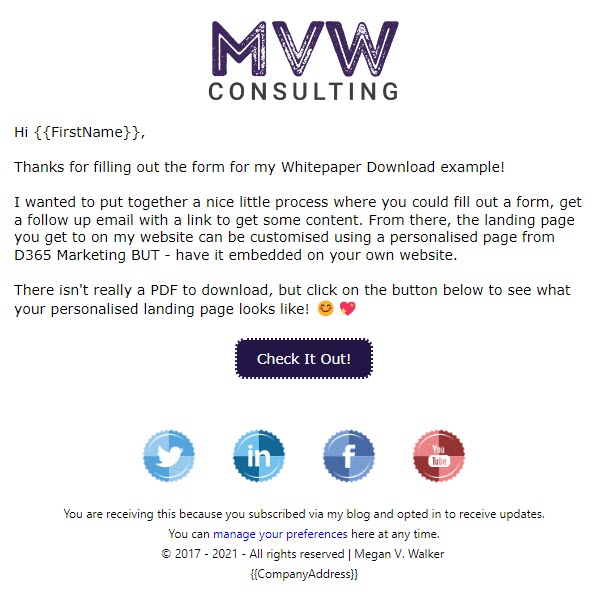
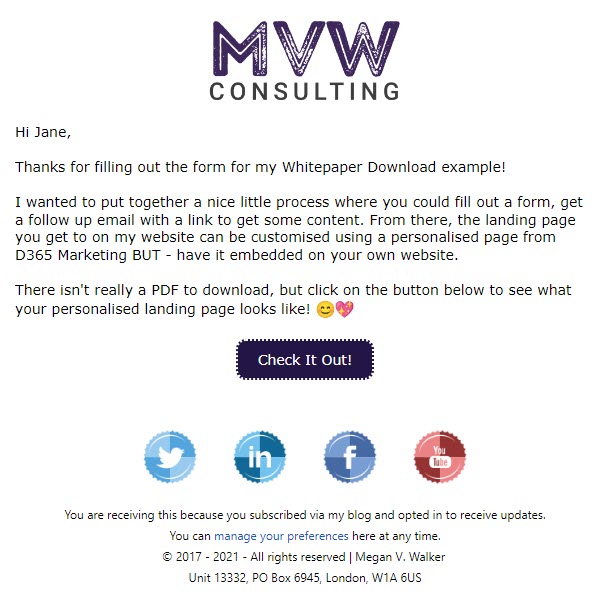
Create a nice email that will be sent out to the Contact when they submit the form. You’ll want to add a button to it, and make sure that button links to where you want to have your landing page on your website. The landing page will include a link to whatever you want the Contact to have access to.
For this example, I want to use a Dataverse trigger that will run when a marketing form submission record is updated, and I also have it based on it being the status reason getting updated. For more information on creating this kind of trigger, check out this post on creating no code custom triggers where I have used this example.
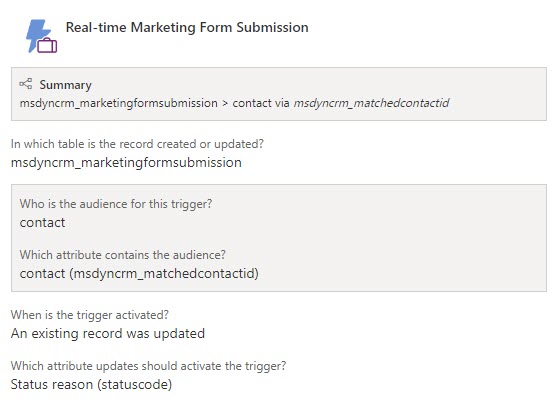
Now create a new Journey using this trigger. You will need to check to see what conditions are right for you, but I only want this to be triggered if the Marketing Form ID field contains the ID of my new marketing form (you can get that from the very end of the URL if you open the marketing form in D365), and when the matched contact field is not empty. That way I know it will only trigger once the submission is linked to a Contact (consider that sometimes a new Contact needs to be created), and only for that specific form.
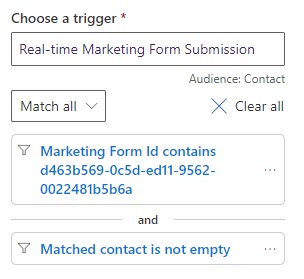
This Journey is a simple one so only needs a step to send out the email. That’s it!
What The Process Looks Like
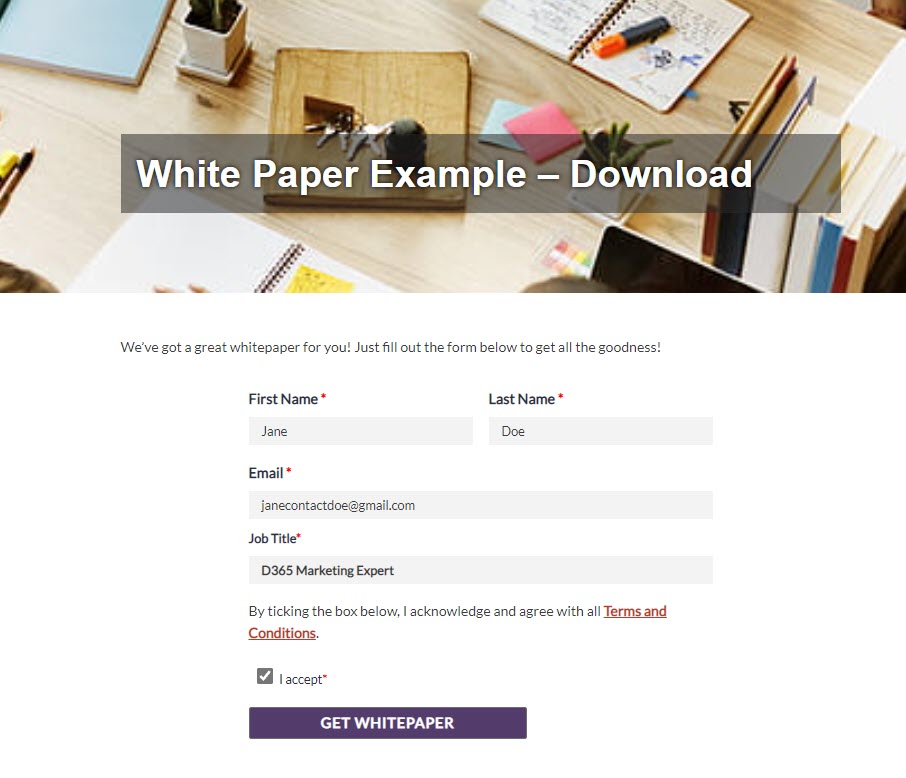
First, we have the page on my website that has the marketing form embedded into it. Feel free to fill it out if you would like to see this in action! White Paper Example – Download – Megan V. Walker
Once the form is submitted, D365 either links the form submission to an existing Contact (based on the email address) or creates a new one. Then the Contact will be added to the Journey I created. So we can see the email is sent. Clicking on the Check It Out button will then open up to another page on my website.
This is the landing page where I’ve added some code that relates to the Personalised page (more on this in a moment including a script you can use). When you first land on it, a spinning gif image will show to indicate the page is loading.

If it finds that the person viewing the page has a cookie in their browser for D365 Marketing, we can then show their first name, and also their job title that they filled out.

If the link is then opened again in a different browser, or there are no cookies enabled and/or prefilling is not enabled, slightly different content can be shown on the webpage (read on to see how!).

The Landing Page Script
OK, so I’ve mentioned this script that we need a few times. I’ll walk through each part and explain it, then will provide it in its entirety at the end. Hopefully this will be useful. You will need to have access to add a new page to your website AND be able to add custom html or code to the page.
Styling With CSS
This part could be part of your main sites CSS, or you can do as I have and just add it to the top above the entire script on the page(s) where you have your personalised information that you want to display. This hidden element will be used later on to determine if we are showing content to a known Contact (with the cookies in their browser and the remember me set to Allow) or if we are showing content to someone and we aren’t able to tell who it is (they opened in a different browser, have cookies turned off or the remember me field is set to Do Not Allow). We also use it so when someone first lands on the page and we wait for the script to run, we can show a loading gif image instead.
<style>
.hidden {
  display: none;
}
</style>
D365 Marketing Javascript Loader
If you look back at the Personalised page you created, and I told you the script it generates shouldn’t be used, it does have one line we need to make sure gets included. This is reference to a loader.js file that needs to run in order to make this work. Be sure to include this line after you have defined the CSS.
<script src="https://mktdplp102cdn.azureedge.net/public/latest/js/loader.js?v=1.84.2007"></script>
Now we simply add in a line to indicate the next few steps are part of a script that needs running.
<script>
Functions For What Content To Show
Functions are still something I try and wrap my head around. I can understand them, but not something I can sit and write myself… yet. 😜 But I can definitely explain this! Further down in the script we are going to add an id that determines what personalised page we are going to pull values from. If you remember, I added the first name, job title and business phone number. This first function is going to get access to those different data fields on the personalised page, then use the name of the field to create what is known as a span. Spans are containers that hold content (in our case text) and each span can be styled using CSS, or have changes made to it using JavaScript. So the function below finds each field passed through from D365, then adds a prefix of span.dyncrm-inject. then the field name. We can then use those span names to determine what content to show on the page and where. The same can be done with a div. More on that in a moment. Underneath the part of the script where we get all of the fields from the personalised page, we have three lines that define the three different scenarios that will occur on the page and if those elements (DIVS) should still be hidden, or indeed the hidden CSS class should be removed. For this function, it would be the content we determine when we know who the Contact is that will be displayed (the hidden CSS class is removed).
  function showPersonalizedPage(data) {
    const Data = data.Data || {};
    for (fieldName in Data) {
      elems = document.querySelectorAll("span.dyncrm-inject." + fieldName);
      elems.forEach(function (elem) {
        elem.innerHTML = Data[fieldName];
      });
    }
    document.getElementById("identifying-visitor").classList.add("hidden");
    document.getElementById("unknown-visitor").classList.add("hidden");
    document.getElementById("known-visitor").classList.remove("hidden");
  }
Now we add a second function. This function determines what happens if we can’t find who the Contact is that is viewing the page, and all this does is determines that the content for an unknown visitor is what should be displayed.
  function showStandardPage() {
    document.getElementById("identifying-visitor").classList.add("hidden");
    document.getElementById("known-visitor").classList.add("hidden");
    document.getElementById("unknown-visitor").classList.remove("hidden");
  }
Required Personalised Page Information
This next part is something we need that is required by D365 Marketing in order to pass through the fields from the personalised page. We need to add in the ID from the page in D365 that was created at the start. This was included in the script that was generated along with the success and the error aspects. You can also get the ID from the end of the URL when you have the Personalised page record open. Now we just have some functions that we can actually pass through. So, when the page loads, we are aiming to access D365 and get those field values. If the page can do that, it’s considered a success, so we use the showPersonalizedPage function. If the page cannot get anything, it’s an error, so we can then sue the showStandardPage function.
  window.msdyncrm_personalizedpage = {
    id: "ID FROM YOUR PERSONALISED PAGE",
    success: showPersonalizedPage,
    error: showStandardPage,
  };
Now we close out the script.
</script>
Known Visitor Content
Below the script is where all of the actual content should go. This is what will then be displayed on the page once the script has run. Obviously you will put whatever makes sense for your own requirements but this should give you a good example. This block must be wrapped in a DIV and named the same as whatever you put in your two functions. So here we have a DIV with the id of ‘known-visitor’. In the script, when the D365 field are found, and we know who the contact is, this function is run because we have success. Notice that by default the class of the DIV is hidden, which if you go back to the start of this section you will note we added a CSS class called hidden where the display is none (making it hidden). The success function will remove the hidden class, therefore making this section now visible. It will also add the hidden class to the next two DIVs we are going to add.
Although we don’t need to list out all of the fields within the function (which makes it easier if we want to add additional fields later on), we do need to know the name of the field to then show it in the content. Remember for each field name, we are able to add it to a span. The class is dyncrm-inject then with the field name at the end of it. So below we can see that the firstname field and the jobtitle field have been added by including them as a span each time.
<div id="known-visitor" class="hidden">
<h1><span class="dyncrm-inject firstname">X</span>, thanks for downloading!</h1>
<p>As a busy <span class="dyncrm-inject jobtitle">X</span>, we think the information we've shared in this free download should help you gain additional skills, get some top tips and help you excel in your role! <br><br>
<a href="/category/dynamics-marketing/" class="button">Access Whitepaper</a><br><br>
Thanks again <span class="dyncrm-inject firstname">X</span>. See you next time!
</p></div>
Unknown Visitor Content
If there are no D365 fields brought back, and we don’t know who the Contact is, this will be our error which means the function will run for an unknown-visitor. Notice that again, this section is wrapped in a DIV which is hidden by default. The function will then remove the hidden element from the unknown-visitor DIV and add the hidden class to the known-visitor DIV and the next DIV below that we are going to add.
<div id="unknown-visitor" class="hidden">
<h1>Thanks for downloading!</h1>
You seem to have found our free download which is great! Just click the button below to access it and it's all yours. We'd love to know more about you though. <a href="/contact">Click here</a> to fill out our contact form and let us know how we might be able to help you achieve greatness!<br><br>
<a href="/category/dynamics-marketing/" class="button">Access Whitepaper</a><br<br>
</br<br></div>
Initial Loading Content
Finally we have a third DIV called ‘identifying-visitor’. Notice that this one does not have a class added by default so that means it will be shown initially while the script has the chance to load. This means it’s a nicer experience for the person visiting the webpage. Once the script has run and we have either success or error, either function that runs is going to add the hidden class to the identifying- visitor DIV. All we are then left with each time the page loads is one of the three DIVs being visible at any given time.
<div id="identifying-visitor">
<center><img src="link to your loading image gif"></center>
</div>
How Will You Use It?
Again, if you want to check it out, feel free to do so by filling out the form here: https://meganvwalker.com/white-paper-example-download/ – there isn’t really a whitepaper so sorry to disappoint, but it gives you the opportunity to see it working live.
Do you think this is something you might use? What kind of examples do you think it would work for? Let me know in the comments below, I’d love to hear your ideas.
For reference, here is the full script that you can use:
<style>
.hidden {
  display: none;
}
</style>
<script src="https://mktdplp102cdn.azureedge.net/public/latest/js/loader.js?v=1.84.2007"></script>
<script>

function showPersonalizedPage(data) {
    const Data = data.Data || {};
    for (fieldName in Data) {
      elems = document.querySelectorAll("span.dyncrm-inject." + fieldName);
      elems.forEach(function (elem) {
        elem.innerHTML = Data[fieldName];
      });
    }
    document.getElementById("identifying-visitor").classList.add("hidden");
    document.getElementById("unknown-visitor").classList.add("hidden");
    document.getElementById("known-visitor").classList.remove("hidden");
  }

function showStandardPage() {
    document.getElementById("identifying-visitor").classList.add("hidden");
    document.getElementById("known-visitor").classList.add("hidden");
    document.getElementById("unknown-visitor").classList.remove("hidden");
  }

  window.msdyncrm_personalizedpage = {
    id: "ID FROM YOUR PERSONALISED PAGE",
    success: showPersonalizedPage,
    error: showStandardPage,
  };

<div id="known-visitor" class="hidden">
<h1><span class="dyncrm-inject firstname">X</span>, thanks for downloading!</h1>
<p>As a busy <span class="dyncrm-inject jobtitle">X</span>, we think the information we've shared in this free download should help you gain additional skills, get some top tips and help you excel in your role! <br><br>
<a href="/category/dynamics-marketing/" class="button">Access Whitepaper</a><br><br>
Thanks again <span class="dyncrm-inject firstname">X</span>. See you next time!
</p></div>

<div id="unknown-visitor" class="hidden">
<h1>Thanks for downloading!</h1>
You seem to have found our free download which is great! Just click the button below to access it and it's all yours. We'd love to know more about you though. <a href="/contact">Click here</a> to fill out our contact form and let us know how we might be able to help you achieve greatness!<br><br>
<a href="/category/dynamics-marketing/" class="button">Access Whitepaper</a><br<br>
</br<br></div>

<div id="identifying-visitor">
<center><img src="link to your loading image gif"></center>
</div>
Check out the latest post:
Removing Issues With Mobile Phone Numbers On Realtime Forms
This is just 1 of 447 articles. You can browse through all of them by going to the main blog page, or navigate through different categories to find more content you are interested in. You can also subscribe and get new blog posts emailed to you directly.