*** NOTE: ALL INFORMATION IS ACCURATE AT DATE OF PUBLISHING ***
The ability to add lists of records to your emails in Dynamics 365 Marketing has existed for some time now. However, if you ever tried to use it, you would have quickly realised one slight flaw – no ability to set any filters on those rows. So, if you wanted to send a list to a Contact showing their current outstanding cases, you were out of luck as there was no way to differentiate between those that had been closed versus those that were still open and being worked on. We’ve now got the ability to set create a filtered list including one or more attributes to make sure the right information is displayed in your emails.
First, make sure you are up to date with your versions and that you are on at least 1.90.2011.0. Also note that at the time of writing this, the filter on lists feature is still in preview. More about it here and if you should consider using this in your environment. Once you have the latest version, navigate to the Feature switch section in the Settings area of the app. Turn on the feature and save.

Now you are ready to add a list to one of your emails. Note that this is for Real-time Marketing emails only. Click on the Personalise button on the right of the email and then open the Lists section. Click on Add list.
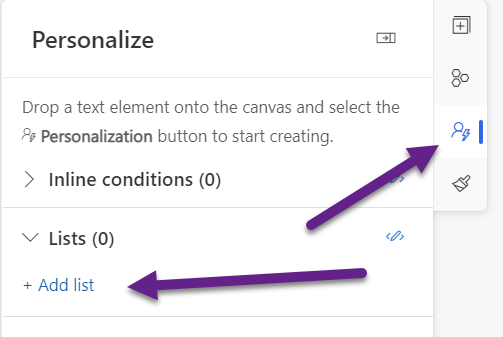
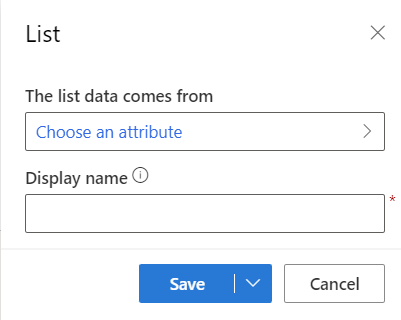
Now we need to determine what related records we want to use to list in the email. Click on Choose an attribute.
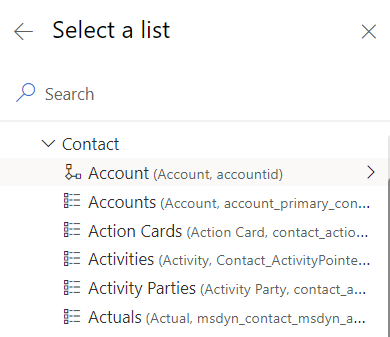
In this example I want to send an email to confirm a list of Contacts that have registered for a class based on an updated field on their record. I need to go from the Account record that the Contact receiving the email is linked to.
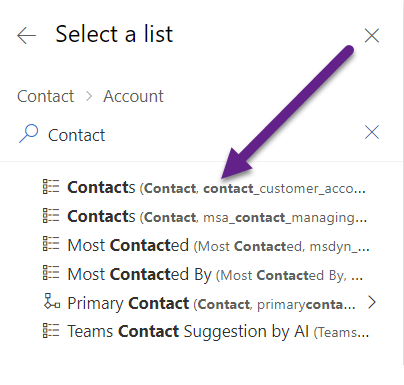
Then from the Account I need to find the related Contacts table so I can access those records.
Now we get a screen that looks like this. We need to set things up to make sure we get the right data in our list.
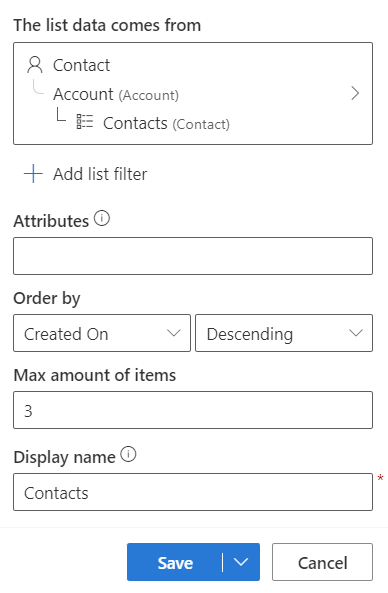
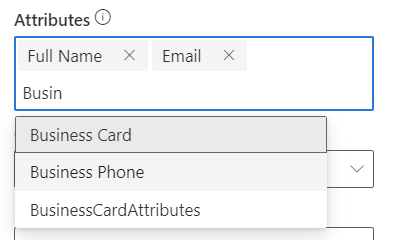
In the Attributes field, click and a drop down of all fields will show. You can also type to find the required fields. Here we are going to pull the Contacts full name, email and business phone. Just make sure you pick them in the order you would like them displayed in the list on the email.
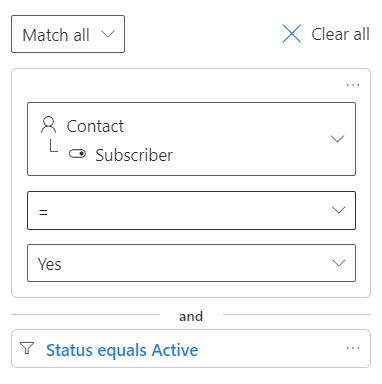
Now we will add a filter to make sure we aren’t bringing back ALL of the Contacts. Click on Add list filter from underneath where you set the relationship to the Contact records.

Now we can find fields from that record type and set up conditions. In this example the Subscriber field must equal Yes and the Contact record Status must equal Active.
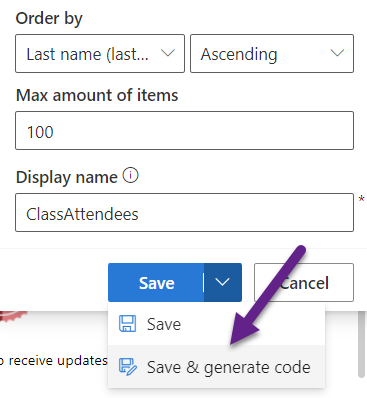
Back on the List, you can set an order by (Contact Last Name in my example) and the number of items to be returned. Note that you can only bring back 100 rows in to the list so you really need to make sure you are adding some valid reliable filtering to the list. Finally, give it a logical display name. You can then save or click the arrow and click on Save & generate code.
When generating the code, you will see some logic already provided for you. Just click on Copy code then close the window.

You can then paste it where it needs to go in your email.
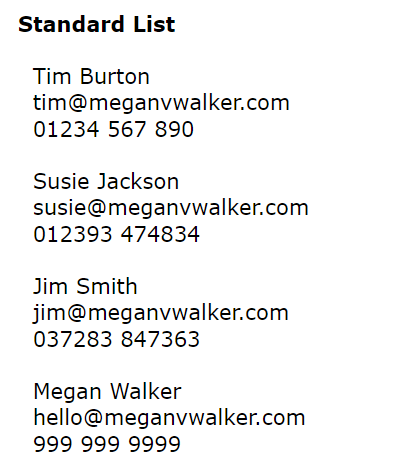
Here is what the list will look like in the email, what I have called the ‘Standard List’ of data. This might be perfect for your requirements, but what if you want it formatted in a different way? That’s possible, but you will need to be brave and dig in to the HTML.
Want to display your list with bullet points? Format your list code like this with <ul> at the start and end, then <li> in front of the attributes you are using in the list. Want a list with numbers? Simply change the <ul> and </ul> (unordered list with bullet points) to <ol> and </ol> (ordered list with numbers).
<ul>
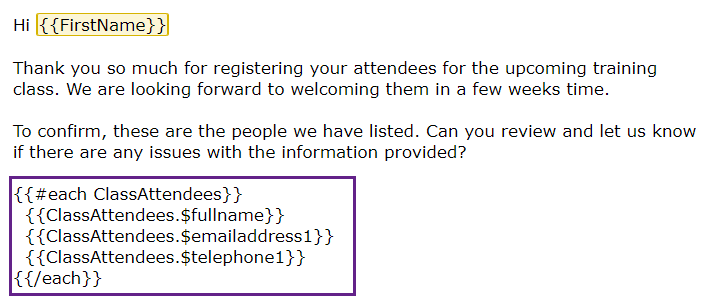
{{#each ClassAttendees}}
<li>{{ClassAttendees.$fullname}} - {{ClassAttendees.$emailaddress1}} - {{ClassAttendees.$telephone1}}
</li>
{{/each}}
</ul>

This one could be valuable to use depending on what you want to show, and that’s displaying the list using a description title (in this case the Contact Full Name) and then details below it (Email and Phone Number).
<dl>
<dd>{{#each ClassAttendees}}</dd>
<dt><strong>{{ClassAttendees.$fullname}}</strong></dt>
<dd>{{ClassAttendees.$emailaddress1}}</dd>
<dd>{{ClassAttendees.$telephone1}}</dd>
<dd>{{/each}}</dd>
</dl>

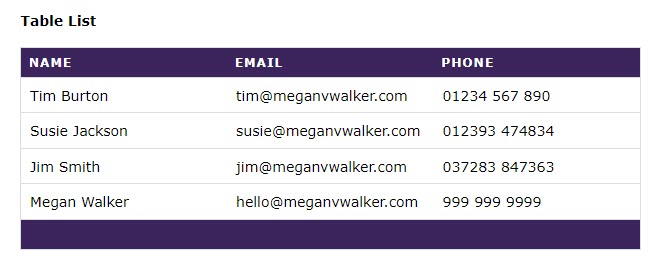
What about showing the results in a table? This once can be a bit finicky but if you persevere you can create a nice looking table, even better if you add some CSS to style it. Use this as your HTML for where you want the table to go. Notice that the elements for each are commented out, meaning we have <!– and –> surrounding them. Not putting those in will make the each elements strip out of the table and break the email. Make sure you include a class for your table at the top.
<table class="attendees">
<thead>
<tr>
<th scope="col">Name</th>
<th scope="col">Email</th>
<th scope="col">Phone</th>
</tr>
</thead>
<tbody>
<!-- {{#each ClassAttendees}} -->
<tr>
<td scope="row" data-label="Name">{{ClassAttendees.$fullname}}</td>
<td data-label="Email">{{ClassAttendees.$emailaddress1}}</td>
<td data-label="Phone">{{ClassAttendees.$telephone1}}</td>
</tr>
<!-- {{/each}} -->
</tbody>
<tfoot>
<tr>
<th scope="row" colspan="3"><br></th>
</tr>
</tfoot>
</table>
Something like this could be a good starting point, but there is so much you could do with your styling. Make sure you include the same class name at the end of each table style or else you will end up restyling the entire email as it will include it’s own tables too.
table.attendees {
      border: 1px solid #ccc;
      border-collapse: collapse;
      margin: 0;
      padding: 0;
      width: 100%;
      table-layout: fixed;
      background-color: #ffffff;
    }
    table.attendees tr {
      background-color: #fffff;
      border: 1px solid #ddd;
      padding: .35em;
    }
   table.attendees th, table.attendees td {
      padding: .625em;
    }

    table.attendees th {
      font-size: .85em;
      letter-spacing: .1em;
      text-transform: uppercase;
      background-color: #3c245c;
      color: white;
    }
I definitely see so much value and potential in this feature. Do you think you will start using it too?
Check out the latest post:
Removing Issues With Mobile Phone Numbers On Realtime Forms
This is just 1 of 447 articles. You can browse through all of them by going to the main blog page, or navigate through different categories to find more content you are interested in. You can also subscribe and get new blog posts emailed to you directly.
Nice!
Thanks lovely Megan x
Ah thank you Lu!!! x
You mentioned that “Note that you can only bring back 100 rows in to the list….”. So what happens to the hundred and first record if you’re list goes beyond 100?
It just won’t display any more rows in the list after 100.
Grat tips !
I was wondering if we can change date format in the list result ? By default it is in US format mm/dd/yyyy.
Hi Vincent, doesn’t look like that is an option just yet! You can format dates added directly to the email as personalisation, but not within a list.
Hi Meghan,
Lovely functionality. But it is still in preview. Isn’t it? Any idea when it will be GA?
Hi Eline, looks like your colleague has asked Microsoft this question, so we shall see what kind of update they have. I don’t have an answer for you.
This is fantastic, I stumbled upon this a little late and I was wondering if you know where the “Filter on List” feature toggle may be living now. I cannot find it in the admin center or the settings for the app in Dynamics (on a much later version now obviously)
Hi Adam, when a feature has been out for a while or was originally preview, they often remove it and it’s then just part of the app. You should see Lists there on RTM emails automatically in the personalisation section now. Is it not there for you?
Hey Megan, thank you for the reply. I did find it, I didn’t realize the change in the marketing solution and when we implemented originally we used a custom “outreach” solution, so I didn’t even see the RTM choice until I started tinkering in the out of the box Marketing solution.
Thank you!!