*** NOTE: ALL INFORMATION IS ACCURATE AT DATE OF PUBLISHING ***
I have written in the past about setting up your custom subscription centre as a marketing form that you can then embed in a page on your website. For me, I believe this is the best approach to make sure your customers, prospects, and website visitors have a seamless experience where all of your content is branded consistently. The other option is to create a marketing form and then add to a marketing page, which means you must have a portal configured (not my preferred or recommended approach). Then along came Real-time marketing, which included a change with quite frankly an ugly page that allowed someone to opt in or out of email and/or text messages but no way to decide exactly WHICH KIND of content they wanted. It was an all or nothing approach. That’s changed and we can now add links to subscription centres in Real-time Marketing. Hooray! Let’s take a look.
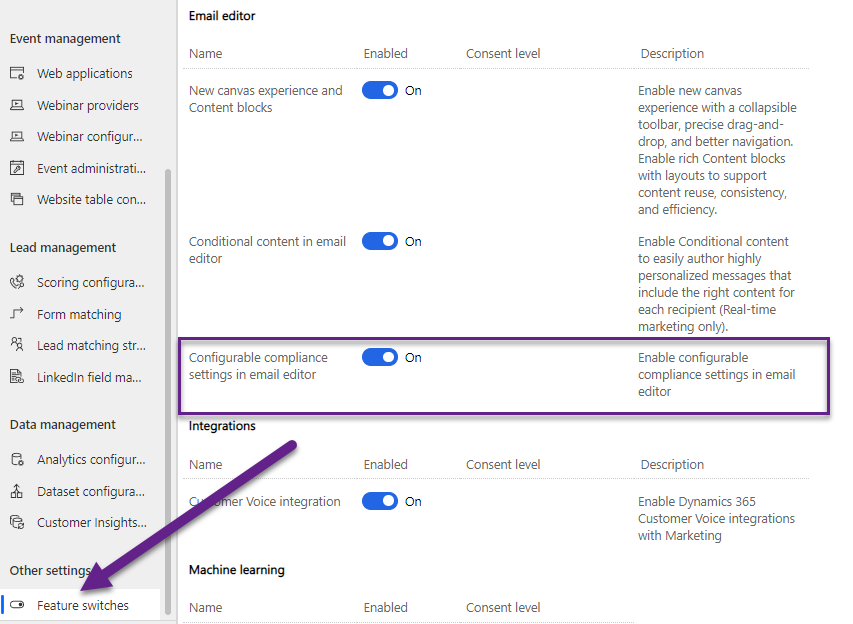
The default preference page used in Real-time Marketing can be found under Settings, Customer engagement, then Compliances in the D365 Marketing App. Although there are several settings for the page, there is no way to brand it (currently) and it’s just not a great experience.

If you are on the latest version, you can now go in to the Feature switches area and then turn on the switch for ‘Configurable compliance settings in email editor’. Save from the top right and you are ready to go.
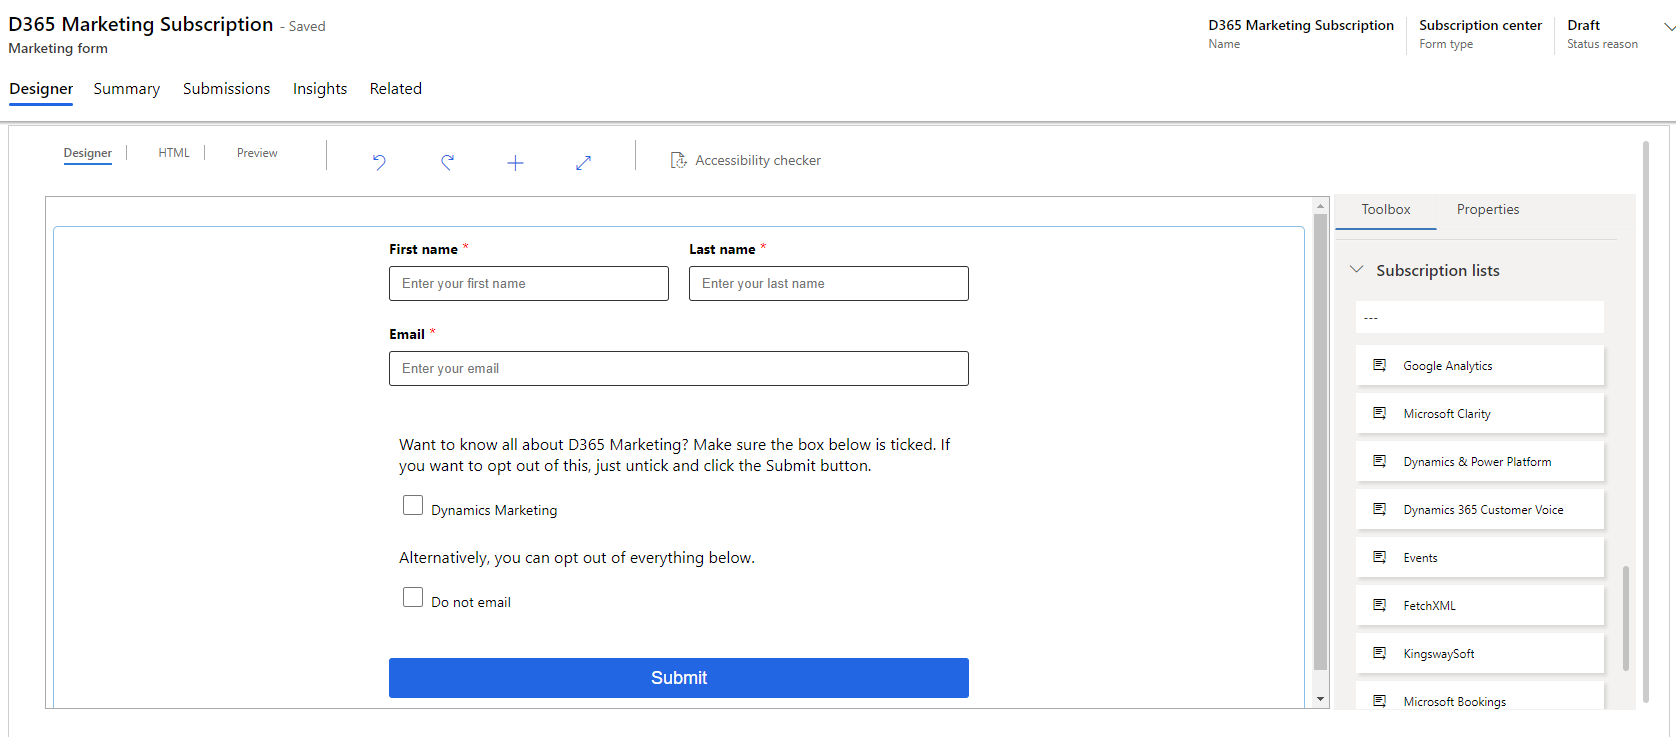
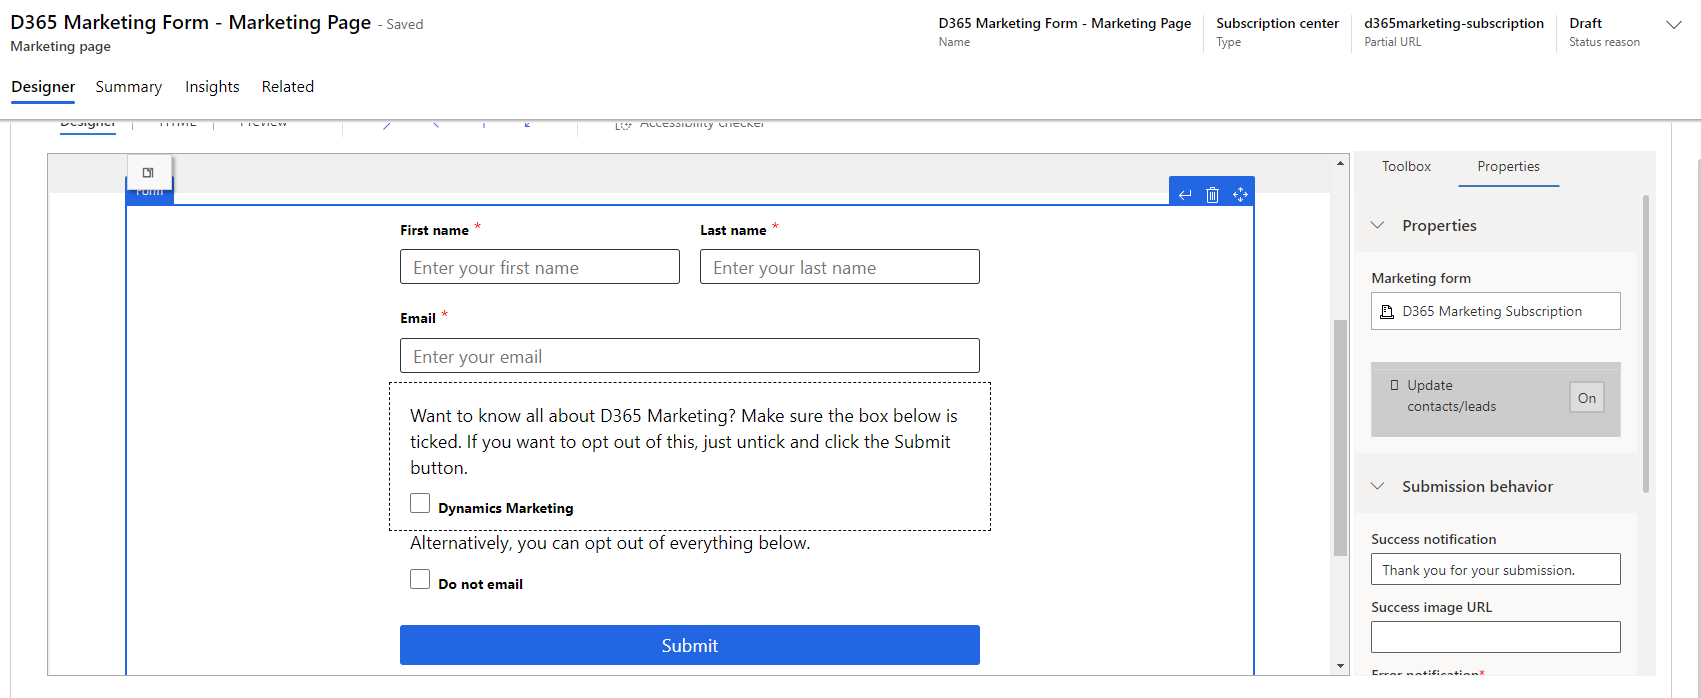
It’s up to you and your organisation how you approach this, but I always suggest using a marketing form that you can embed in to your own company website. So below we have a Marketing Form, and in this example I am just adding one of many subscription lists. I can then use this to add to the bottom of only specific emails that relate to D365 Marketing perhaps. It gives the ability to create a condensed subscription list. For more information, go back and read this post on setting up your subscription centre.
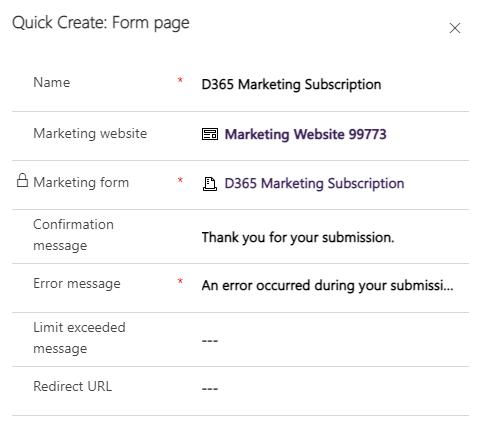
Once it’s published and ready to be used, click on the Form hosting tab on the Marketing form and then click on the New Form page option in the grid.

A quick create form will open on the right. You can give it a name and then just save it. Once saved, it will be visible in the related marketing form pages area and you can click on it to open the record.
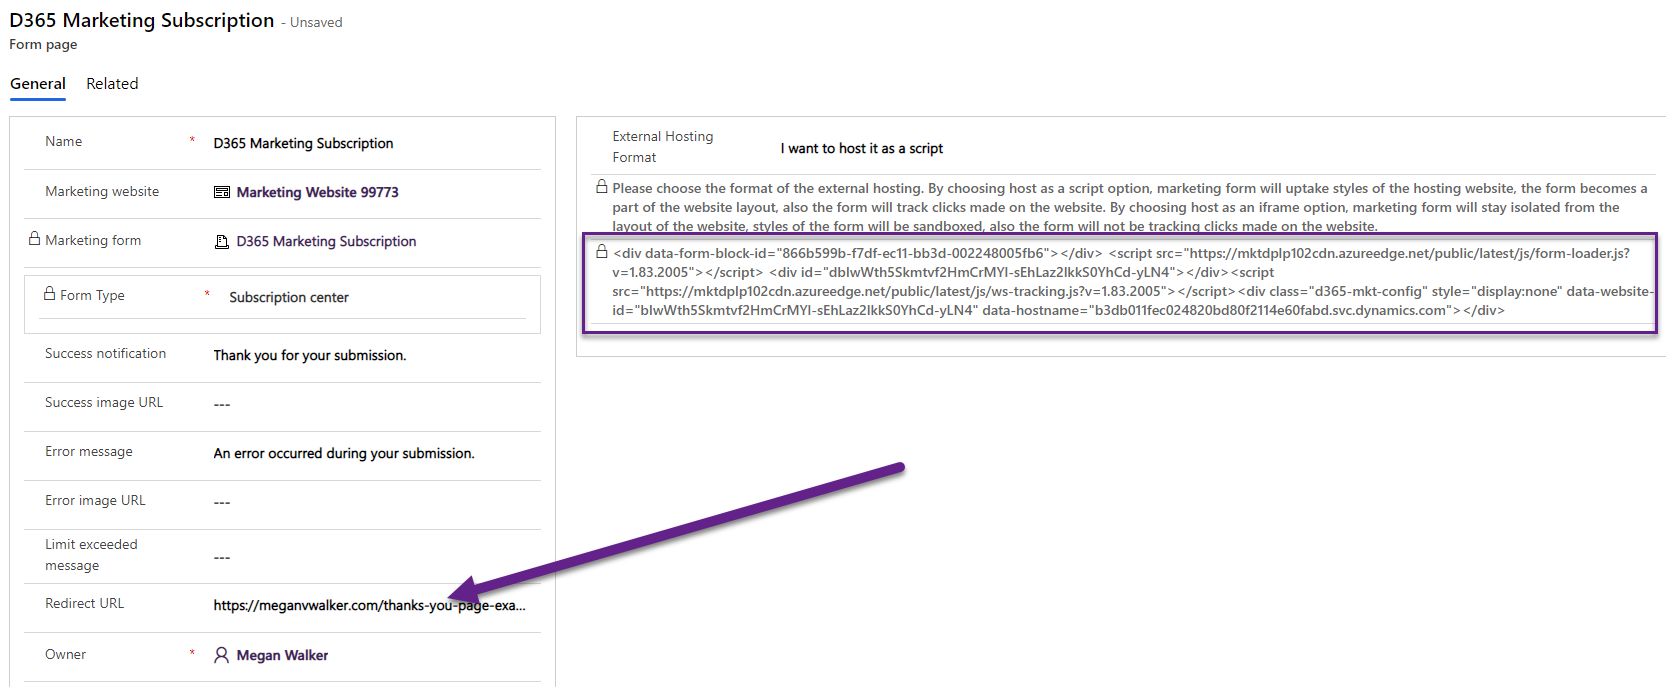
Add a redirect URL if you want to use one and save the record, then you can copy the script and paste it in to a page on your website (check with your site administrator if you are not sure!).
You also have the option to create a Marketing page and add in a Marketing Form directly to that page. However, with this option you must have a portal set up and linked to the D365 Marketing installation. I don’t recommend this option but it is there and might fit the requirements for some organisations.
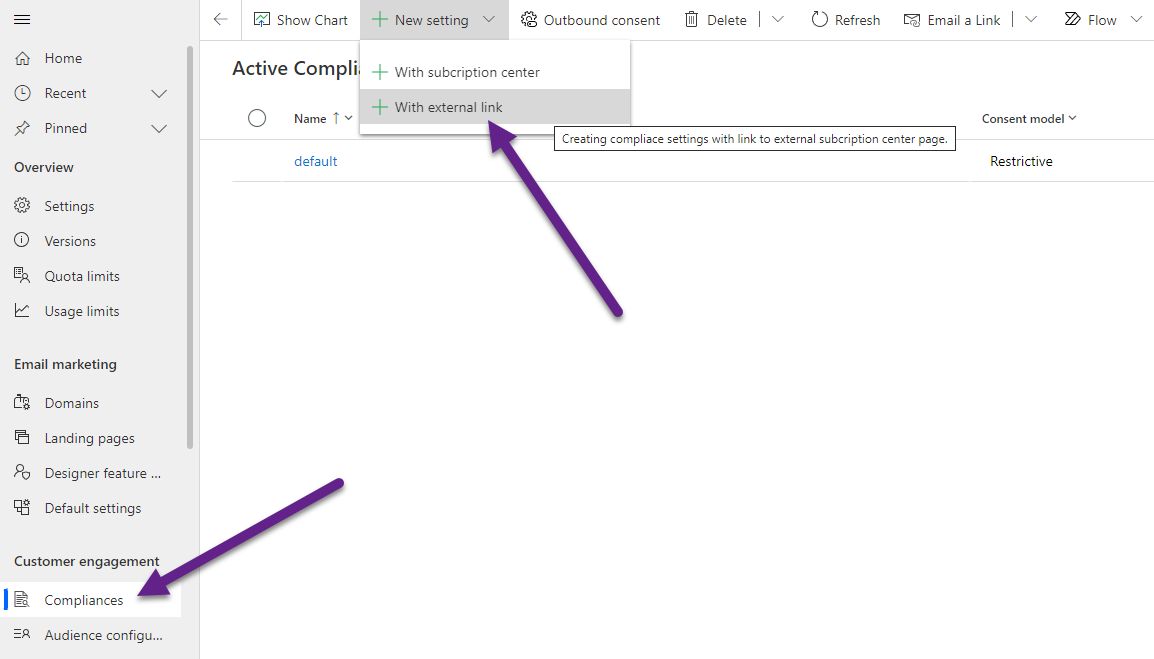
Now you have seen the two options with the form, you can go to the Compliances section again under settings then Customer engagement. There are two options available when creating a new compliance settings record. With a subscription center or with an external link.
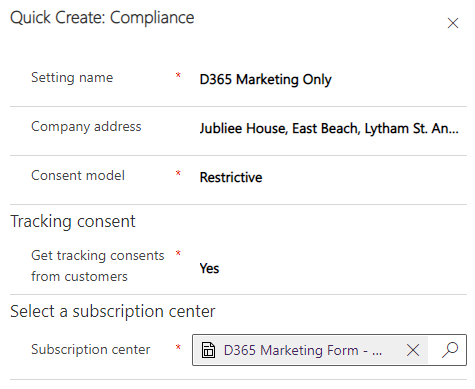
After choosing the external link option a new quick create form will open on the right. Give the record a logical name. From here an address can be added for the company which will then be accessible when creating a real-time marketing email. There are two consent models to pick from:
- Restrictive: If consent isn’t specified, assume it isn’t allowed.
- Non-restrictive: If consent isn’t specified, assume it’s allowed.
If you set the tracking consent to No, you then need to set if by default you are going to Track or not Track your customers interactions with the content you send them. This is up to you to determine what legal requirements you need to follow for each Compliance record. Finally, add in the external link for where you added the tracking code to a page on your website.

Adding a Compliance record using a subscription centre is pretty much the same, but this time you have a lookup to a subscription center which is essentially a published Marketing Page from Outbound Marketing that has the type of Subscription centre.
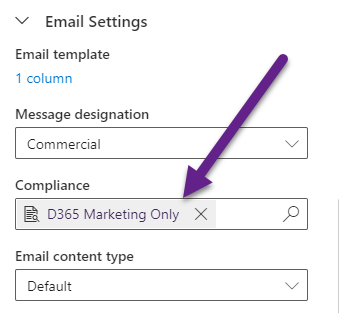
Now create your marketing email in the real-time marketing area. Clicking on the email header, you can scroll past the send settings and review the email settings. This is where you can then set which compliance record to use, with the ability to use a record that is tied to an external link, a subscription centre or the real-time marketing preferences centre. Awesome!
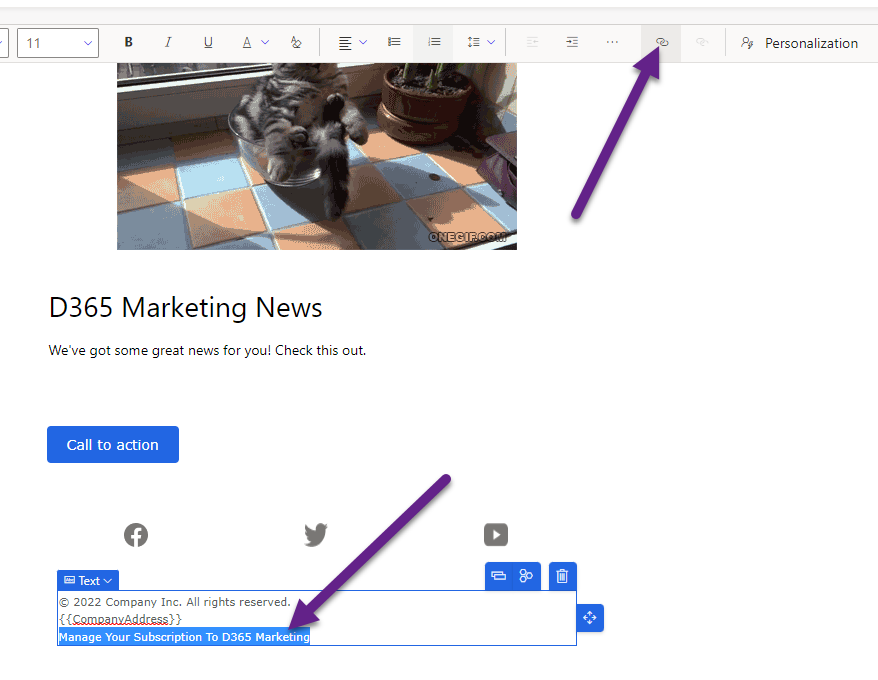
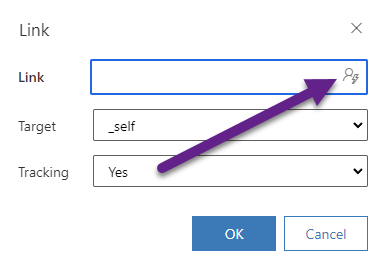
Add the text you want to use to link to the compliance settings record, then highlight it and press the link button from the top control.
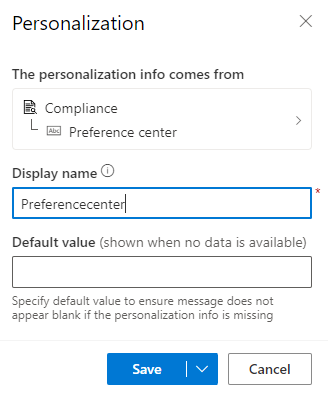
Then click on the personalisation icon in the link box.
You can now link this to the Preference center under the compliance section. You can do the same thing for the Company address too.
Then when the email is received, the Company address displayed will be the one from the related Compliance record, and the link to unsubscribe or update preferences will take them to the correct Preference centre.

When the Contact updates the Do not email field (either selecting or deselecting) this will update the Bulk Email field and change it to Do Not Allow or Allow. It will also update the Contact Point Consent record that is tied to the email address and mark it as either Opted In or Opted Out as appropriate. This will make sure Outbound or Real-time Marketing emails can be sent, or are indeed blocked from being sent.
Check out the latest post:
Send Unique Event Registration Response Emails For Each Event Using No Code
This is just 1 of 448 articles. You can browse through all of them by going to the main blog page, or navigate through different categories to find more content you are interested in. You can also subscribe and get new blog posts emailed to you directly.
Hi Megan
Thank you for your helpful blog!!
I have a question about Unsubscribes and re-subscribing.
The scenario:
We are using double opt-ins per form for subscription lists.
We are using the standard subscription Centre to manage the unsubscribes which works like a charm.
What happens if a contact has unsubscribed and then later decides to subscribe again but no longer has the unsubscribe url, so they go back to the website and complete a new subscription form.
Currently the contact record is still in the system, but the “do not bulk email” remains as “do not allow”. Is this correct even after clicking confirmation in a confirmation email?
The requirement is that if someone unsubscribes, they can easily re-subscribe.
D you have any suggestions, maybe something I’ve missed?
Hi Teresa, I would suggest having the bulk email field on the marketing form for people who are subscribing for the first time and have it set to Allow, then hide it (or change the text that shows next to the box). Make sure it is required. Anyone using that form is only using it because they WANT to opt in to your subscription lists. So setting the field to Allow makes sense. Should be the simplest way to accomplish this!
Hi Megan,
Super helpful stuff you have on here. I have the form working for our real time emails to contacts. However, I can’t seem to use it for leads that we are nurturing. Is there a work around for this at all?
Thanks
Hi Mark,
Unfortunately there have been changes since that was written last year. Check out this post which is the first one in a series of four all about Compliance.
https://meganvwalker.com/compliance-profiles-marketing-leads-contacts/
From there you can then move on to looking at your forms, moving consent and then adding additional compliance profiles. The reason you can’t use the subscription centre for Leads is because it’s tied to Subscription Lists which only Contacts can belong to. The newer Compliance Profiles for Preference Centres works for Contacts AND Leads. Hope that helps!
Hi Megan,
Thank you so much for this post, this is very helpful. One additional question: is it possible to use the compliance profile with an external link in outbound marketing as well? Somehow I cannot select it when creating a Journey.
Thanks,
Lina
Hi Lina, you can have a compliance profile where you have used an external link and use it in both Realtime and Outbound Marketing. For Outbound, you would need to update your Content Settings record to include that external link URL. Similar to how I have it on this blog here: https://meganvwalker.com/setting-up-your-custom-subscription-page-in-d365-marketing/
Hope that helps!
Hi Megan. Thank you for this great blog! I’m wondering… How can we do a incremental transition from Outbound to Real-Time while considering the consent set on the Contact entity? Can we access the consent set on DoNotEmail and DoNotBulkEmail in Outbound from Real-Time, or do we have to do a “load consent” from the Consent Center into the Contact Point Consent? We want to avoid consent being updated in two different places during a transition period…
I would suggest factoring both things in to your segments during your transition period. You don’t have to load the consent, but then you would likely want to make sure you have your enforcement model on your Compliance Profiles set to Non-restrictive which would allow for sending people emails even if they haven’t yet Opted In with a Contact Point Consent record. Using your segments to filter based on the Bulk Email field would be a good idea until you are fully away from Outbound and using Realtime only.