*** NOTE: ALL INFORMATION IS ACCURATE AT DATE OF PUBLISHING ***
If you have used Outlook for long enough, no doubt you have had cause to use the recurring appointments functionality. You have the ability to create a ‘series’ of appointments from one record. Saves you time and keeps all appointments the same with regards to accurate information. Using recurring appointments in Dynamics CRM is pretty similar. It’s straightforward to use, but understanding what it’s doing and exactly how it works is important. This is one entity that functions slightly differently to others.
Creating Recurring Appointments
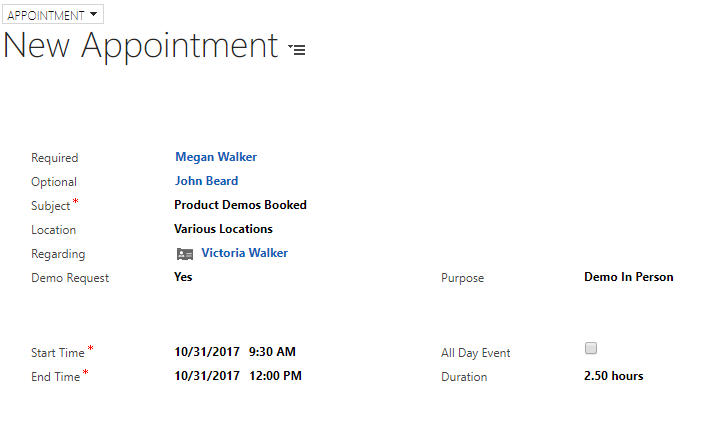
First, let’s create the initial appointment. Notice the standard fields for Required, Optional, Subject etc. However, there are two new custom fields added to it. Set the start time and end time.
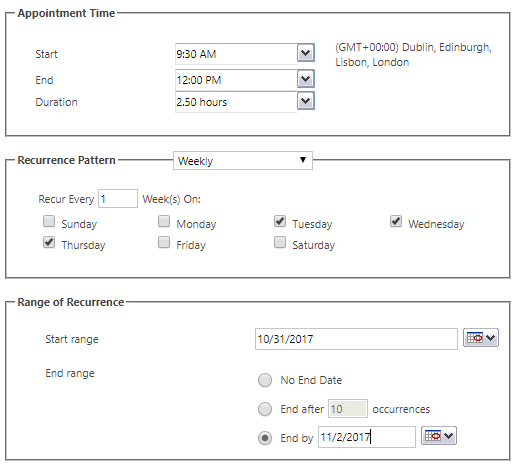
Click on the recurrence button on the appointment ribbon. Here is where you set the recurrence pattern and the range. How many times should it recur and on what dates? Modify the fields as needed then click Set.
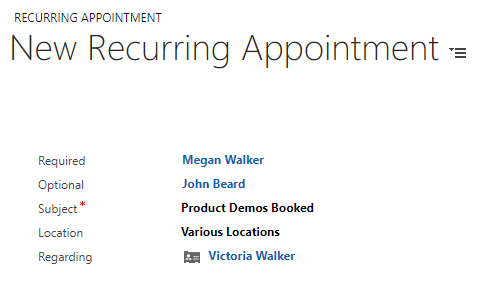
Notice now that your Appointment is now a Recurring Appointment. When you create a recurring appointment, the original appointment record is removed. When you save your recurring appointment, it then creates one new appointment record for each day or time slot you selected. So in the example above there are 3 appointments created, one for Tuesday 31st, one for Wednesday 1st and one for Thursday 2nd.
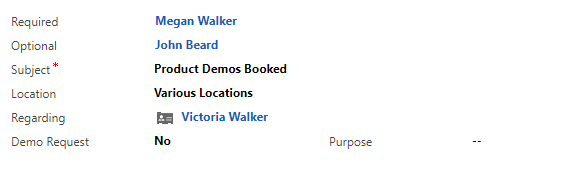
Looking at one of the new appointments, the two custom fields haven’t been mapped over. No is the default on Demo Requested, and the Purpose field is blank. Stands to reason that we need to do something with the mapping from Appointment to Recurring Appointment right?
Map Your Fields
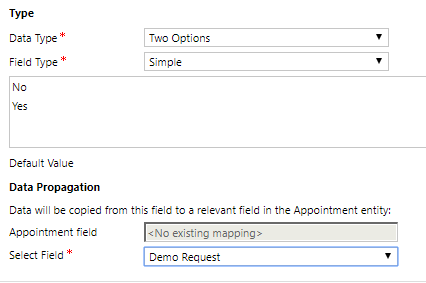
However, this is where it’s a little different. Past experience would tell you to go to 1:N Relationships to map your new fields. You will notice that there are in fact no mappings set up in that area. Instead, when adding your fields to the Recurring Appointment record scroll to the bottom to the Data Propagation section. From here, select the relevant Appointment field that appears in the Select Field drop down list. It will only show fields of the same Data Type on the Recurring Appointment field so make sure you have used the same one.
Now when you create your next Recurring Appointment, the field values from the original Appointment record will be mapped accordingly and will be displayed on all of the new appointments created as part of that process.
Check out the latest post:
Send Unique Event Registration Response Emails For Each Event Using No Code
This is just 1 of 448 articles. You can browse through all of them by going to the main blog page, or navigate through different categories to find more content you are interested in. You can also subscribe and get new blog posts emailed to you directly.