*** NOTE: ALL INFORMATION IS ACCURATE AT DATE OF PUBLISHING ***
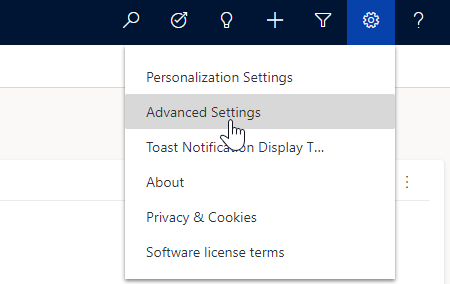
If you haven’t already done so, if you use Dynamics 365 Customer Engagement, you SHOULD be using a Unified Interface App of some kind. If you are a System Administrator, you know that to get to administrator type things (technical term 😉 ), you are hopefully going to the Power Platform Admin centre. If not, you may be using the Advanced Settings link found by clicking on the gear icon from the top right of the Unified Interface App. What about users that only need to be accessing one or two things? Perhaps they need to be creating and editing Email or Document Templates. What’s the right approach for them? Let’s look at how we can add links to admin areas in the navigation on a Unified Interface App.
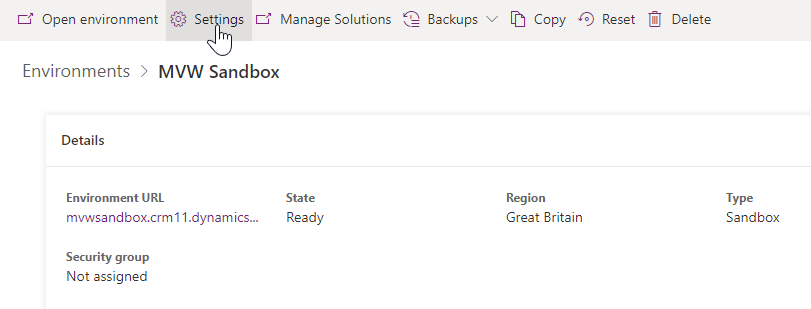
First, navigate to the Admin area for your environments. You can do this by going to: https://admin.powerplatform.microsoft.com/environments.
Once logged in, find the right environment, then click on Settings from the top.
Once in the settings area, navigate to the section you need, in this case we will go to the Templates area. I want to add a link for accessing Email templates.
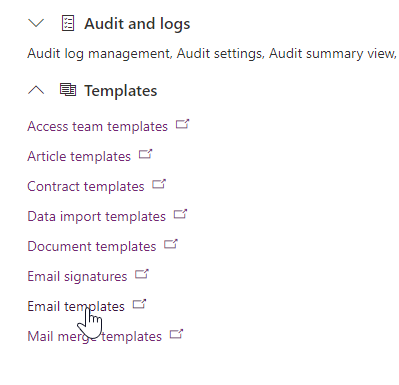
If you click on the link it will open up in a new tab, give you a new direct URL. We can use this URL to provide a direct link for users.

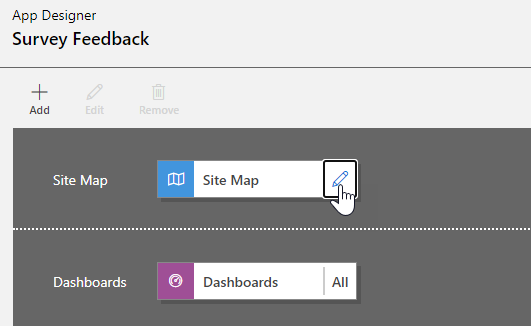
Now that you have the link, go to: https://make.powerapps.com. Find the app you need to Edit, and open it up in the App Designer.

With the App open, click on the Edit icon on the Site Map.
You might need to add a new Area first, and perhaps a Group. Add in a new Sub Area where you want your link to go. Set the Type as URL, and then paste the link you got from your environment settings area into the URL field. Give the link a title, and set the Icon. Note, with the icon, it will display Use Default Image. Delete the wording, and that will allow you to search for other icons. You should be able to find icons already in your environment if you don’t want to add new ones as Web Resources.
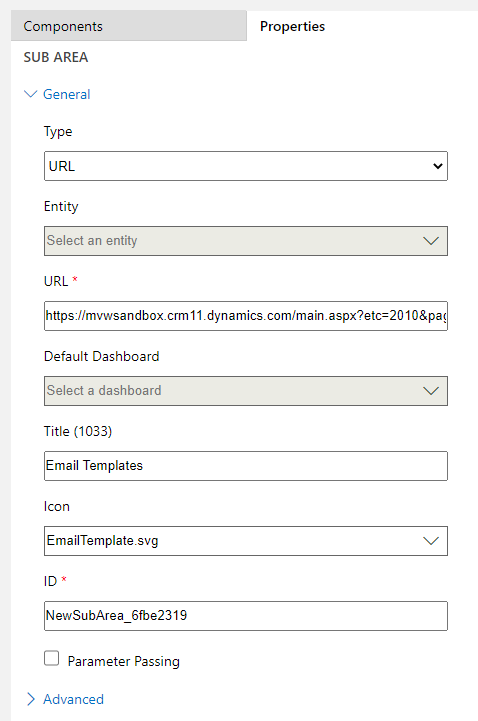
Expanding the Advanced link, and you can set the Privileges, which determines who will get to see this link in the navigation. By picking the Email Template entity, only users who have access to this via their security role(s) will be able to see it.

Save and Publish the Site Map, then go and check out your updated App. Here we can see an Area called Admin Settings, with three Groups, each with their own Sub Areas for the links. When a user clicks on any of these links, they will open up in a new tab for them to access. No more needing to remember where to go to access each of these sections, it’s all within one app for them.

Check out the latest post:
Removing Issues With Mobile Phone Numbers On Realtime Forms
This is just 1 of 447 articles. You can browse through all of them by going to the main blog page, or navigate through different categories to find more content you are interested in. You can also subscribe and get new blog posts emailed to you directly.