*** NOTE: ALL INFORMATION IS ACCURATE AT DATE OF PUBLISHING ***
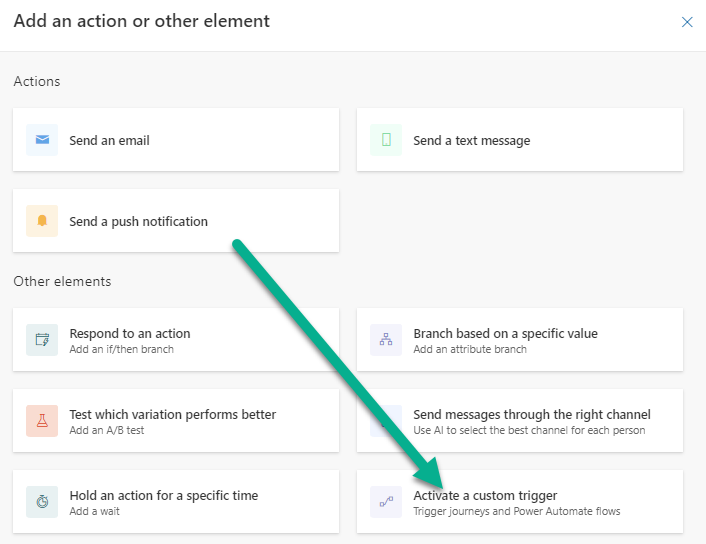
If you are using the Real-time Marketing functionality within the D365 Marketing App, you might have already seen the new step you can add in to a Journey. The Activate a custom trigger allows you to trigger other journeys or flows in Power Automate. I’ve written previously about creating a flow to kick off the trigger, but not the other way around. So, in this post we will look at how Power Automate will know you have activated a custom trigger from a Journey so you can then ‘do something’ with that information.
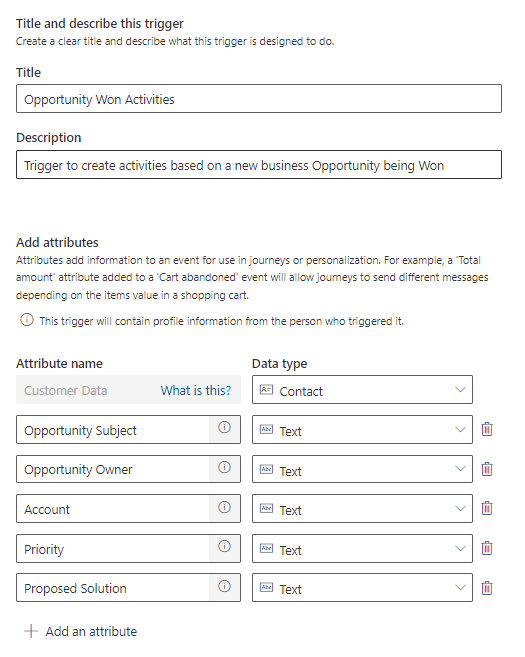
First things first, what do you need your custom trigger to be? In my example I am going to create a trigger that can be called at the end of a Journey when an Opportunity is won, which can then create a series of activities or other records to kick start a new project. Simple, and just one made up scenario, but hopefully it gets you thinking. Navigating to the Triggers area in Real-time marketing, create your trigger and give it a nice name. Try not to use hyphens in it as that ends up giving it a strange database name. The description should help other users know exactly what it’s for. Then you need to ad the attributes. These are place holders for where the ACTUAL values will be added during the Journey. So I want to get the subject (topic) of the opportunity, the name of the opportunity owner, the name of the account, priority and the proposed solution that was added to the opportunity. I am just giving them names, that’s it at this point.
Clicking Next takes us to a screen that looks a bit scary, but all you are doing is essentially publishing the trigger and marking it as ready to use. We won’t need to do anything with code here.
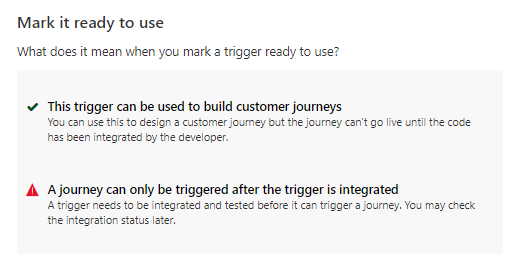
Once it’s published you will see a note of Pending integration. Again, we are not going to integrate it anywhere, no code needed.

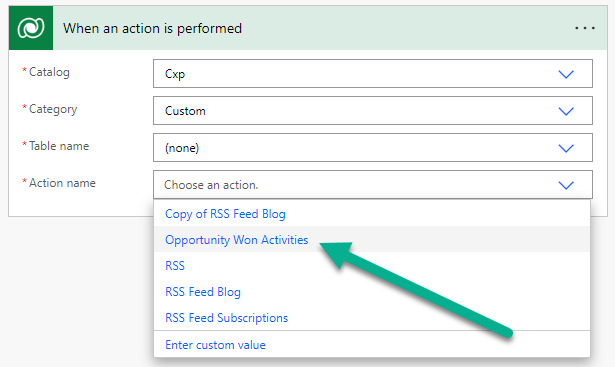
Next we go and create a flow in Power Automate. If you don’t know how or where to begin, I would suggest going and looking for some basic training you can walk through on Microsoft Learn perhaps. This will point you in the right direction of how to get started (this post is not a basic tutorial for Power Automate). The trigger needed is this one from the Dataverse connector, when an action is performed.
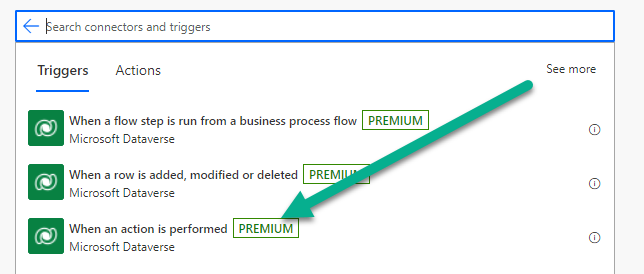
The options here are Catalog which should be Cxp, then Category of Custom. Table name should be none. Finally, the dropdown for Action name should show the new Trigger you added and then made live. Select it from the list.
Honestly, that’s pretty much it. You should now see the dynamic content that you can use to add in and create or update a record.
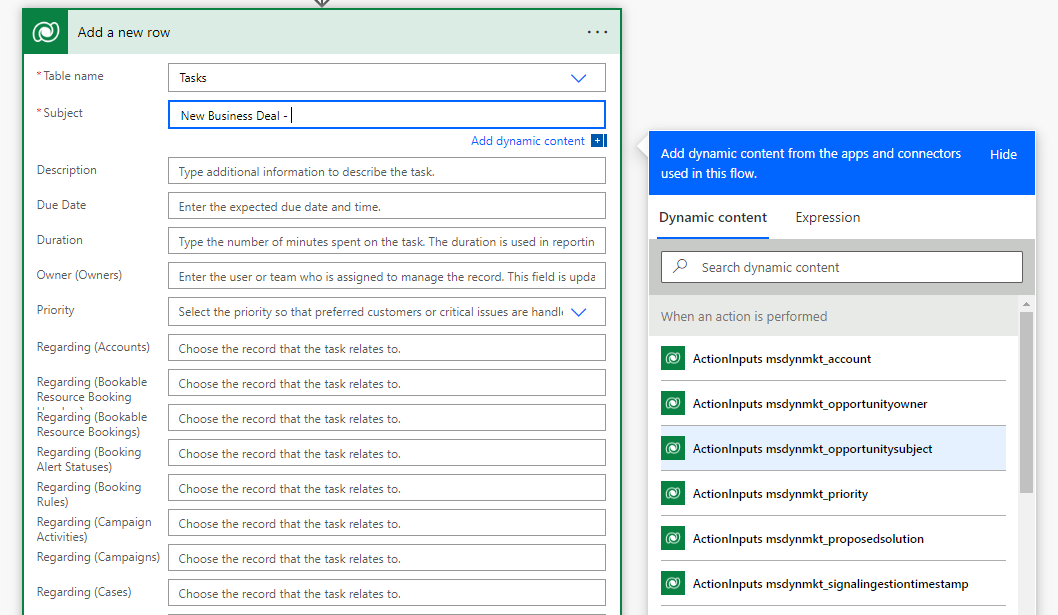
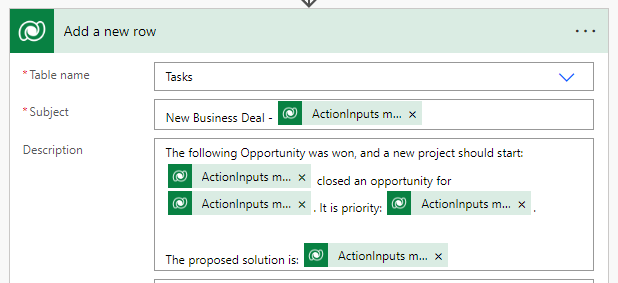
Quick example here, using the Add a new row action from the Dataverse connector, we can add a task and pass through the Dynamic content from the custom trigger that will be fired from a Journey. You can obviously do what ever wonderful and complicated things you need in this flow based on your requirements. Save your flow and make sure it is turned on.
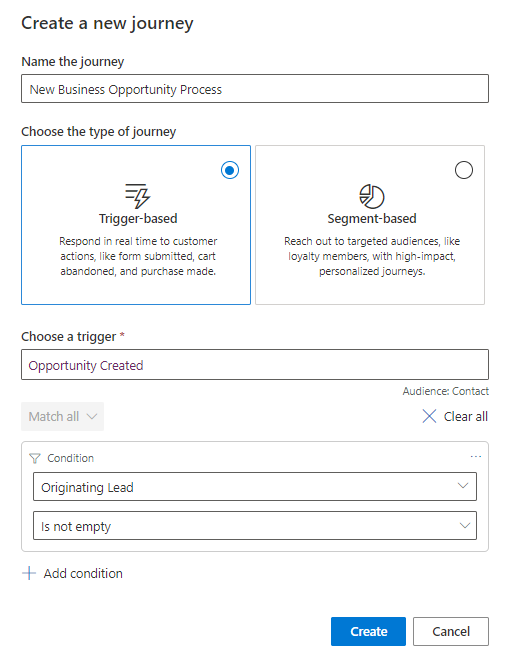
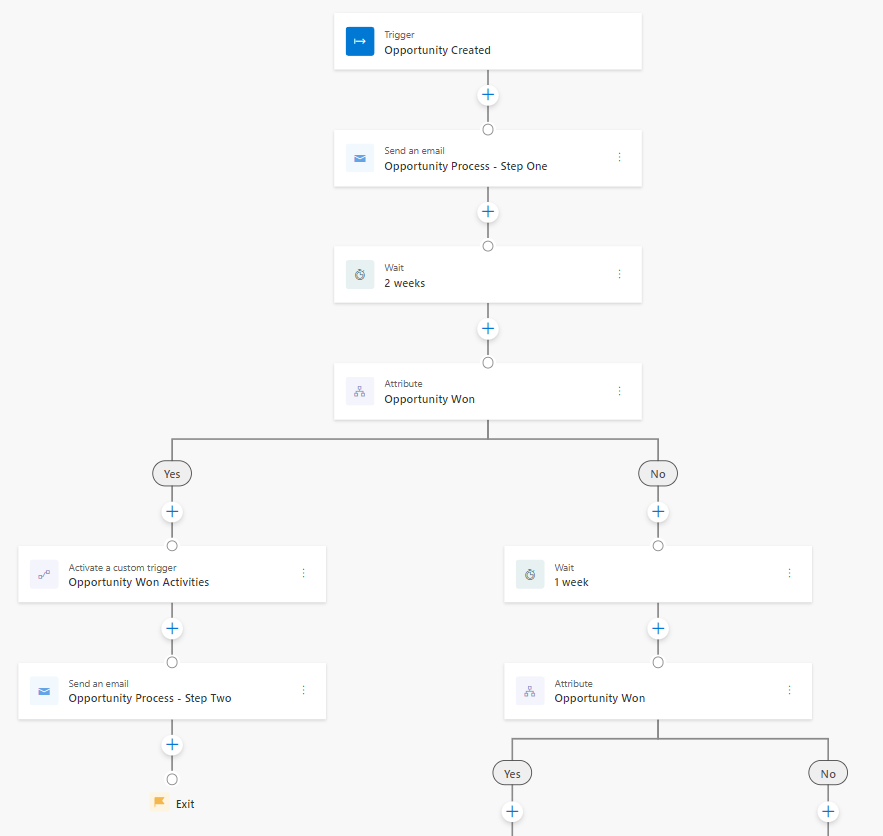
Now we create a new journey. Again, this is make believe, and just a quick example, so use it to help think what you might need it for. First thing, I pick a trigger as the starting point for putting people in to the Journey. For this I will use the standard out of the box trigger of ‘Opportunity Created’. We now have a nice little additional Condition box below that, so I can also set to make sure it only fires when the Originating Lead on the new Opportunity is not empty. Perfect!
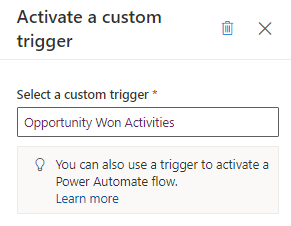
Now we add whatever actions and elements are needed for the journey, and when appropriate add in this step to Activate a custom trigger.
I can now pick the new trigger I created and used in the flow in Power Automate.
We are given a panel with all of the attributes that were added to the custom trigger during it’s creation. Each one shows a red icon meaning it’s not yet mapped. Clicking on it, we can then map it to one of the fields from the Contact record, or a record linked to the Contact. For example, here I can get directly to the Account Name via the Account the Contact is linked to.

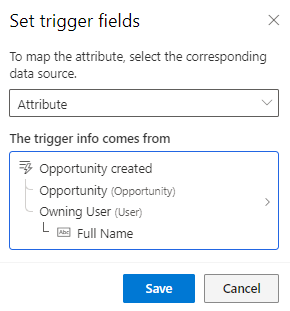
I can also get attributes from the Opportunity Created trigger that has been used to start the Journey so can go right to the Opportunity and through to the Owning User to get their Full Name.
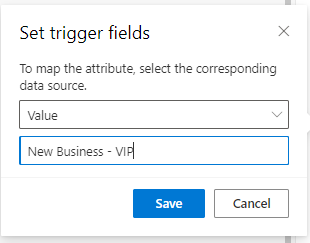
Finally, I can just type in a value directly rather than trying to pull it from somewhere else.
Once all of the values for the custom trigger are mapped, you will see a row of green icons. Success!
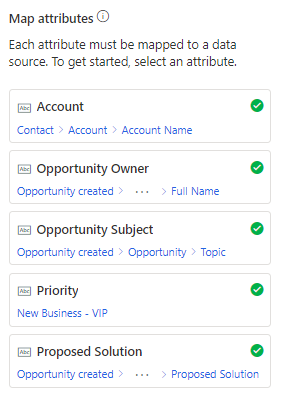
My made up Journey is ready to go with a Custom Trigger added in.
The Journey runs and when each Contact hits the step to trigger the custom journey, this will in turn trigger the flow to run that was set up in Power Automate, which in my example means I get a nice little task created at the end of it.

There are SO MANY use cases for this. I hope it helps you and you can see where this might fit within your own requirements and the needs of your organisation. Let me know what you think in the comments!
You can watch a video on this here.
Check out the latest post:
Removing Issues With Mobile Phone Numbers On Realtime Forms
This is just 1 of 447 articles. You can browse through all of them by going to the main blog page, or navigate through different categories to find more content you are interested in. You can also subscribe and get new blog posts emailed to you directly.
Thanks for this post, was looking high and low for this and MS Documentation says you can do this but the instructions they provide are the opposite in that they fire a trigger from a flow, not fire a flow from a Journey.
https://docs.microsoft.com/en-us/dynamics365/marketing/real-time-marketing-custom-actions#trigger-power-automate-flows-from-real-time-marketing-journeys
Your solution works great.
Thanks Bill! Yes, seems like that page needs a bit of an update!
This is so informative and just what I needed to see. I was looking at this process today and got nervous at the coding/developer stage and couldn’t figure out what to do. Now I can try again tomorrow. Thank you.
You are very welcome Laura! Good luck!!!
Hey Megan,
Thanks for your post. Is it possible to pass the GUID type attribute from a journey. I want to pass my custom entityID which can later be used to match on bindingID to correlate across trigger as indicated here: https://docs.microsoft.com/en-us/dynamics365/marketing/real-time-marketing-correlate-triggers
Hi Rahul. check out this post where I talk about adding the bindingID to one trigger, and then using that same bindingID with another trigger that will then make sure the correct actions are taken within a journey. Hopefully this will help! https://meganvwalker.com/reminder-emails-events-using-real-time-marketing/