*** NOTE: ALL INFORMATION IS ACCURATE AT DATE OF PUBLISHING ***
We’ve got tons of way to filter data in Microsoft Clarity, including standard filters, and advanced filters. What if you want to add some additional filters? Well you can, if you add custom tags. How easy is it to do that? Well, pretty easy if you understand what you want to capture AND you know which template files or pages you need to edit on your website. In this post, we will look at a couple of examples of how to add custom tags to filter the dashboard and recordings even further.
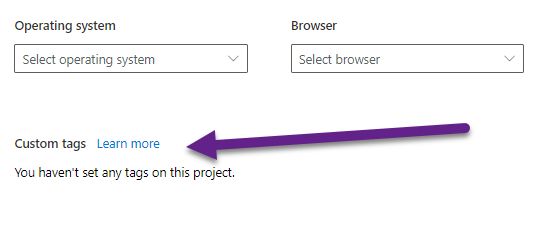
If you are in the filters for either the dashboard or recordings, you will notice a section for Custom tags. By default, nothing will show in this section until you start setting them up.
Adding the custom tags is similar to adding the initial tracking script, but it might not necessarily be added in the same place. If we go back to the instructions for adding that script, it must be added in the header of our website. If you want to add a custom tag and include it as a part of the tracking script, this means it will fire on every single page of your site. This might be fine in your circumstances, in which case, add in a new line right before the closing </script> line and put clarity(“set”, “key”, “value”); – with the key being the name of the tag you want to add, and the value being what you want to see when you select the filter. Confused? Let’s look at some examples.
<script type="text/javascript">
    (function(c,l,a,r,i,t,y){
        c[a]=c[a]||function(){(c[a].q=c[a].q||[]).push(arguments)};
        t=l.createElement(r);t.async=1;t.src="https://www.clarity.ms/tag/"+i;
        y=l.getElementsByTagName(r)[0];y.parentNode.insertBefore(t,y);
    })(window, document, "clarity", "script", PROJECT_ID);
    clarity("set", "key", "value");
</script>
Let’s say that someone was interested in my events page and reviewed it… I might be interested to know what led them there and know the journey that takes people to that specific page. So I could add the following script to the header for that specific page that would run when the Events page was viewed. By using the code below, with Individual Page as the KEY, and Events as the VALUE, this would add in a new tag called Individual Page into Clarity.
<script type="text/javascript">
    clarity("set", "Individual Page", "Events");
</script>
Now that’s great, but the reality is, most people with a site have some kind of Content Management System that uses templates and a series of files that make up their site, rather than static pages. The content is also set dynamically a lot of times, so I wanted to try and do that instead. The first thing I wanted to add was a tag that allowed me to filter my recordings and visits based on the category of blog posts people were viewing. This would give me the ability to drill down in to the recordings for all visits that included blog posts for a specific kind, such as those on Dynamics 365 Customer Voice, or Personal Brand, or even on Microsoft Clarity. To do this, I wanted to only fire the script on blog posts rather than all of the pages on my site, so I added it to the theme file used for single blog posts. I use WordPress so it was easy to find the right file. WordPress is written in PHP, so I was able to set the category for any post being viewed dynamically. So below, the KEY being used is ‘Category’ and the VALUE being used is set using PHP and pulling in the name of the category from the blog post.
<script type="text/javascript">
    clarity("set", "Category", "<?php foreach ( ( get_the_category() ) as $category ) {echo $category->cat_name. '';  }?>");
</script>
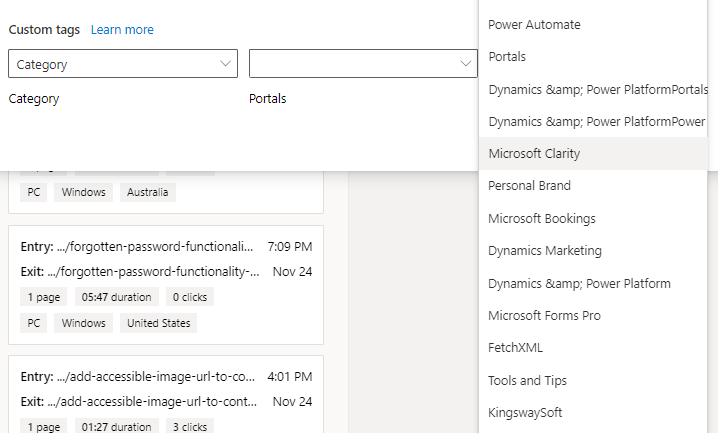
After I added this, and waited a few hours, I could then see the tag of Category (which again is the KEY part from the script example at the start of this post), and all of the category names (which is the VALUE part from the script example). Now it looks a bit messy, mainly because I forgot that some of my posts had multiple categories…. which concatenated them together… lessons learned right? But it does indeed then filter my data accordingly.
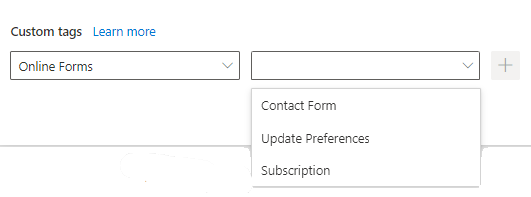
Next I wanted a way to see all visits where someone had ended up on a page that included a form. On my site I have three of them. So I wanted to add a KEY of Online Form, and then have various VALUES, one to represent each of the three forms I have. So for this, I again used some PHP to query the id of the page, and depending on which one it is, then go through and set the correct value.
<script type="text/javascript">
<?php if( is_page( 19 ) ) : ?>
    clarity("set", "Online Forms", "Contact Form");
<?php elseif( is_page( 4806 ) ) : ?>
    clarity("set", "Online Forms", "Update Preferences");
<?php elseif( is_page( 489 ) ) : ?>
    clarity("set", "Online Forms", "Subscription");
	<?php endif; ?>
</script>
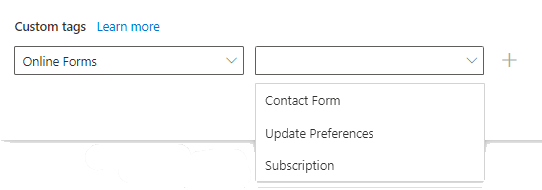
This is how it then looks in Clarity, with the tag of Online Forms and the three values I added to my script above.
The last one then got a bit more adventurous. I wanted to have a way to filter the data in Microsoft Clarity and see recordings and visit information for those visitors who I knew were a subscriber of my blog, versus those who aren’t. In my situation, I know that when I sent out an email about a new blog post, an id is passed through the URL at the top of the page. This is pretty common with marketing platforms and can be done pretty easily when sending out emails, or sharing links. I wanted to check the URL and see if that parameter existed and then using the KEY of Subscriber, set the VALUE to Yes if the parameter was present, and No if it wasn’t. You could also apply this to UTM Parameters, in general, to capture all kinds of data and pass them through as Custom tags in Microsoft Clarity. This is what I used. So we use the clarity code, then Subscriber as the KEY then the value is determined by checking the URL, and looking to see if subscriber_id appears at the end. If it does (not false), then use Yes, if it doesn’t use No.
<script type="text/javascript">
	 clarity("set", "Subscriber", "<?php $url = 'https://' . $_SERVER['SERVER_NAME'] . $_SERVER['REQUEST_URI']; if (strpos($url,'subscriber_id') !== false) {echo 'Yes';} else {echo 'No';}?>");
			 </script>
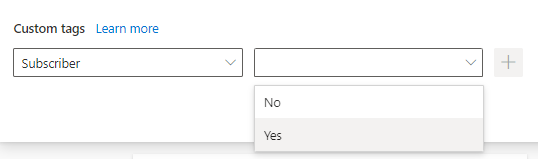
And here it is in Clarity.
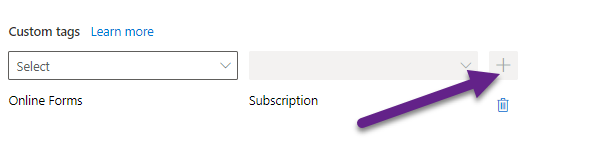
Once you’ve got your custom tags in, you would click on one to select it.
Then click on the plus button to add it to the filter. Finally, click Apply just like you would with any of the other filters.
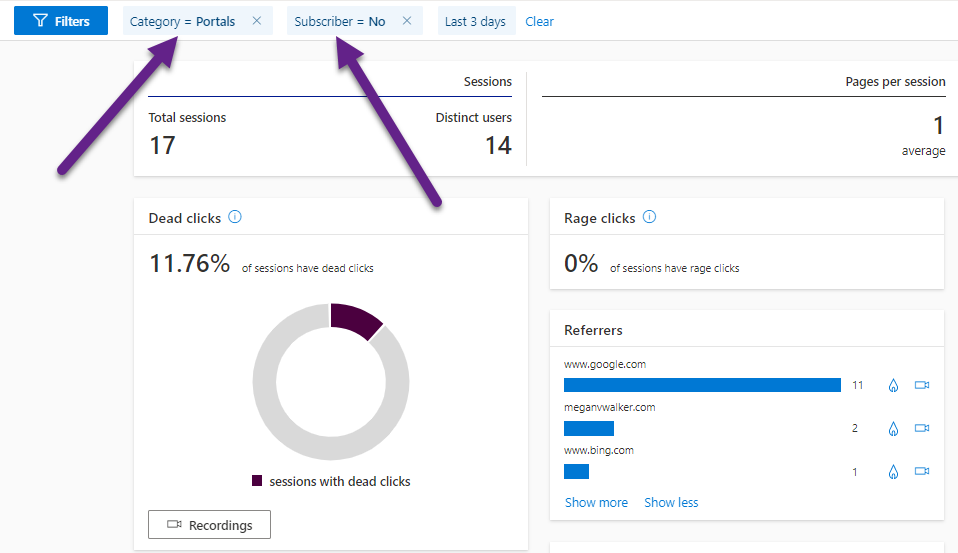
Now we can see the custom tags listed along with the value that was selected. Keep in mind that the tags are going to be combined to make one big AND filter, so in this example the recordings/visits must include the custom tag where Category equals Portals AND Subscriber equals No.
You can watch a video on this here.
Check out the latest post:
Send Unique Event Registration Response Emails For Each Event Using No Code
This is just 1 of 448 articles. You can browse through all of them by going to the main blog page, or navigate through different categories to find more content you are interested in. You can also subscribe and get new blog posts emailed to you directly.