*** NOTE: ALL INFORMATION IS ACCURATE AT DATE OF PUBLISHING ***
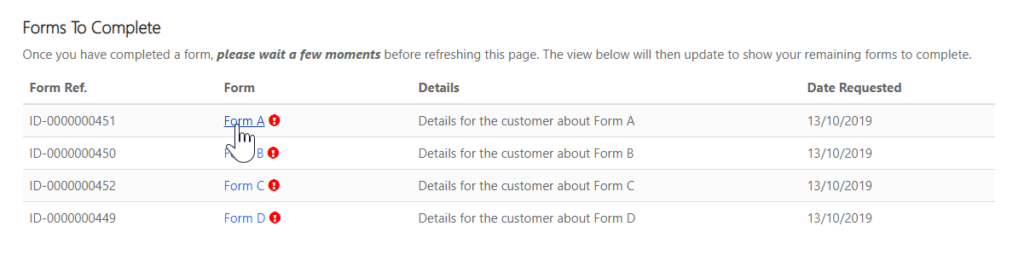
Here we have the final article in a three part series of how to create a Forms Library using Microsoft Flow, Dynamics Portals and Forms Pro. Part One showed all of the D365CE and Portal configuration needed, then Part Two showed how to create a Flow to actually generate Account specific surveys which would then be displayed in the Portal. When the Form Requests are first created and need to be completed they will show with a red indicator icon under a ‘Forms To Complete’ section. Let’s look at how to show them as ‘Completed’ once the survey response has been submitted by your customer.
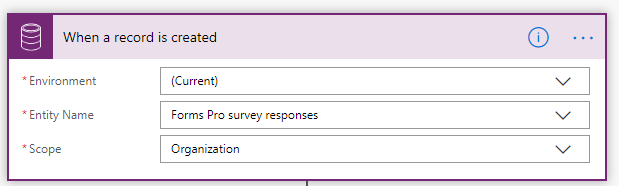
In Microsoft Flow create a new Flow triggered when a record is created, using the Common Data Service connector. Select the Forms Pro survey responses entity.
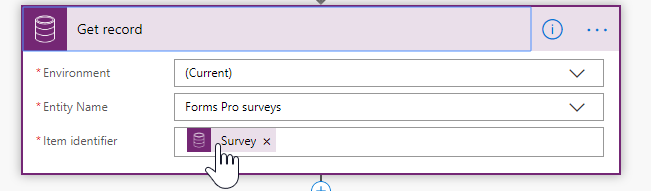
Next, add a Get record step and select the Forms Pro survey using the Survey id from the trigger step as the item identifier.
Now we are going to check to make sure the survey response received is for one of the Forms we are showing in the portal. You can use the guid, or the name (just make sure to adjust if you ever change the name of your survey!). We are using an Or check to see if it is any one of our forms.

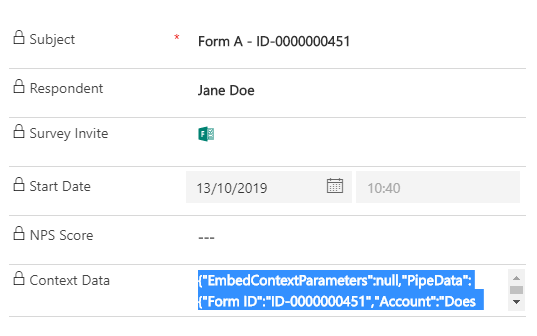
If the condition is met, we are going to extract out the variables we passed through when we originally created the survey invitations using the first flow. The cool thing is, they come back in to CDS via the survey response! 🙂 This is going to be done using a Parse JSON step. Use the Context Data field to do this. Click the link under the Schema box to ‘Use sample payload to generate schema’ and paste in your JSON. Where do you get this? Read on my friend.
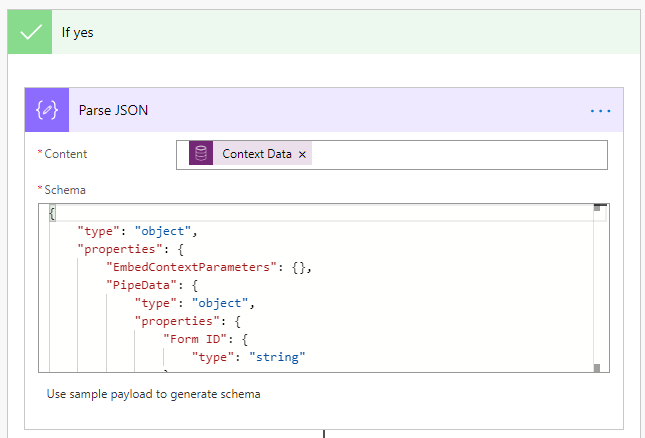
Once you tested your first flow in Part Two, make sure you fill out one of the surveys, then go to the response in your CDS app. There is a Context Data field which should have been populated with some data. Simply copy this, and then paste it in to Flow in your Parse JSON step as mentioned above. That’s it!
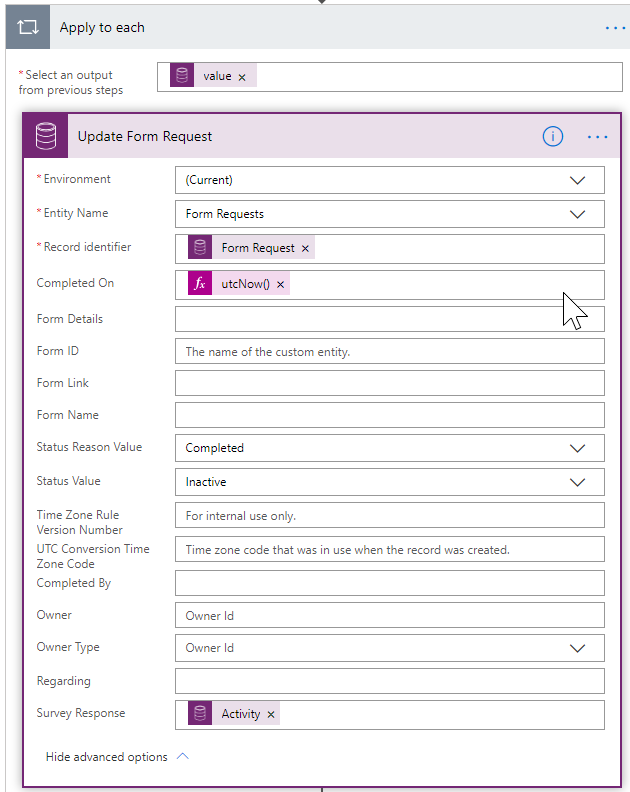
Now the values found in those variables we passed through are made available to us. This is so cool right? Add in a List records step from the CDS connector and use the Form Requests entity. Add in a Filter Query using the field name of the Form ID field you added. Then use eq to indicate equals, then single quotes. Add the Form ID from the Parse JSON step and add it between your single quotes. We are basically only looking for the Form Request record with the same Form ID that has been returned in the Survey Response. There should only be one that exists.

Now add an update record step from the CDS Connector. Use the record identifier of the Form Request id from your List records step above. This will add the Apply to each section to your flow. In reality each is actually one based on there only being one Form Request with that unique Form ID. We are going to update the Completed On field with utcnow as the expression. Set the Status Reason to Completed, and the Status to Inactive. Finally in the Survey Response field, use the Activity Id from the original Survey Response trigger step.
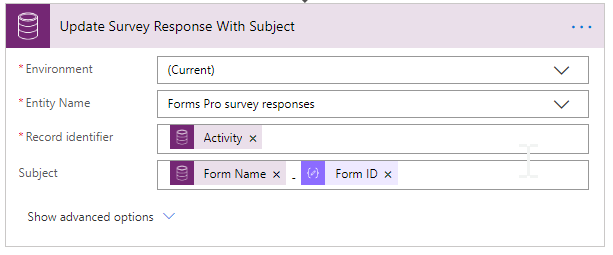
Now we are going to update the Survey Response record with a nice subject with an Update record step. Use the activity id from the original trigger, and set the subject with the Form Name from the list records step, and the Form ID from the Parse JSON step.
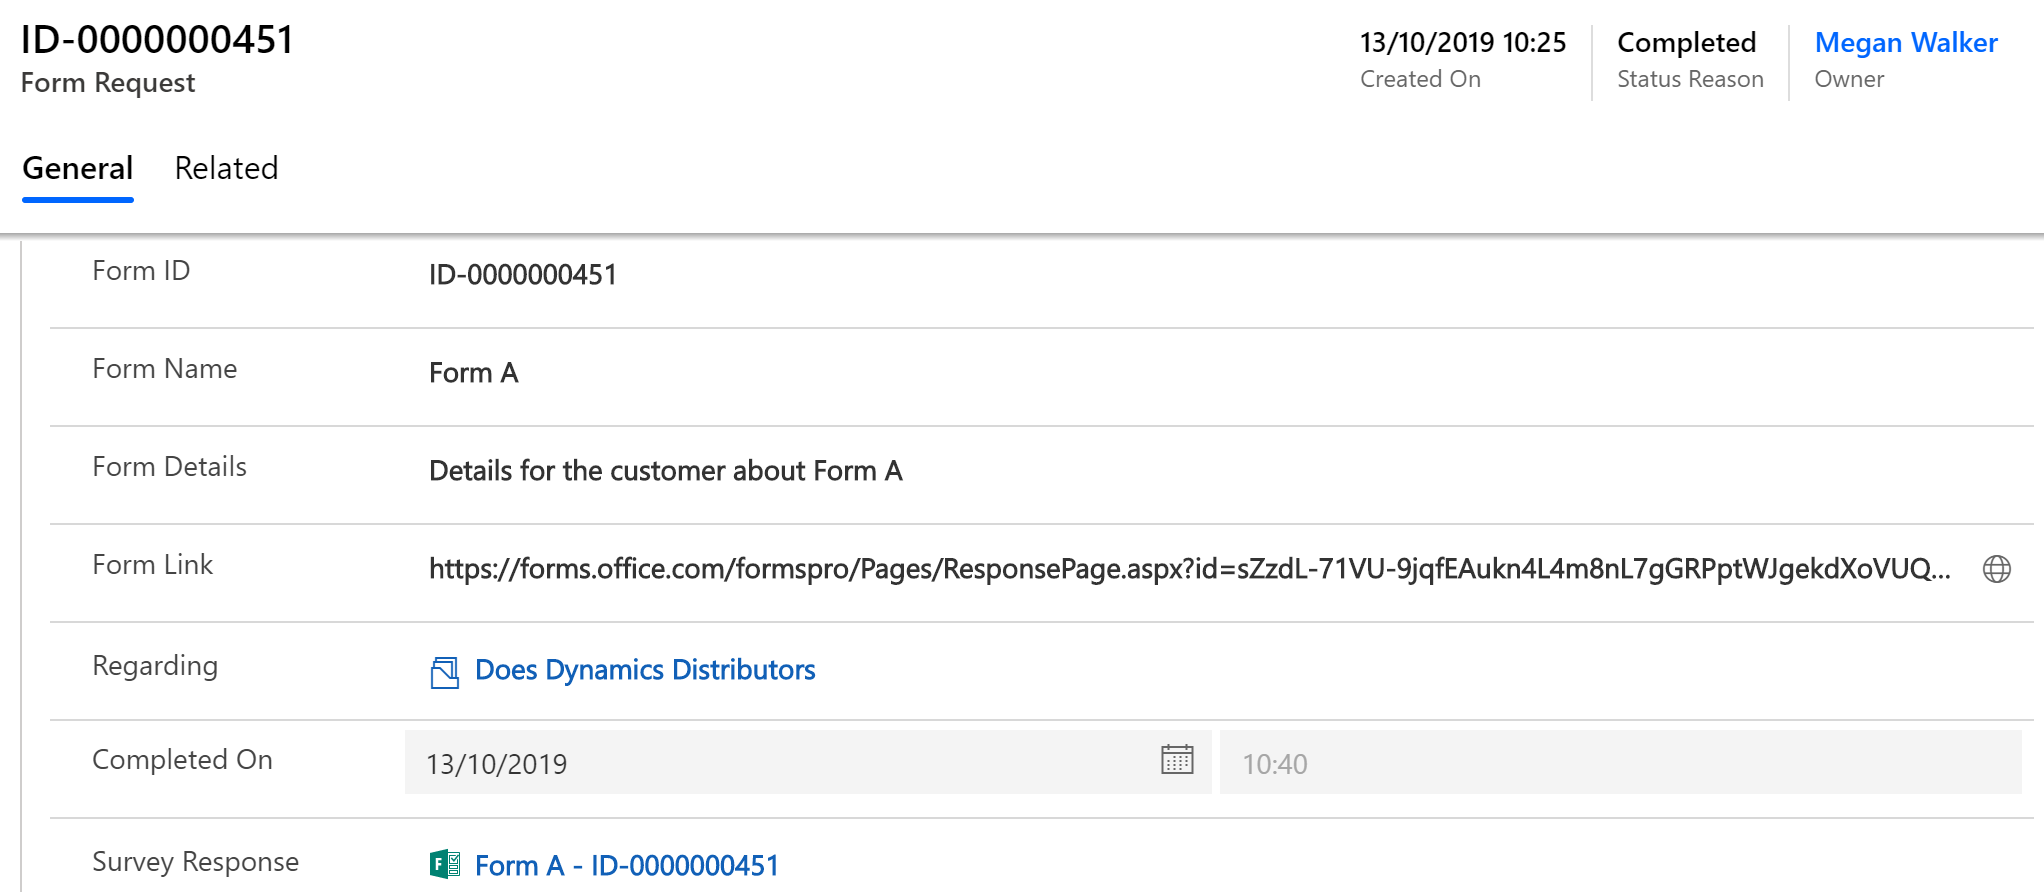
Here we can see the updated completed Form Request with the Completed On date, the Completed Status Reason and the completed Survey Response with the updated subject linked correctly.
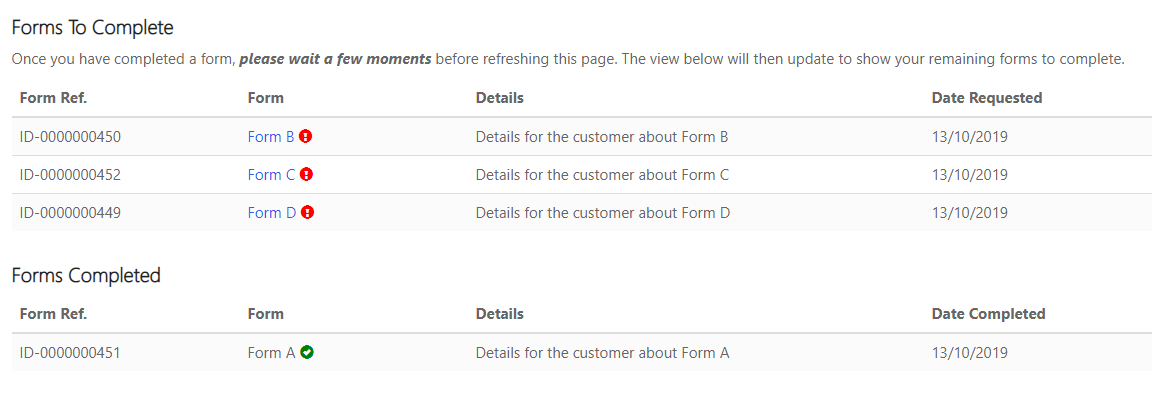
Finally, because we have updated the Form Request record, the lists in the portal update. We now see the Forms Completed section has been populated with the form that was completed with a green indicator next to the form name, and the hyperlink no longer exists.
What do you think? Is this something you might consider using in your organisation? Let me know in the comments below!
Want to just watch how to do this? Check out the video below:
Check out the latest post:
Send Unique Event Registration Response With QR Code Using No Code
This is just 1 of 449 articles. You can browse through all of them by going to the main blog page, or navigate through different categories to find more content you are interested in. You can also subscribe and get new blog posts emailed to you directly.
One thought on “Creating A Forms Library – Flow Two”
Comments are closed for this post.