*** NOTE: ALL INFORMATION IS ACCURATE AT DATE OF PUBLISHING ***
If you’ve used Microsoft Forms, you’ll know it’s pretty straightforward to use and provides you with a quick tool to create surveys and forms to send to people. Enter Microsoft Forms Pro, which is currently in PREVIEW mode, and it’s looking more interesting. Given the name, there will most likely be a cost associated in the future, but for now it’s something that can be tried and tested at no cost. Being a huge fan of marketing, Voice of the Customer and anything related to improving a customers journey, and I wanted to take a look at what it has to offer. This post will walk through creating a simple survey and sharing it with a link.
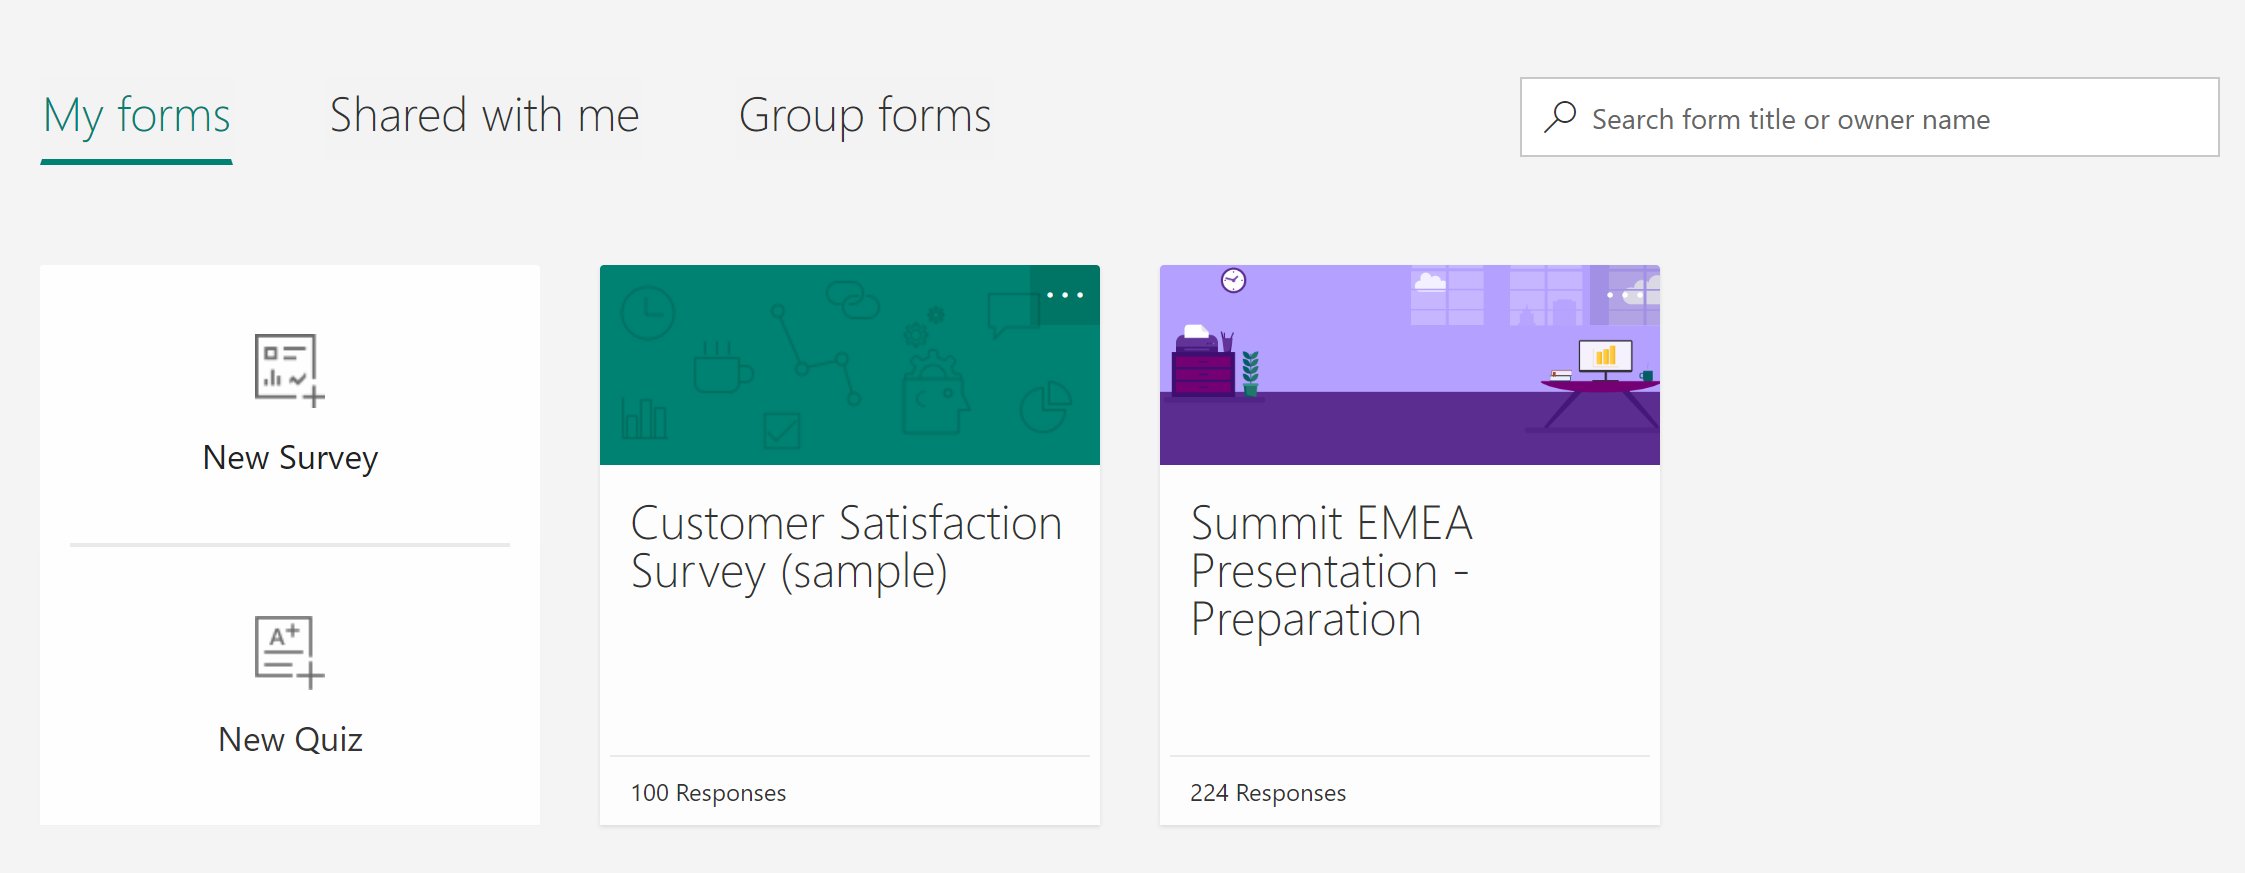
First head to the Forms Pro website to enable it. A form I had created prior to enabling Forms Pro was already there for me, along with a sample customer satisfaction survey. There are two options, a New Survey or a New Quiz. Let’s look at creating a New Survey.
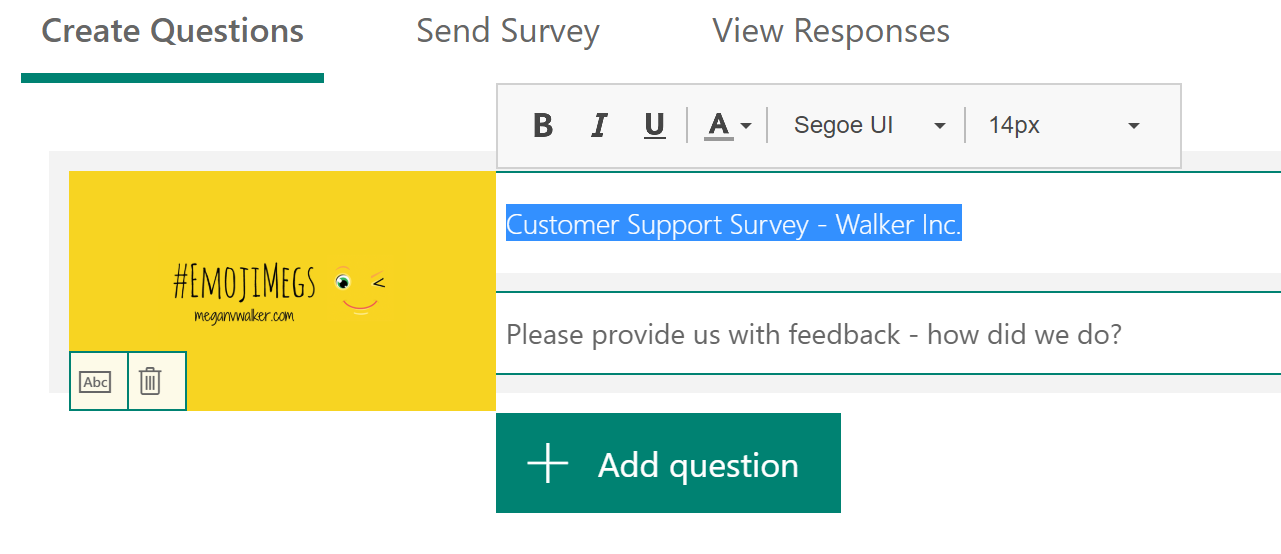
First we add the name of the survey, and a description if required. An image can also be added, so I figure let’s put one in there so we can see how it will be displayed. The font can be changed slightly but with limited fonts to pick from.
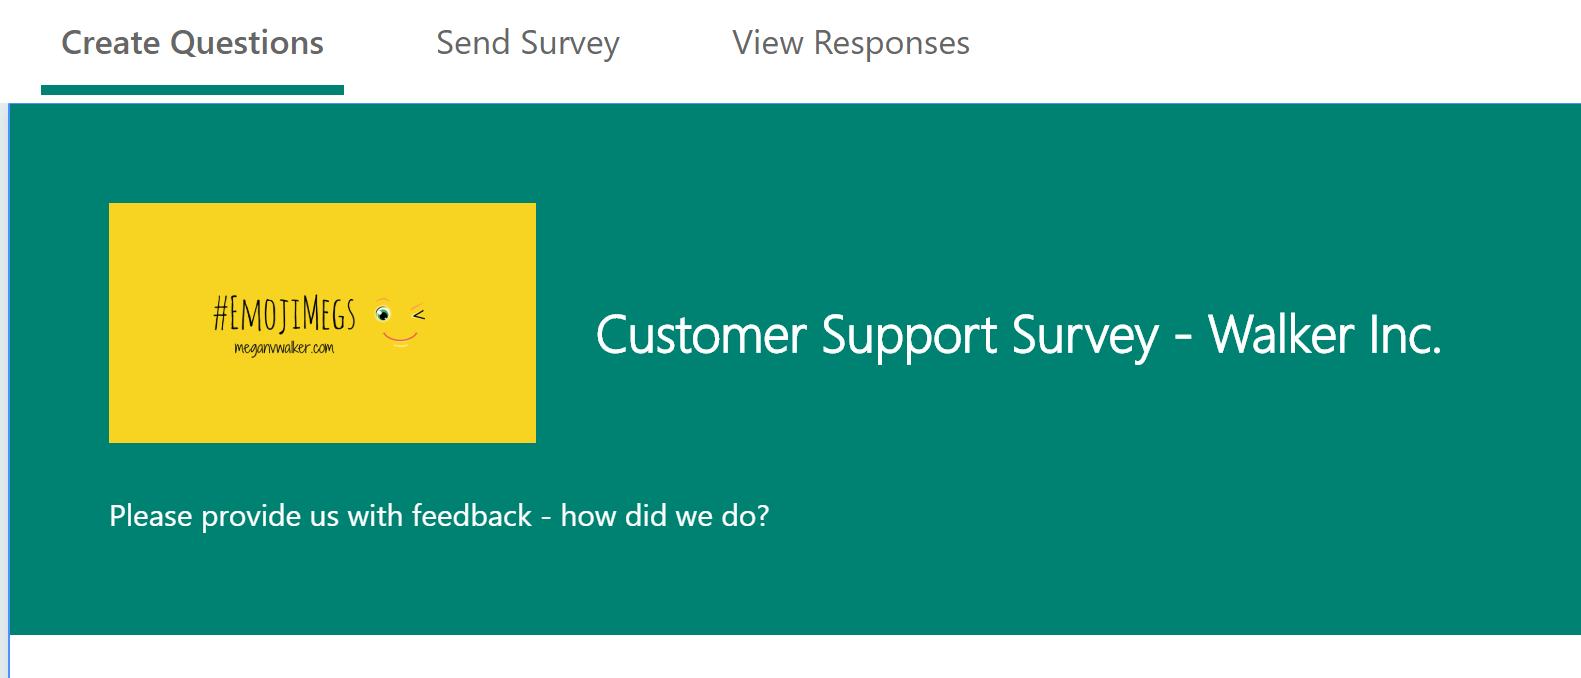
Here we can see how the image will display. It’s pretty small, so great for a company logo, but not much else.
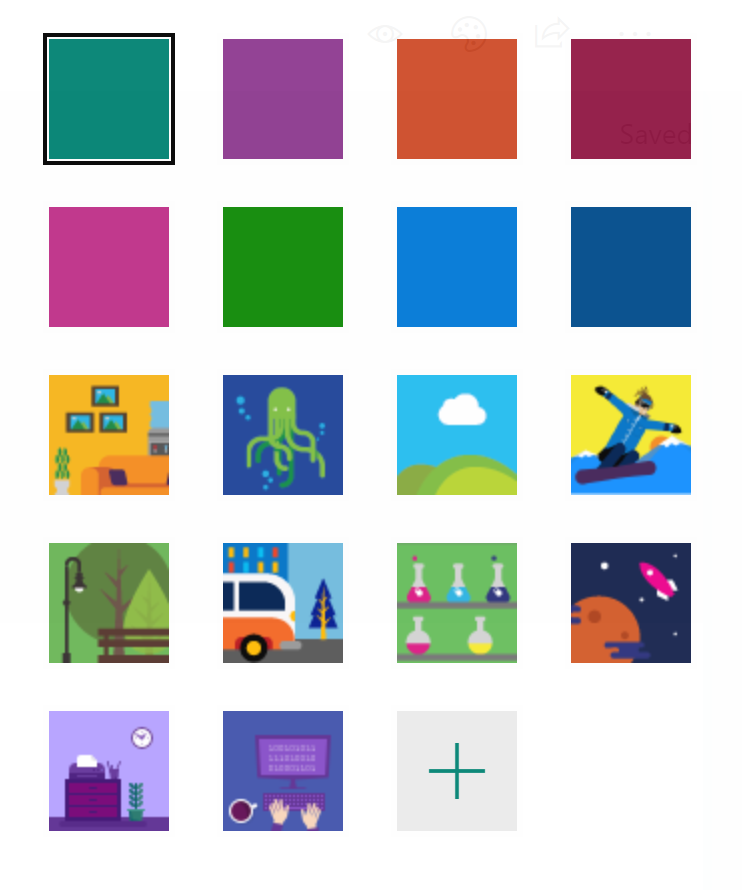
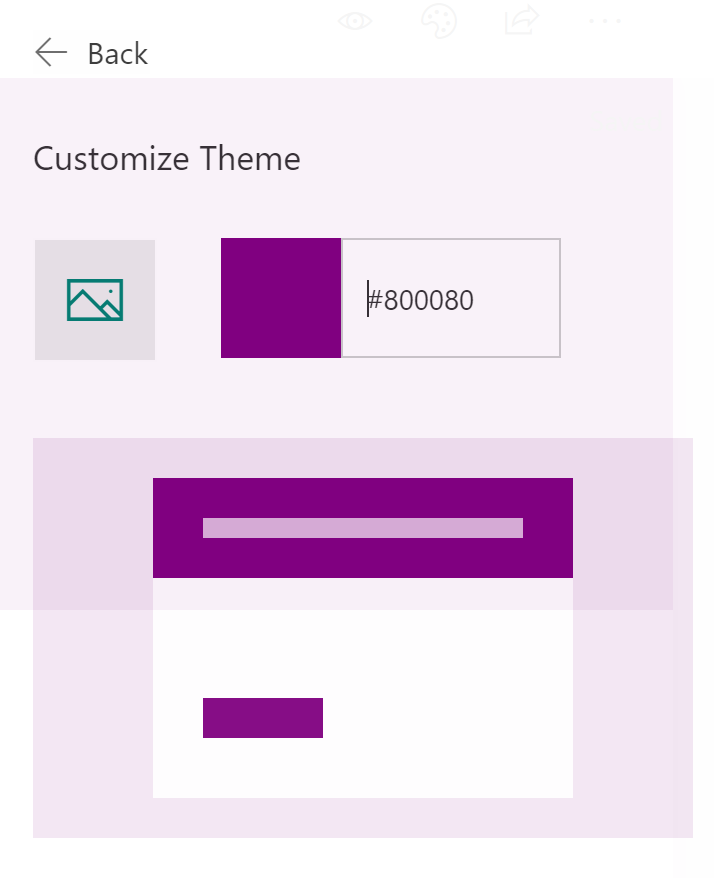
Next over on the top right, we can select to change the theme. There are a number of pre-set colours, and backgrounds which you can choose from, or click the plus sign to add your own.
You can set the colour using a specific hex number, or click to search for an image. The image only shows around the background of the survey, so would most likely need to be designed by your marketing team or graphic designer to look good.
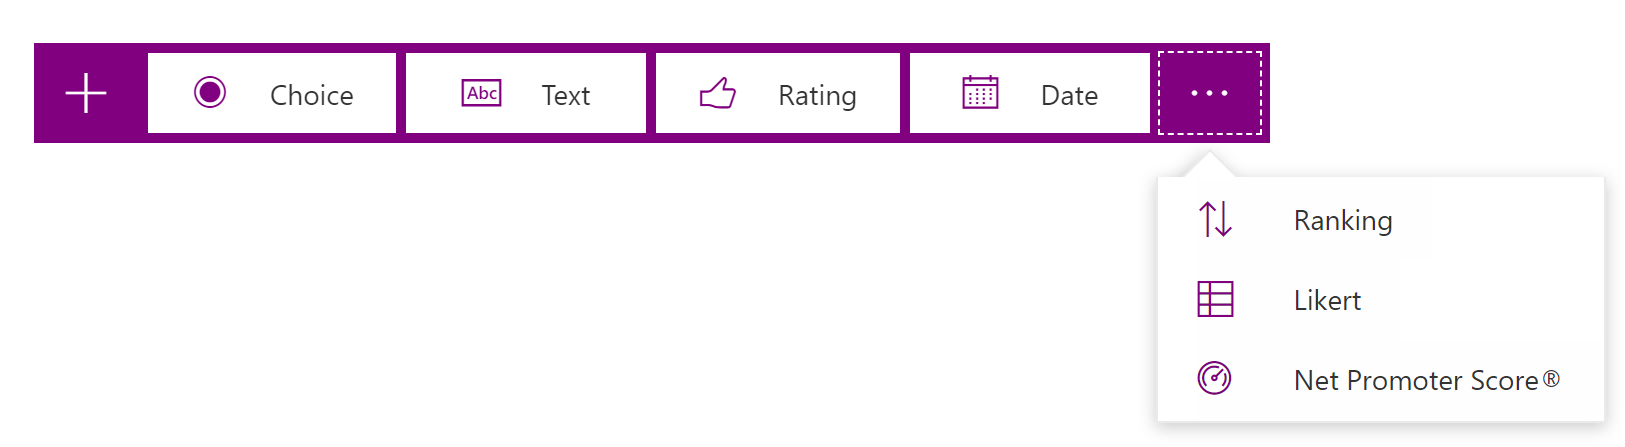
Next we get in to the questions. There are currently seven (7) different options available. Multiple choice (or singular), Text (single or multi line), Rating, Date, Ranking, Likert (a matrix) and Net Promoter Score.
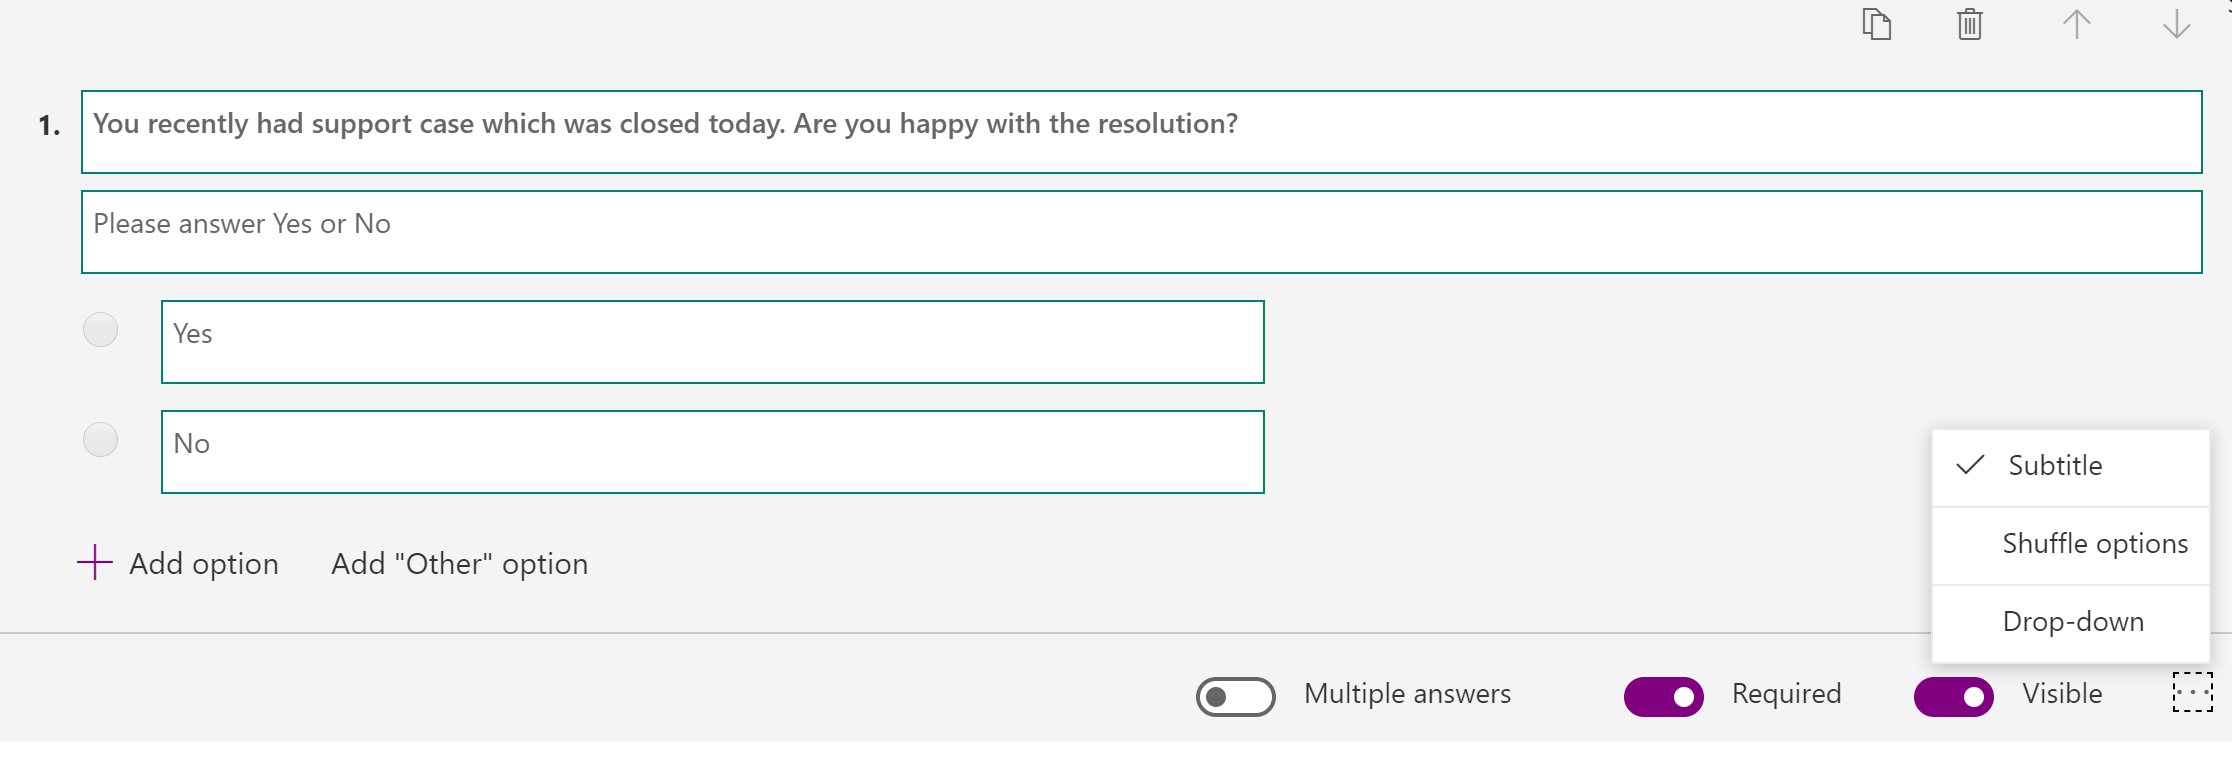
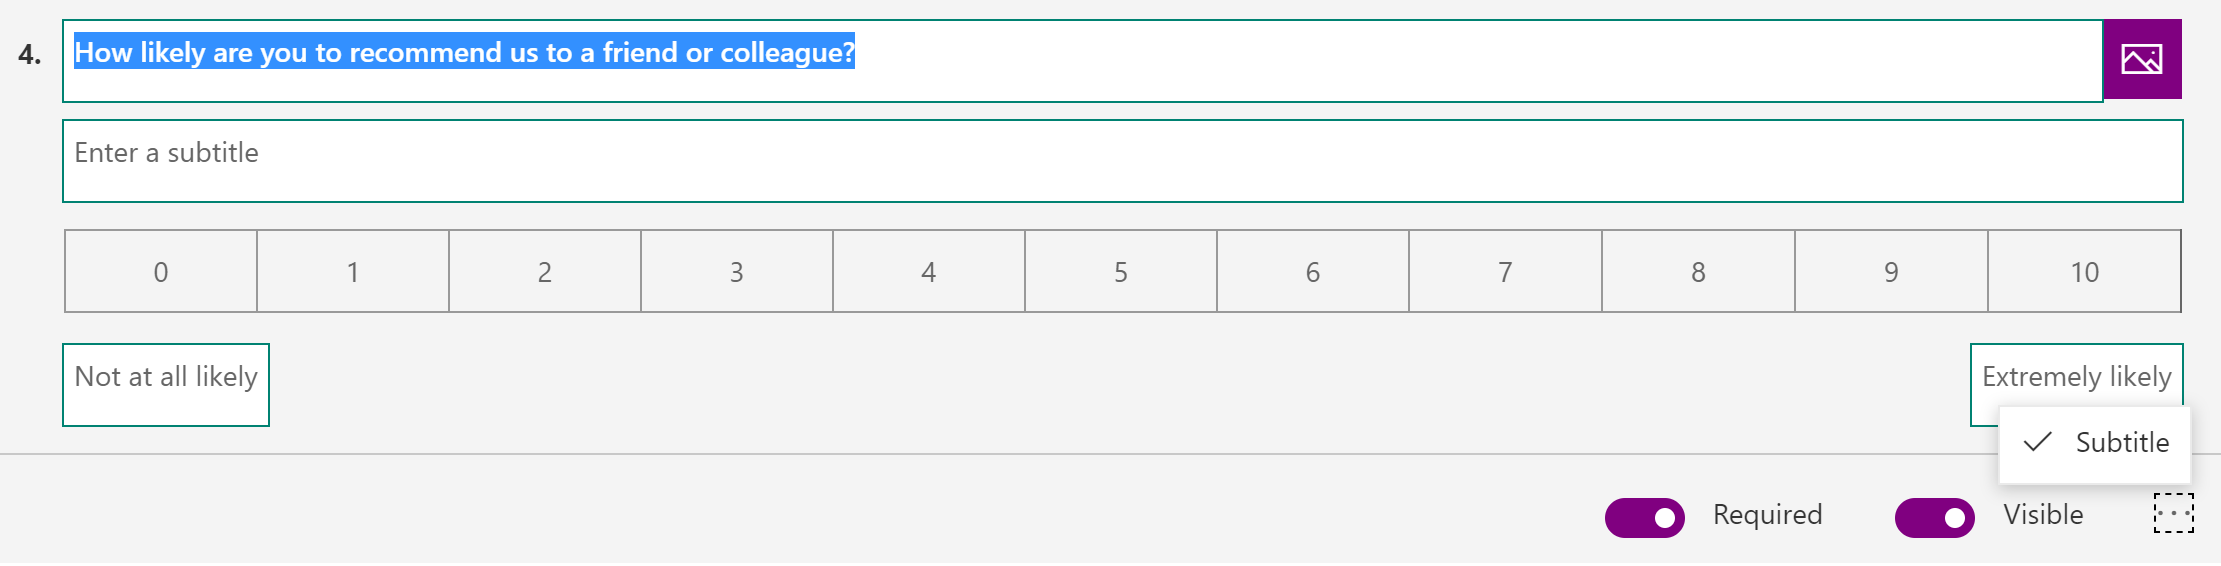
For the first question, we have a Choice, with two possible answers, and the Multiple answers turned off. You can determine if the field is required, and also add a subtitle if you think it might help the users of the survey.
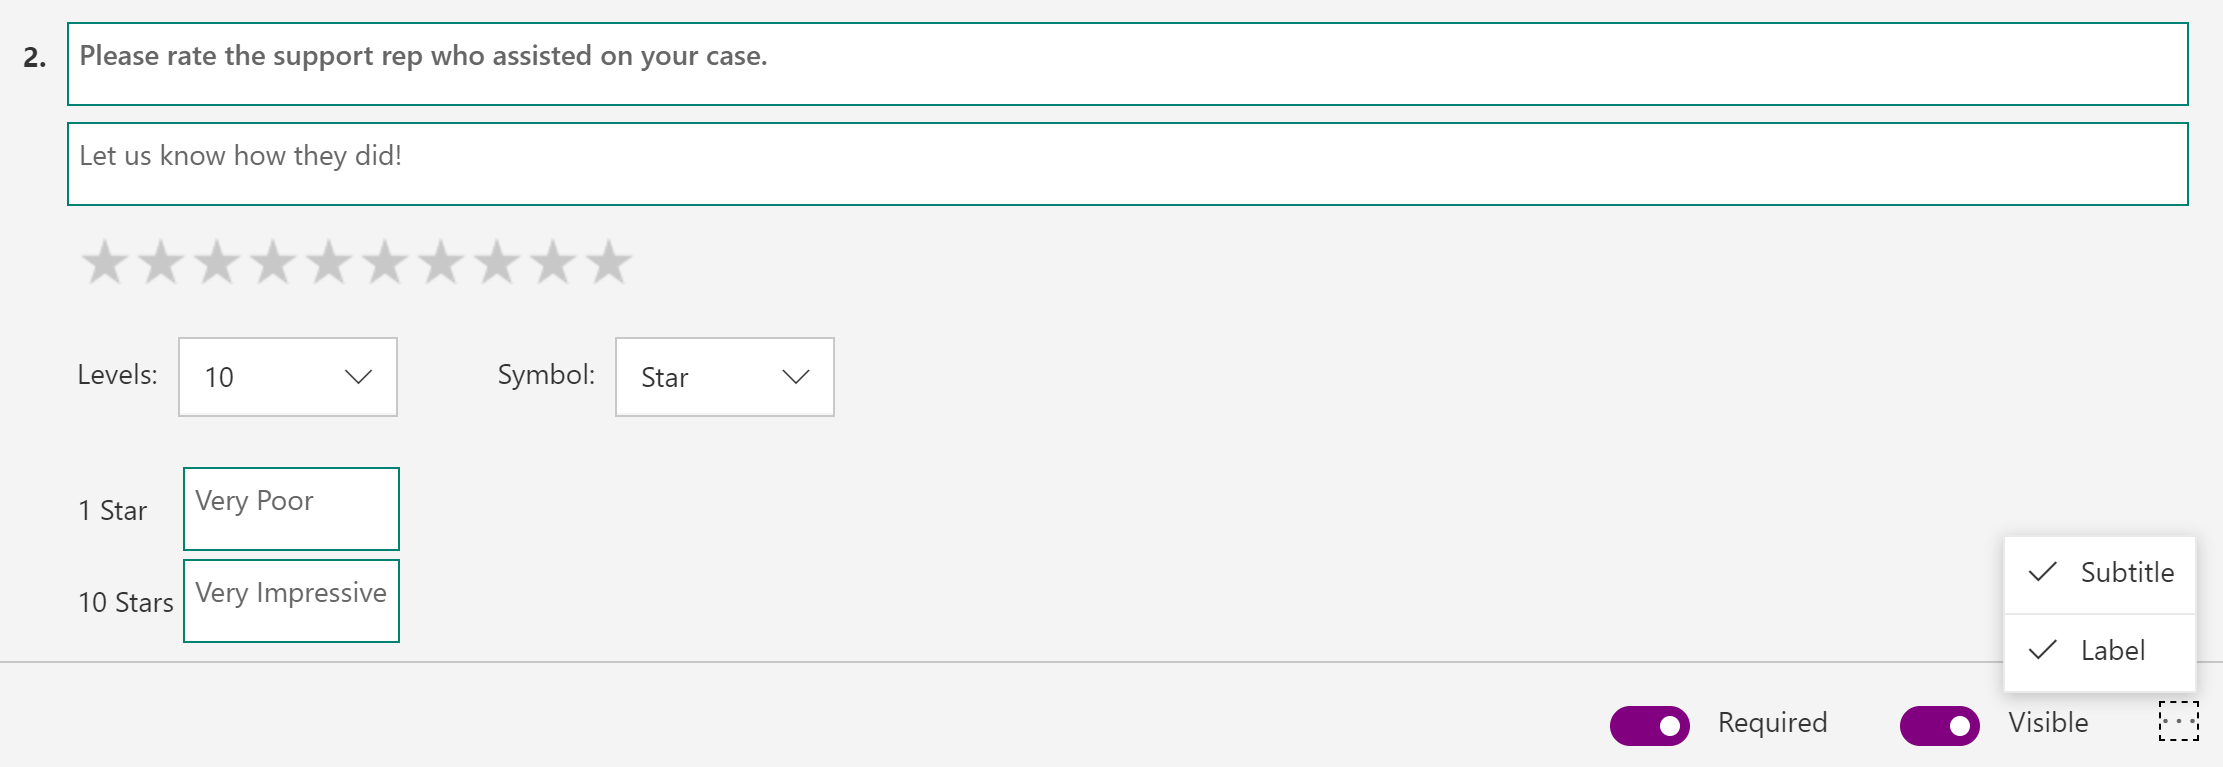
For the rating field, we can set the number of options available with the Levels field, and pick from either a star or a number display.
The Likert field is what I would call a matrix. You can have options to rank each statement, typically asking for feedback after a service has been provided.

Finally, we’ve now got the Net Promoter Score (NPS) question on the survey, asking if the user would recommend the organisation to a friend or colleague.
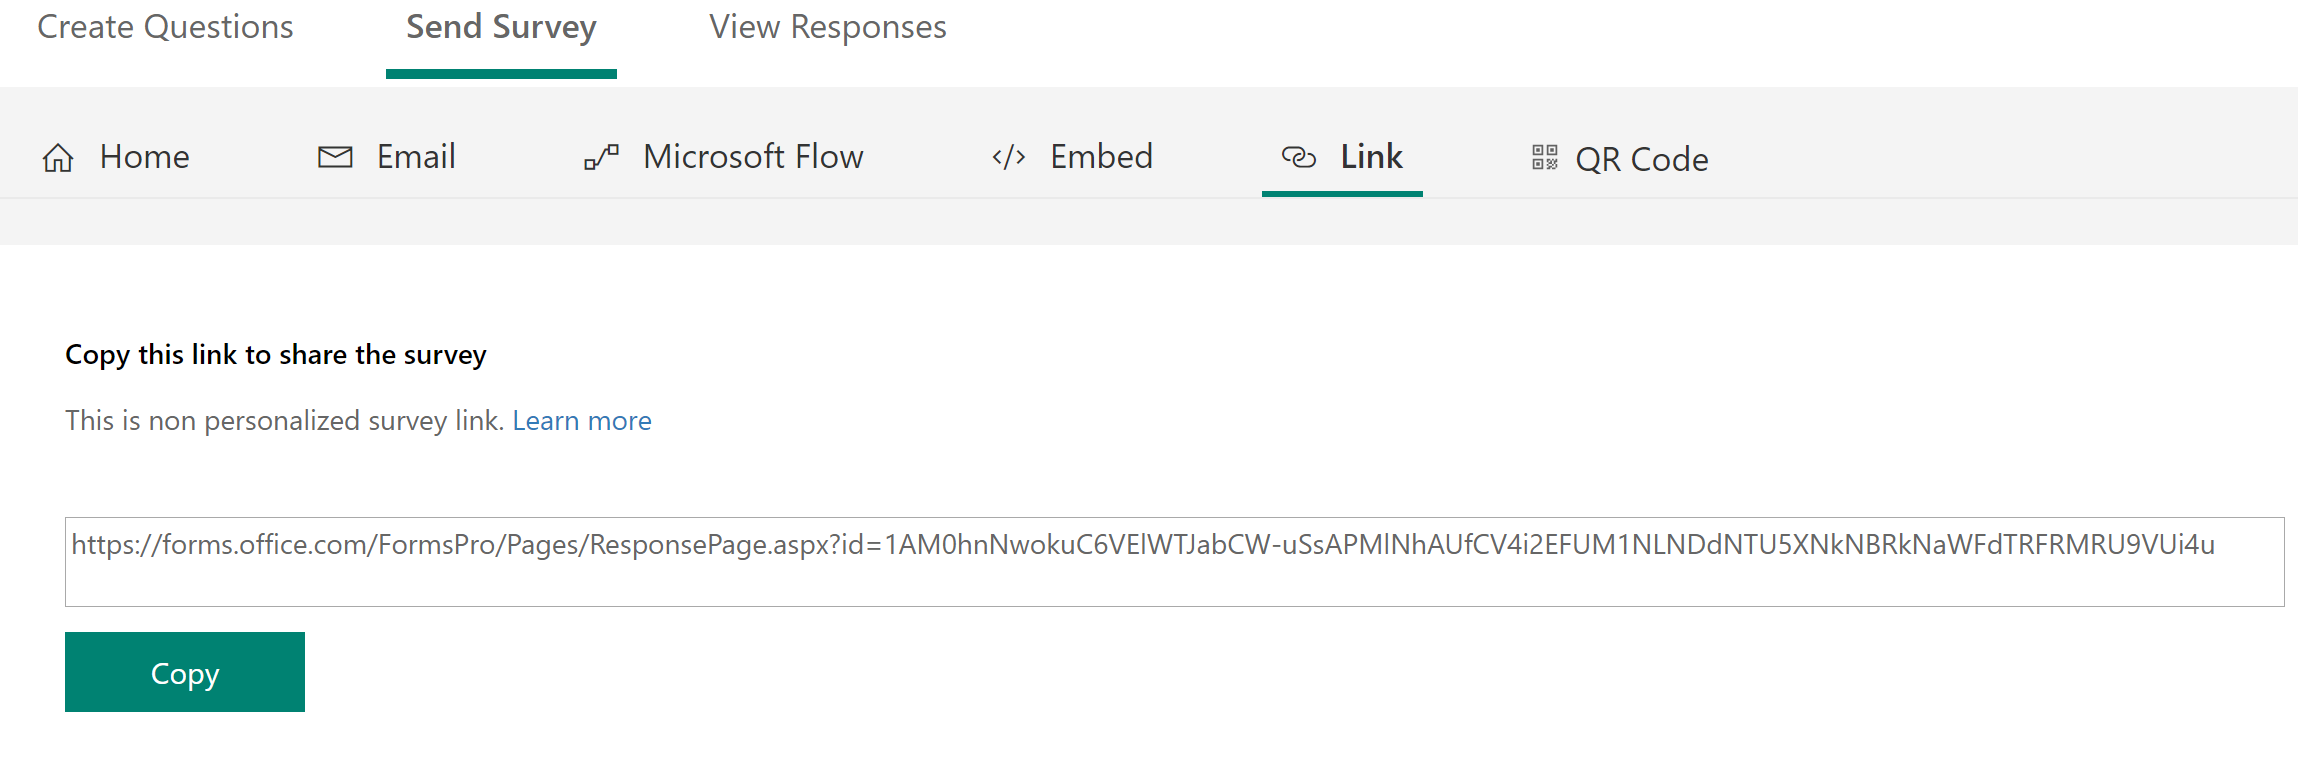
The survey is saved as you go, so there isn’t a final save button to click. Once you are ready to share the survey, click on the Send Survey link at the top. There are a number of options, but the simplest is the Link. This gives you a non personalised survey link (meaning it won’t show their name or any personal details on the survey) which can be shared with people.
Once the survey has been completed, the responses will be accessible within the View Responses tab. We can see the number of responses, the overall NPS, and overall Sentiment (how happy people are in general based on the combined survey responses). The bottom of the responses shows further insights.

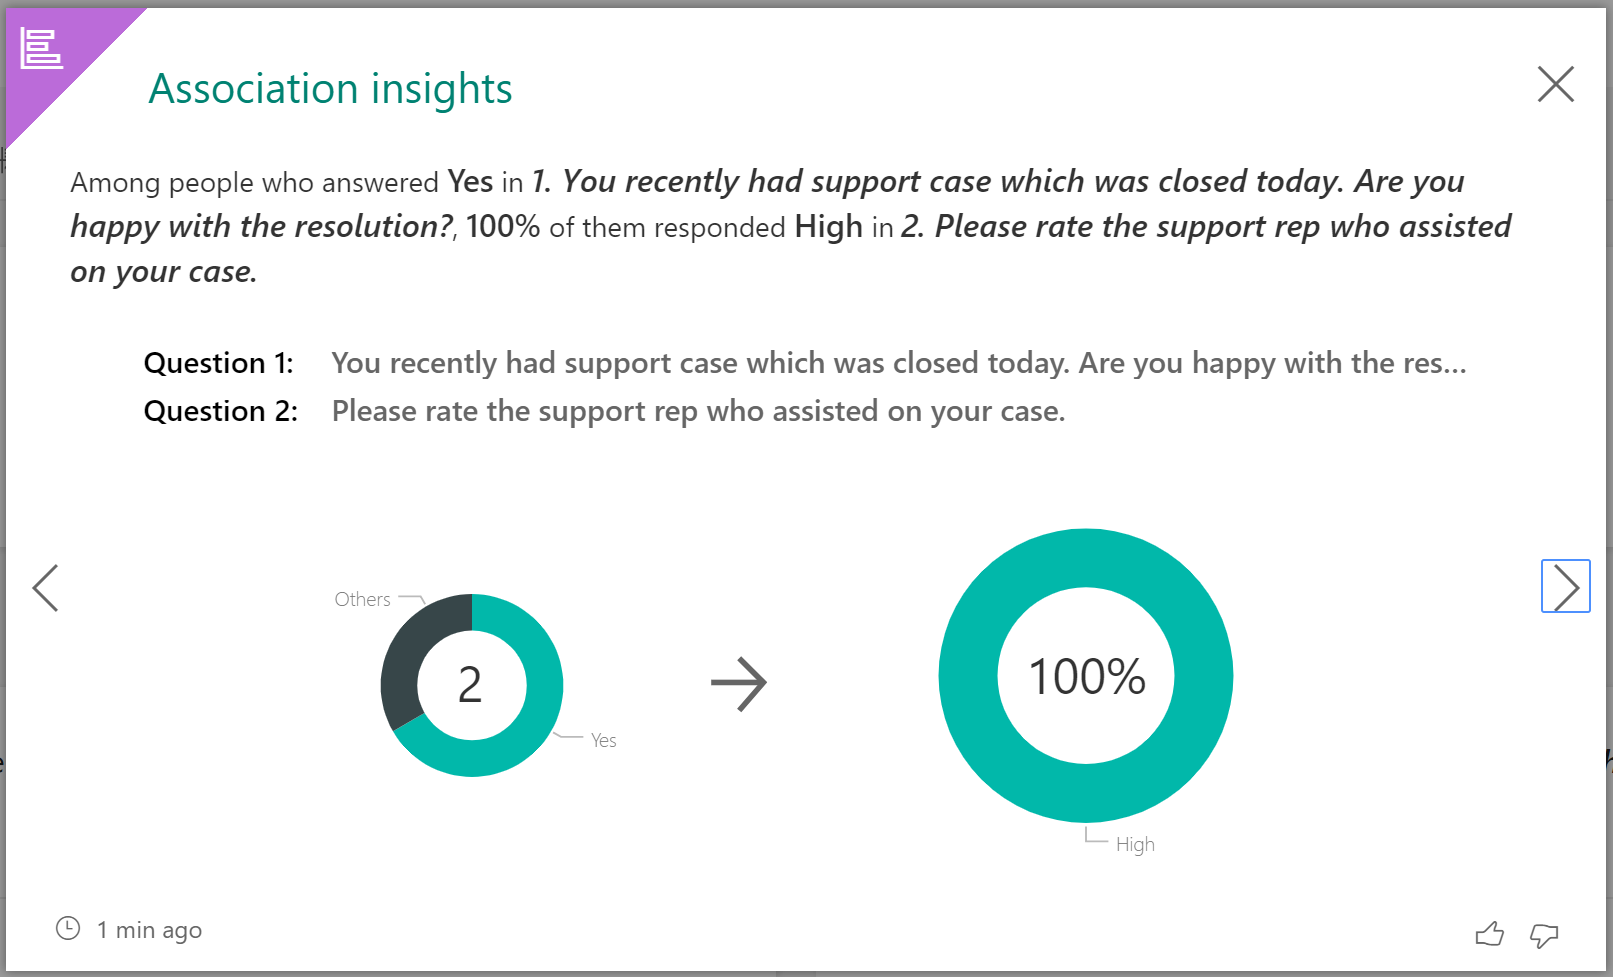
Clicking on the insights cards will open them up and display further detail.
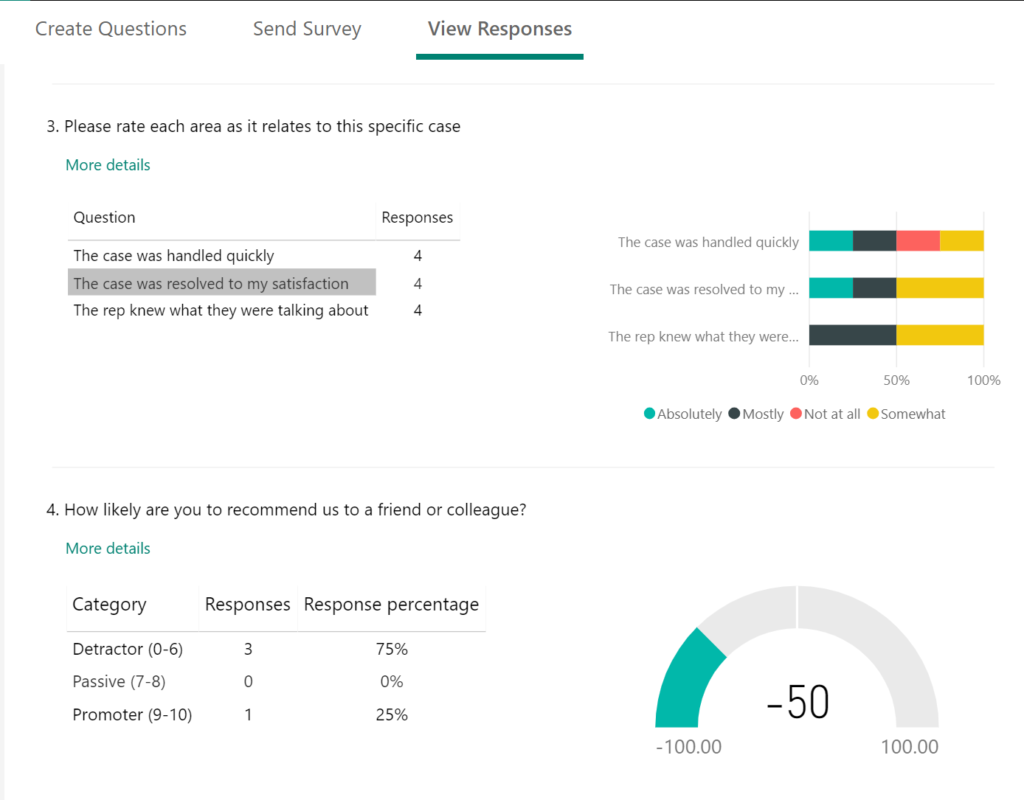
Clicking on the Question Responses shows each question in the survey, with an overview of the responses for each one. It’s clear, easy to read and understand, and provides quick insights as default functionality. Some pretty nice functionality available even with just creating a very basic survey. Will be interesting to see what else is available, which I will look at in future posts.
Want to just watch how to do this? Check out the video below:
Check out the latest post:
Removing Issues With Mobile Phone Numbers On Realtime Forms
This is just 1 of 447 articles. You can browse through all of them by going to the main blog page, or navigate through different categories to find more content you are interested in. You can also subscribe and get new blog posts emailed to you directly.
Very useful!
Thanks Kristin! Hopefully you will enjoy the series, I have quite a few posts on the subject all scheduled ready to go over the next few weeks.
really useful- thanks for sharing !
You are very welcome! Hope you enjoy the rest of the Forms Pro series. ????