*** NOTE: ALL INFORMATION IS ACCURATE AT DATE OF PUBLISHING ***
I’ve worked with Microsoft CRM for well over a decade, along it’s progression as Dynamics 365 and renaming’s of the Common Data Service, Dataflex, Project Oakdale and Dataverse. One of the things that has always been a bit frustrating is the clean up of data often needed when users aren’t always all that thorough in looking for existing Accounts when adding new Contacts, and making sure they are linked accordingly. Likewise, if an Account record is not required on a Contact, adding a Contact and not bothering to create a new record for the organisation where they work. I have various automated processes for adding new Contacts to my own D365 environment, so wanted to make sure I didn’t end up with lots of Contacts floating around not linked to anything, so came up with the following process. This is just a suggestion, so as always, modify it to meet your own requirements.
Add Some New Fields
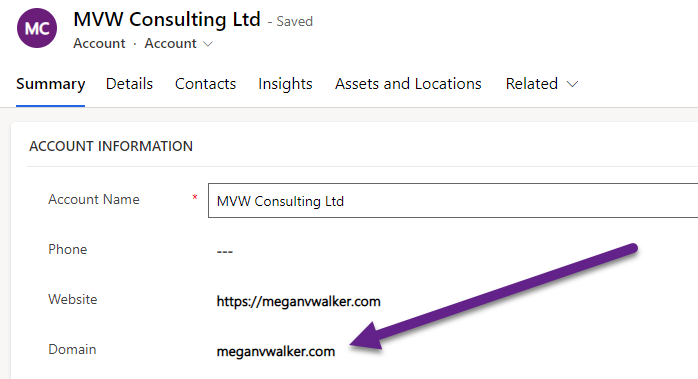
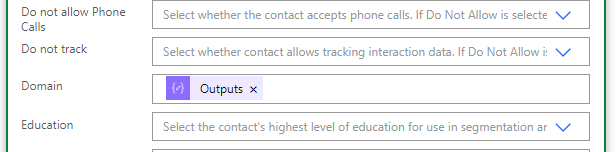
I needed a way to try and link a new Contact to an Account if one already existed. The easiest way is by checking the domain on the email address of a Contact, so I added a new single line of text field called Domain to both the Contact and the Account tables. You could use the existing Website field on the tables, but in theory those could potentially be different from the email domain, which is why I opted for new fields. If a user adds a new Account, they will need to fill out the Domain field with just the last part of the related website or email domain. So instead of https://meganvwalker.com or www.meganvwalker.com it would be meganvwalker.com.
Power Automate Flow
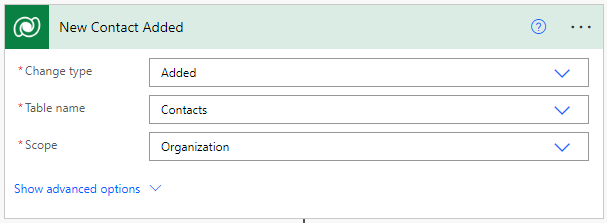
Now let’s create a flow. First step is the trigger using the Dataverse connector. I want it to run each time a new Contact record is created. Sometimes I manually create a Contact, but many times it comes through via a Marketing form submission, or other processes I have running from different services I use. This way it will run no matter what mechanism is running to create a new Contact. You might want it to run when Contacts or modified, or use other logic, so go for what you need!
This next step is so that we can create a custom dynamic link to access the Contact record. That link can then be added to an Email notification. For more on why we need this action (Get row by ID from the Dataverse connector), check out this post from Thomas Sandsør on finding the Dataverse environment URL. In short, the action step gets more information about the record than the trigger step does!

Now we can create the link back to the Contact in D365 using a Compose step. We can build out the full link by combining the URIHost (again, check out the post above from Thomas) then a little more of the URL including the contact entity name, then add the Contact ID to the end of the string. We can use the Full Name from the Contact as the pretty link for people to click on.
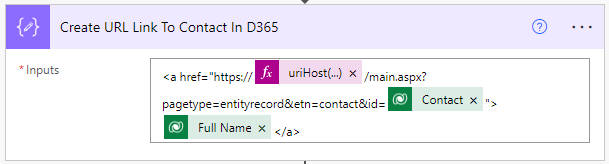
You should be able to copy and paste the code below in to your Compose step. This will only work if you have also named your action step Get Contact By ID.
<a href="https://@{uriHost(outputs('Get_Contact_By_ID')?['body/@odata.id'])}/main.aspx?pagetype=entityrecord&etn=contact&id=@{triggerOutputs()?['body/contactid']}">@{triggerOutputs()?['body/fullname']}</a>
Next we are going to extract the Domain from the Contact’s email address using another Compose step. For this, we are going to take the email from the Contact in the initial trigger and split it up to only leave everything after the @ symbol.

Assuming you are using the standard email field, you can copy and paste the code below in to your Compose step.
last(split(triggerOutputs()?['body/emailaddress1'],'@'))
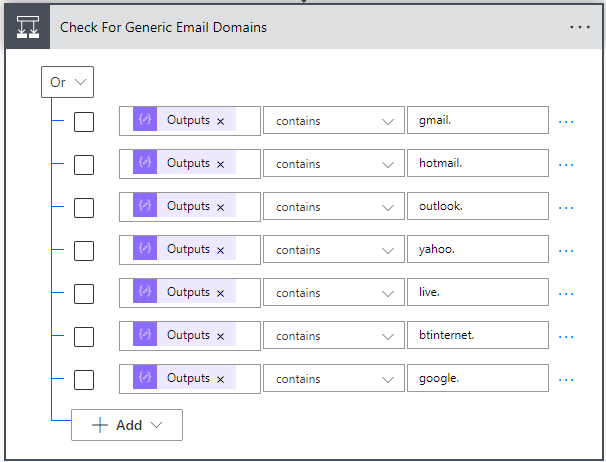
Now we will add a Condition. I don’t want to create new Accounts for Contacts that are created with what we would call a generic email address. So people who have a Gmail or Yahoo account for example. There is likely an easier way to do this (feel free to gently comment with your suggestion 😊🥰😊) but for me, this allows me to quickly review and see what the condition is in full. I am using OR logic and then using the Output from the Extract Domain compose step. Then using contains as the operator, and then the part of the domain I want to check. So, if the domain includes any of those items, we will go down the Yes path of the condition.
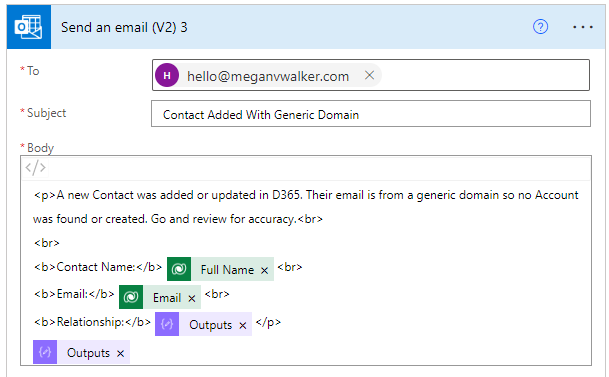
The Yes path is now very simple. I wanted to know when a Contact had been added, but also know that it has a generic domain, therefore no Account was found or created, so I am using the Outlook connector and the send an email action. For my requirements, I wanted to know the Relationship (coming from a custom field) so you can see that below, but everything else pulls the Full Name and Email from the Contact, and the final Outputs will be the generated link back to the Contact record.
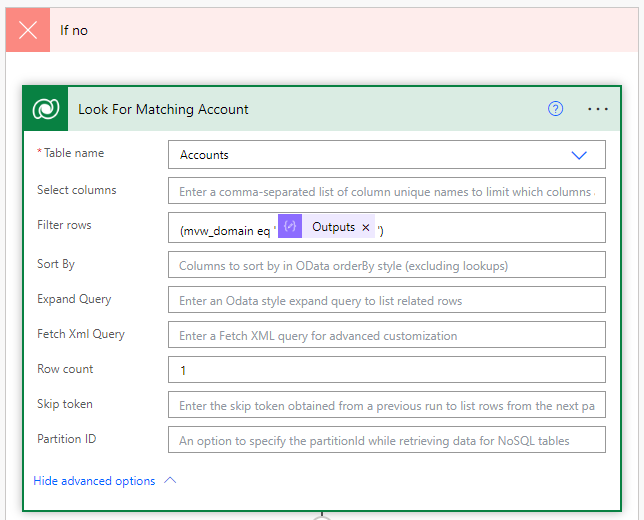
Now, if the email address domain was not generic, they will go down the No path of the condition. For this, I am going to use a List rows action from the Dataverse connector, with a simple filter which uses my custom domain field name then eq and then the output from the Compose step where we extracted the Domain. Depending on the quality of your data, you might want to leave the Row count empty, but I have it set to 1. I know I will only ever have 1 account found (easy when there is only one user!), but you might not be so lucky!
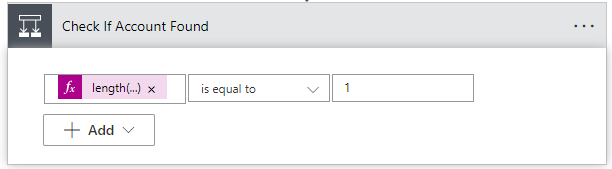
This means I can then use the next condition to check that the length (or number of records found in the List rows step) is equal to 1.
Again, if you have renamed your steps like I have, you can simply copy and paste as your expression. If not, just type in the name of your list rows step instead of where I have Look_For_Matching_Account. Make sure you use the underscores between each word.
length(body('Look_For_Matching_Account')?['value'])
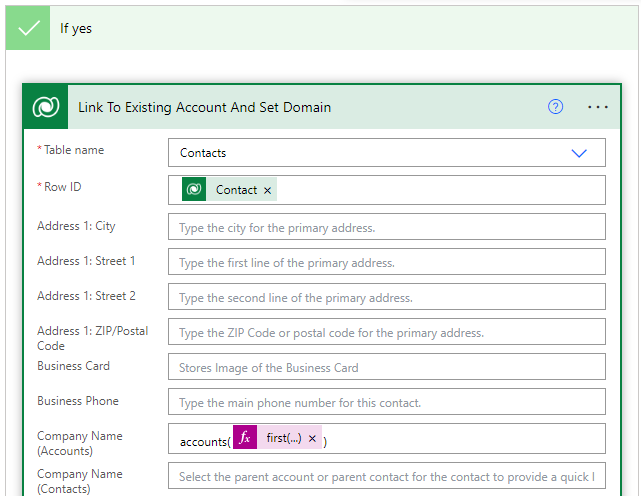
If 1 record is found, we don’t want to create another Account. Instead, we are going to link the new Contact to the existing Account record and then set the domain. Notice that the Company Name field shows an expression rather than just an Account ID. We’ve used a List rows step to find the Account, so if we just added the Account ID, we would end up with an Apply to each. Instead, use this expression to make sure we get the first (also the only record) account record that was found by using this code:
first(body('Look_For_Matching_Account')?['value'])?['accountid']
We can also use the Output from our domain extraction Compose step and set it in the Domain field on the Contact for consistency.
This next part you might not want to do, but if there is no Primary Contact on the Account already, let’s set this new Contact as the chosen one! We have a Get record by ID step to get the Account using the Parent Customer ID field (or whatever field you use in your environment) from the previous step (or you can use the same expression we used above by getting the first row from the List rows step). Then do another Condition check and check to see if the Primary Contact field from the Account is equal to null.

If No, we do nothing. If Yes, we will use an Update row step to set the Contact as the Primary Contact on the Account record.

Now minimise your condition so you don’t put the next action step in the wrong place and add another send an email action. This one will have slightly different wording to the other email notification and will also include the Account Name.

So now we go to the No path from the ‘Check If Account Found’ condition. Again, you might not want to have a flow creating a new Account, but this made it a lot easier for me to manage. The first step will be Add a new row from the Dataverse connector and we add a new Account record. There isn’t much you can do in terms of filling out fields. I have set the Account Name, Website and Domain all as the extracted Domain value. I am also setting the Primary Contact as this new Contact record that was created. The next step is then an Update a row step to link the new Contact to the new Account that was just created. Then finally we have another Send an email step from the Outlook connector.

Process In Action
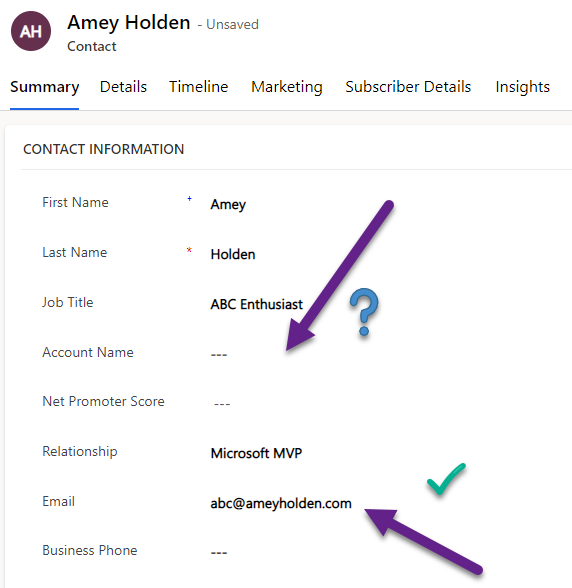
Now you just need to add a new Contact. Here we have an unknown person. We have their email address but don’t have their Account.
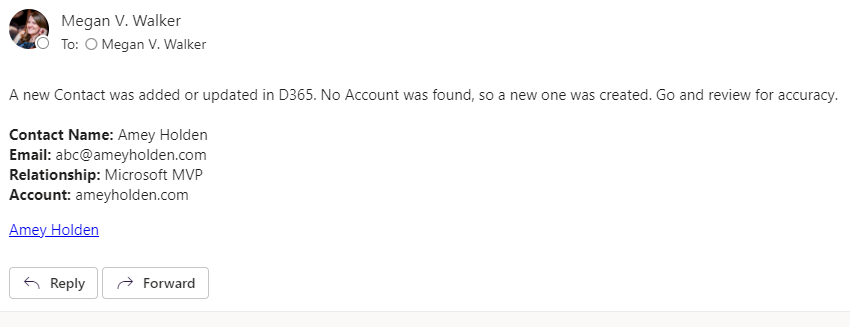
The flow runs, and we get a lovely email notification telling us a new Contact was added, No Account was found so a new one was created. We get a nice pretty hyperlink using the Contact’s full name, and when clicking on it get taken directly to their record in D365.
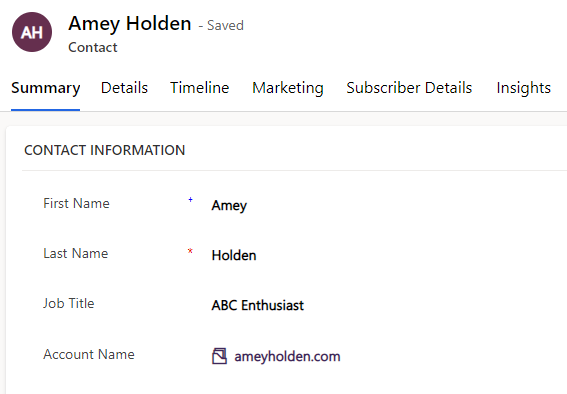
Now we can see they are linked to the new Account.
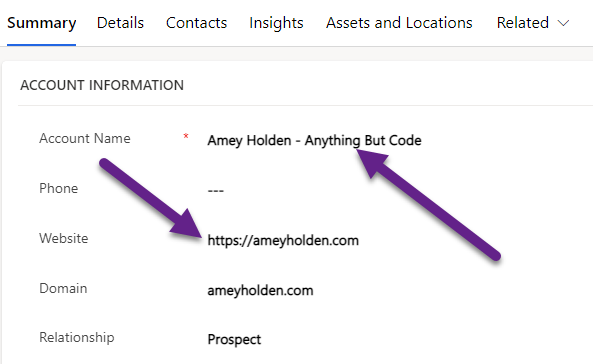
Going in to the Account, we can review the details. I’m using the domain to update the Website address which automatically adds https:// to it. So we can click on that field, go to the website and get the real name of the company. Update the Account Name and then save it. Job done!
If you have a section for Contacts on your Account record, you can review it. Here I can see that the Primary Contact field has been populated with our new Contact.

This has saved me so much time, and also let’s me know exactly what is going on in my Dynamics 365 environment when it comes to Contact and Account Management. Love it! ❤
Check out the latest post:
Removing Issues With Mobile Phone Numbers On Realtime Forms
This is just 1 of 447 articles. You can browse through all of them by going to the main blog page, or navigate through different categories to find more content you are interested in. You can also subscribe and get new blog posts emailed to you directly.
Hi just going through the steps as outlined. I have got to Get Generic Email domain and I set up email into the Yes Path. Flow succeeded but no email sent. When I moved email to NO Path email was sent.
Am I missing something here
Regards
Sean
The condition check must not be correct. Do you have OR used for all the domains, or is it AND? If you are testing and the No path is used when you think it shouldn’t or vice versa, it’s something in the condition that is being met. I would check again to be sure!