*** NOTE: ALL INFORMATION IS ACCURATE AT DATE OF PUBLISHING ***
One of the first things you likely learned to create when starting off with the Dynamics 365 Marketing App was how to create segments. These are your ‘buckets’, ‘groups’ or ‘lists’ of people that you want to take on a Customer Journey of some kind. If you are using Dynamics 365 Customer Voice, you might want to leverage survey submissions and responses to specific questions to create Segments. In this post we’ll walk through some of the options you have to do this.
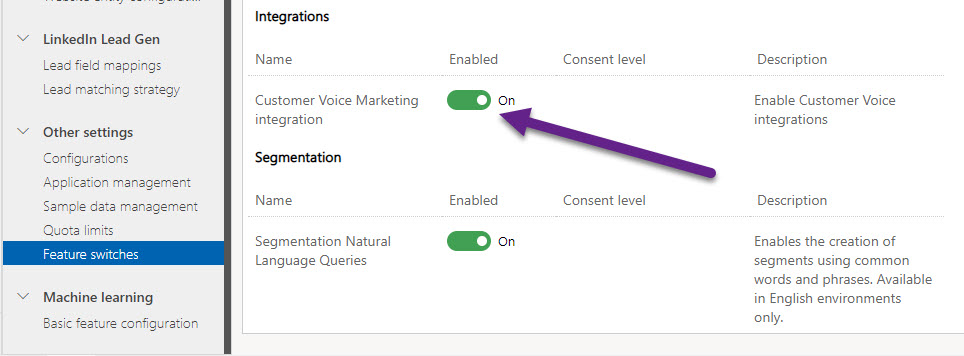
First step, have your Administrator go to the Settings area of the Marketing App, then in to Feature Switches. Be sure to turn on the Customer Voice Marketing integration so that the Customer Voice entities are available to add to your Segments.
You can watch a video on this here.
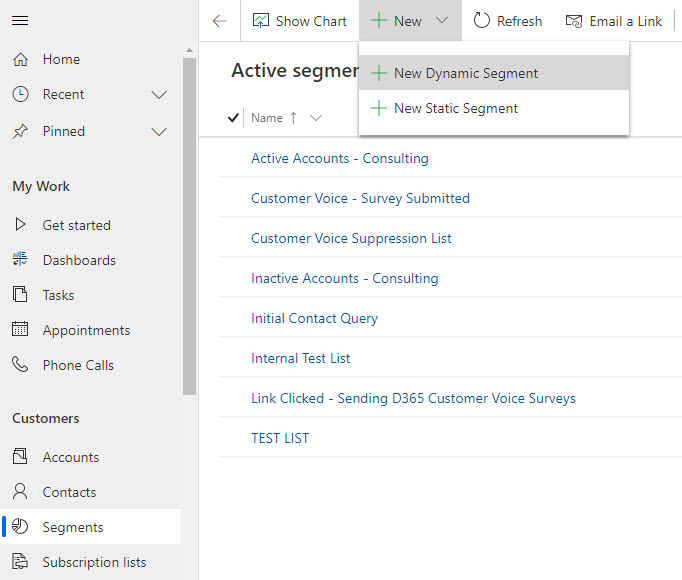
Next, navigate to the Segments area from under the Customers category on the menu in the Marketing App. For a bit of clarity, these are the two types of segments.
- Dynamic segments are set up by using logical expressions, meaning Contacts can fall in and out of these segments based on changes on their record, or based on interactions they have with other data in the marketing app.
- Static segments contain Contacts who are manually selected by a user. This might be your ‘top ten’ clients considered based on logic and criteria that can’t be determined by any fields you have. So you can hand pick these and have a list of people you target. Contacts will not ‘fall out’ of these segments and would need to be manually removed.
We are going to create a Dynamic Segment.
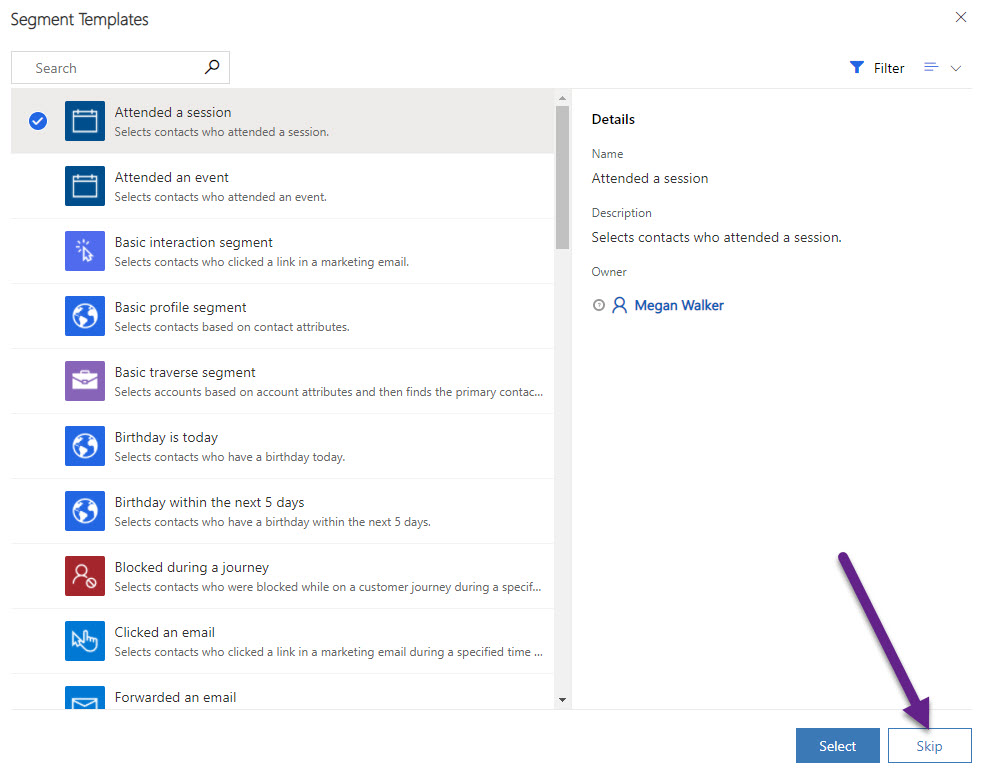
The list of Segment Templates will open. Unless you have a template you’ve already created as a good starting point, click Skip to start with something blank.
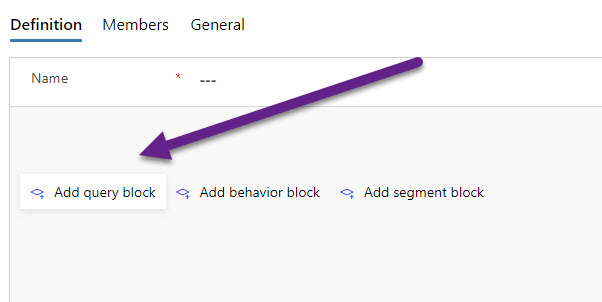
The first thing we will add is a query block.
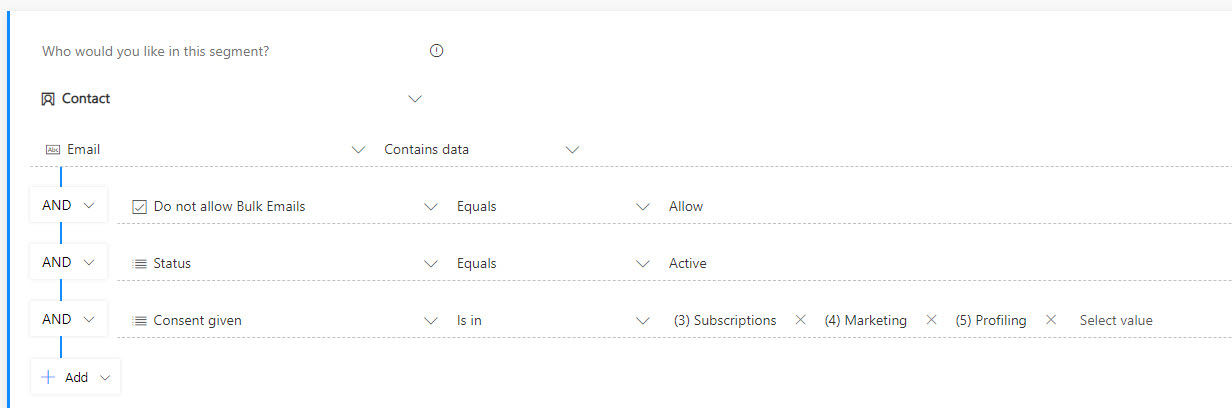
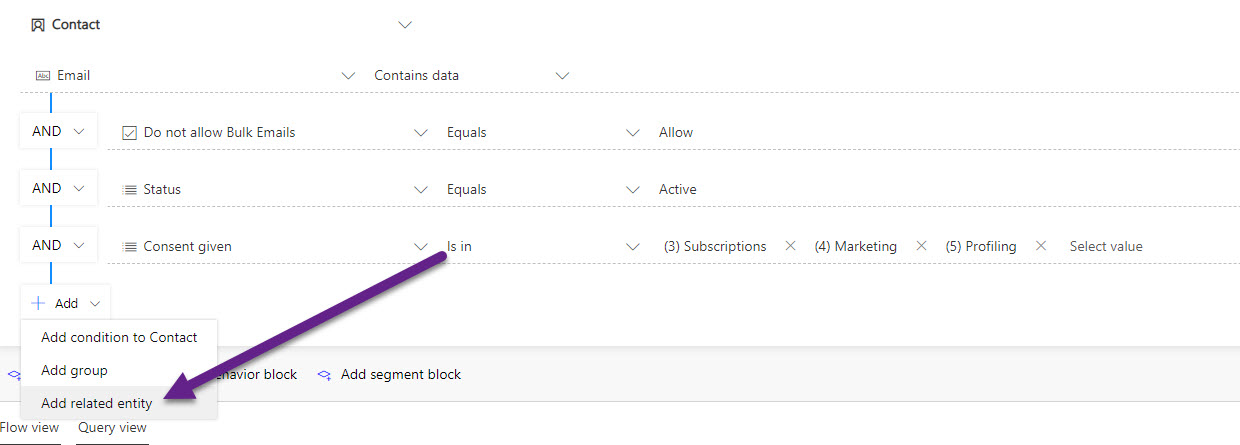
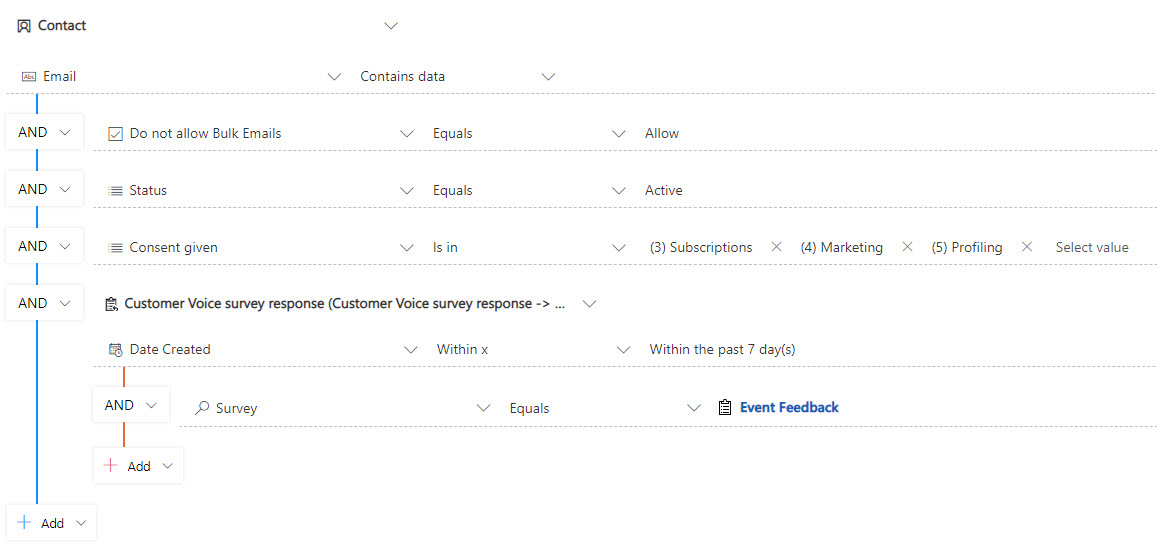
We can use this to add conditions to the Contact record. I typically like to set it to include people where the Email field contains data, the status of the record equals Active, Do not allow Bulk Emails is set to Allow, and then set the Consent given to be either 3, 4 or 5. While it’s true that there are blocks in place that mean a Contact wouldn’t be sent an email if their Do not allow Bulk Emails is set to Do Not Allow, or the Email was missing, or the Consent given levels didn’t match to that on the Customer Journey, I would rather see an accurate number for the Members on a Segment and see how many are included that COULD actually be a part of a journey.
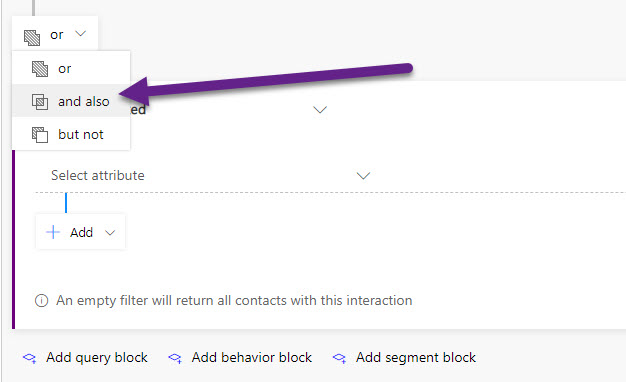
So next, we will add a behaviour block, and make sure the connection is set to and also between that and the query block.
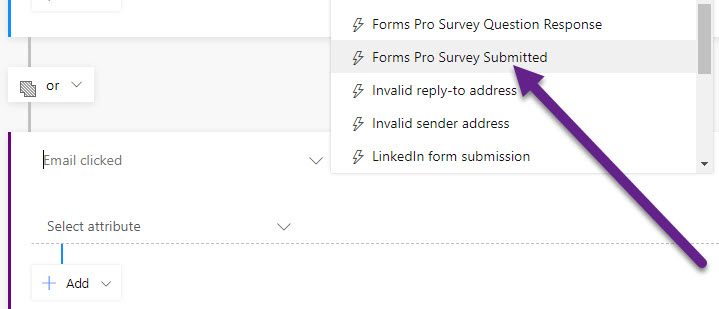
There are several options available with the behaviour block, but we will select, Forms Pro Survey Submitted. Yes, it’s now Customer Voice, it just hasn’t been renamed yet.
We can then select the Survey from the list of attributes.

Then we can use the equals indicator, and then select the survey from the list of Customer Voice surveys found. That will then give us all Contacts that meet the conditions set in the query block AND that also have submitted the survey we pick. That segment might work well for you.

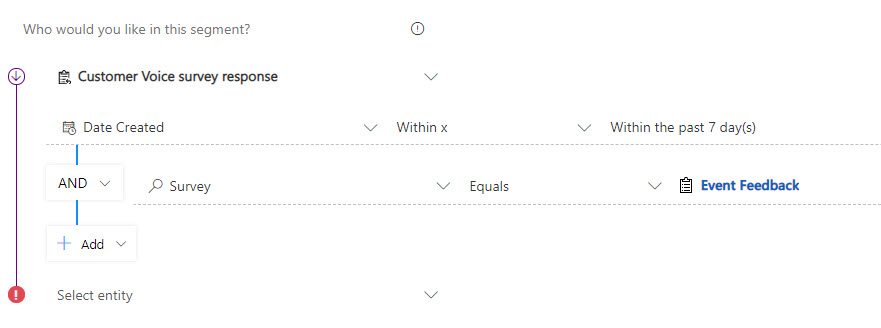
However, what if you want to dig in further and add some conditions about the survey itself? Instead of using the behaviour block, we have a couple of other options. We can add a second query block, and select the Customer Voice survey response entity.
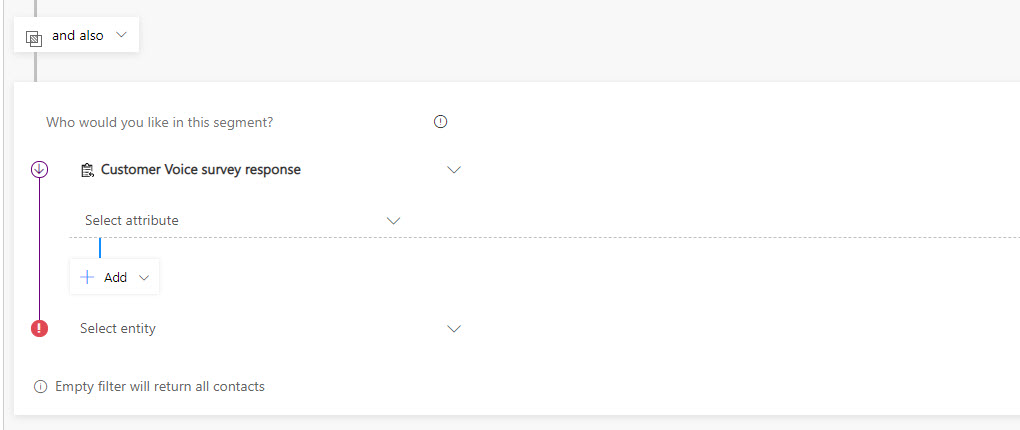
Then we can pick the Date Created field, and choose the Within option, and look for responses within the past X number of days.
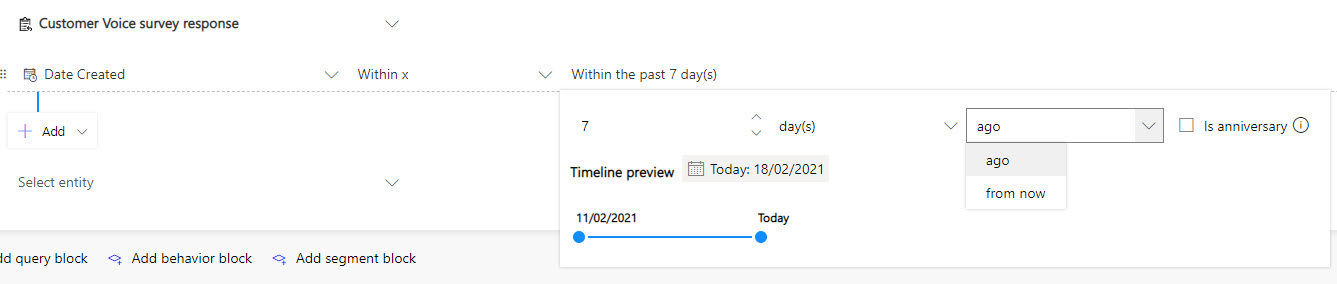
We can then add another condition and specify which Survey from here. At the bottom, you will notice a red exclamation mark. This means that we need to indicate a link back to the Contact via the correct relationship.
When a survey response is created in Customer Voice, it’s the From field that is populated with the related Contact, so that’s the relationship we will select. Once you’ve done that, the red exclamation mark will go, and you can save your segment and make it live. Now you will get any Contacts who have filled out a survey within the past 7 days. This might even be a segment you want to use as a suppression list so that you don’t ask Contacts to fill out too many surveys via a Marketing email in a Customer Journey.
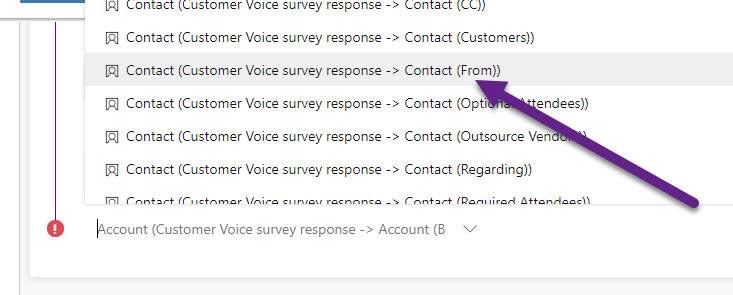
So having said all that about how to access the Customer Voice Survey Response, you can also do it another way. From the Contact query block, click and add in a related entity.
You can then select the Contact (From) relationship.

Then we can just add in the same fields and conditions as above, but it’s all part of the same query block. The end result will be the same, just a bit neater and easier to create.
One last segment we might want to create is based on the response to a specific question from one of the Customer Voice surveys. This can be achieved by adding a related entity to the Contact query and picking the Customer Voice survey response entity, linked via the Contact (From) relationship. We can add a condition using the Survey field, and select the correct survey. This isn’t required but would be useful if you possibly have the same question on multiple surveys and want to make sure it’s the correct one.
From there, we add another related entity, and this time select the Customer Voice survey question response entity. Then we can pick a specific Question, and then add in the Response and the response we want. So in the example below, I want any Contact with an Email, Do not allow Bulk Emails set to Allow, who are active and have given 3, 4 or 5 for Consent. They must have answered the Event Feedback survey, and given a response of Yes to the question asking if they would like more information shared with them. We can now use this segment in a Customer Journey and send Event information when it’s ready to go!

You can watch a video on this here.
Check out the latest post:
Removing Issues With Mobile Phone Numbers On Realtime Forms
This is just 1 of 447 articles. You can browse through all of them by going to the main blog page, or navigate through different categories to find more content you are interested in. You can also subscribe and get new blog posts emailed to you directly.