*** NOTE: ALL INFORMATION IS ACCURATE AT DATE OF PUBLISHING ***
This post continues on in the mini-guide to planning a webinar using Dynamics 365 Marketing. In this post we will look at actually adding the Event record, adding team members and a speaker, customising the calendar file, and finally, adding the marketing form for the event to your website. Let’s look at the steps!
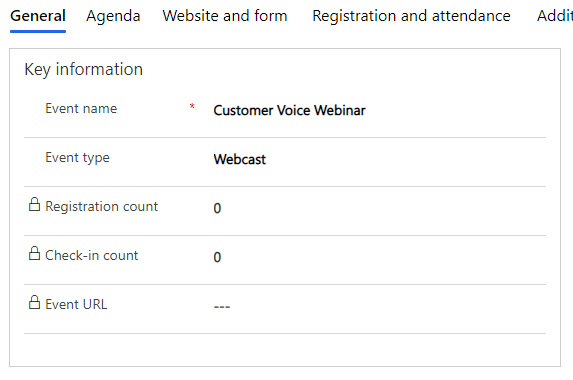
From the Event section in the marketing app, click on Events from the top. This will show you any Active events you may have already added. Click the New button from the top ribbon. Our event needs a name to be created. We give it a name and then use the Event type field if needed. The other three fields are locked. The registration count and check-in count will be calculated as people register, or once they enter the event once it’s started. The Event URL will be added a bit later on.
We can then set details in the schedule section to determine the time zone, start date/time, and the end date/time. You’ll see a countdown in days from now until the start date. You can also indicate if this is a recurring event.

Next, we are going to set the field to indicate that Yes, we are going to stream this event. Once that is selected, you have several options. It can be a Teams Webinar, Teams Live Event, Teams Meeting, or Other (On24 or another provider you have had configured and customised). Depending on the streaming provider option you select, you will have slightly different options available to you. Adjust these settings as required for your organisation and this specific webinar.

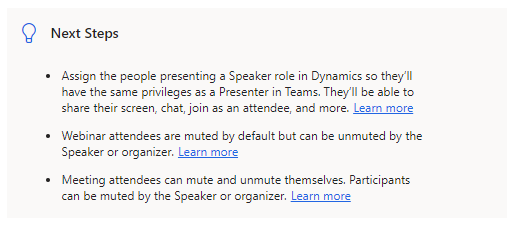
Once you’ve adjusted the streaming settings, you will see a Next Steps panel. If it’s a Teams Webinar, you will notice that anyone added as a Speaker in D365 will have the same privileges as a Presenter in Teams. You will also see a little more detail in terms of how attendees can interact within the webinar.
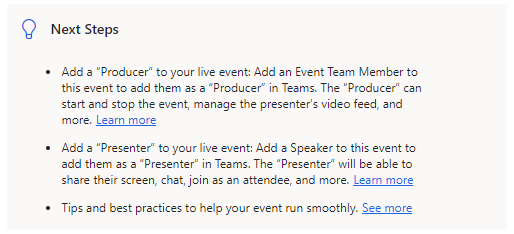
If you’ve set up a Teams Live event, adding Team Members will add these people as a Producer of the event who can start and stop the event and manage the presenter’s video feed. Anyone added as a Speaker will be added to the Live event as a Presenter in Teams. They will be able to share their screen and will have additional privileges.
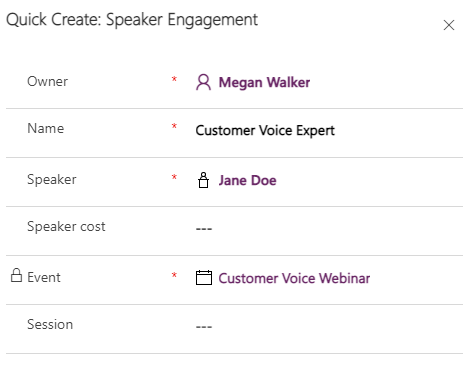
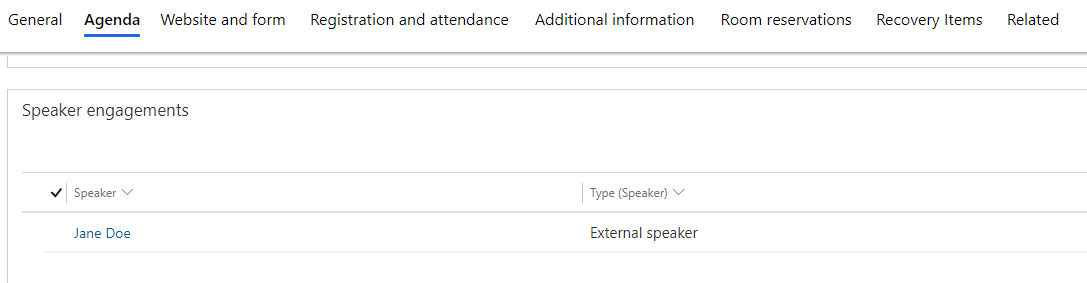
Click on the Agenda tab of the Event and scroll down to the Speaker engagements section. Click on New Speaker Engagement from the grid. A quick create screen will open on the right. If you already added your speakers, you can just search for the right person and link them quickly.
You’ll then see them listed in the Agenda section. Each person you add will be sent a calendar invite for the event.
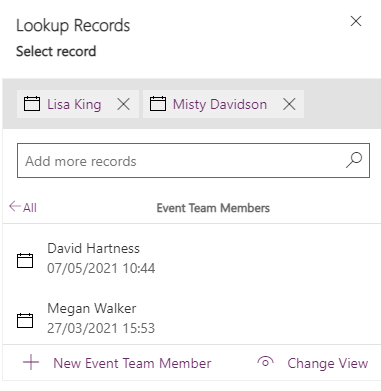
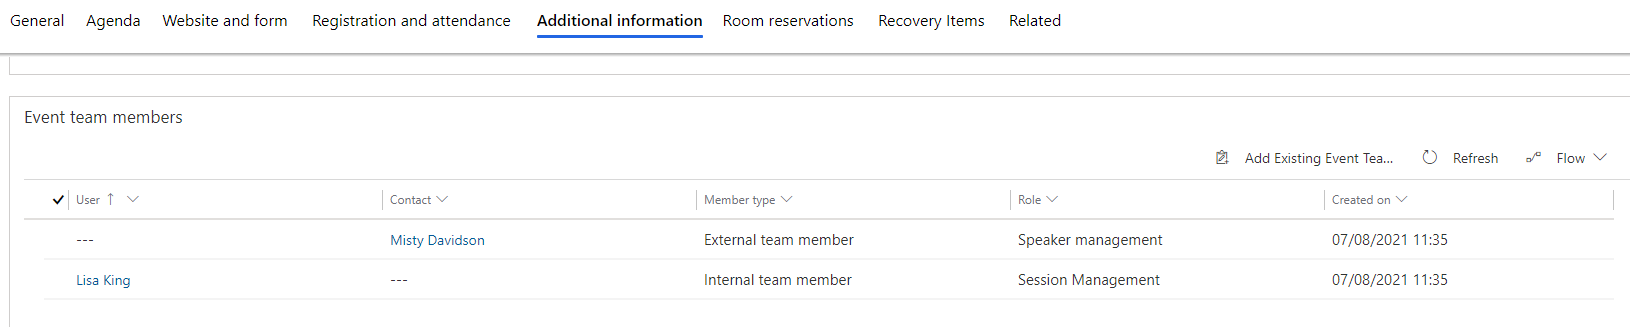
Event Team Members can be added from the Additional Information tab on the Event. Scroll down to the Event team members section and click on Add Existing Event Team Member to the top right of the grid. Here we can pick from all of our existing Event Team Members and add them to the Event.
Now we can see exactly who is taking part in and has a role in the event. As with the Speakers, each person you add as a Team Member will be sent a calendar invite for the event.
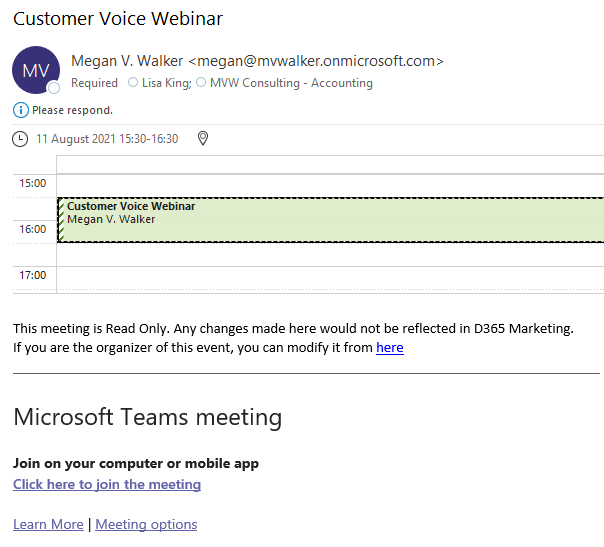
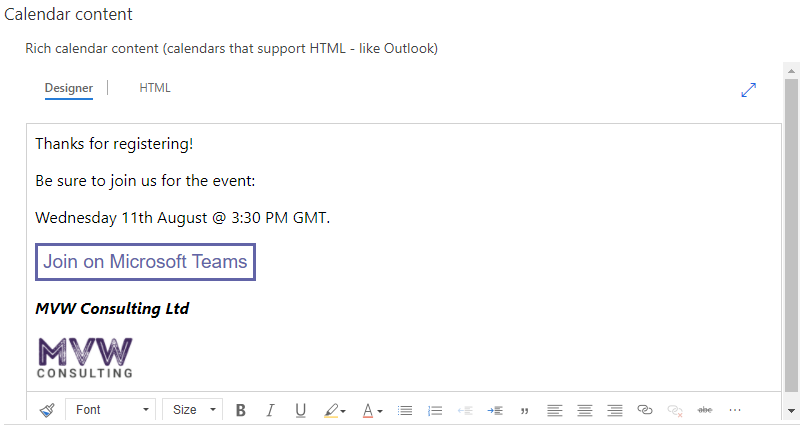
The calendar event sent to Speakers and Team Members will look something like this.
Staying on the Additional information tab, we can customise the calendar file that someone can download and add to their own calendar after they have registered. There is a very basic file that just includes a unique “Join on Microsoft Teams” button by default. We can click on and edit the HTML of the calendar content.

You can then click on the Designer tab to see the changes you’ve made. Although you don’t need to make your changes using the HTML, it does mean you can add images and do a lot more with the branding than you can with just the Designer controls.
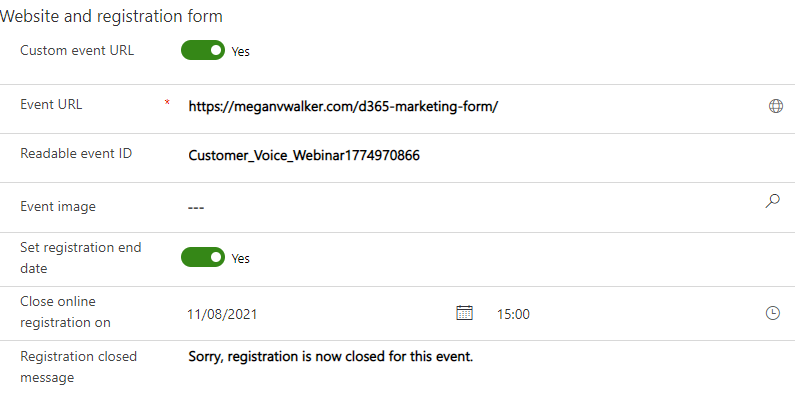
Now let’s move on to the Website and form tab. The registration form for the event will be hosted on our own website. We set the Custom event URL to Yes. You can do this part in stages, depending on where you are with your external web page, but this assumes you have it all set up ready to go. As soon as you state you have a Custom event URL, you will then need to add the Event URL. You can also set an event registration end date if you don’t want to have people registering right before or after the event, and add a message that will be displayed once that date is met.
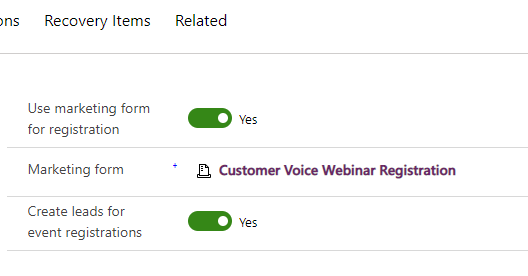
We are going to state that we will use a marketing form for registration, then we will look for the published marketing form we have already created. Finally, we can indicate if we would like to create new lead records for any event registrations. If someone fills out the registration form and their email is not found in D365 Marketing, a new Contact record will be created. If we have indicated that we want to create Leads, a new Lead IN ADDITION to the Contact will be created.
That’s it, now we save and press Go Live on the Event record. It’s then, and only then that we are given the script needed to go and add our registration form to the page on our own website. If your custom page wasn’t ready, you could always leave the Custom event URL field set to No, then take the Event to live to get the script. Then add to your webpage and come back to the Event to set the Custom event URL.
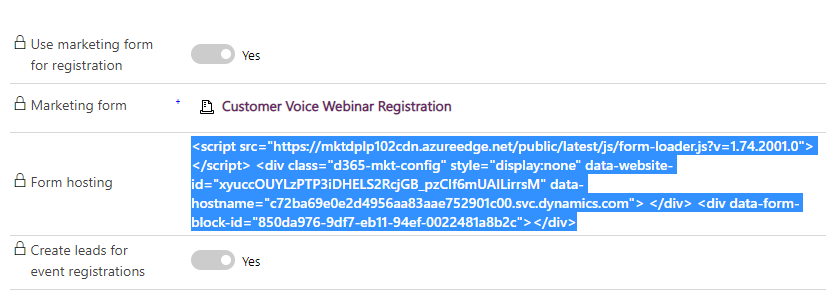
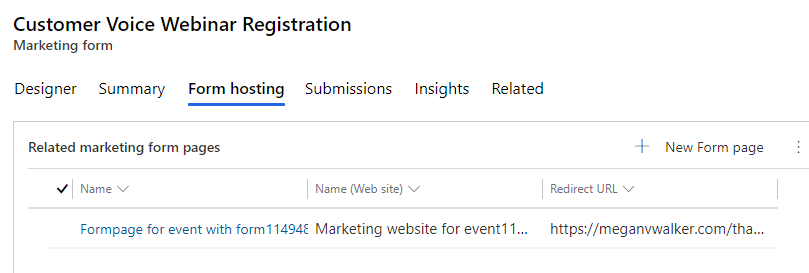
One last thing though. When you publish the event, it actually generates the related marketing form page for you. Even though you don’t need to come here and get the script (because you were already given it in the step above), if you want to redirect the user when they complete the form, you will need to set it in the redirect URL field on the marketing form page that was automatically created. A little annoying to have to go back to it, but it is what it is right? 😊
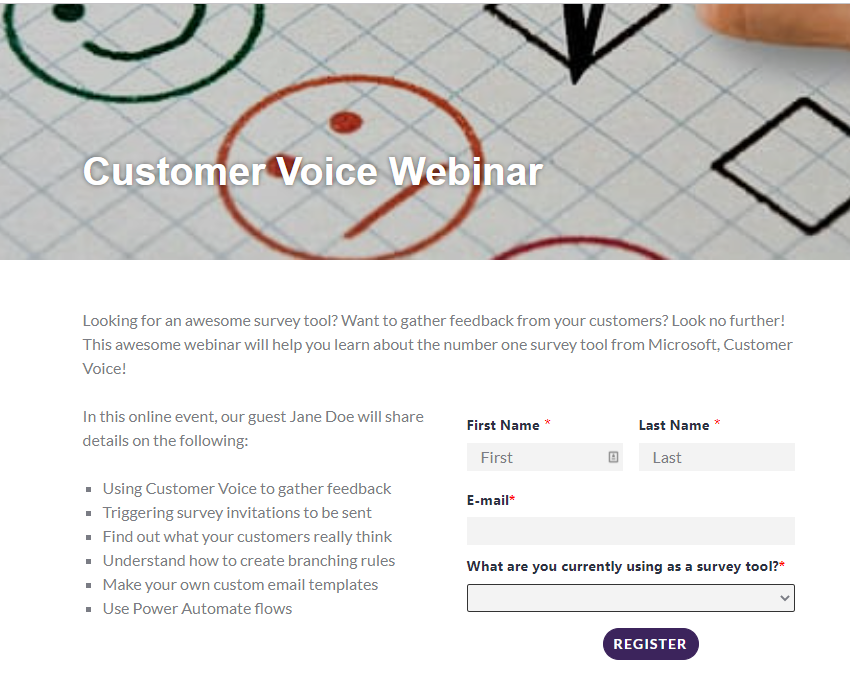
Now we can see the fruits of our labour, and a lovely form embedded in a page on our website that is promoting our webinar.
In the next post, we will take a look at some of the Marketing Emails that will likely be needed to make this entire webinar process a success!
- Part One – Creating Your Registration Form
- Part Two – Adding Team Members & Speakers
- Part Three – Adding Your Webinar Event
- Part Four – Creating Your Marketing Emails
- Part Five – Building Your Webinar Customer Journey
- Part Six – Understanding Event Registrations
- Part Seven – Reviewing Insights Post Webinar
Check out the latest post:
Removing Issues With Mobile Phone Numbers On Realtime Forms
This is just 1 of 447 articles. You can browse through all of them by going to the main blog page, or navigate through different categories to find more content you are interested in. You can also subscribe and get new blog posts emailed to you directly.
Hallo Megan,
Thanks for your post. It is quite infomativ.
how can i find out when an event went live?
You have a Start Date/Time and an End Date/Time. That’s the indicator for the Event. Of course, the Event happens outside of D365 Marketing (either Teams, another webinar service or in person), so it’s up to you to know if the Event actually happened.