*** NOTE: ALL INFORMATION IS ACCURATE AT DATE OF PUBLISHING ***
Most people who have used CRM for a while either as a consultant or System Administrator will be familiar with data imports. You’ve got the ability to import CSV files and create new records in your database. This is simple and easy to use, and perfect for small quantities of data. What if you have hundreds of thousands, or even millions of records? Or what if you are under a time constraint and don’t want to wait perhaps days for these records to import? This is where a tool called KingswaySoft (by a company of the same name) is awesome.
First off, this post (and subsequent posts on the subject) isn’t intended for developers. You’ll be able to pick this up easily I am sure, and will be a lot smarter about using it than me. 🙂 This also isn’t a paid endorsement for KingswaySoft. This is simply a set of articles designed to help others in the same boat I found myself in… needing to migrate a LOT of data, including getting email and note attachments from one CRM environment to another. I hope this will help at least one person avoid the pitfalls I fell in to, and make your learning curve a slight incline rather than a very steep hill!
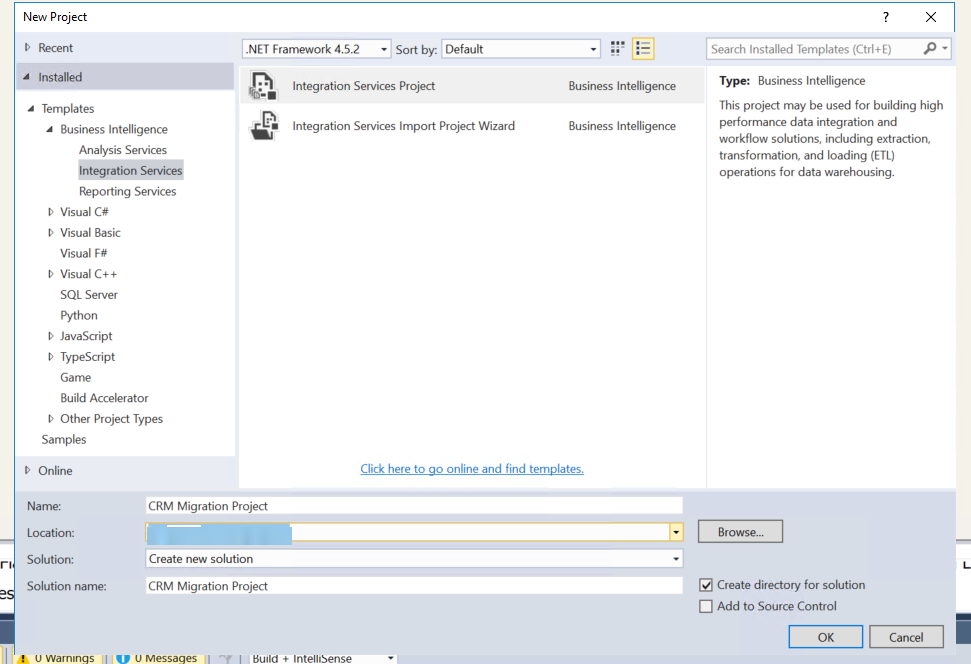
To get started, you will need Visual Studio. I use 2015, and the first thing that’s needed is to download and install the SQL Server Data Tools which can be found here. This will give you a new type of Project called Integration Services. Next, download and run the executable file found on the KingswaySoft website here. Using Visual Studio means you can use the free developer license. This can’t be used outside of Visual Studio, but that shouldn’t be an issue! Once you have these things sorted, create a new Integration Services Project.
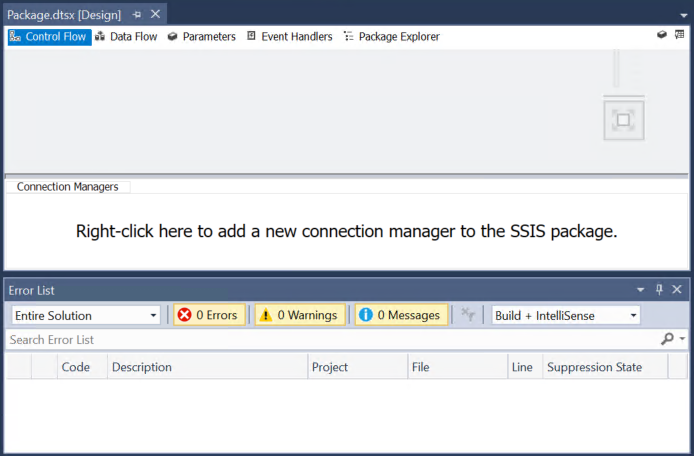
Next, from the Control Flow tab, right click in the Connection Managers area.
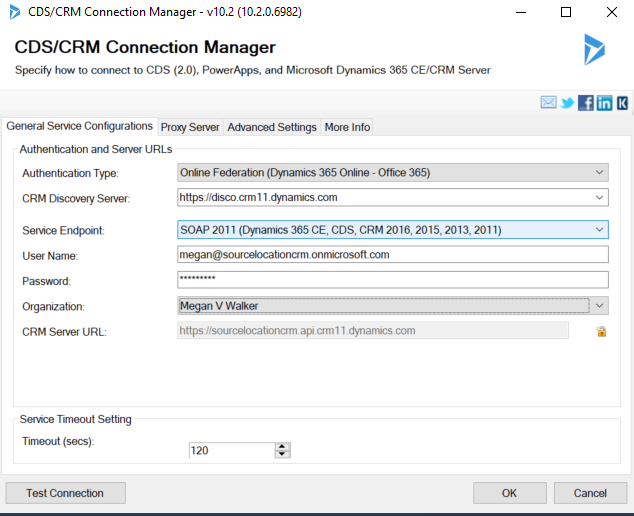
You’ll get a list of options and should see several that reference KingswaySoft in the file name. Click on the DynamicsCRM option to select it, then click Add.

You’ll need to know the details of the Source CRM environment you are pulling the records from. Most likely if you are moving data from one environment to another it will be an older On Premise environment, so you will need to know the Authentication Type and CRM Discovery Server address. If it’s D365 Online, the discovery server options available will be in a list for you to pick from. The number in the URL should be the same as the number in the url for your D365 instance. Add in the username and password, then click on the Organisation drop down. If you have added everything correctly, you should be able to find your instance in the list. Once you have tested the connection, click OK.
Do the same thing again and set up another connection to your Destination CRM. You can then rename the two connections so it is clear which is which.

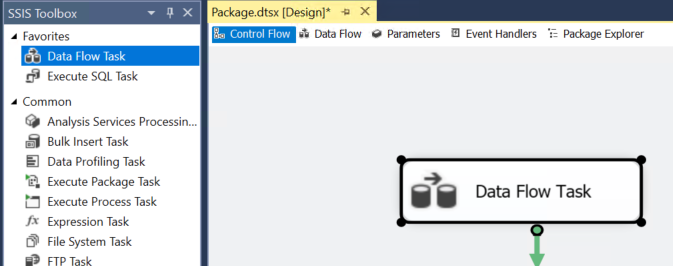
Next, from the SSIS Toolbox menu on the left, click on Data Flow Task and drag it over in to the Control Flow area. Double click on the Data Flow Task which should open it up in the Data Flow tab.
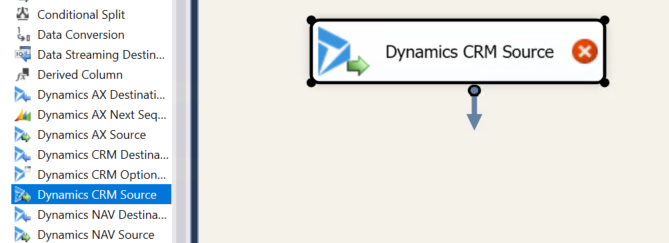
Next, from the menu on the left, click on the Dynamics CRM Source option in the Common area. Drag it over to the Data Flow area.
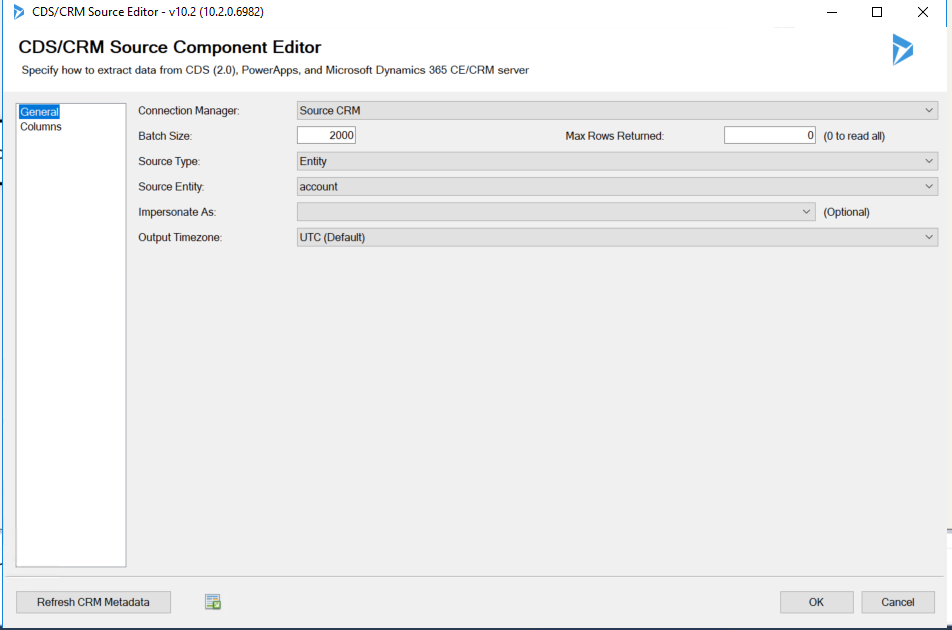
Double click to open it. From here is where we select the Source CRM from the Connection Manager dropdown. From the Source Type, you can select the Entity (which would move all of that type of record), or use FetchXML to determine exactly which records to be moved (use Jonas Rapp’s awesome FetchXML Builder from the XrmToolBox for this!). Next, click on the Columns option from the side menu.
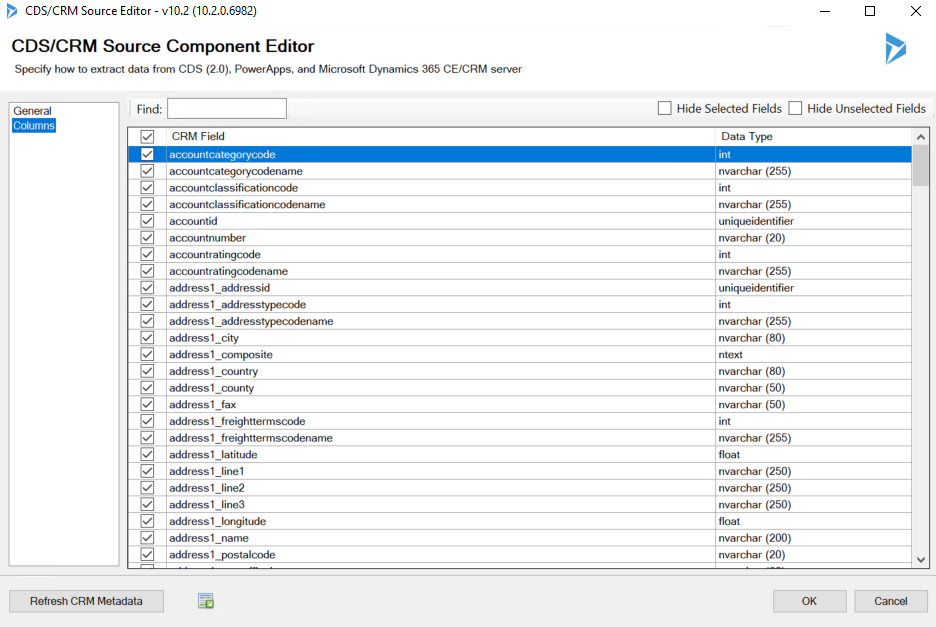
This shows all of the columns for the entity, or all of the columns you might have identified in the FetchXML query if you used that option.
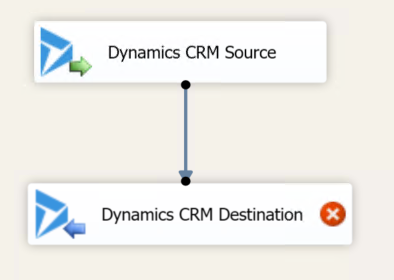
Click OK to confirm and close the screen. Next, go back to the menu on the left, and click on the Dynamic CRM Destination option. Drag it over to the Data Flow area below your Dynamics CRM Source.

Click on the grey arrow from the bottom of the Dynamics CRM Source, and drag it on to the Dynamics CRM Destination so it connects the two.
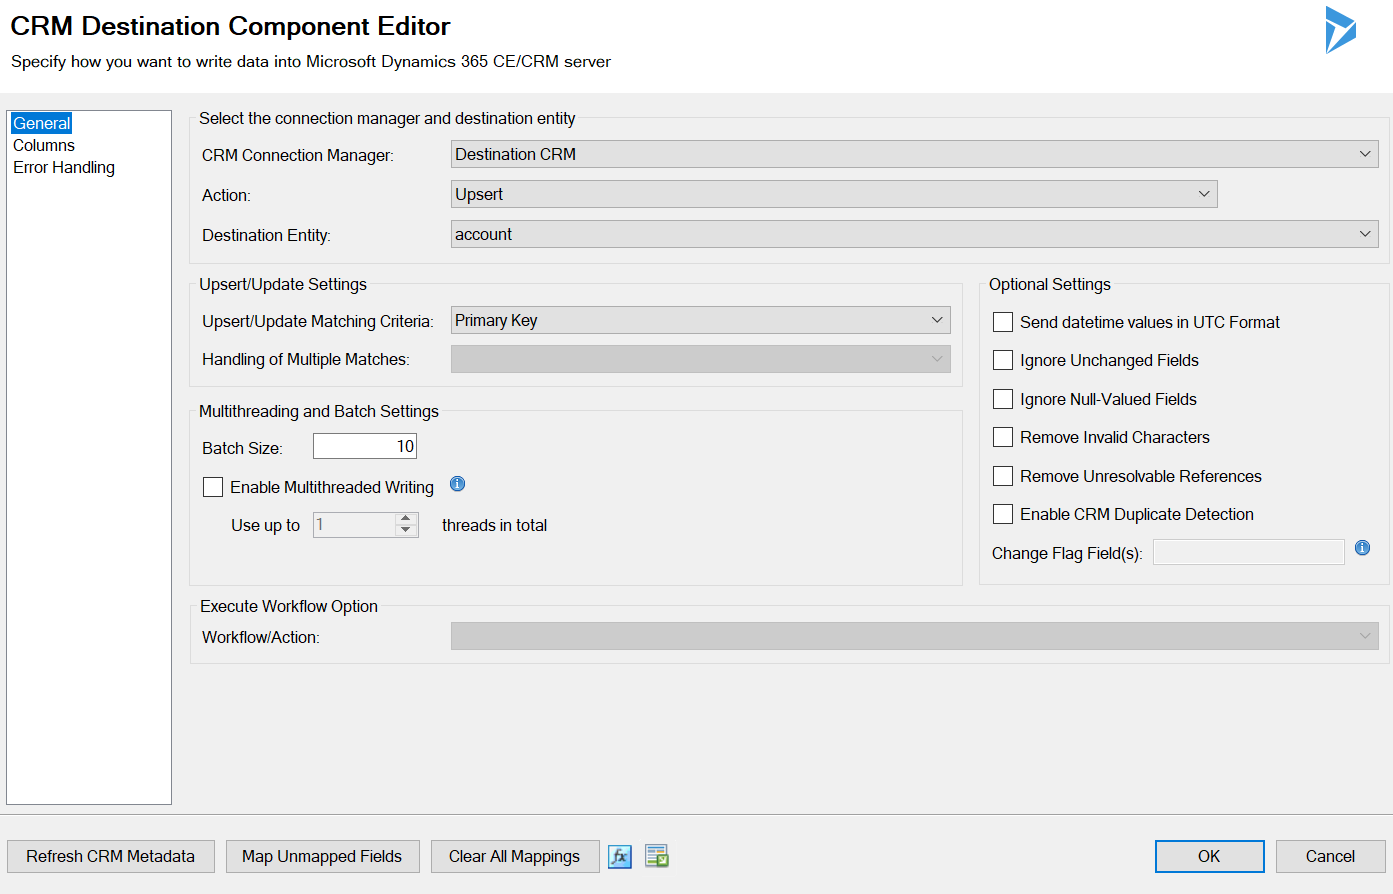
Open up the Dynamics CRM Destination. On the General tab, select the Destination CRM from the connection manager field. For the Action, select Upsert. This will Create new records if they don’t already exist (based on their id), and update any records that do already exist. This is perfect if you want to edit existing records at the same time as creating new ones! Select the Destination Entity. The Batch Size determines how many records are handled at one time, and the multithreading determines how many batches are handled simultaneously. Next, click on the Columns tab.
This shows the all of the destination CRM fields in the second column. The first column has dropdown lists of all of the fields being pulled from the source CRM environment. This allows you to map the fields correctly. You can use the Map Unmapped Fields button at the bottom. Any exact matched fields will be mapped. You can then manually map any of the rest.
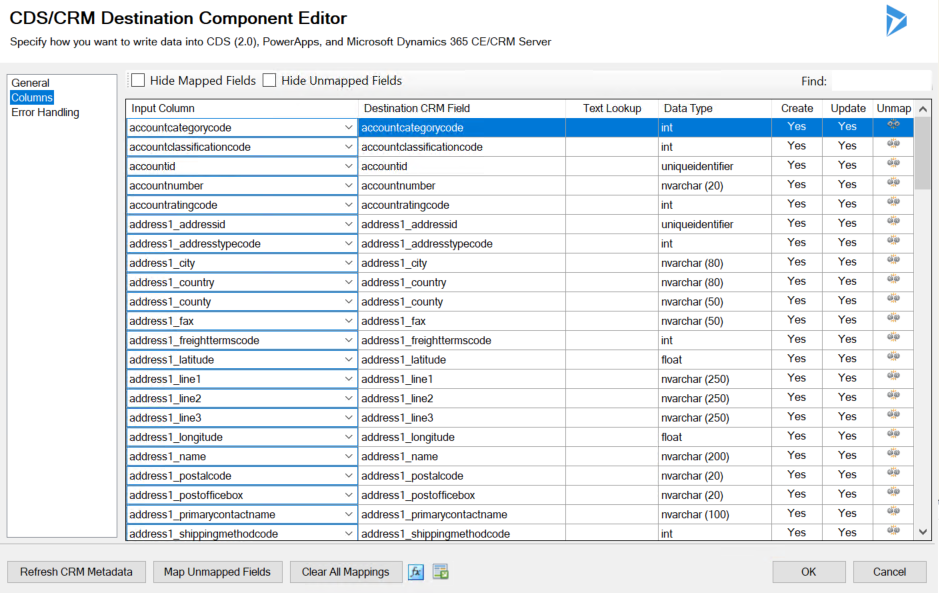
A couple of things to keep in mind. The Ownerid field should be mapped from the Owneridname field. You will not have the same id on user records. So, make sure you change the mapping, then click on the button next to where it says No.
![]()
From here, click on Choose Target Field(s). Leave the lookup method as Primary Field so that the mapping is done on the name. In the far right column for Option default value, add in the name of the user who should be used if no match is found. Most likely there will be users from the old system who will not be added to the new system, so a user such as ‘Migration User’ or ‘Admin Owner’ might be helpful to set up. You might also need to do the same with a Team name too if there are Team owned records. If you are mapping Created By or Modified By you will want to do the same with these fields too.

Another mapping to review is the Created On date. Map this across to the Overiddencreatedon field. This will make sure your records keep the original Created On date.

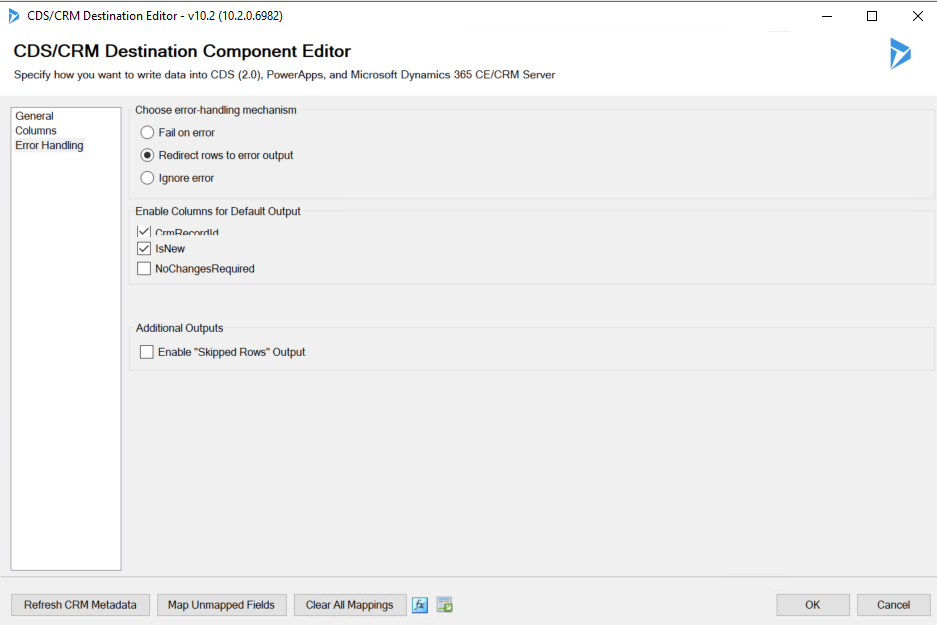
Finally, click on the Error Handling tab. Select the option to Redirect rows to error output. This will allow you to create an error log, which is invaluable when trying to see why records are failing so you can resolve any issues.
More coming in Part Two on Wednesday!
Check out the latest post:
Send Unique Event Registration Response Emails For Each Event Using No Code
This is just 1 of 448 articles. You can browse through all of them by going to the main blog page, or navigate through different categories to find more content you are interested in. You can also subscribe and get new blog posts emailed to you directly.
Thanks Megan for this interesting article about Kings Way Soft for loading data in Dynamics 365 CRM. I especially appreciate that your posts are intended for non-Geeks. 🙂
You are very welcome Emma! Really hoping this series helps others. There will be two more posted this week. ????
Megan – Thank you for taking your time and articulating this process of using Kingsway Soft in a simple and easy to read format. Look forward to reading the rest of the articles! 🙂
Hi Chetan, thanks so much for making the comment! Glad you liked it. Hope they help!
Hello Megan,
Thank you for your incredible job with this blog. I have been literally devouring article after article: they’re well written, useful and provide all the information needed.
Keep up the good work!
Cheers
Thank you so much for your comment MF! Very kind of you. Glad you are finding them useful!