*** NOTE: ALL INFORMATION IS ACCURATE AT DATE OF PUBLISHING ***
With each new release from D365 Marketing come new features and improved functionality. If you are up to date and on at least version 1.85.2012.0 you may have already spotted the new feature of Brand profiles, providing the ability to create different profiles for the various products, services or areas of the business you are sending out marketing email communications about. Let’s check out how to enable the functionality, set up your profiles and then link them to your emails.
Setting Up Brand Profiles
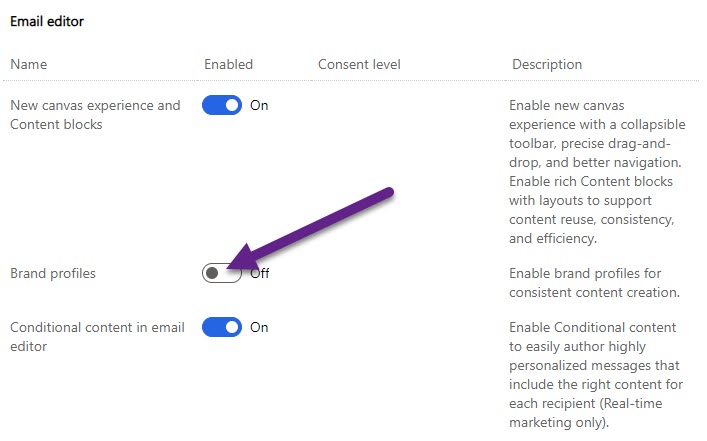
You should know the drill by now. After an update, head to the feature switches area in the settings overview and scroll to the email editor section. Turn the Brand profiles switch to on.
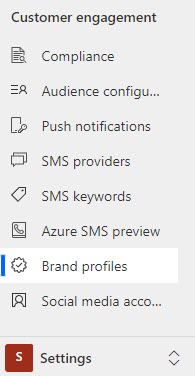
You might need to refresh the screen a few times, but you should see Brand profiles now show up under the Customer engagement section in the Settings area.
Creating a Brand profile is straight forward. Simply give the profile a name, and a description (should you wish to add one).

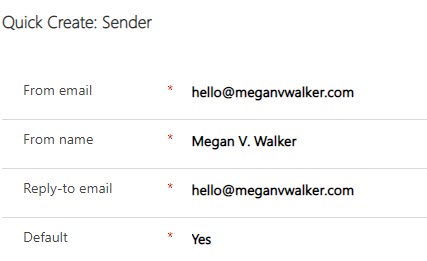
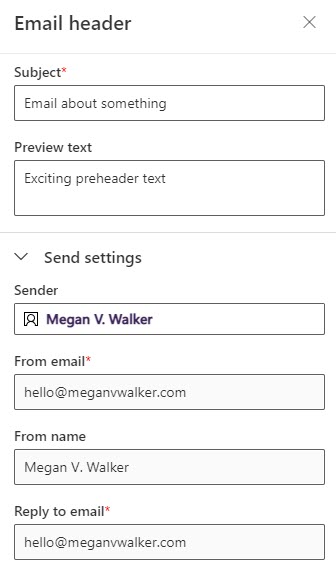
The Senders tab will show a list of all possible email addresses and names you want to be able to send your emails from. Note, you still need to have authenticated the domains in order to actually send the emails, but you do not need to have done that prior to setting up your senders. Click the New Sender option in the grid to get started.

Add in the From email, From name and Reply-to email. Indicate if this sender should be used as the Default for this Brand Profile. There is only one Default per Brand profile allowed. Continue adding all of your Senders before moving on to the Social links tab.
There are several fields for social media profile links that can be added where needed. Save the brand profile.

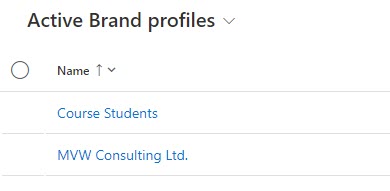
You can continue to add as many brand profile records as your organisation needs.
Using Brand Profiles In Emails
Now when creating a new email, there is a Brand profile option at the top right.
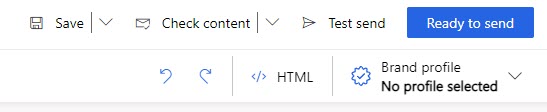
Clicking on this shows all of the profiles in a drop down.

After selecting one, the default sender for the profile will be populated and the From email, From name and Reply-to email will all be set. If you have more than one Sender, you can remove the default one and then choose from any others set up.
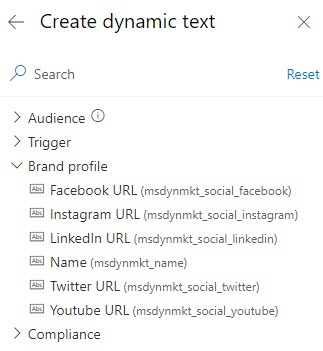
Now when creating your email, you can use the dynamic values from the Brand profile record to set things like the URL link on any social media profile images you have in the email. This will make sure the url is accurate no matter which brand profile you have selected.
Extending Brand Profiles
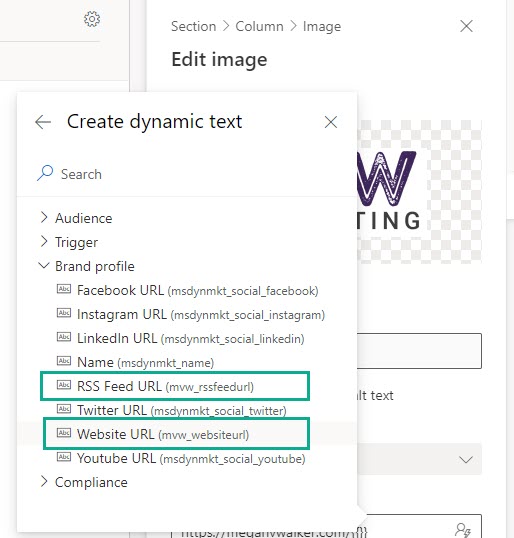
One of the good things about the Brand profiles is that the table is editable, meaning you can add in new fields if that would meet additional requirements for your organisation. Here you can see two new fields I have added in, one for RSS Feed URL and one for Website URL. I can also edit the form and remove the Instagram URL for example if I won’t ever use it.

Now when adding an image, I can edit the URL and set it dynamically for one of my new fields on the Brand profile.
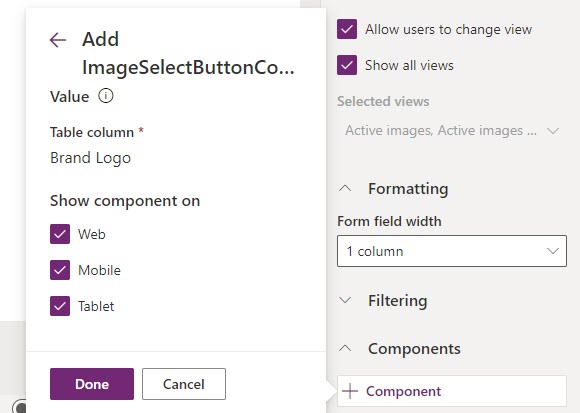
I then wondered if I could take it a bit further and add in an image which could then be used to store a logo for a Brand profile. Instead of setting this as a data type of file and the image option, I have used a Lookup field and linked it to the D365 Image table.
When adding it to the form, using the ImageSelectButton Control will make it a better experience for the user.
Click to view in detail
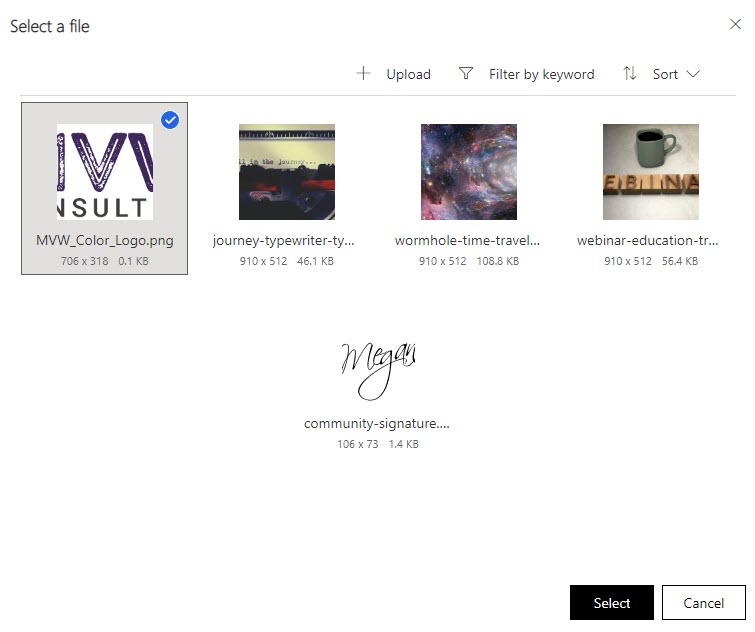
Once the user clicks to add an image, they can select one already added, or upload a new one then select it.
What we really need to do is get the URL that is generated for the uploaded image. For this I am using a single text field called Brand Logo URL and making it a calculated field. Then setting the URL from the related Brand Profile image field and using the Blob CDN URI value.
Click to view in detail
This allows a user to seamlessly upload an image, and then the actual externally accessible URL is available for us to then use.

Adding images dynamically is possible to do by selecting the Insert from URL option. You will need to type in a dynamic tag like you see below. Just do something like {{BrandLogo}}.
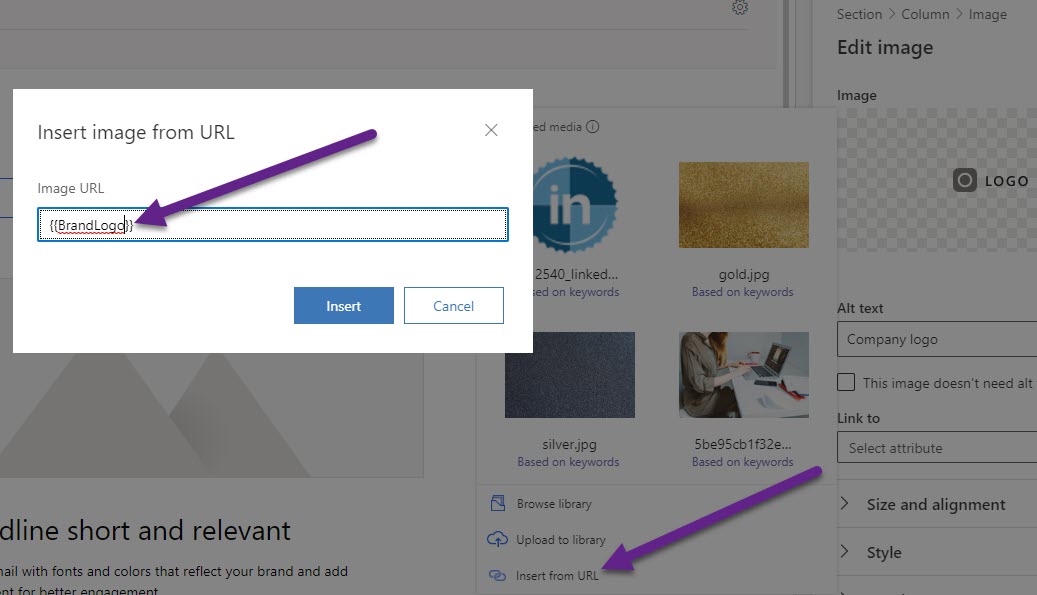
Then click on the Personalise option from the right side of the Email. You will notice that the dynamic tag you just added has a red icon next to it. This is because it’s not yet been mapped to anything. Click on it, and then go to the Brand profile and select Brand Logo URL. Once it’s mapped, the red icon will disappear.
You won’t see the image within the email, but can do a test by setting a Brand profile on the email and then sending yourself a test email. Here we can see the image for the MVW Consulting brand profile.

Then after switching the Brand profile on the email and doing another test send, we can see the logo image has changed.
For me, the Brand profile functionality is a great addition to D365 Marketing. The fact that the table can be customised is a bonus. Do you think you will start using it? Will you make any changes to the table and add in any new fields? Let us know in the comments below!
Check out the latest post:
Removing Issues With Mobile Phone Numbers On Realtime Forms
This is just 1 of 447 articles. You can browse through all of them by going to the main blog page, or navigate through different categories to find more content you are interested in. You can also subscribe and get new blog posts emailed to you directly.
Hi Megan,
I’m not to sure if it actually is such a great addition. Based on the information you’ve added here, I don’t see much improvements to just using different Content Settings records for brands. All the customizable fields can be added there, and referred to in Marketing Emails anyway.
What do you think about Brands vs. Content Settings?
Hi Timo. Content Settings work with Outbound Marketing, Brand profiles work with Real-time Marketing. So what do I think? I think you use whichever one makes sense depending on what area of the D365 Marketing App you are using. 🤓
Hi Megan,
Thank you for sharing this intresting freature.
We’ve tested this setup with the ImageSelectButtonControl, and it seems like it only works with the outbound image gallery. As Marketing is moving to realtime, it would be great to have all images in the same place (realtime gallery). Any thoughts on this?
I couldn’t find a way to get that to work, but that makes sense as what I provided is using out of the box functionality and an out of the box control on the form. I don’t see Microsoft changing this. If you find a way to link back to a RTM image, share please!!!
Hi Megan
Have you had any requirements to limit the brands to certain marketeers, what do you recommend to limit marketeers to only have access to content for a specific brand?
Hi Teresa, no one has had that requirement yet that I work with. There isn’t anything that would separate out the access to brand profiles right now unfortunately!