*** NOTE: ALL INFORMATION IS ACCURATE AT DATE OF PUBLISHING ***
If you take a moment to create a Lead or a Contact in your D365 environment, you will likely have some fields that are required. They could be the standard default required fields (Last Name on Lead for example), or your system administrator may have made other fields required as part of a specific business requirement. This is typical and totally makes sense to do so. However, when implementing the Marketing App, this means stepping back and maybe even reconsidering the requirements. When creating Marketing Forms, those same required fields will need to be included in order to be able to create a new record. Let’s look at how to handle required fields and marketing forms.
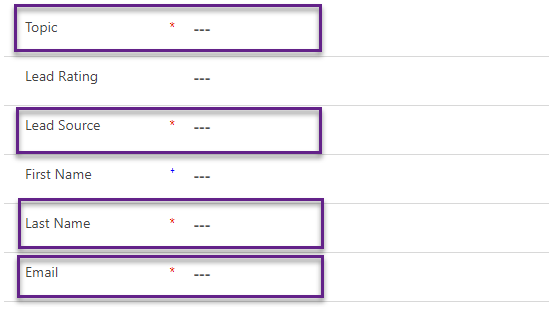
Below we can see fields on a Lead record, with the red asterisk denoting they are required. Looking for the red asterisks is one way to know which fields you need to complete, but simply trying to create a new Lead or Contact is going to tell you exactly what is needed. Simply press the new button, then try and save without any fields being filled out. All the required ones will be displayed at the top for you.
When creating a new Marketing Form, you can determine which type of fields will be created and/or updated. The Update contacts/leads field gives you the option to create/update both, only contacts or only leads. This will also determine which required fields you need to consider on your Contacts and/or Leads.

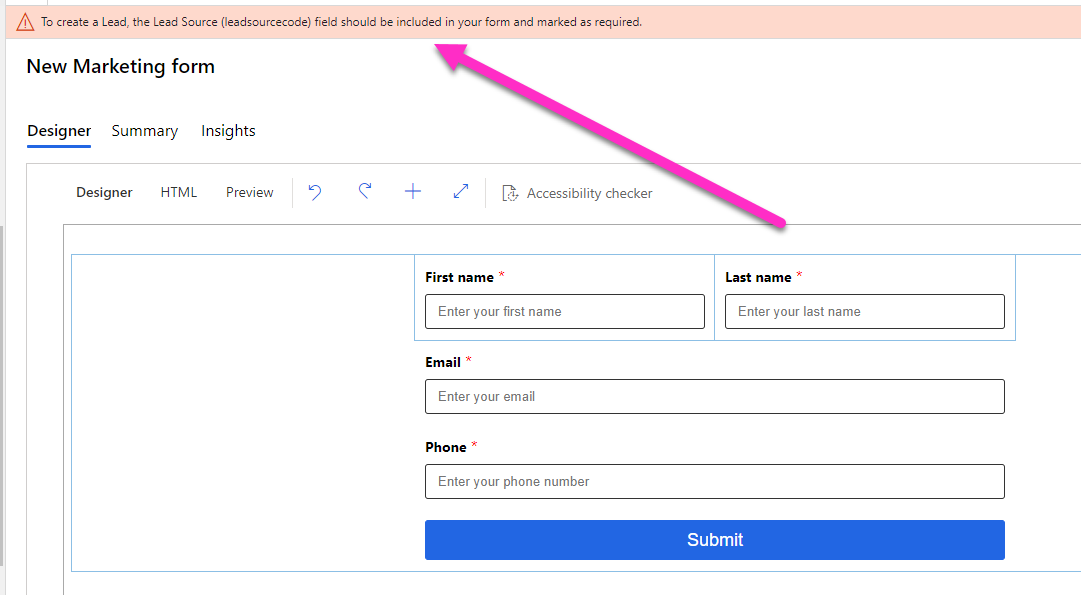
If we create a new form and then either Go Live or Check For Errors, and there is a field missing from the form that needs to exist in order to create any new records, you’ll see it listed at the top. As the Lead Source field has been made required on a Lead record, and the form has been set to update Contacts and Leads, we MUST include it on the form. If you are adding a form that will potentially create a new Lead, the name of the form will be used to populate the Topic field (which is required by default).
Lead Source is actually a pretty easy one to deal with because we can add it, set a value to be populated, and then hide it. Make sure it’s also marked as required.

At this moment in time, if you are adding a field that is mapped to a choice (good old option set) field, you won’t see a button to hide the field. Hopefully this changes in the future, but for now there is a way around it. There are actually two, but let’s look at each one… and one is much better than the other. You COULD go in to the HTML and add in the following – hidden=”hidden” in to the section that starts <div class=”lp-form-field”.

This literally just hides the entire field and label. While this gives us the outcome we are looking for, anyone else coming to the form won’t know it’s been added.

So instead, we can change one little thing in the HTML that tells the form to handle the field in a different way. In the part that starts off with <div data-editorblocktype…. it will show as =”field-dropdown”. All we need to do is change the word dropdown to the word checkbox. Do that for each choice field that you want to hide.

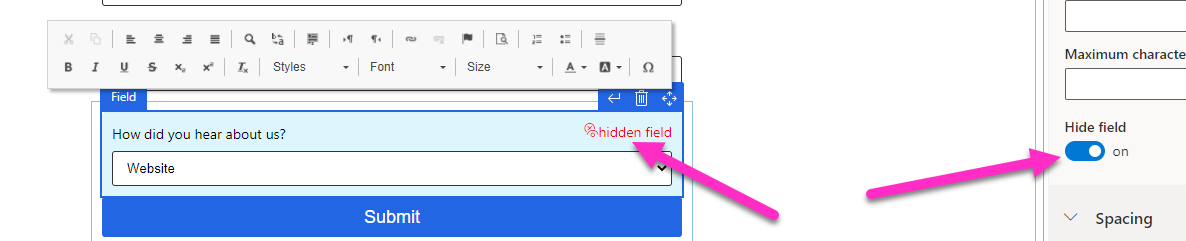
Now we have the hide field button when clicking on it from the form. We can now turn that on. The field stays on the form so we know it’s there, but it’s hidden so people filling it out do not need to interact with it, and don’t even know it’s there.
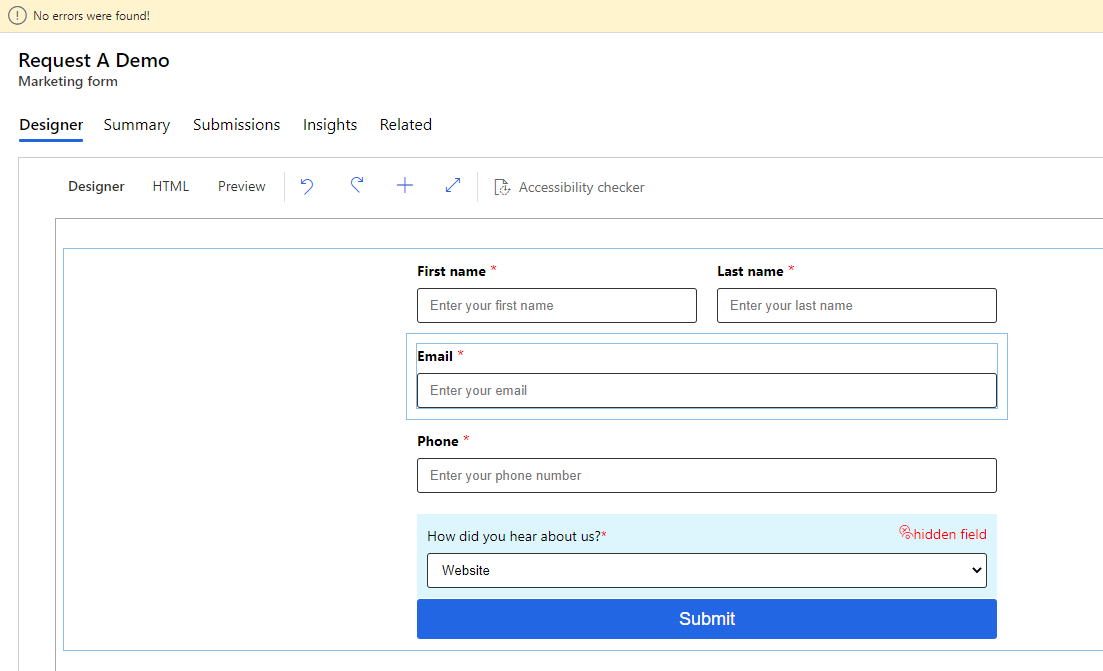
We can then Check For Errors or Go Live, and no errors are found. This field was an easy one to handle. The new Leads would be coming from the Website, so setting that as the Lead Source makes sense. It could be a little more complicated, such as having the Account required on a Contact. The Account field is a lookup to all of the Accounts in your system, which is NOT likely to be something you want to display to people on your website!!! Making changes to required fields is going to need an internal discussion to see IF fields truly should be made required, or if instead a business rule could be used to make things required under certain circumstances.
Are there any other ways you have used to get around the required fields on Contacts and Leads to make sure you can still create and use your marketing forms effectively? Let me know in the comments below!
Check out the latest post:
Send Unique Event Registration Response With QR Code Using No Code
This is just 1 of 449 articles. You can browse through all of them by going to the main blog page, or navigate through different categories to find more content you are interested in. You can also subscribe and get new blog posts emailed to you directly.
Hi Megan,
You could also ask a consultant to set up a script for the required fields in D365. This scripts sets the required function on the fields when loading the contact form in D365 itself.
So the marketing form does not have issues with the requiered fields and when a user opens the contact or lead form in D365 they will get a message that some required fiels where not filled in. Or you could set up a view so a user can screen all the incoming data on missing required fields.
Also you can set up a workflow to fill in the required fields automatic if they are all the same for a contact or lead.
Hi Mariette, all really good suggestions! Yes, quite a few ways to achieve this. And of course, it just takes a bit of thought to determine exactly what the requirements are for those fields, and WHY they should be made required. Sometimes things were made required months or even years ago, but no longer need to be required. Sometimes it’s time for a change!