*** NOTE: ALL INFORMATION IS ACCURATE AT DATE OF PUBLISHING ***
The February 2026 release of Customer Insights – Journeys has rolled around and with it has come the news that the historical HIP (Human Interactive Proof) captcha on marketing forms is being deprecated. The advice from Microsoft, starting February 2026, use reCAPTCHA instead of HIP captcha for all new forms. Then before June 30, 2026, update existing forms to include reCAPTCHA if bot protection is required. If you don’t the original HIP captcha element will just be removed from those forms. If you want to start using the reCAPTCHA, there is a bit of set up needed. I dug in to it and after a lot of round the houses frustration, figured I would write my own guide to help people! Hope this makes your life a bit easier.
OK, so first things first, the official documentation is poor and minimal, but you can check it out here: Set the default configuration for forms – Dynamics 365 Customer Insights. You are kind of on your own trying to figure out how to set things up. One thing on that page is that the new reCAPTCHA works with v2 and not v3. If you are not already aware, reCAPTCHA is a Google ‘product’ or service, so we need to set things up there initially. It’s highly likely your organisation already has a Google account used for either Google Tag Manager and/or Google Analytics, so I suggest using the same one. Although there is a newer link to get to Google Recaptcha, I would suggest going to the legacy admin console to set up your new site to link the reCAPTCHA to. You can access it from here: https://www.google.com/recaptcha/admin/create
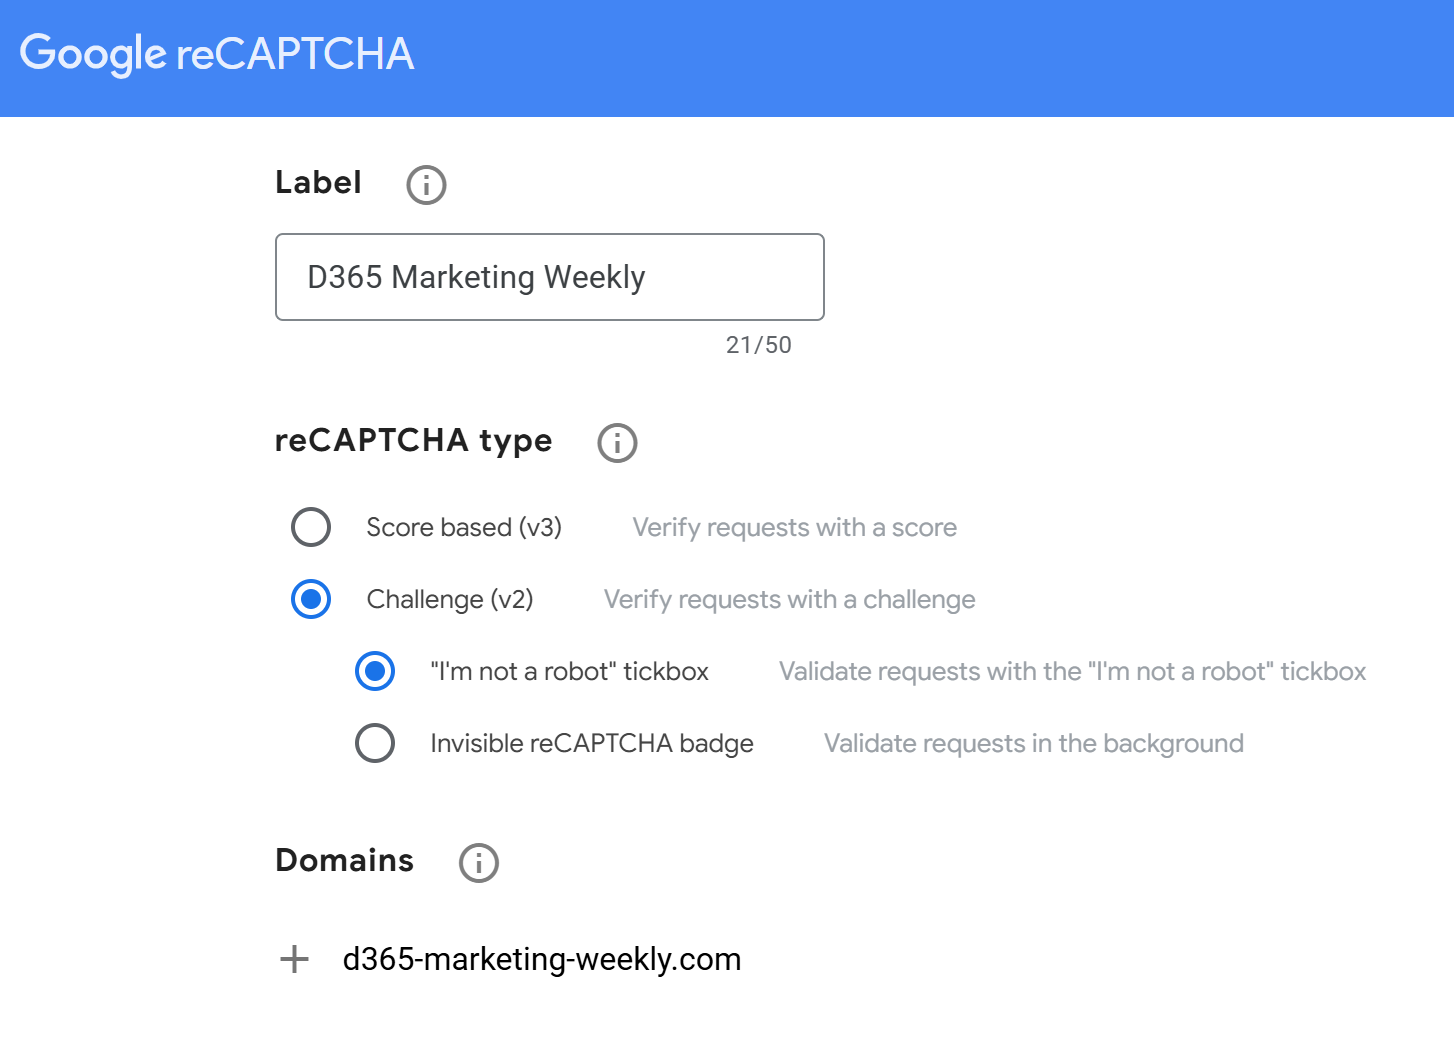
We are creating a new site that will be linked to our domain. Keep in mind this should be a domain you have already set up and authenticated within Customer Insights – Journeys. Give it a name, then make sure you pick the reCAPTCHA type of Challenge (v2) then pick the ‘I’m not a robot’ tickbox option. Then type in the domain (without https/http/www or anything). If you have multiple domains that are set up in CI-J, be sure to add them in as additional domains here. Likely you have one forms settings record in CI-J so be sure you have them all added here too. The ability to pick the type is more obvious and easier to set up in the legacy console. Google really want people using the latest version (v3) but that isn’t what the forms use. Such is life. 😊
IMPORTANT: If you have standalone forms, meaning not embedded in to your website, make sure you also add assets-gbr.mkt.dynamics.com to the domains or it will not work.
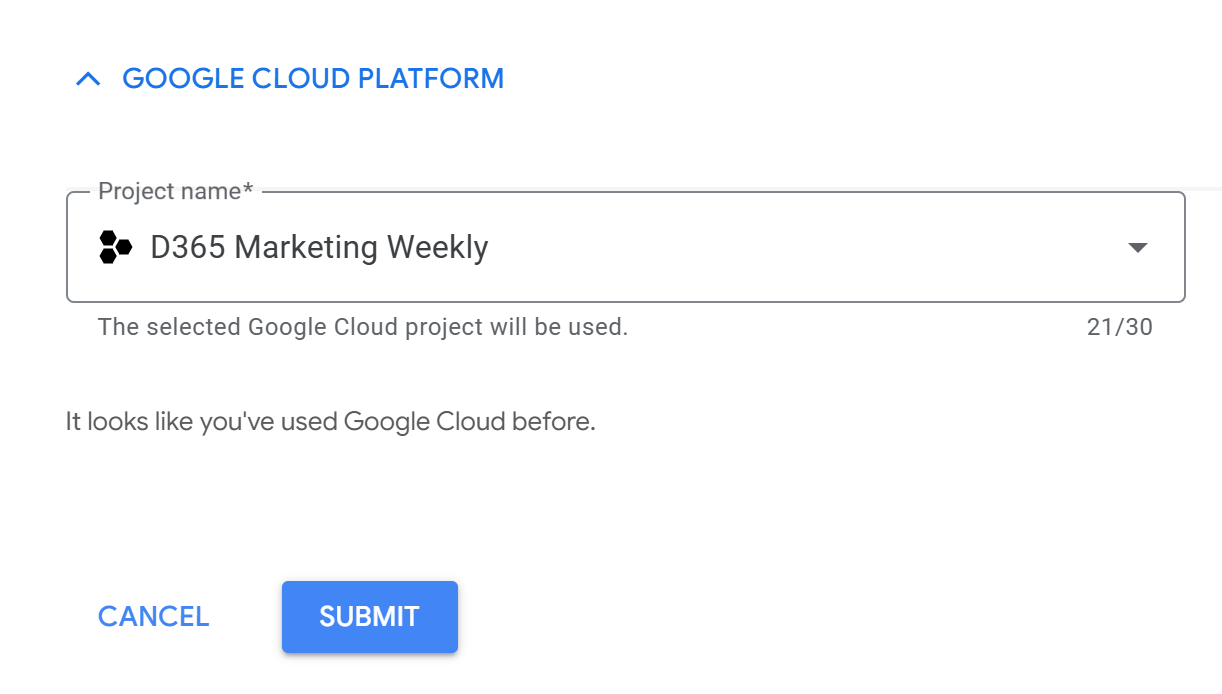
Your site needs to be linked to a Project. If you have never set one up before, just give it a name and one will be created for you. If you have done other things with the Google account, you might find you already have a suitable one to link it to. Click Submit.
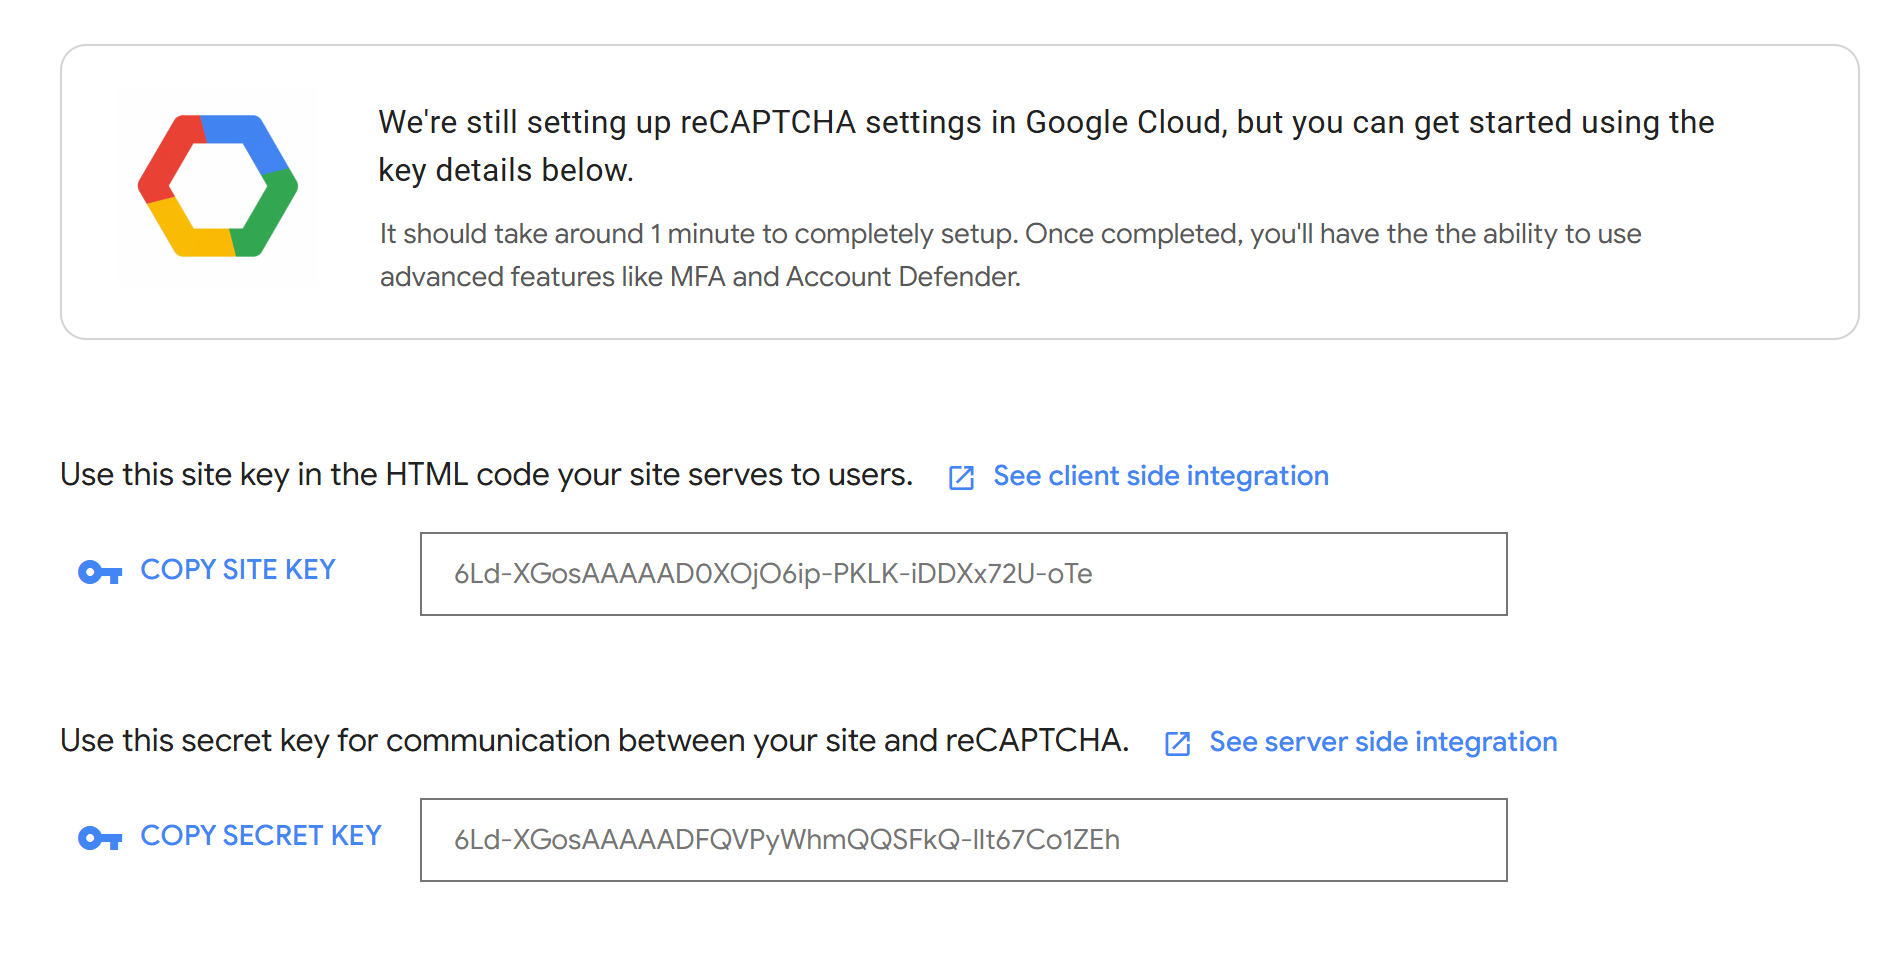
You will then be shown a site key and a secret key. Copy these, we need to add them to CI-J. Note that you will see it shows this is being added to Google Cloud which is where the Project is stored. This is fine, and is the current version of the admin console. We shouldn’t have a need for the legacy console again.
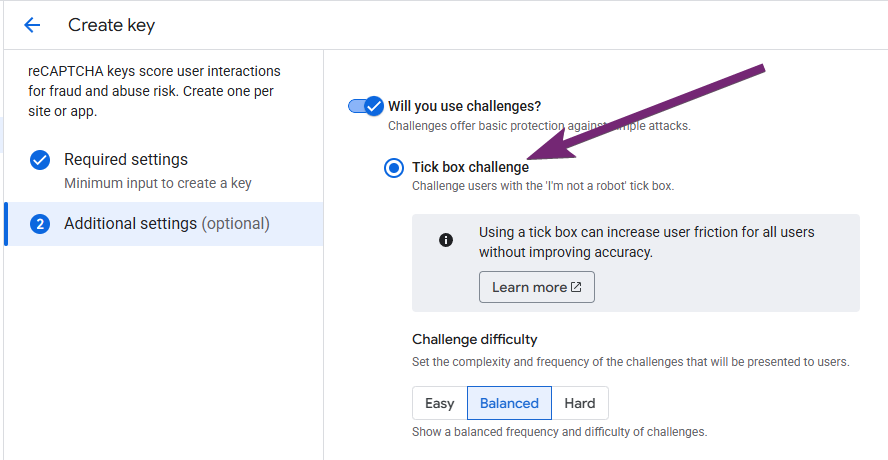
UPDATE 18/02/2026: Thanks to a lovely webinar attendee, he shared exactly what to click on to get the tickbox option in the current reCAPTCHA admin area. If adding a new reCAPTCHA key in the newer console, just make sure you change the toggle for ‘will you use challenges’ and then pick Tick box challenge. I had ignored this so missed it!
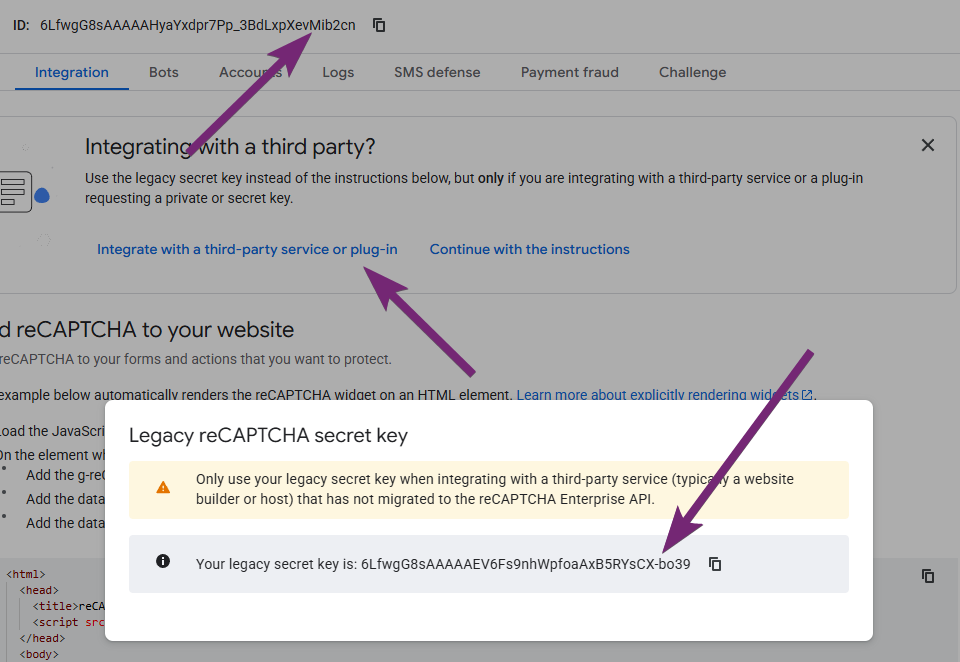
Once you have created it, you can click on the Integration tab, then click on Integrate with a third party service or plug-in and get your secret key from the pop up. Your site key is right at the top.
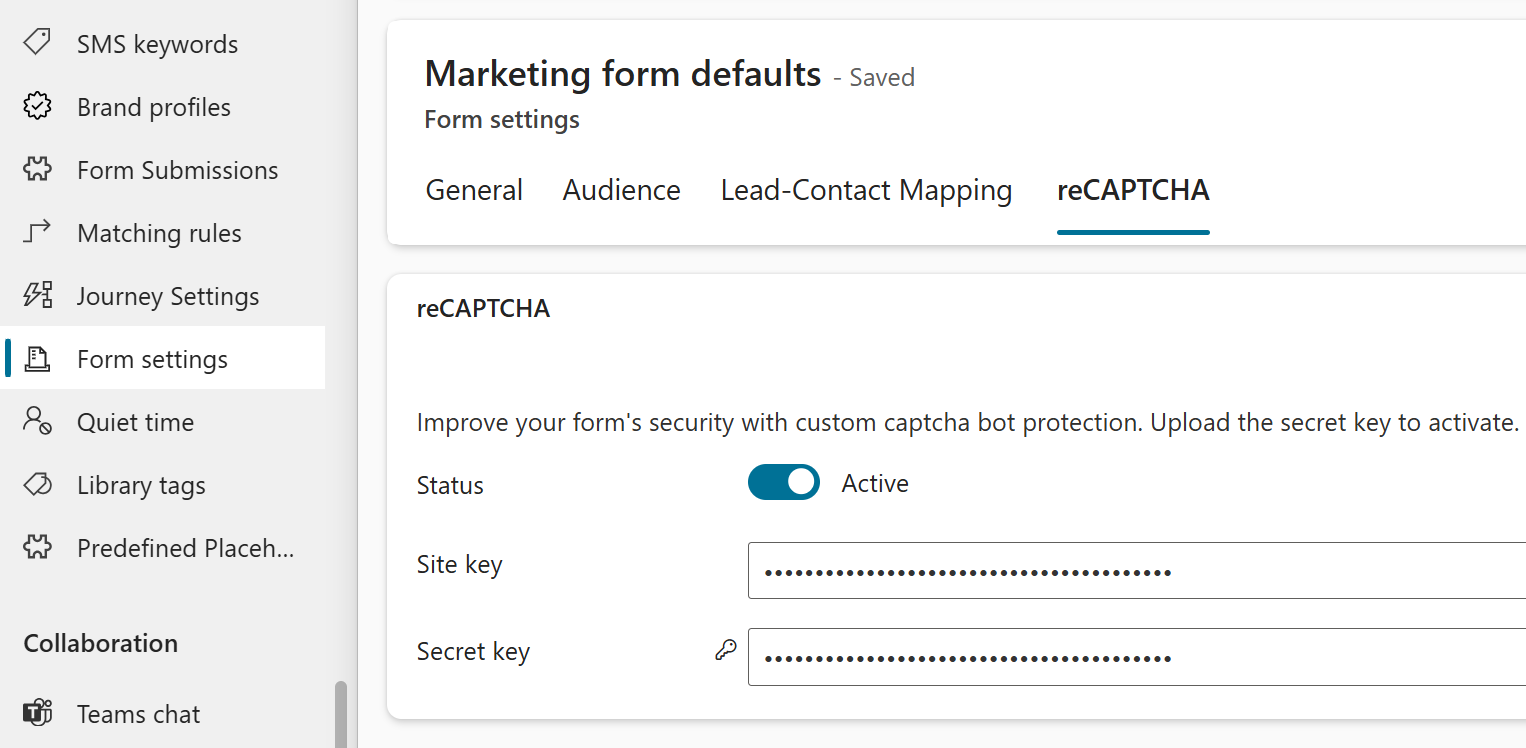
Go in to CI-J and then to the Settings area, then Form settings. Open up your default marketing form settings and then click on the reCAPTCHA tab. Past the site key and secret key, then toggle the status to Active. Save and close the record.
To get to the main console area and out of the legacy console area, you can click on this link: https://console.cloud.google.com/security/recaptcha. Now it might take a while to see that this is protected so be patient. It took about 15 minutes for everything to be set up, so you can always go and start adding the reCAPTCHA to one of your marketing forms in the mean time.

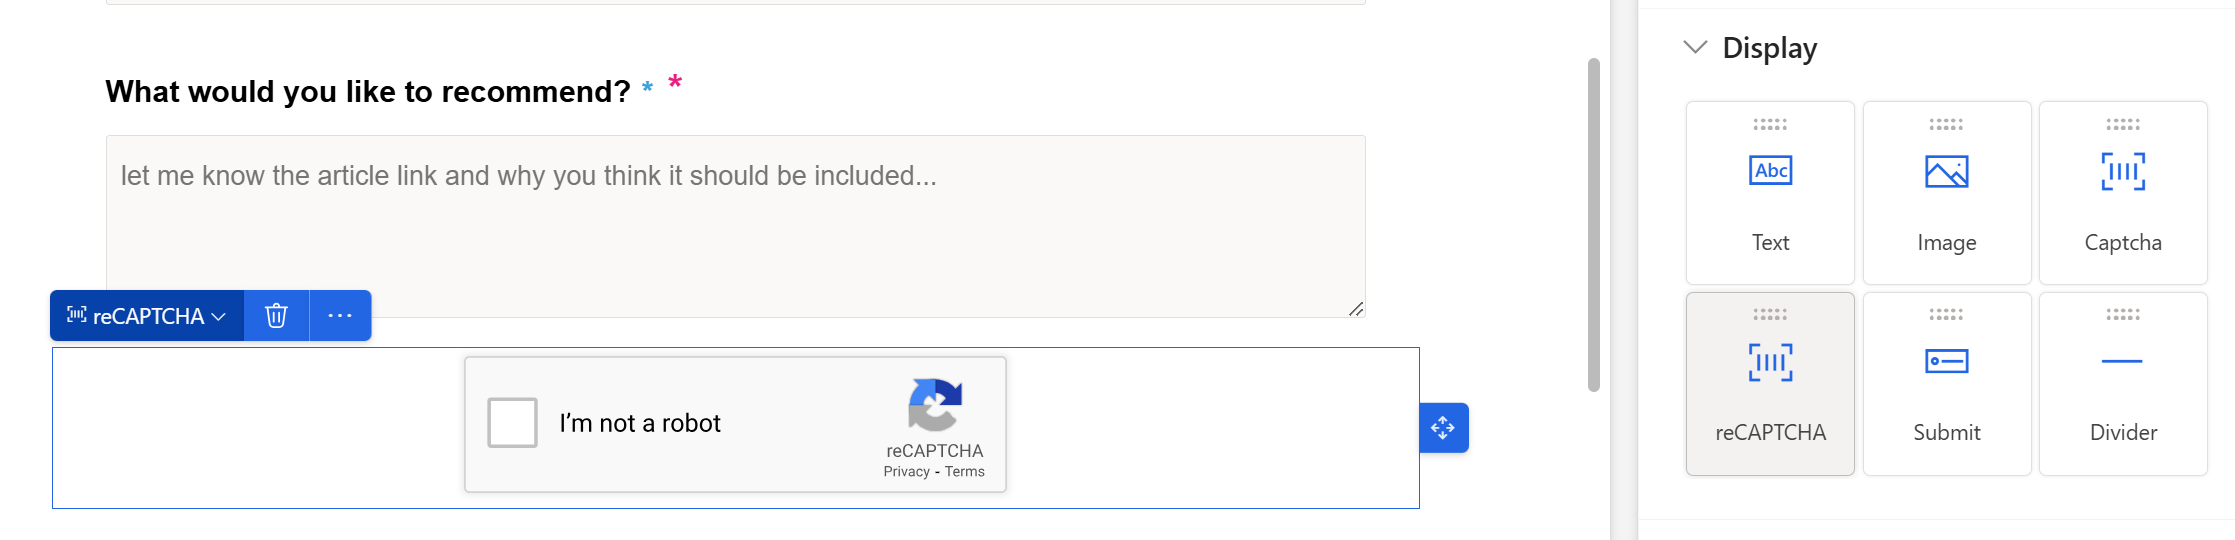
On the marketing form in CI-J, you should see a reCAPTCHA option to drag on to your form. Do that, save it and then go and open the page where your form is embedded. If you don’t see the reCAPTCHA on the form right away, or at least an error where it should be, add #d365-nocache to the end of the URL to refresh and show the current version of the form.
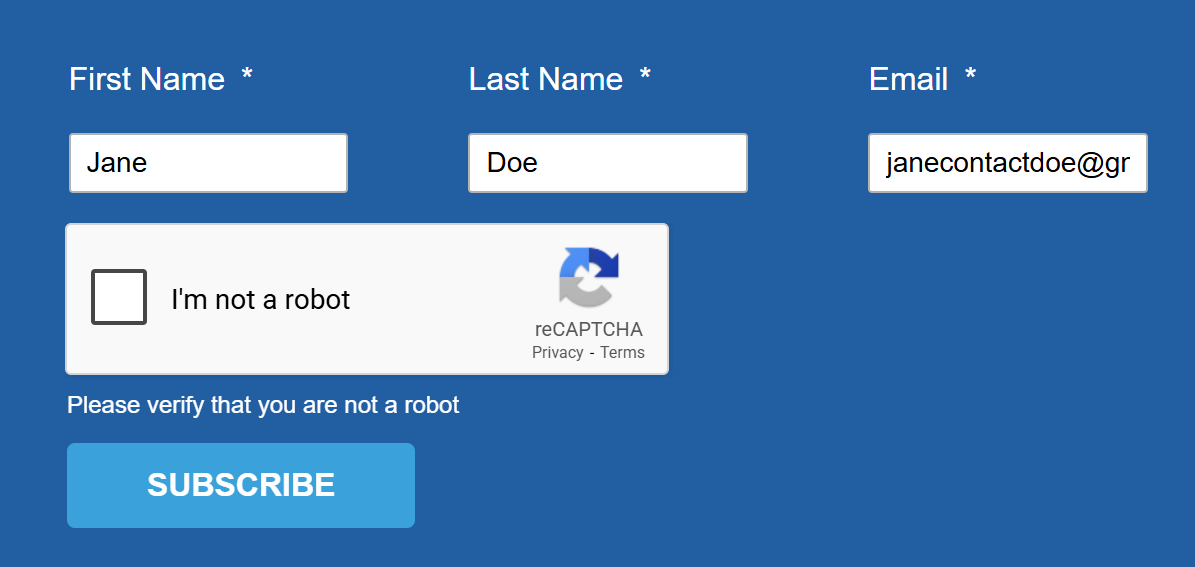
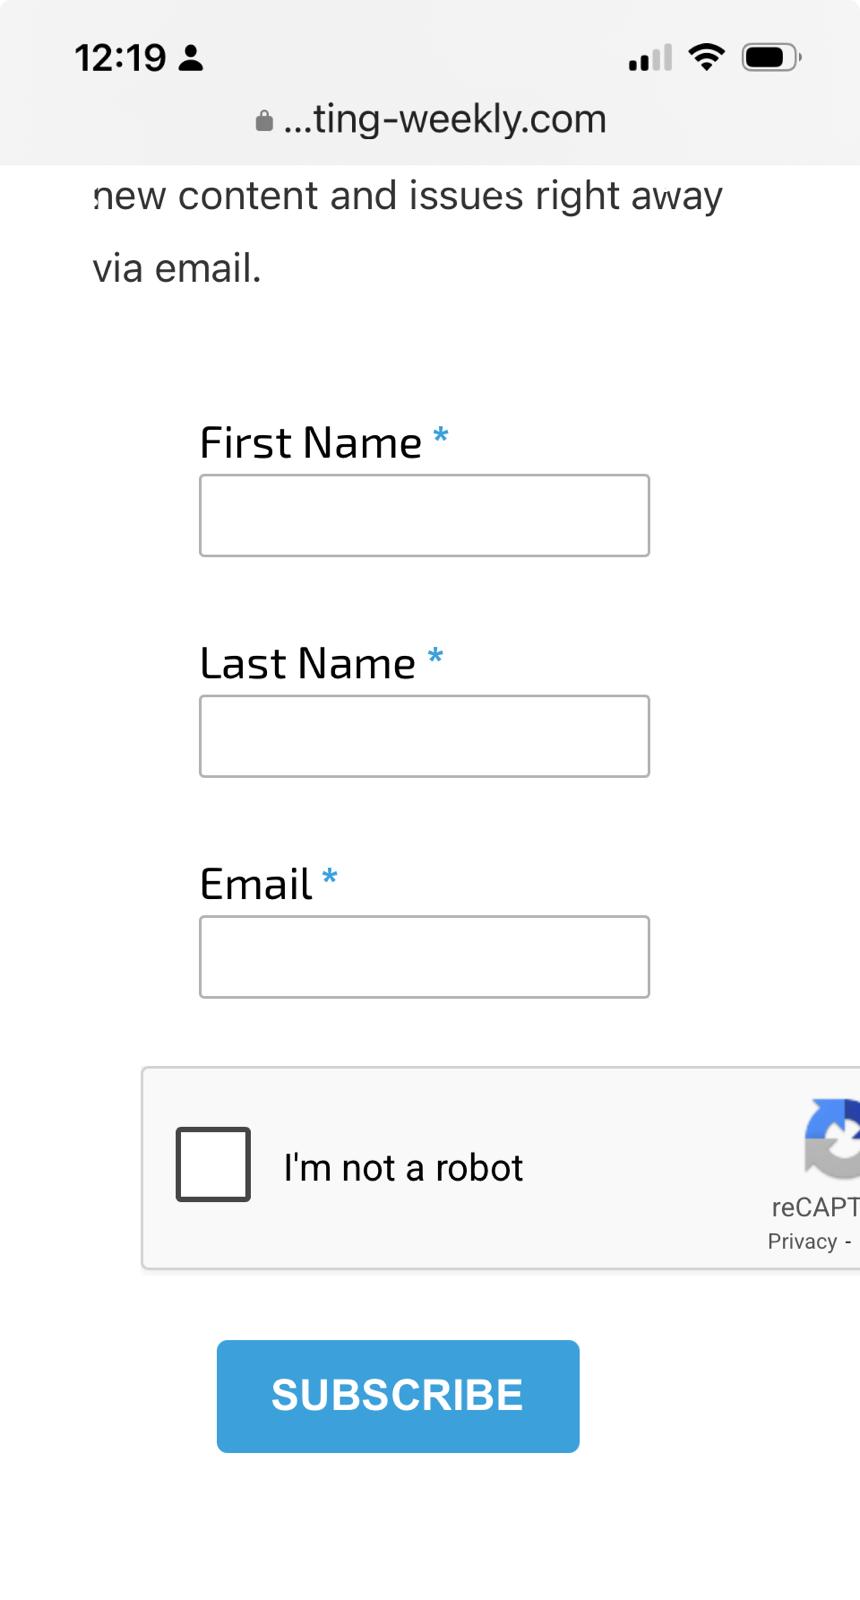
If you don’t see the reCAPTCHA showing up right away, again, be patient. I nearly gave up and thought I had something wrong but then after about 15 minutes it showed. YOU DO NOT NEED TO ADD CODE TO YOUR WEBSITE! Got it? 😊 If you want to see what it should look like, I added it to a form here on the D365 Marketing Weekly website: Contact | D365 Marketing Weekly You might notice that page also has a form in the footer of the page, so great news is that it works even if you have multiple forms on a site.
Speaking of the form in the footer, I needed to adjust things slightly for that one. By default the reCAPTCHA block shows up in the middle of the form, and I wanted it to show justified to the left just like the button. I also wanted to adjust the error message text as it shows in red which looked pretty bad with the blue background on the web page. Below is the CSS I added to the HTML of the form. First is to change the colour of the text that shows if you try and submit the form without verifying you aren’t a robot. I made it white and then changed the left margin slightly to align with the reCAPTCHA image. I then added in CSS for the margin of the box to bring it up higher underneath the form (reducing the margin-top) and then moving it across to align with the first name field (increasing the margin-left).
    .recaptcha-error-text {
    color: white !important;
    margin-left: 1.6em;
}
        div#recaptchav2-sitekey-holder {
       margin-top: -2em;
       margin-left: 1.3em;
}
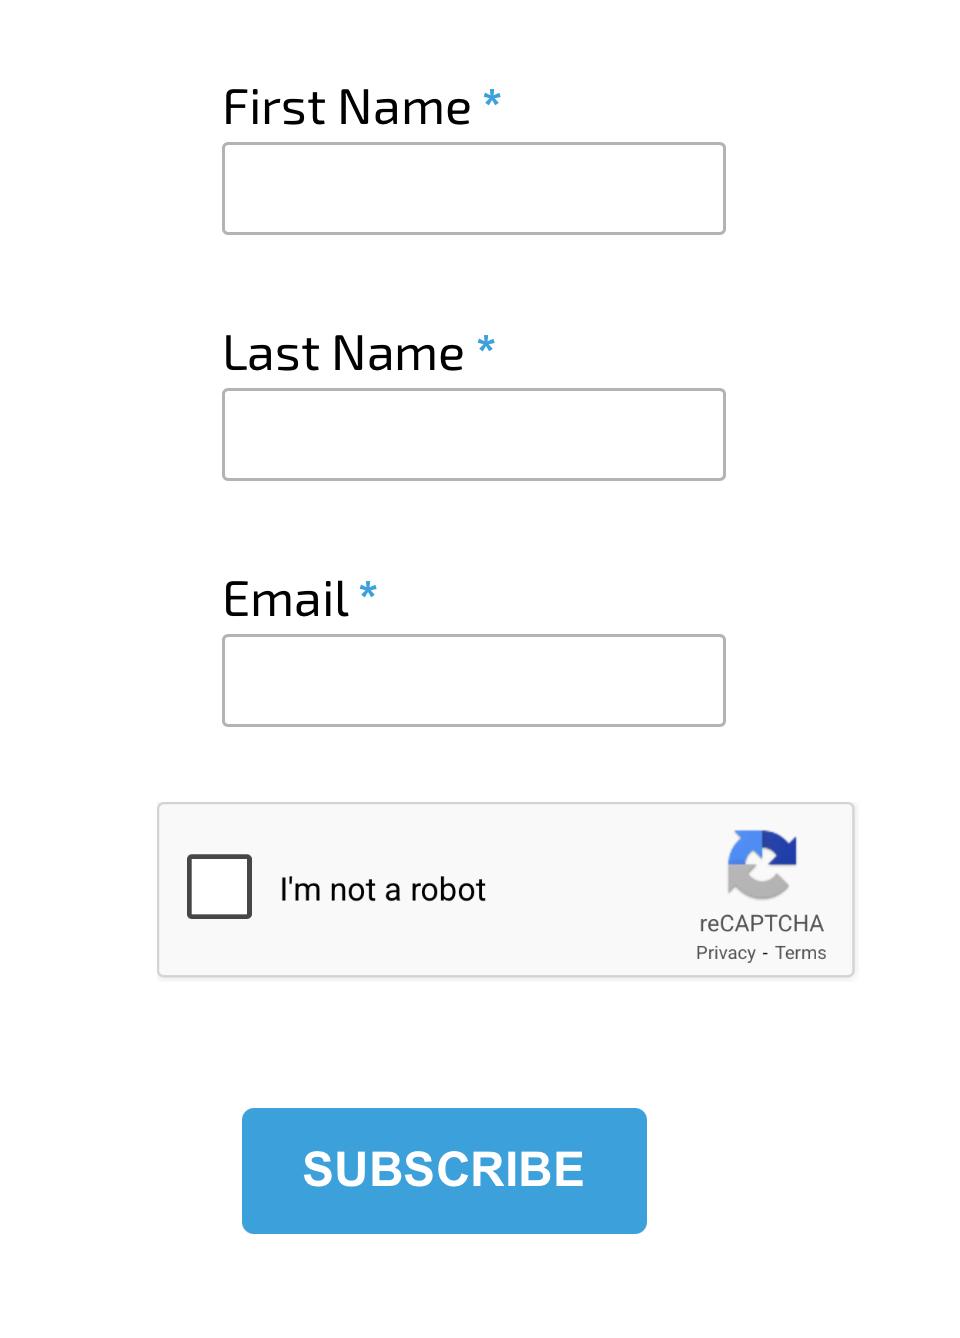
The last thing I changed was to add CSS to make sure the reCAPTCHA image wasn’t cut off for people viewing on a mobile. This is what it looks like, and no changes I was making seemed to improve it.
A few Google searches and I came across this post How to resize the Google noCAPTCHA reCAPTCHA | The Geek Goddess – thanks Geek Goddess! I added this to the HTML at the top of the <style> section for each form.
@media only screen and (max-width: 500px) {
.g-recaptcha {
transform:scale(0.77);
transform-origin:0 0;
}
}
The reCAPTCHA image now displays perfectly regardless of if the form is viewed on a mobile or desktop.
Check out the latest post:
Adding Multiple Screens To A Custom Page To Provide Confirmation Of New Record Creation
Planning your next phase?
Upgrade without starting over
Whether you are adding new teams, regions, or functionality, I help you extend Dynamics and Power Platform and help improve forms, flows, and apps so people actually want to use them.
This is just 1 of 576 articles. You can browse through all of them by going to the main blog page, or navigate through different categories to find more content you are interested in. You can also subscribe and get new blog posts emailed to you directly.
Thanks for this information.
I managed to add the new reCAPTCHA to my form. BUT i found that my Javascript on the form stopped working. Once I removed the new reCAPTCHA, My Javascript stated working again.
Hi Sailesh, ah that is frustrating for you. I have some Javascript on the form here: https://meganvwalker.com/contact/ – and I have the reCAPTCHA added. They both seem to be working together OK. You might just need to do some troubleshooting on your own JS and reviewing the console log to see what might cause the errors. I do know that using the reCAPTCHA adds in extra scripts to your page that are needed for it to work. Could be a conflict there causing your issues. Good luck!
This is so helpful, the documentation at launch is so poor, thank you so much!! 🍏
A question: do you know if you can use reCAPTCHA v2 on forms which are hosted by Microsoft “standalone” pages? I guess I’d need to specify the domain “assets-gbr.mkt.dynamics.com”, but then everyone will be doing that 🤔
Hi Stephen, yes that is the only way to do it! See further up in the blog post, shows that this how to achieve it. But that domain is used by everyone for all kinds of things. Embedding forms is always a better approach if you can do it!
For companies in the EU, ReCaptcha poses a double challenge, as the issue of GDPR comes into play in addition to integration. Google transfers data to the United States. Although this is set to change from April 2026, the situation still seems unclear. Anyone using it would have to obtain user consent beforehand. Hip hip hooray!
Hi Thomas, agreed, it is definitely not one size fits all with these things!