*** NOTE: ALL INFORMATION IS ACCURATE AT DATE OF PUBLISHING ***
If you haven’t already dabbled with Voice of the Customer, you should. 🙂 In my opinion it’s an underrated tool. You can send out customised survey requests automatically and link back responses to Contacts, Cases and pretty much any entity you wish. One of the things you might not be happy with is how the surveys look. Although you can create a theme, and add a logo, it might not be immediately obvious that you can create awesome surveys using custom style sheets (CSS).
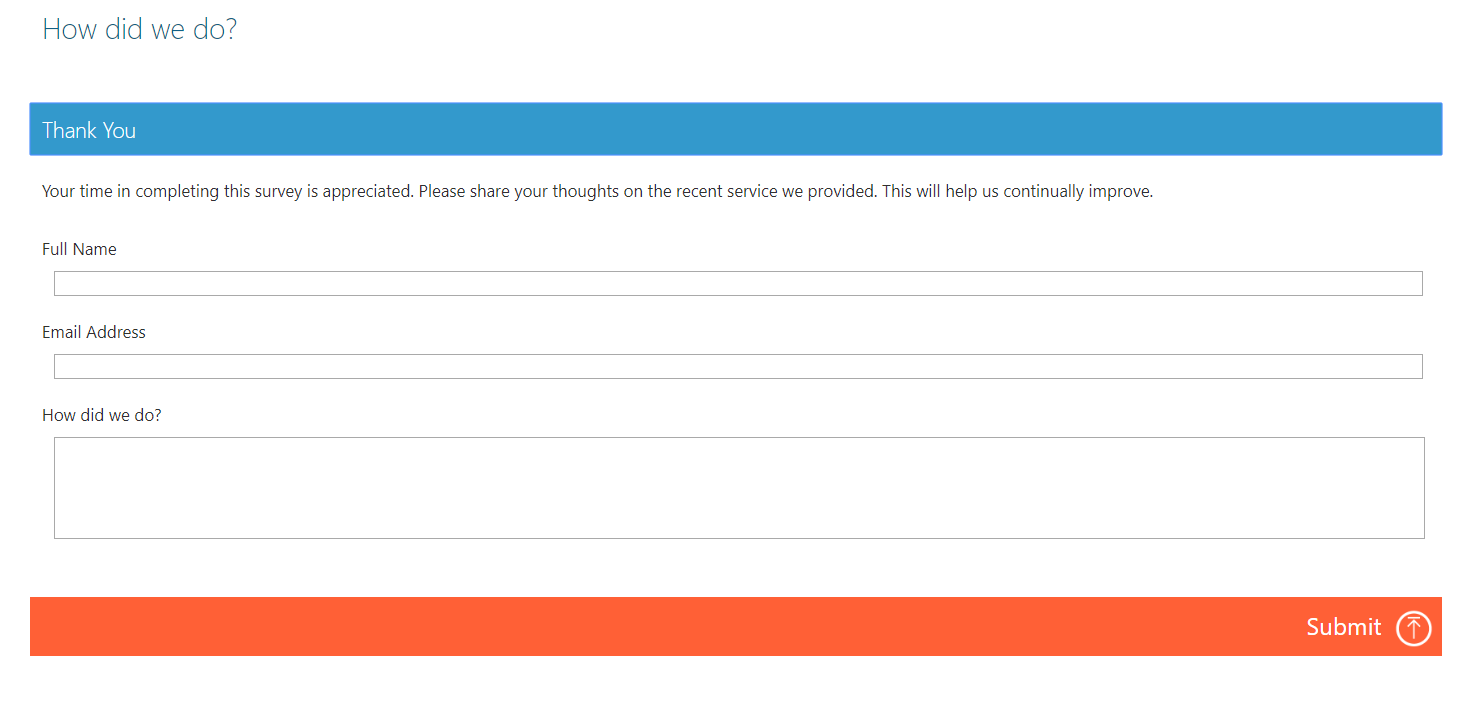
Here is the standard default theme.
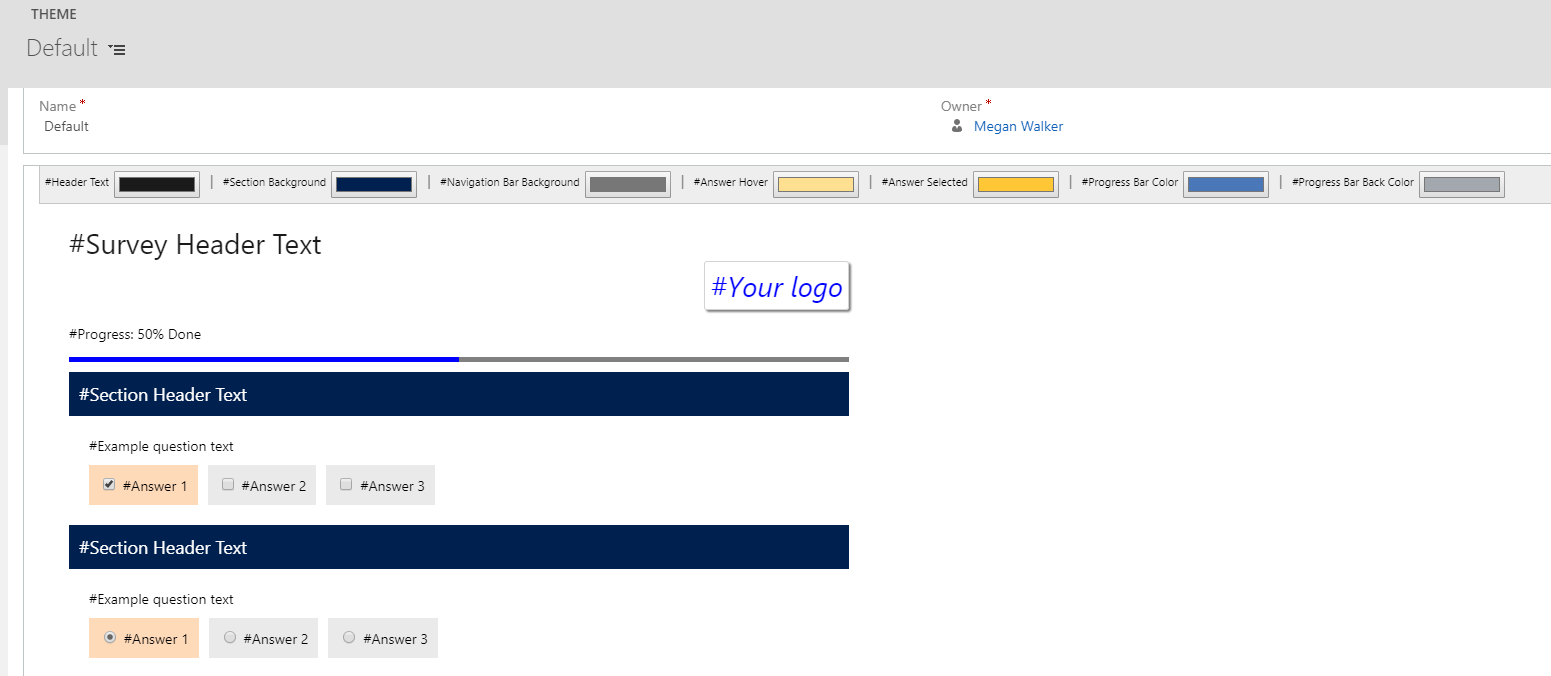
This can be edited by changing the colour scheme. It’s really easy. Just click on any of the sections from the top that you want to change and pick a new colour. The changes will be seen immediately in the preview window. Once you save the theme, any of your surveys using this theme will be updated automatically. You can also add a logo (found in the Voice of the Customer images area from the navigation). The logo can then be selected for any of your surveys but is not required.
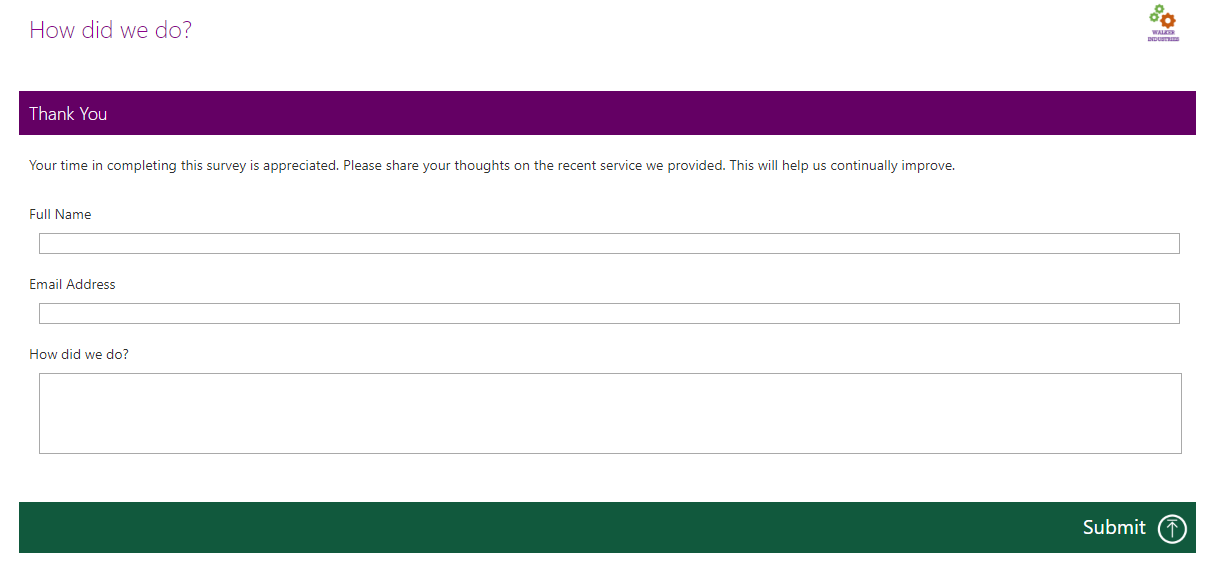
So here is a survey with a customised theme, and a logo added for brand recognition. Great! It’s still a little boring though and the logo is tiny even though the image uploaded isn’t.
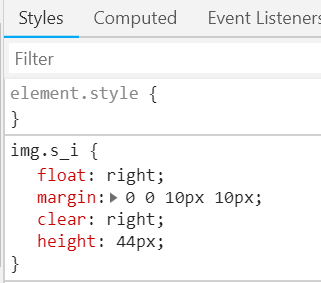
If you have never used this next little trick before, prepare to be amazed 🙂 – if you right click on what’s known as an element on a web page, you can inspect it and see what styling has been used. Here we will right click on the logo and click Inspect. You can use other browsers to do this, but to me Google Chrome is the best one for this.
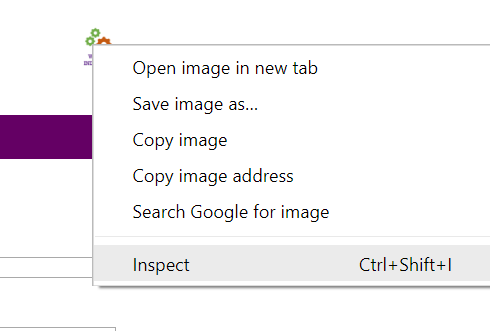
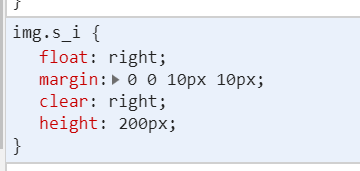
Now we can see that the image (or the logo) has a height of 44 pixels which is not big enough at all!
We can change that by clicking in to a field where it says 44 and typing in to that section. Once changed to 200px, the image size will change before your eyes so you can see how it will look. Keep in mind, you are not changing it in the code of the actual web page, mearly having the opportunity to see what it might look like, allowing you to play around and see what looks right.
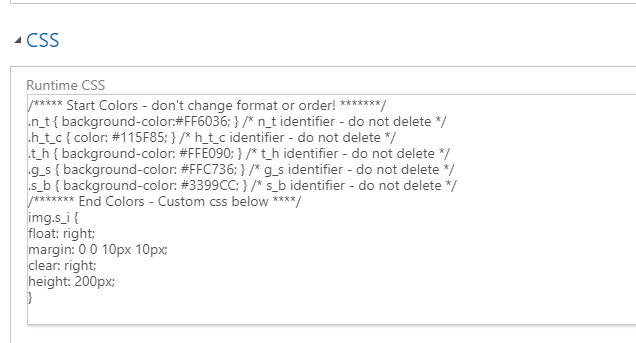
Once you are happy, simply select the entire section and copy it. On the theme for your surveys back in D365 there is a CSS section. Awesome! Paste in your code directly at the bottom of the field being careful not to delete anything already in there. Save your theme and go back and look at the survey. You will need to click the preview button again to open a new window. You should now see that the change you made while testing is now being displayed. How cool is that?
What about changing some of the fonts? The only way to do it is by using the stylesheet, and Google Fonts. Many sites use Google Fonts, but usually you would add a line of code to the header file for the website. We can’t access this area via Voice of the Customer, but we can still add something to the top of the CSS section. Using Google Fonts is easy, just search through the fonts, then click the plus button next to the ones you want to be able to use. Each time you add a new one it will be added to a little window at the bottom of the screen. Open the window and click on the @IMPORT link in the Embed Font section.
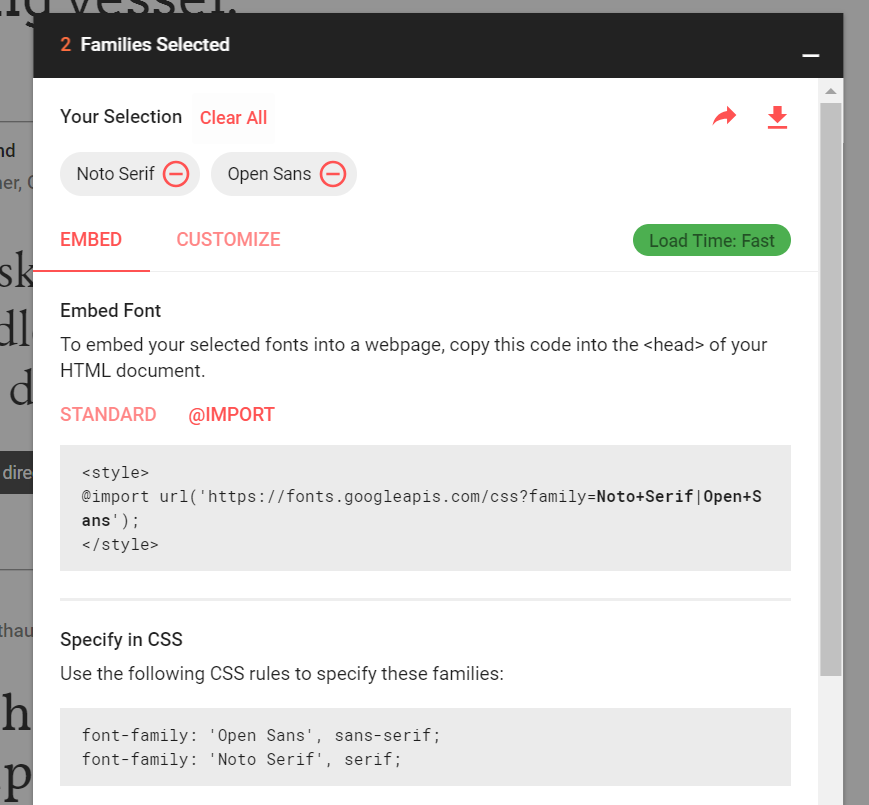
This is the bit you need, so ignore the <style> and </style> at the start and end. Take this and paste it at the very top of the CSS area in D365. Then when you want to change the font on the survey, right click an area and inspect it. Then change the font family using the rules provided at the bottom of the window in Google Fonts.
@import url(‘https://fonts.googleapis.com/css?family=Noto+Serif|Open+Sans”‘);
So, here is an example of what can be achieved with a bit of styling. Much slicker and cleaner, good brand recognition and much larger fonts where needed. We’ve also made the form fields larger in height, shorter in width and with a nice background colour and enlarged the submit text and button. The logo is a sensible size and the fonts are a little more modern.

So with a bit of patience you can really improve and impress with your surveys. If you are interested in seeing the style changes I added to the CSS area, you can view them below. Hope it helps out!
@import url('https://fonts.googleapis.com/css?family=Noto+Serif|Open+Sans"');
/***** Start Colors - don't change format or order! *******/
.n_t { background-color:#FF6036;  }  /* n_t identifier - do not delete */
.h_t_c { color: #115F85; }     /* h_t_c identifier - do not delete */
.t_h { background-color: #FFE090; }   /* t_h identifier - do not delete */
.g_s { background-color: #FFC736; }  /* g_s identifier - do not delete */
.s_b { background-color: #3399CC; }  /* s_b identifier - do not delete */
/******* End Colors - Custom css below ****/
img.s_i {
    float: right;
    margin: 0 0 10px 10px;
    clear: right;
    height: 240px;
}
#h_t {
    font-size: 36px;
    /* font-weight: bold; */
    font-family: 'Open Sans', sans-serif;
    font-weight: 700;
    padding-top: 130px;
}
div.s_b, section.s_b {
    font-size: 28px;
    color: #fff;
    font-family: 'Open Sans', sans-serif;
    font-weight: 300;
    padding: 20px 0 20px 20px;
}
div.q_t {
    margin: 0 5px 10px 0;
    font-size: 20px;
    font-family: 'Noto Serif', serif;
}
.q_i {
    width: 80%;
    height: 35px;
}
.q_i {
    width: 80%;
    height: 35px;
    background-color: lightyellow;
}
img.navI {
    cursor: pointer;
    height: 52px;
    width: 52px;
    vertical-align: middle;
}
span.navT {
    height: 32px;
    margin: 0 5px 0 5px;
}
.sz_pnl {
    min-width: 280px;
    max-width: 1177px;
    margin-left: auto;
    margin-right: auto;
    /* border-width: 2px; */
    background-color: #403d42;
}
div.navB {
    margin: 2px 0 0 0;
    color: #fff;
    font-size: 30px;
    font-family: 'Open Sans', sans-serif;
}
div.section {
    background-color: #fff;
    border-bottom-color: #403d42;
    border-bottom-style: solid;
}
Check out the latest post:
Use Custom Event Registration Questions To Branch Your Journeys In Customer Insights
This is just 1 of 603 articles. You can browse through all of them by going to the main blog page, or navigate through different categories to find more content you are interested in. You can also subscribe and get new blog posts emailed to you directly.
Hi Megan, I am very new to this Customer Voice. Trying to do some css changes. But not finding way out. I am sure there should be some way in the new Customer voice as you have mentioned above in the old versions. Could you please guide me how to find theme css page?
Thank you in advance.
Hi Anand, that option is not currently available for us to try out yet. It looks like adding CSS changes will be allowed soon though, just not sure when!