*** NOTE: ALL INFORMATION IS ACCURATE AT DATE OF PUBLISHING ***
An app that recently caught my eye in AppSource is D365 Tiles from MiiiA Pty Ltd. In a nutshell the company describes themselves as ‘is a modern software services team dedicated to helping organisations large and small better understand their own business and customers using cloud technology.’ They claim their is the ‘ultimate tile navigation ninja for Microsoft Dynamics 365’. What’s not to love about that!
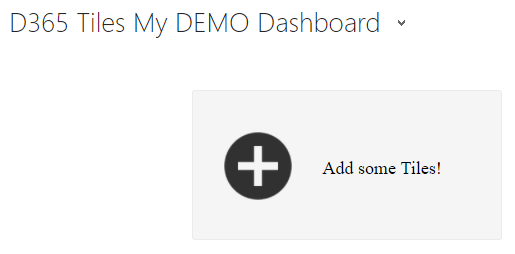
Rather than a trial, you can take a test drive which lasts an hour. So if you want to check it out, make sure you have some time carved out where you won’t be interrupted. There is a cost for the app which is based on a per instance basis. The first thing you’ll want to do is add some tiles. From the dashboard area you’ll have the option to do just that. Click the ‘Add some Tiles!’ option to get started.
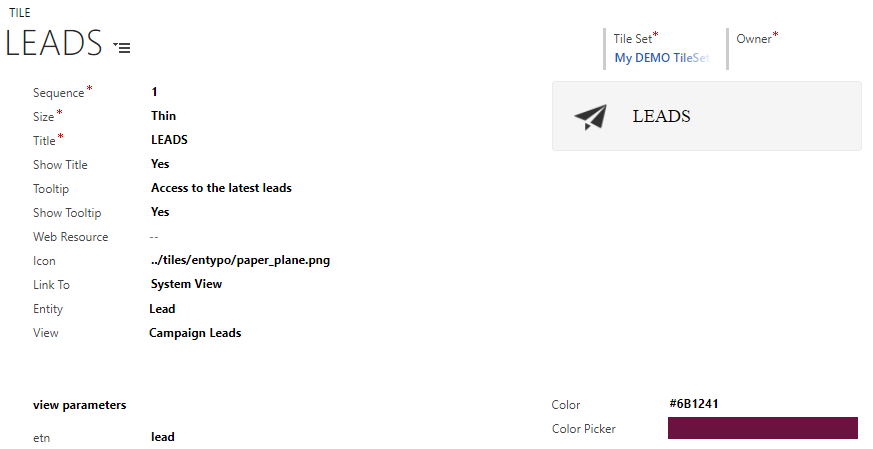
Tiles are bundled in to ‘Tile Sets’. So for each dashboard you will have a set of tiles. For each tile you have a number of fields to complete. The sequence will determine the order in which the tile will appear within the tile set (based on all tiles in the set from left to right). The size options are square, thin, wide and large. Give the tile a title. Make sure it’s something short, snappy and logical as this is what will display on the title. If you want a tooltip to display when the tile is hovered over add that in and change show tooltip to yes. For the icons you can use any of the 342 icons that come with D365 Tiles, or add your own images. The images can be found using the Web Resources look up field, then using the url in the icon field. Next, decide what you want to link to (Dashboards, Views, Create Record, Open Record or an External URL). For the Dashboards and Views these can link to Personal or System ones.
Finally you can pick the colour of the tile that you want. This will show up when the tile is hovered over. A specific hex colour can be used, which is great if you want to brand it in similar colours to your company.
The tiles you have added can then be found on the Tile Set record you added them to. You can change the Tile Set name from here. A preview is displayed showing you what the Tile Set will look like once on the dashboard. The Copy Id field is used to add the Tile Set to a Dashboard (more on that in a moment).
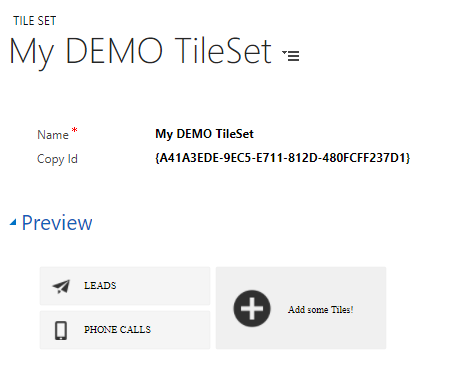
The bottom of the Tile Set shows all of the tiles that have been added.

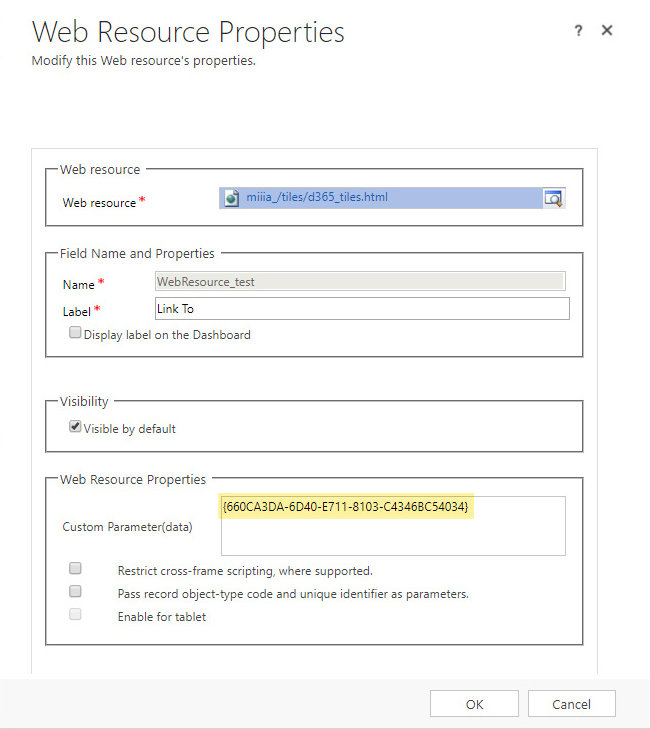
Creating the dashboard is done in the usual way. A web resource element of d365_tiles.html (shown below) is added to get the tile set to display. In the properties of the Web Resource you will need to paste the {GUID} (from the Copy ID field) of the Tile Set you created that you wish to display in the element.
Finally, here is what the tiles look like on the Dashboard. You can include up to 6 elements on the Dashboard which could be 6 Tile Sets making it a full and comprehensive Dashboard for a user.

And ‘here’s one made earlier’, with a screenshot direct from the D365 Tiles page in App Source. Looks pretty awesome!
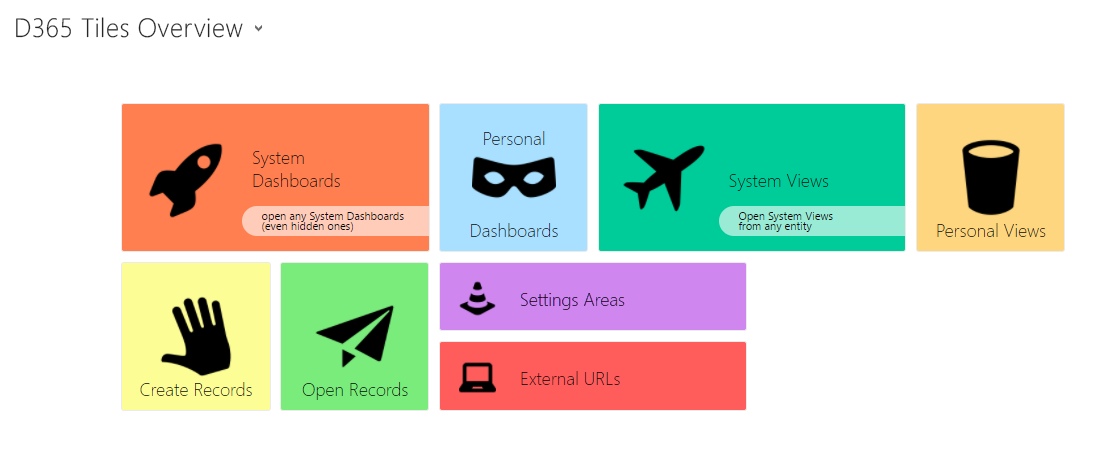
So, how could you use D365 Tiles? Here are a few ideas for different roles within an organisation:
Marketing
- Create a Marketing List
- View of new Leads
- Create Email Send (if using ClickDimensions)
- View of Posted Forms (if using ClickDimensions)
- View of site Visits or Page Views (if using ClickDimensions)
- External link to company blog
- External links to social media profiles
- Link to a specific marketing list (blog subscription perhaps?)
Business Development
- Create Leads
- View of Scheduled Phone Calls
- View of new Leads
- Link to an upcoming Event (if using ClickDimensions)
- Link to another dashboard with all of your Leads broken out by location or sector etc.
Sales
- View of Opportunities
- View Opportunities with high probability of closing
- External link to LinkedIn for research on contacts
- Create Phone Call
- Create Email
- Link to a recent Email Send record to view stats for your Contacts (if using ClickDimensions)
Customer Service
- View of Cases
- Create Case
- Create Phone Call
- View of Survey responses (if using ClickDimensions or Voice of the Customer)
- Link to another dashboard containing stats for open/closed/on hold cases
Can you see ways in which you can use D365 Tiles in your business? Daniel Hesketh at MiiiA Pty Ltd is fantastic to communicate with, very responsive and answered a LOT of questions while I was working through the review of the app. Great work guys!
Check out the latest post:
Assign Records To A User Or A Team From Your Custom Page
This is just 1 of 571 articles. You can browse through all of them by going to the main blog page, or navigate through different categories to find more content you are interested in. You can also subscribe and get new blog posts emailed to you directly.

One thought on “Improve Navigation And Usability With D365 Tiles”
Comments are closed for this post.