*** NOTE: ALL INFORMATION IS ACCURATE AT DATE OF PUBLISHING ***
I shared how to use the new Website Tracking feature and explained how to add it to your website, but I often get asked about using Google Tag Manager. So if you are using GTM and not sure how to go about adding the code, this post will walk you through the steps. Let’s take a look!
So although this assumes you already have GTM set up, just a few screenshots to show you how to get started if you haven’t. First, you need a Google account to be able to log in with and get going. Navigate to https://tagmanager.google.com and get logged in, then use the Create Account option. Note that the button might be in a slightly different place if you are already using GTM with other accounts.
Walk through the wizard to create your new account and container. Think of the container as your site as you can add multiple containers under the same account. Make sure you select the target platform of Web.
After creating your account and container you will end up with your GTM code. THIS is the only code you should need to add to your site. The wonderful thing about GTM is that it will house all your code (or should do) from now on. Google Analytics, Customer Insights – Journeys, social media platform code etc. If you aren’t sure where to add this in your site, ask your web company/person to do this for you. It states exactly where to add each snippet of code. Once they indicate the code has been added to your site you can test it to make sure the code can be found by GTM.
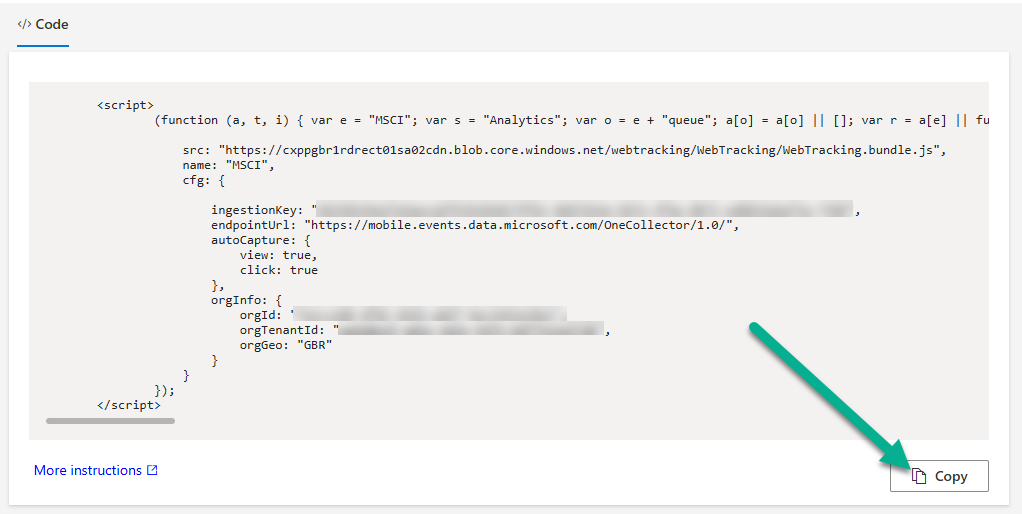
Now it is time to add the Website Tracking code. Make sure you’ve read the previous post so you know where to get it from within Customer Insights – Journeys, then copy the code.
In GTM, click to add a new tag from the overview or tags section.
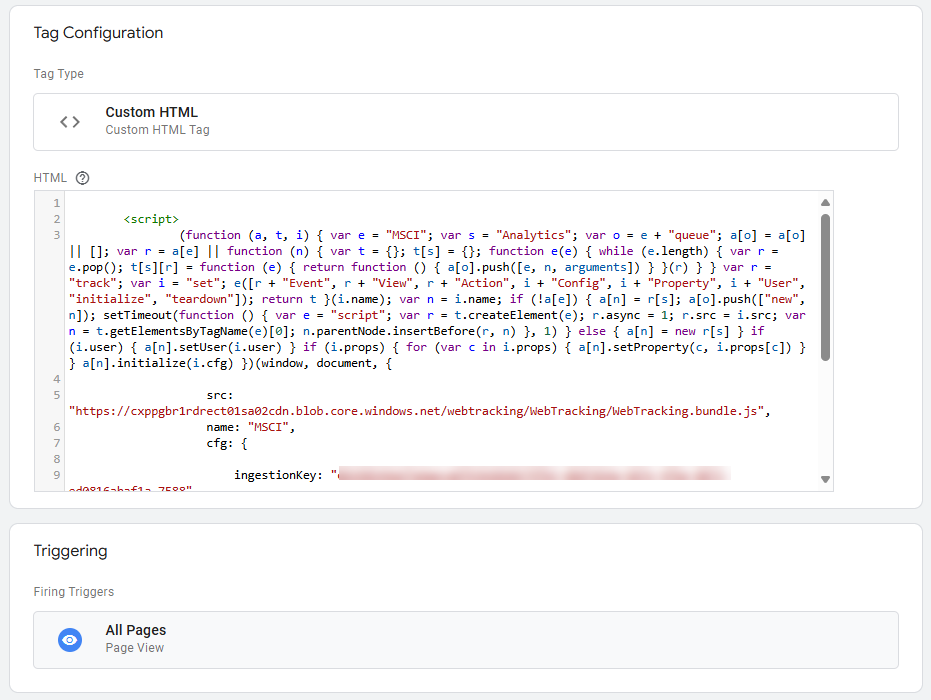
You can call the tag whatever you like but should make sense to you and any other users that have access to your GTM account. We need to add both tag configuration (the actual script) and determine when this will trigger (all pages).
Clicking in the Tag Configuration section will show you a list of options. Choose Custom HTML, then paste your script in the HTML field. That’s it for the top part. Then click in the Triggering section to see a list of options for when the tag should be fired. You should see All Pages as an option. Select that and save your new tag.
Now click on the Preview button from the top right of GTM. At this point the website tracking code isn’t yet ‘live’ and added to your site. We can use the preview mode to make sure it’s firing when you visit the site. Add in the URL to your site and then click Connect. This will open up a new browser window covering the current one, so just drag it so you can see the window behind.
Now you can make sure that in the Container Loaded event if your tag fired. It did, which is just what we need. Feel free to click on other pages on your site in that new window, and for each page you visit you should get something new in the summary. Again, you just need to make sure the website tracking tag you added has fired.
Once you are happy it is working, click Finish from the bottom right of the window that opened up.
Now you can go back to the main screen on GTM and click the Submit button to publish your changes. Always good to add a version name and description to clearly state what you did. That’s it!
Check out the latest post:
Setting Up reCAPTCHA v2 For Your Realtime Marketing Forms
This is just 1 of 571 articles. You can browse through all of them by going to the main blog page, or navigate through different categories to find more content you are interested in. You can also subscribe and get new blog posts emailed to you directly.


Thank you for the article you created. Following the steps, we implemented web tracking for Dynamics 365 Customer Insights – Journeys using Google Tag Manager. On our website, we can confirm in the browser developer tools that the tags are firing. However, no web-tracking data (e.g., visits/page views/events) is appearing in Customer Insights – Journeys.
Could you let me know if there are any configuration steps I might have missed, or anything required beyond what’s described in the article? For example, do we need any of the following:
The exact tracking script and correct environment/organization ID
Domain allowlisting or tracked-domain configuration
Consent/Privacy settings that could block data collection
Specific permissions or prerequisites in Customer Insights – Journeys
Typical processing latency we should expect before data becomes visible
Thanks in advance for your guidance.
I believe you emailed me about this too? My suggestion is still the same, if you have done everything in terms of adding the tracking code, and you can see from Google Tag Manager that it is firing, and you have sent out an email with a link back to your site and someone has clicked on it, and still no tracking on a related Contact/Lead, then you would need to contact Microsoft.
You WILL need to have sent out an email from a Journey with a link to the site where you added the tracking code in order for the cookie to be added and tracking to start. if you haven’t done that, then no, the tracking will not show up on any records.