*** NOTE: ALL INFORMATION IS ACCURATE AT DATE OF PUBLISHING ***
One of the main differences with Canvas Apps and Custom Pages is that most times a Custom Page has just one screen. I say most times, because there are times where an extra screen is valuable and CAN be enabled. Consider someone using a custom page in Dynamics 365 to create a new record. You can show confirmation on the same screen, or just close the page once the action is complete (not always obvious to the user then that it all worked), but navigating to a new screen is a good approach. From that second screen you can also give them a button to click on to open the new record they just created, even better! So this post will look at the creation of a new Lead from a Contact, then showing a confirmation screen and providing a way for that new Lead to be opened, all pretty smooth and seamless.
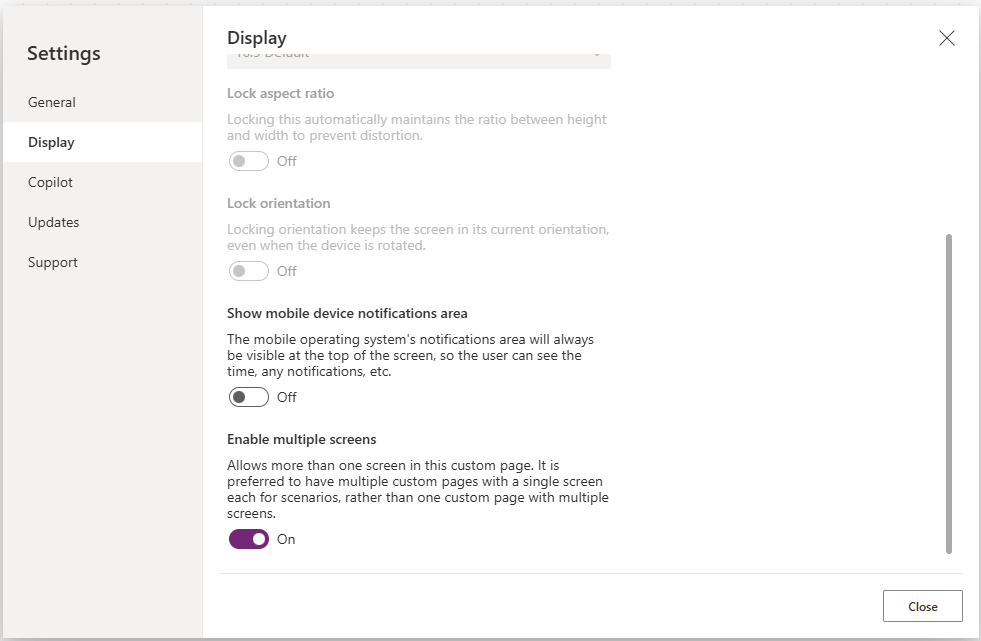
To add extra screens, click on the Settings from the top of your custom page, then scroll to the bottom of the Display settings. From here, click to enable multiple screens.
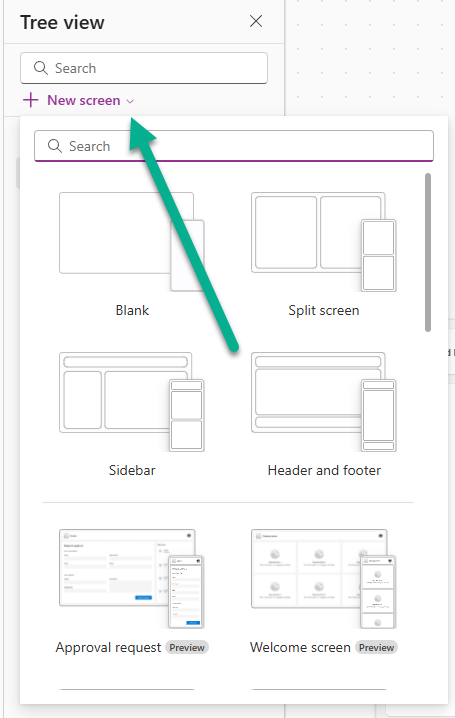
Once you’ve done that. you will have the option to add a new screen from the top of the tree view.
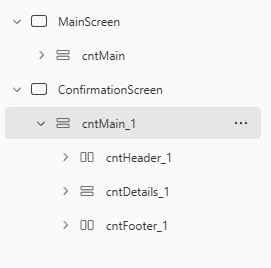
Doing that will automatically add in the screen for you. If you want the two screens to look similar, just click on the three nots next to the main screen container and copy it, then paste it directly in to your second screen. That gives you the exact same layout and other settings, then you can just delete and edit the components that aren’t needed.
For this example, someone in sales or account management can go to a Contact and click a button to create a Lead. It’s kind of going backwards, but this allows you to review the requirement from the Contact, and then still go through the process of qualifying or disqualifying the Lead, but keeping it all linked to the existing Contact and their Account (if applicable). The App OnStart looks something like this. We are getting the ID of the Contact (or using the test GUID when editing the custom page), then using the lookup function to set varSelectedRecord as the Contact. Next we can set varAccount as a variable containing the related Account record from the Company Name field on the Account.
Set(
    varRecordId,
    If(
        IsBlank(Param("recordId")),
        GUID("7871009b-f3ea-ea11-a815-0022481aef30"),
        GUID(Param("recordId"))
    )
);
Set(
    varSelectedRecord,
    LookUp(
        Contacts,
        'Contact (contactid)' = varRecordId
    )
);
Set(
    varAccount,
    If(IsType(varSelectedRecord.'Company Name',Accounts),
    AsType(varSelectedRecord.'Company Name', Accounts)
)
);
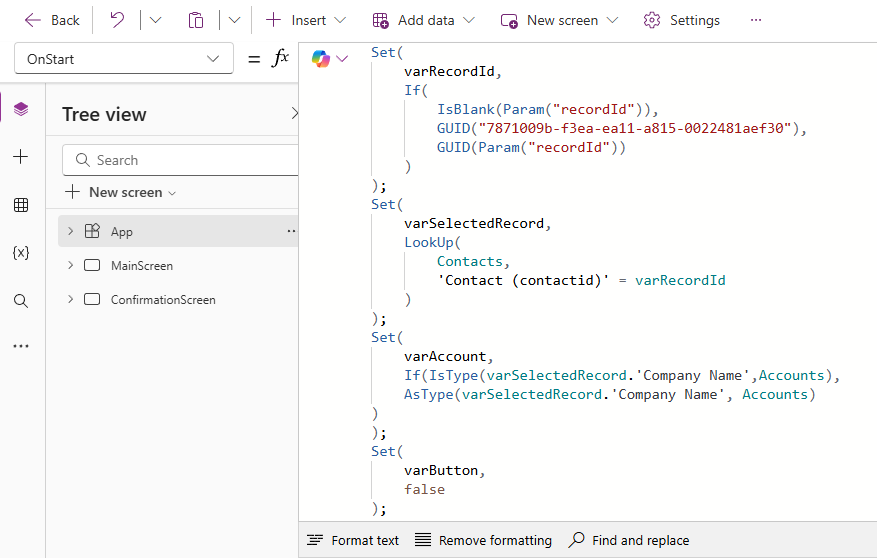
One note on the logic for the Account above as it might be the first time you’ve seen it. An Account is what is known as a Polymorphic look up, where it can be either an Account or a Contact. So in this case we need to check whether Company Name is actually pointing to an Account. If it is, convert it into a real Account record and store that in varAccount. If it isn’t an Account (for example, the lookup is blank or points to Contact or some other table), varAccount simply becomes blank because the If has no ‘else’ branch.
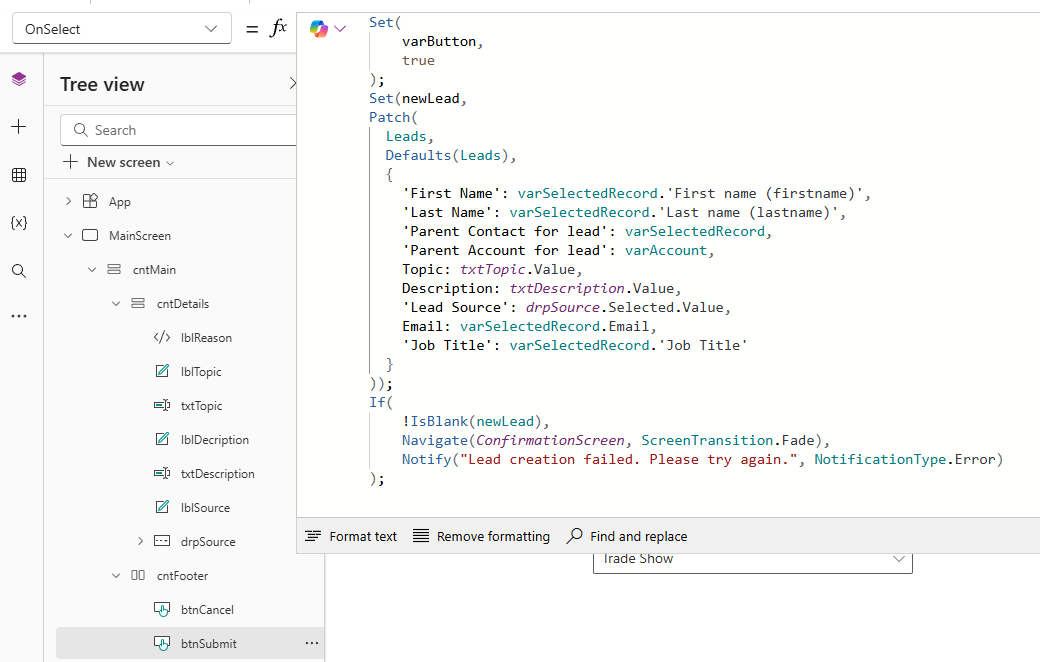
Now instead of a Submit button that patches to create a record, we have a button that when pressed it will create the record but then navigate through to the second screen. We start by setting a variable I have called newLead, then we patch directly after that, so the new lead record we create is going to be included in that variable. The bottom if checks to make sure the lead was actually created (that the variable isn’t blank) and only navigates to the second screen if it was created, otherwise it will show an error notification on the first screen. I am using three fields on the screen to get Topic, Description and Lead Source, but everything else is coming from the original Contact (varsSelectedReocrd) or the Account linked to the Contact (varAccount).
Set(newLead,
Patch(
  Leads,
  Defaults(Leads),
  {
    'First Name': varSelectedRecord.'First name (firstname)',
    'Last Name': varSelectedRecord.'Last name (lastname)',
    'Parent Contact for lead': varSelectedRecord,
    'Parent Account for lead': varAccount,
    Topic: txtTopic.Value,
    Description: txtDescription.Value,
    'Lead Source': drpSource.Selected.Value,
    Email: varSelectedRecord.Email,
    'Job Title': varSelectedRecord.'Job Title'
  }
));
If(
    !IsBlank(newLead),
    Navigate(ConfirmationScreen, ScreenTransition.Fade),
    Notify("Lead creation failed. Please try again.", NotificationType.Error)
);
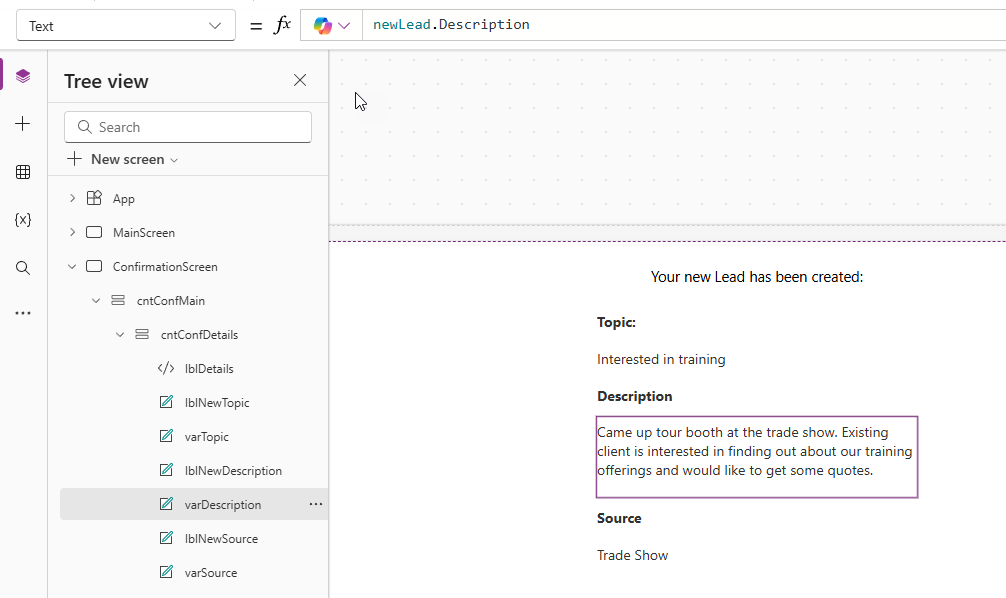
On the second confirmation screen, you can then display information linked to the lead created by using the variable name then a dot and then a field from that new record. This is helpful to provide on the confirmation screen to show what was created.
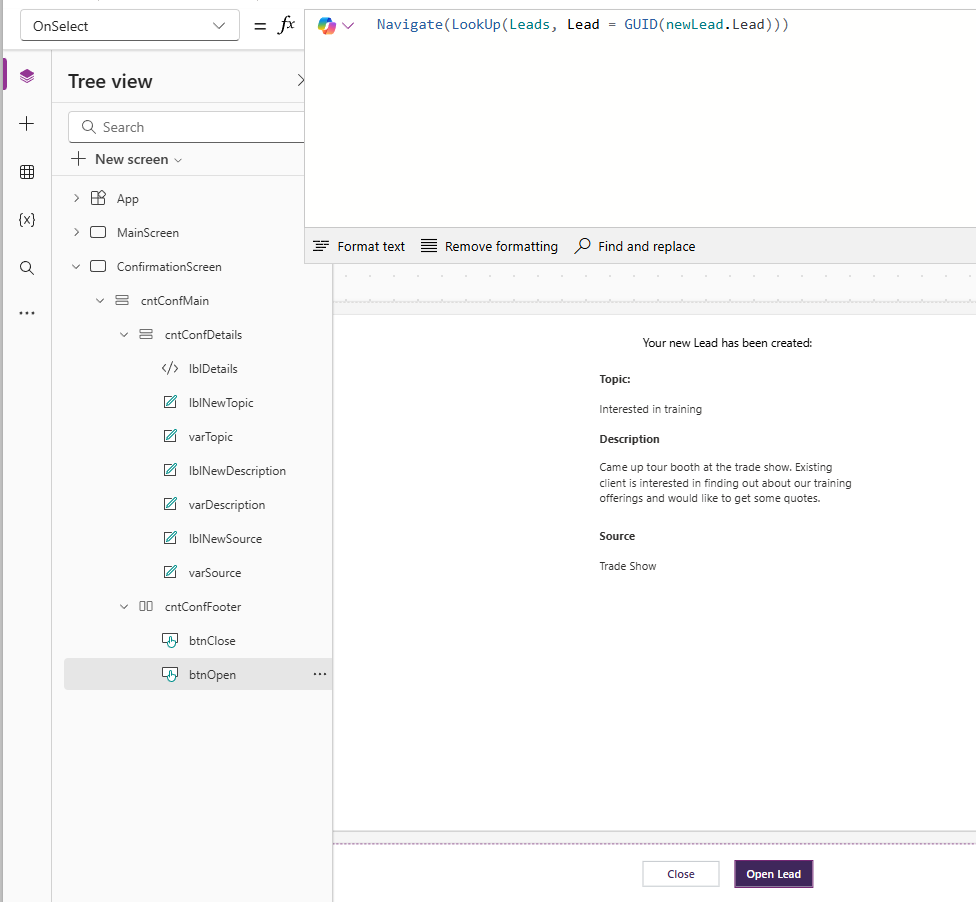
Finally, add two buttons on the final confirmation screen. The first button would be to close the custom page without going to the new Lead that was created. For this, we use the Back() command. Typically you would just have that once, but because we have two screens we need to include it twice, otherwise it would just take the user back to the first screen of the custom page.
Back();Back();
On your second button, the one I have called Open Lead, we can use the Navigate command to find the right record and then open it up.
Navigate(LookUp(Leads, Lead = GUID(newLead.Lead)))
newLead.LeadnewLeadis the record you just created with your Patch.Leadis the ID (GUID) of that new Lead record
- G
UID(newLead.Lead)- Ensures that the value is in proper GUID format. Sometimes the ID comes as text, so wrapping it in
GUID()makes sure Power Apps treats it as a record identifier.
- Ensures that the value is in proper GUID format. Sometimes the ID comes as text, so wrapping it in
LookUp(Leads, Lead = GUID(newLead.Lead))- Searches the Leads table for the record where the Lead ID matches the one you just created.
- Returns the full Lead record.
Navigate(...)- Opens the screen for that Lead record.
Here it is in action. How nice is that! A smooth process for someone with the ability to navigate directly to the record they created should they choose.
Check out the latest post:
Add Information Buttons To Provide Additional Details For Custom Page Users
Considering Custom Pages?
Thinking about using Custom Pages but unsure where they fit best?
I help organisations design model-driven experiences that are intuitive, scalable, and built for real users, not just technical possibility.
This is just 1 of 580 articles. You can browse through all of them by going to the main blog page, or navigate through different categories to find more content you are interested in. You can also subscribe and get new blog posts emailed to you directly.