*** NOTE: ALL INFORMATION IS ACCURATE AT DATE OF PUBLISHING ***
Assignment Rules can be set up to auto assign Leads and Opportunities to the most appropriate person within your organisation. This could be based on languages they speak, territories they work within, or knowledge of products they might have. You also may only want to consider people with a specific security role to be eligible for having records assigned to them. It’s important to set this part up correctly so users are not assigned records they are unable to work with, qualify or win. Let’s look at the work assignment settings.
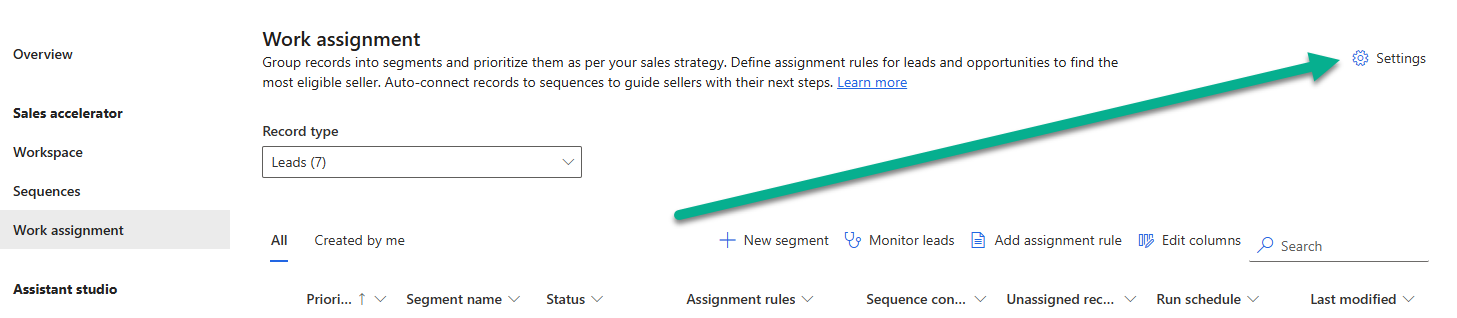
This is found in the Sales Hub app in the Sales Insights settings area. Click on Work Assignment then the Settings button on the top right.
The first thing to review is the eligible security roles. Click on the manage link.
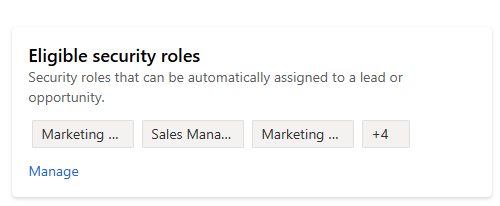
From here you can define which security roles should be taken in to consideration. Selecting a role means anyone with that role will be available (although we can turn this off on a user by user basis). Make your changes then save it. This can take some time to update depending on the number of role changes you’ve made so be patient.

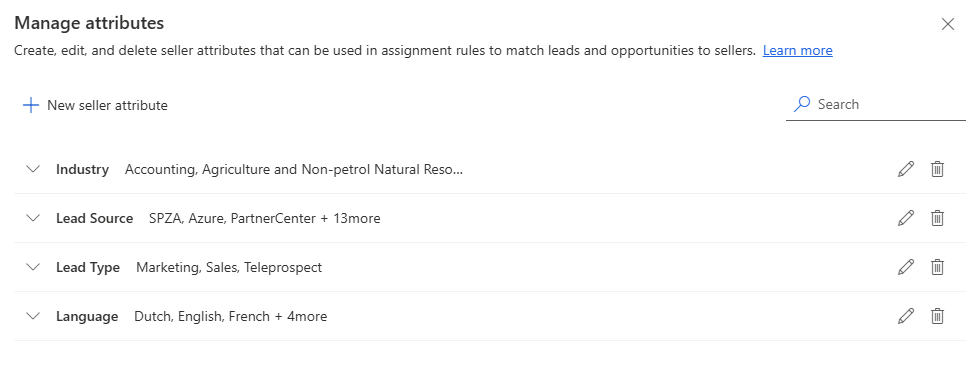
Next, click on the Seller attributes Manage link.

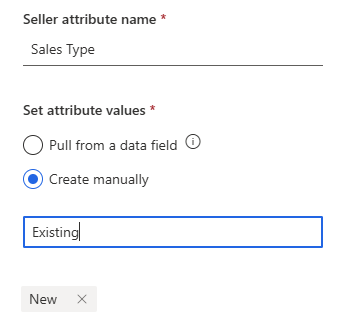
This is where we can determine attributes that are significant to determine who might be best placed to work on a Lead or Opportunity. Click on New seller attribute.
We can pick a field from a Lead (or Opportunity) and use an existing field that we can then assign to specific users to match with the right records. Here we have a Language field on a Lead. All of the values from that field are shown, but clicking on the X next the value will remove it so it’s not going to be part of the consideration when assigning records.
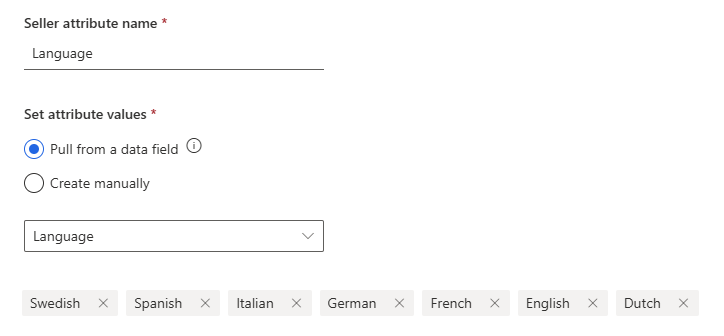
We can also create attributes manually without it needing to be a field on a Lead (or Opportunity). Here we want to define a way to indicate if users work with New or Existing business. Adding the values isn’t all that intuitive. Add in the value then press Enter which will add it to the list of values.
Once the security roles and attributes have been defined, we can start reviewing the users and adding attributes to them. Users and Teams with one of the security roles you added will be displayed for you. There may be users that match that criteria that you would never want to include in the assignment of records. For those, we can turn off their availability.
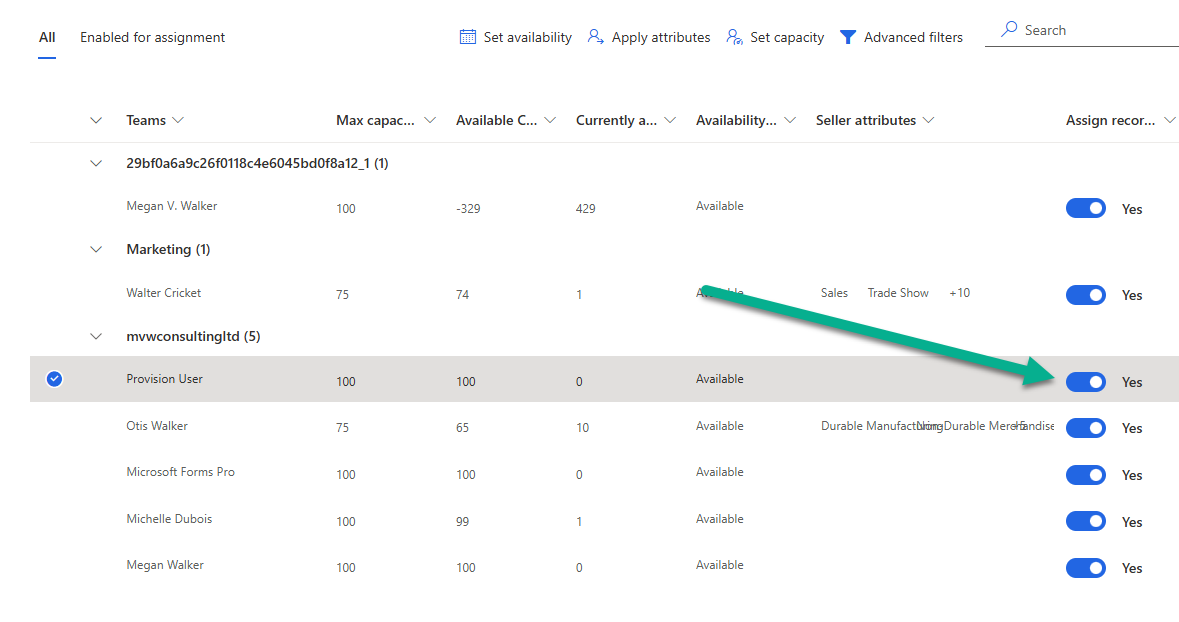
Turning the toggle to No for a user will prompt you to confirm. Make sure you do this for users listed that are service users, or people who wouldn’t typically work with Leads or Contacts.

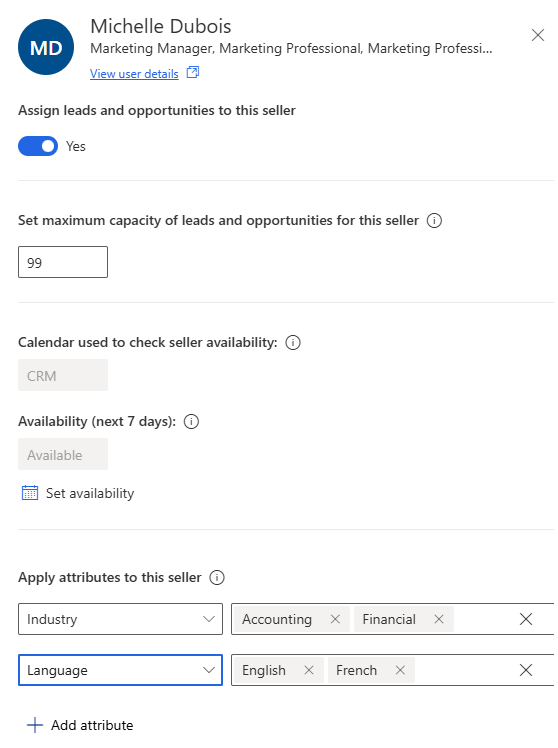
Clicking on a users name will provide you with the ability to review information about them. Here we can set the maximum capacity of Leads and Opportunities which determines how many open records they should have at any given time. They can of course be manually assigned more records than this, but the assignment rules would honour this number to avoid over working the user. The calendar used will be greyed out and disabled, and based on the availability set up in the sequence settings area. We can see the attributes section at the bottom. Simply click to add an attribute and indicate which values apply to this specific person.
This can also be done in bulk for users, either applying attributes or setting capacity.

This will then show how many people were selected that you are making the change for.

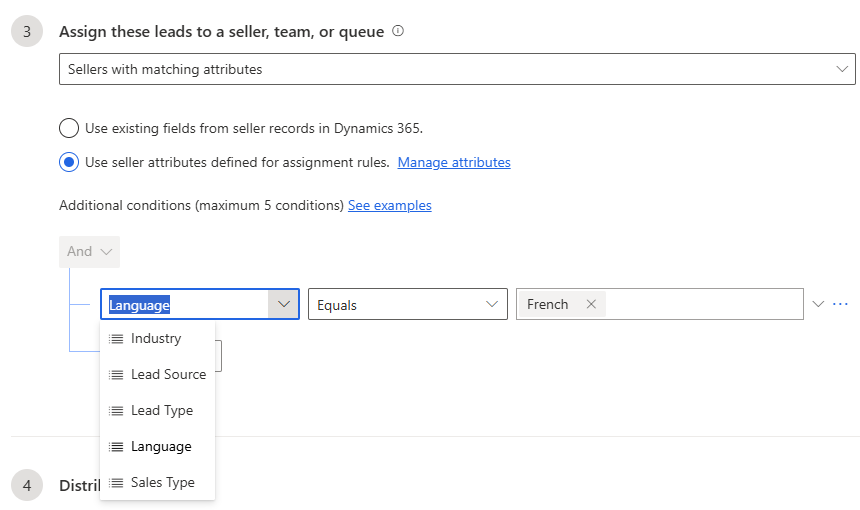
Once you have all of this set up, you can use them in step 3 of your assignment rules. You can assign Leads that match the criteria of a Segment and assign records to only the users that match the attributes you’ve added. This means you could build a segment where language is used to filter them, then have an assignment rule to make sure these Leads are only assigned to users that have had the Language attribute applied to match.
Check out the latest post:
How To Clear LookUp Fields Using A Custom Page
This is just 1 of 582 articles. You can browse through all of them by going to the main blog page, or navigate through different categories to find more content you are interested in. You can also subscribe and get new blog posts emailed to you directly.