*** NOTE: ALL INFORMATION IS ACCURATE AT DATE OF PUBLISHING ***
Don’t use the Dynamics 365 Sales Accelerator functionality WITHOUT setting up your assignment rules for Leads and Opportunities. Right? A bit silly not to take full advantage of the functionality. First make sure you’ve gone through all of the work assignment settings and added in your seller logic to determine which sellers can have records assigned AND what attributes you might want to use to determine those sales assignment rules. Then we can get to work on creating an assignment rule. Let’s jump in!
Navigate to the Sales Insights settings area then to Work assignment. From here you will find the option to add an assignment rule.

Give the rule a name. Although you can link a segment to multiple rules, a rule is only linked to one segment so this is where you can determine which segment the rule is for. You can add in additional conditions which would be used on top of the segment logic. So consider a segment that is based on new leads created from a form submitted on the website. For each assignment rule you could also add in a condition for Language, then create multiple assignment rules (one for each language) to link to the segment. You can tick to consider leads created in the last X hours. Keep in mind this only lets you go back 5 days (120 hours). Any other Leads you would need to assign manually and link to any sales sequence.

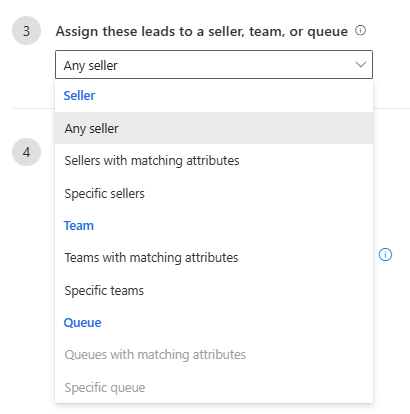
Next you can pick which group of sellers would have the Leads (or Opportunities) assigned to them. You can select Any seller (based on those in your Work Assignment settings), those with matching attributes or a specific list of sellers. The same can also be done for Teams or Queues you might have set up.
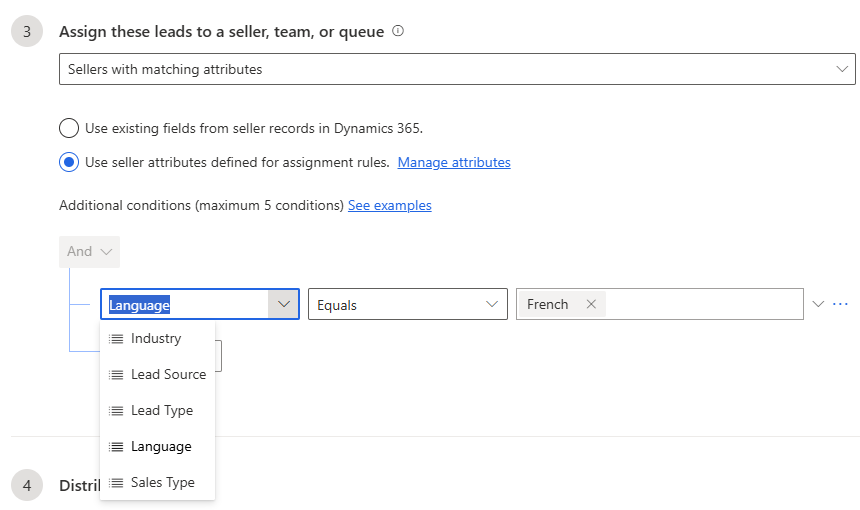
Picking sellers with matching attributes gives you the option to use fields on user records to select. So it could be all users that report to a specific user via the Manager field, or users within a specific Territory or Business Unit.

Using attributes will then give you the list of all attributes set up in the Work Assignment settings area. Here we can select sellers that have the Language attribute and the value of French applied for example.
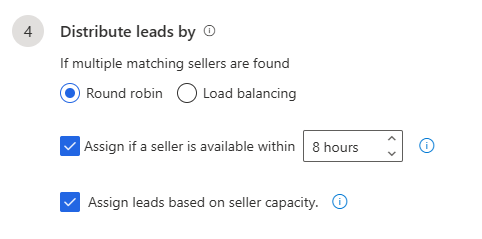
Once records have been matched to sellers, distribution can be done using round-robin (evenly distributed leads) or load balancing (leads distributed based on current load). For multiple team or queue matches, you can either let it randomly assign a record to one or leave it unassigned in the pool.
Once you’ve finished creating the Assignment rule, you will see it linked on the relevant tab on the Segment.

Looking at the segment properties you can then run the assignment rules for any unassigned records in the segment already. You also have the option to add a schedule.

This allows you to determine when records are being assigned out which could be useful to make sure people aren’t getting new records over the weekend or during odd hours. You can set up to two times throughout the day when records will be assigned out. This helps stagger the workload for users.

Although assignment rules are not needed for a Segment, they can be useful especially when it comes to sales processes that need experienced people or those with a specific set of skills to handle.
Check out the latest post:
How To Clear LookUp Fields Using A Custom Page
This is just 1 of 582 articles. You can browse through all of them by going to the main blog page, or navigate through different categories to find more content you are interested in. You can also subscribe and get new blog posts emailed to you directly.
Question: Have you ever tried to update the FetchXml in the assignment record itself to meet a requirement where the UI doesn’t provide that ability? Edge case I know but for me, when I try, it won’t work. It works if I use anything provided in the UI but I would assume the plugin uses the FetchXml so it shouldn’t matter. Perhaps it does though…
I saw your blog post and that you figured it all out. Nice work Kellie!
Quick update on this! I figured it out – there are two fields with the FetchXml and I had only updated the one. So it IS possible FYI!