*** NOTE: ALL INFORMATION IS ACCURATE AT DATE OF PUBLISHING ***
Themes have been around in Dataverse/D365/CRM for years and years. In fact, I wrote about how to create them back in 2017 when I first started this blog! There has since been an additional way to modify the app headers (although I am not a fan because it is limited and there is no way yet to add a logo), but all Model-driven apps (MDA) have a default theme regardless and even if you don’t realise. Custom pages are used within an MDA so why not make them look a bit more like they belong? We can do that by adding the default theme and accessing colours dynamically. Let’s take a look.
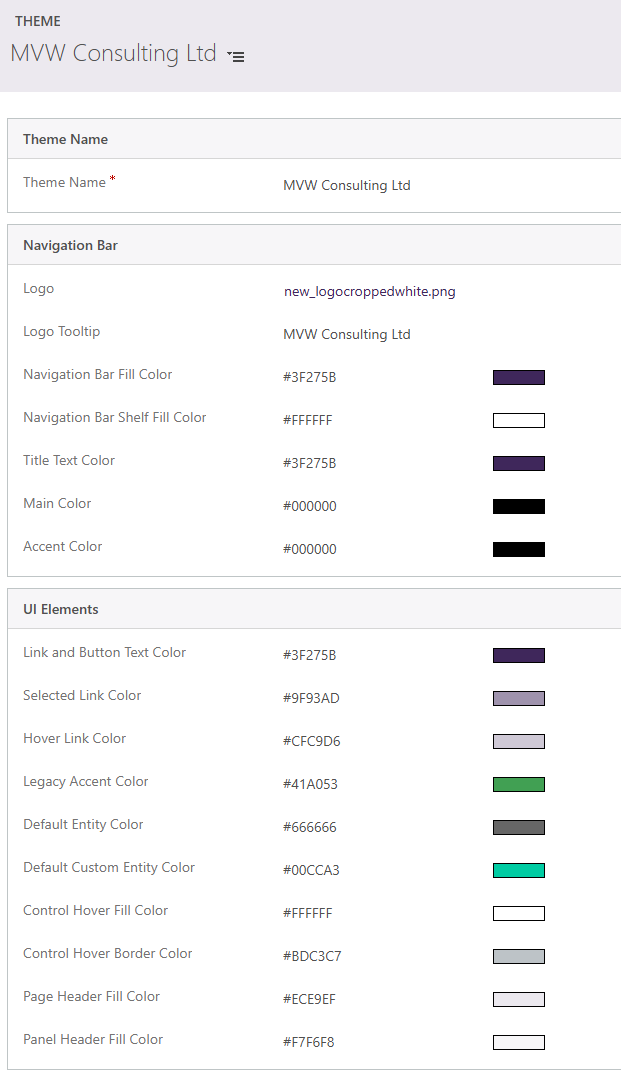
First, this is what a theme looks like. You can find them by going to a link like this, with your link in place of yourCRMlink. This will then take you to the list of all themes you have. Only one of them can be the default and determines the colours used on hyperlinks, buttons, business process flows, views etc. Each environment (PRODUCTION, UAT, DEVELOPMENT) has it’s own default so in theory could be completely different in each one. Even better to set the colours dynamically in your custom page!
https://yourCRMlink.dynamics.com/main.aspx?forceClassic=1&pagetype=entitylist&etn=theme
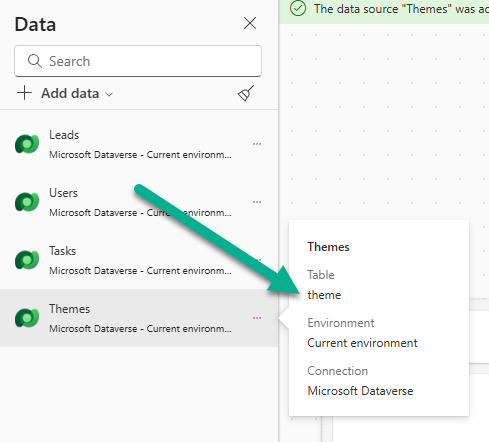
To access that in the custom page, add in Themes to the Data panel. Make sure you pick the one named theme rather than any other possible table that could be in there (especially if you have anything custom included in your environment).
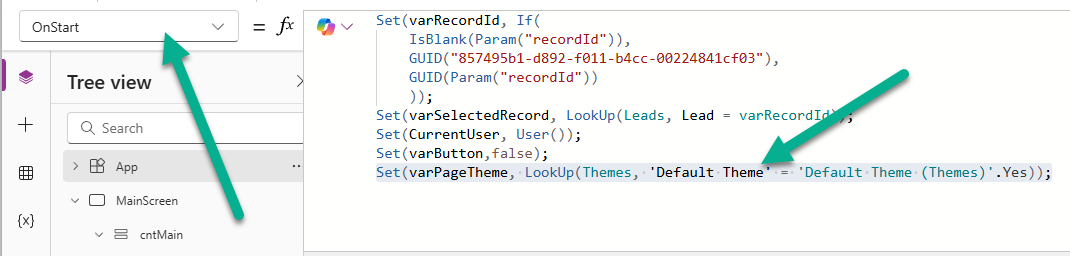
Now go to the App> OnStart formula and add in the following. This will set a variable called varPageTheme with the theme in your environment that has the Default Theme field set as Yes.
Set(varPageTheme, LookUp(Themes, 'Default Theme' = 'Default Theme (Themes)'.Yes));
Now you can simply reference the colour you want to use for different things by going in to the properties for something (button for example) and setting the FillColor or the TextColor to determine which value to use from the theme. The navigation bar fill color in my theme is a nice deep purple, so here is how I would set this on the FillColor property of a button.
ColorValue(varPageTheme.'Navigation Bar Fill Color')
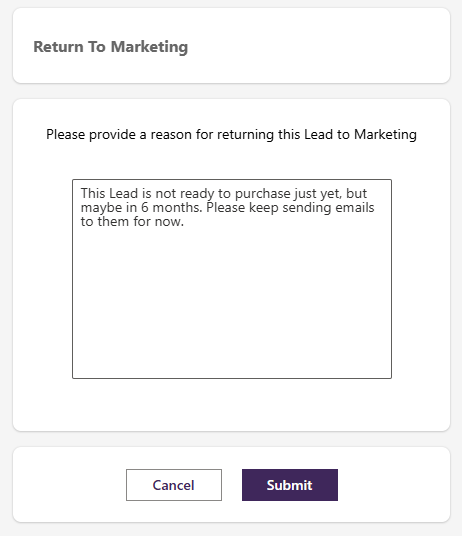
This is how I set up my Cancel and Submit buttons.
- Cancel Button – FillColor – ColorValue(varPageTheme.’Navigation Bar Shelf Fill Color’)
- Cancel Button – TextColor – ColorValue(varPageTheme.’Navigation Bar Fill Color’)
- Cancel Button – BorderColor – ColorValue(varPageTheme.’Control Hover Border Color’)
- Submit Button – FillColor – ColorValue(varPageTheme.’Navigation Bar Fill Color’)
- Submit Button – TextColor – ColorValue(varPageTheme.’Navigation Bar Shelf Fill Color’)
So review your current default theme in Dateverse, then decide which colours would look best for your custom page. You can then take it from something like this:
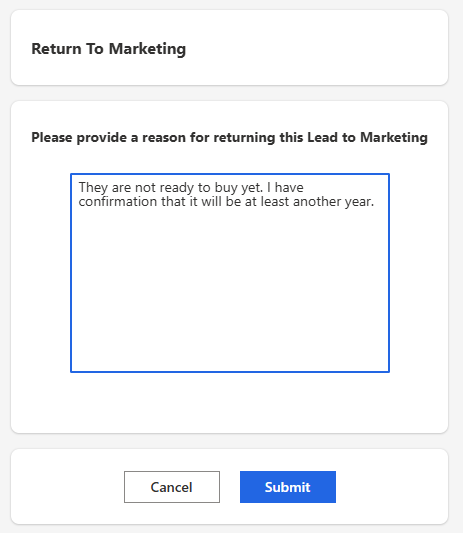
To a nicer themed custom page that fits in with the default theme of your environment and all of the MDA’s you add it to without much effort at all!
Check out the latest post:
Adding Multiple Screens To A Custom Page To Provide Confirmation Of New Record Creation
Hitting platform limits?
Custom Pages remove the workarounds
Stop bending processes to fit templates. Custom Pages are built to support complex logic, integrations, and user flows properly.
This is just 1 of 576 articles. You can browse through all of them by going to the main blog page, or navigate through different categories to find more content you are interested in. You can also subscribe and get new blog posts emailed to you directly.