*** NOTE: ALL INFORMATION IS ACCURATE AT DATE OF PUBLISHING ***
Following on from part two in this series, this post talks about how to bring over any email attachments from a source CRM instance in to the destination CRM instance. Email messages are it’s own entity, and these will need to be migrated first. However, this will not bring over any of the email attachments themselves. For this, we need to add in a new data flow to achieve this.
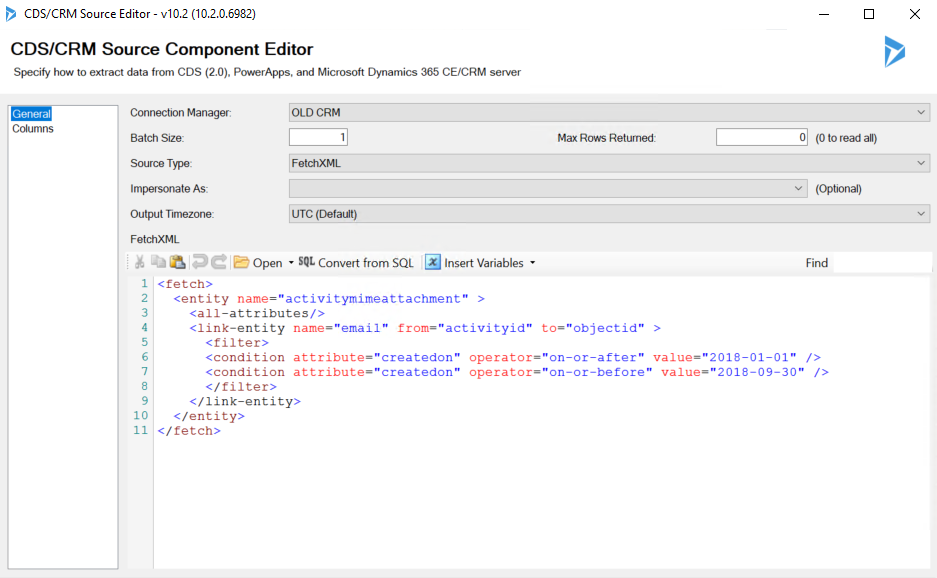
First create a new Data Flow task (see part one for this). Add in your Source CRM step, select the instance from the Connection Manager, and set the Batch Size to 1 (more on that in a moment). Using a FetchXML query, set your filtering with some conditions based on the created on field of the emails. Probably a good idea to do a relatively small number to test with first and make sure it’s all working.
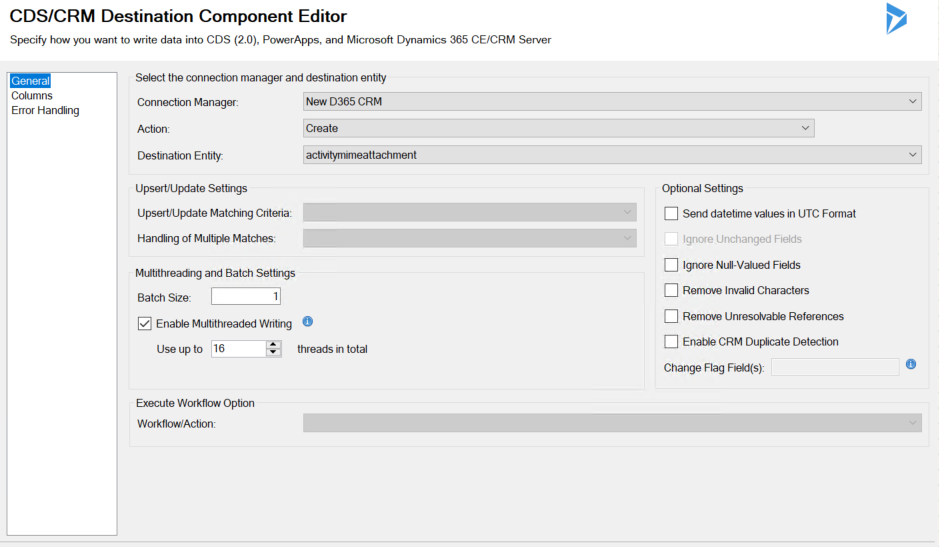
Add your destination CRM step and select the correct environment from the connection manager field. Your action will be Create, and the destination entity is activitymimeattachment. Set the Batch Size to 1, and then tick to enable multithreaded writing. Set the number of threads to 16.
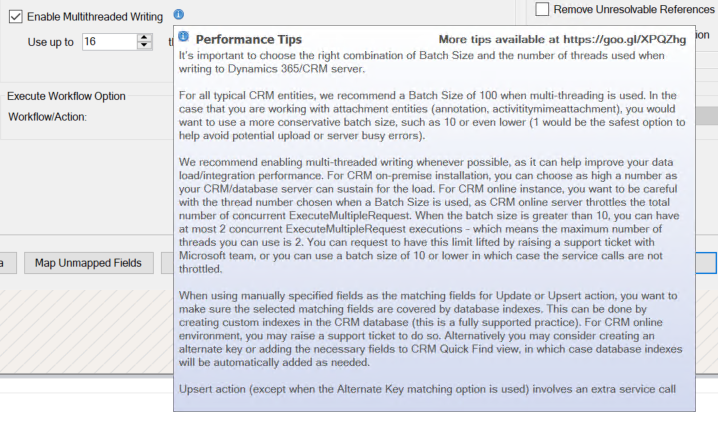
If you want some more detail on how batch sizes and multi-threading work, click on the information icon next to the enable multithreaded writing box. This will provide you with some performance tips. In here you will see details of what batch sizes are recommended. Notice that it clearly states if working with activitymimeattachments you should be very conservative with the number with 1 being the safest. This is especially important if you are moving files from a very slow on premise server. Anything higher and your data flow can end up failing due to lack of resources.
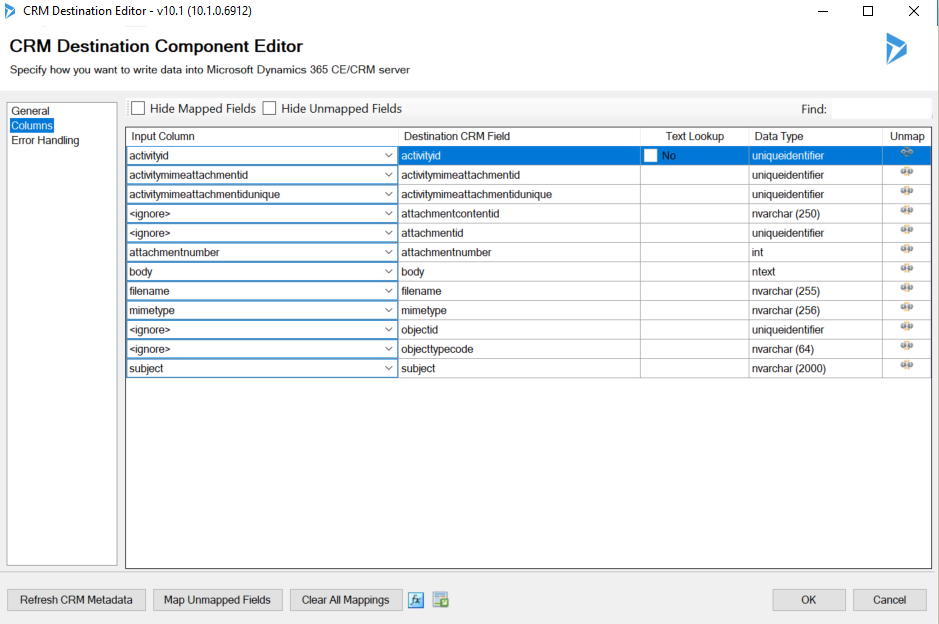
Clicking on the Columns tab on the menu for the destination, make sure your mappings are set to the same as below. Click OK. Finally, add your error log file step (see more on part two) and make sure you are sending your errors to file for review. Start your data flow and sit back! Your job ‘should‘ be done. 🙂
Check out the latest post:
Set A Business Process Flow Stage With Custom Page
This is just 1 of 572 articles. You can browse through all of them by going to the main blog page, or navigate through different categories to find more content you are interested in. You can also subscribe and get new blog posts emailed to you directly.