*** NOTE: ALL INFORMATION IS ACCURATE AT DATE OF PUBLISHING ***
Hopefully by now you’ve added a Custom page to one of your Model-driven Apps (MDA). Once you’ve done this, it is so satisfying, and a great way to extend functionality for your users. When you add the button it’s important to make sure it opens and that can be what you focus on the most, but what about times when that button shouldn’t be there? Have you thought about the logic of when it should be visible to a user? In this post we will look at how you can show or hide custom pages using Power Fx formulas to set a condition on the visibility of that button.
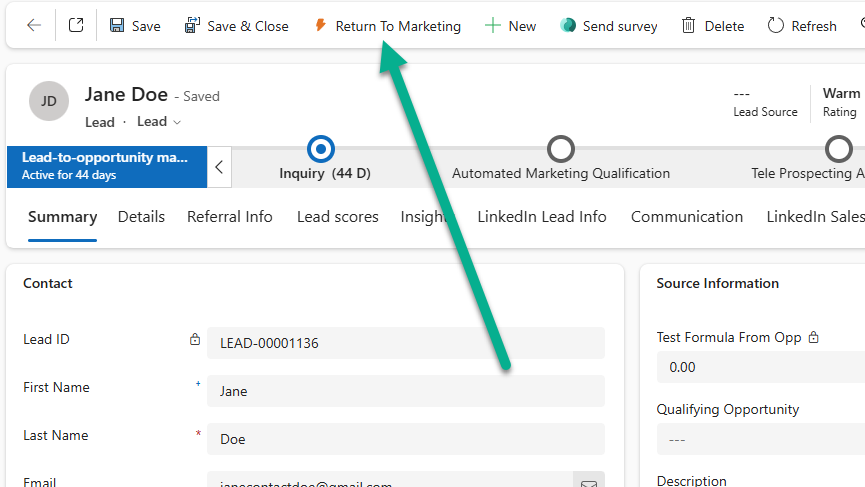
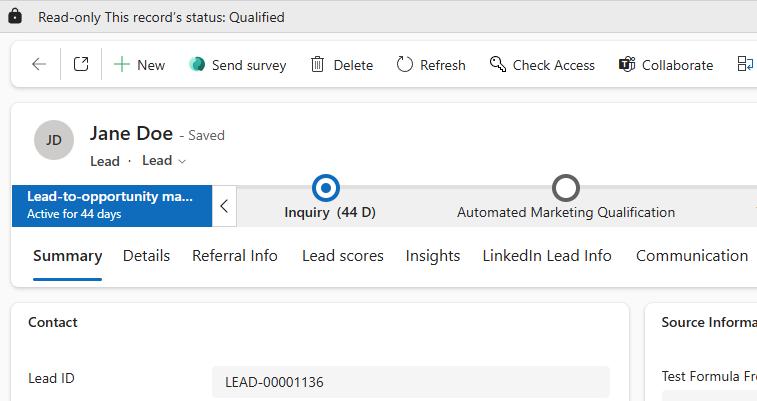
So, here is our button looking pretty. It’s great that it shows but what if that Lead is already Qualified or Disqualified? Or if it already has a specific value in a specific field? For that, we can change the visibility logic on the button.
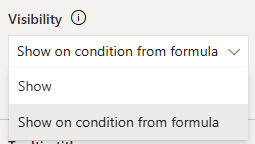
From make.powerapps.com, go in to a solution to edit the MDA that contains the button on the command bar. Once in the MDA, find the table, click the ellipsis menu (three buttons) from view section then edit the command bar. In this case it is the main form command bar. Find your button and click on it. Now from the right side command panel, find the Visibility section and change it from Show to Show on condition from formula.
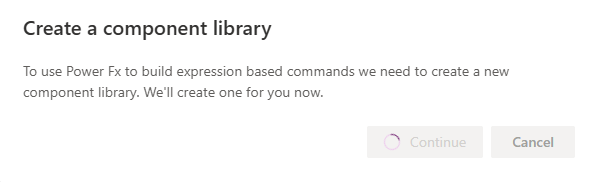
The first time you select this you may see the following message about a component library needing to be created. Click continue.
Right at the top you should see the formula bar. By default the visible logic is true, meaning your button will always show.

Delete the word true and instead, start typing out the following. Self.Selected.Item. You should see things start to appear as the IntelliSense kicks in. Once you get those first three parts in, add another dot, then you can start typing out the name of a field you want to use as a filter. For this I want to use the Status field of the Lead so will pick that one. After that, an equals sign, then start typing Status again so that I can find all of the possible values from the Status field.
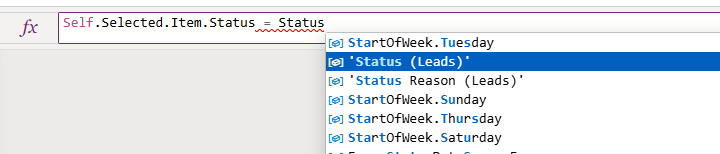
After picking the Status field, I can add a dot which then allows me to pick WHICH status I want to use. So in this below, we are saying that the current Lead we are looking at must have a Status that equals Open.

If we want to add in additional logic, we can join another condition with && which means and in plain English, or you could use ‘And’ with an upper case A and lower case nd. So below we have that the current Lead we are looking at must have a Status that equals Open AND the Marketing Lead field value must be No.

If you want to do OR logic, add in two pipe characters, or you can add ‘Or’ with an upper case O and lower case r. In the logic below I only want to show the button when the Status of the Lead we are looking at is Open, and if the Marketing Lead field is No OR the Status Reason does not equal Marketing Qualified.
Self.Selected.Item.Status = 'Status (Leads)'.Open &&
(Self.Selected.Item.'Marketing Lead' = 'Marketing Lead (Leads)'.No || Self.Selected.Item.'Status Reason' <> 'Status Reason (Leads)'.'Marketing Qualified')

Once you have finished your visibility logic, save and publish the command bar. Then go and open the MDA and test that logic thoroughly to make sure it shows and hides the button as you expected and wanted to.
Check out the latest post:
Use The Dynamics Environment Default Theme In Your Custom Pages
This is just 1 of 565 articles. You can browse through all of them by going to the main blog page, or navigate through different categories to find more content you are interested in. You can also subscribe and get new blog posts emailed to you directly.