*** NOTE: ALL INFORMATION IS ACCURATE AT DATE OF PUBLISHING ***
You’ve set up your Power Pages site, and patted yourself on the back. Nice work! But it looks generic, and NOTHING like your organisation or clients company branding. How do you start making it look a bit better and more inline with the guidelines? Previously I would start by getting the CSS of the main corporate website for the company, then upload attached to a web file against the home web page. This post will look at how to make changes via the maker portal for the power page, and what is going on behind the scenes.
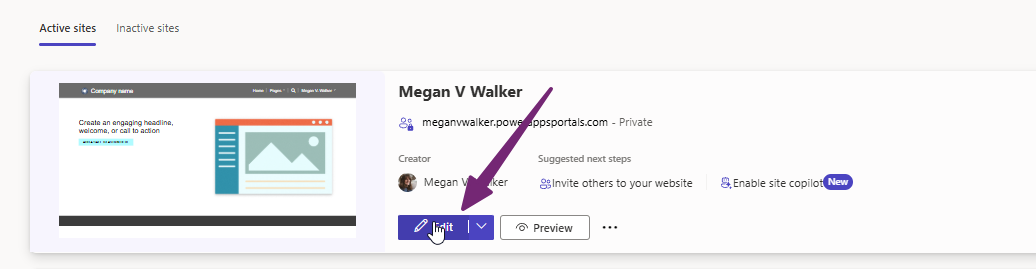
First, going to https://make.powerpages.microsoft.com, you will then see a list of your active sites. Each one will have an Edit button that you can click on.
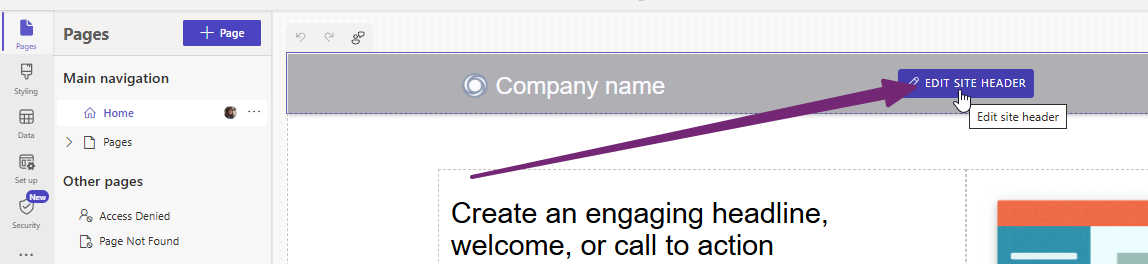
Once you are in the design studio, you can then start making changes. On the Home page, hovering your mouse over the navigation bar along the top gives you access to edit the site header.
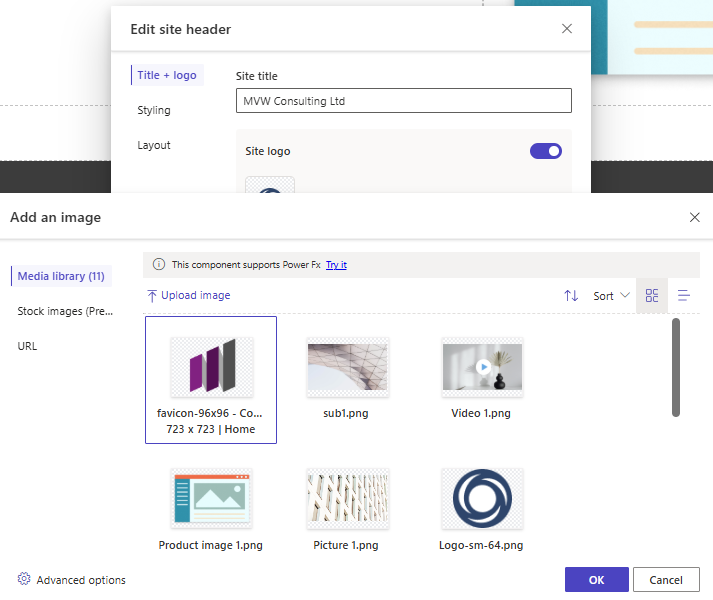
First thing is to change the title and logo for your site. This gives you the ability to upload an image if you wan to use one in the header.
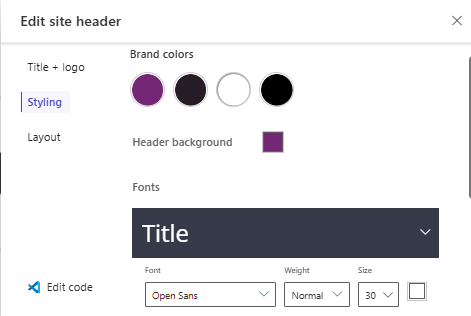
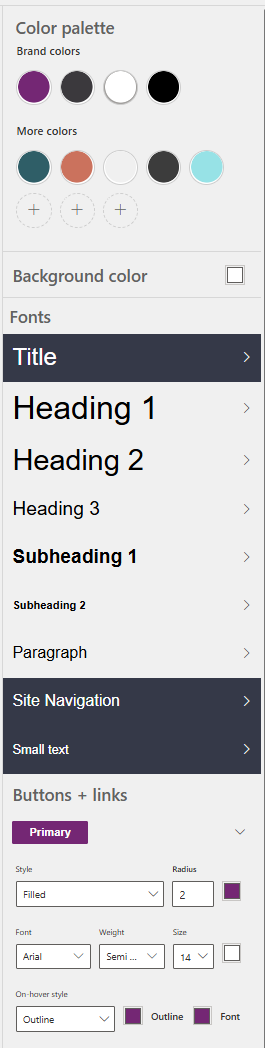
The styling gives you a few items to change including four brand colours and the background colour of the header. Then you can change the fonts used for the title and site navigation. So not everything, but a few bits and pieces.
To change more about the styling click on Styling from the left hand navigation menu. I found this a bit odd. I can pick one of the themes as a starting point. However, it’s unlikely to meet all of your needs so you can then change aspects of the styling and save it. That’s cool. But I can’t take one and rename it. So the theme named Turquoise could end up anything but turquoise if I make lots of changes. Maybe it’s just my brain, but I wanted to be able to change the name to reflect that it had been customised.
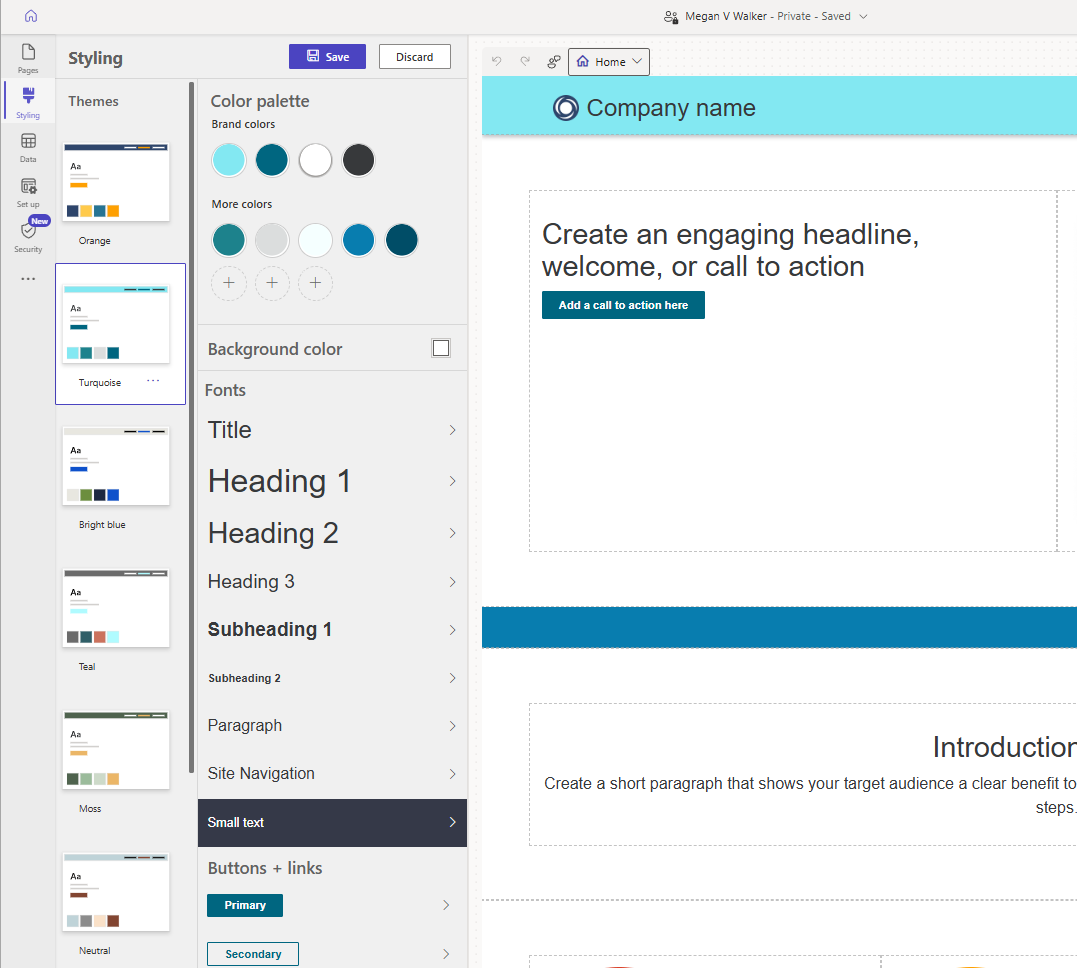
There are a ton of settings and things that can be changed so clicking in to a style gives you further aspects including border radius, font, font weight and size, if you want outlines for buttons, underlines for links etc.
You can click the three dots for a theme and reset it back to the default if you have changed it. However, you can also click on Manage CSS which takes you to a screen where you can upload your own CSS file.
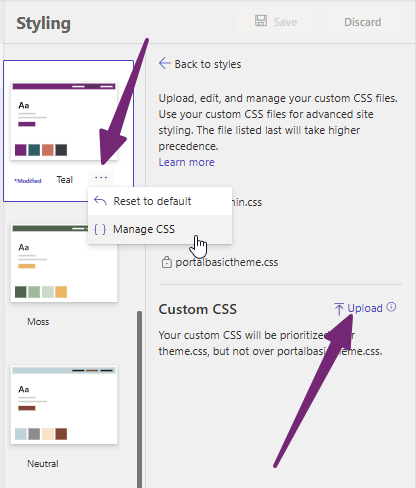
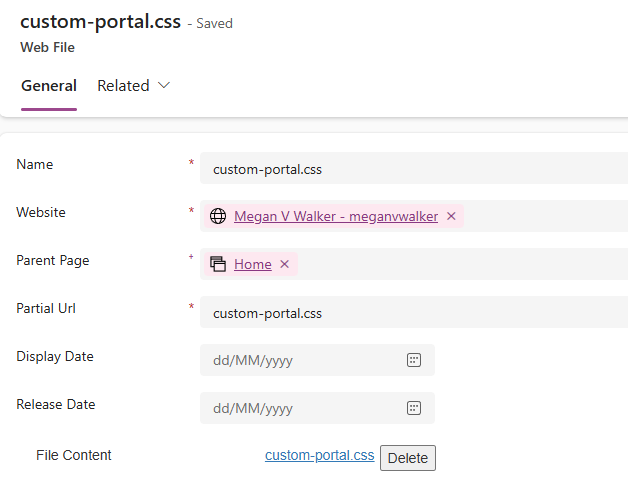
This is what I was familiar with and would always do for styles on portals I worked on. I would upload a CSS file against the Home parent page, save it, and add a note including the file. Now, if I choose to upload my CSS file using the option above, it will be added like you see below. No need to use the Power Pages Management app to do it. One thing I love now, no need to create a note each time you want to upload a file. Much more intuitive this way. Keep in mind that there are already several CSS files that exist for a portal. You’ve got bootstrap.min.css, theme.css and portalbasictheme.css. Your custom CSS will be prioritized over theme.css, but not over portalbasictheme.css. So any changes you make using the theme styling editor tool will be made directly in to the portalbasictheme.css which will be top dog for your styling. Then anything you have in your custom CSS file will be used next and so on. You may have some styles in one file but not the other which ends up creating your literal cascading style sheet. 😊
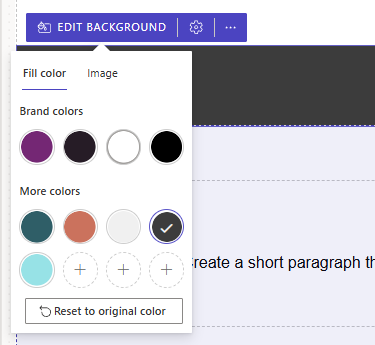
Moving on, you can hover your mouse over different components within the portal on different pages, and get a button to edit that component. Here we can see the option to change the colour of a background, or even upload and use an image instead if that is desired.
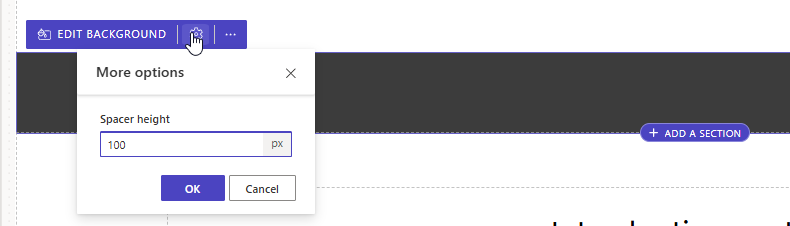
You can also click on the gear icon to adjust the height of different components if indeed it has that as an option.
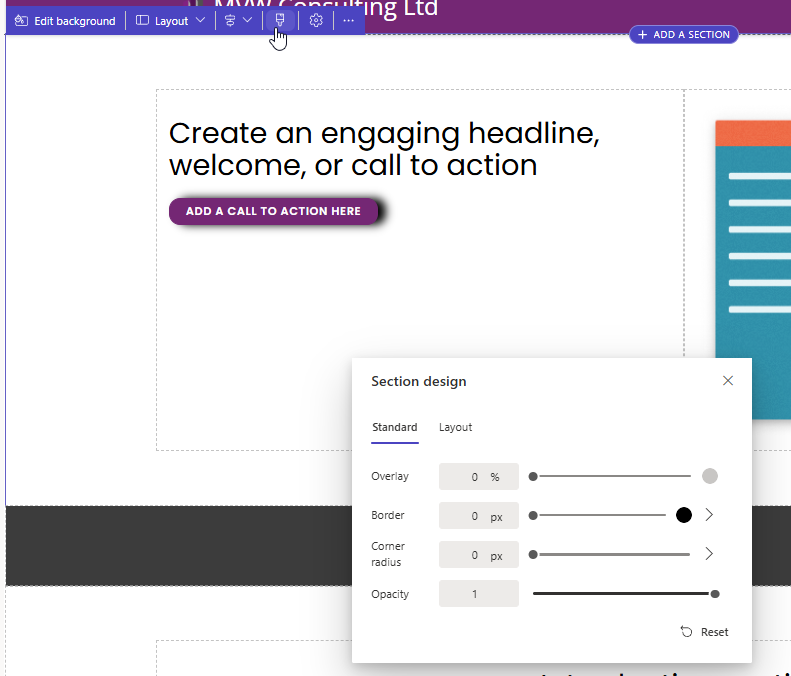
Clicking on sections if you see the styling icon, clicking on it gives you options to adjust the look and feel of it. So click around and see what options you have.
Syncing the changes you are making should be done automatically, and the design studio should show you immediately what it looks like as you adjust the styling. If you are new to building sites, using the editing and styling tool is great. If you are more comfortable and understand CSS, having the ability to upload your own custom CSS is even better. It’s all about what skill level you are at, and the requirements you have for the Power Pages site. For me, I think I will stick to working on my custom CSS file and only use the theme styling for bits and pieces when needed.
Check out the latest post:
Create A Segment Using Unmapped Fields On Marketing Forms in Customer Insights Journeys
This is just 1 of 601 articles. You can browse through all of them by going to the main blog page, or navigate through different categories to find more content you are interested in. You can also subscribe and get new blog posts emailed to you directly.