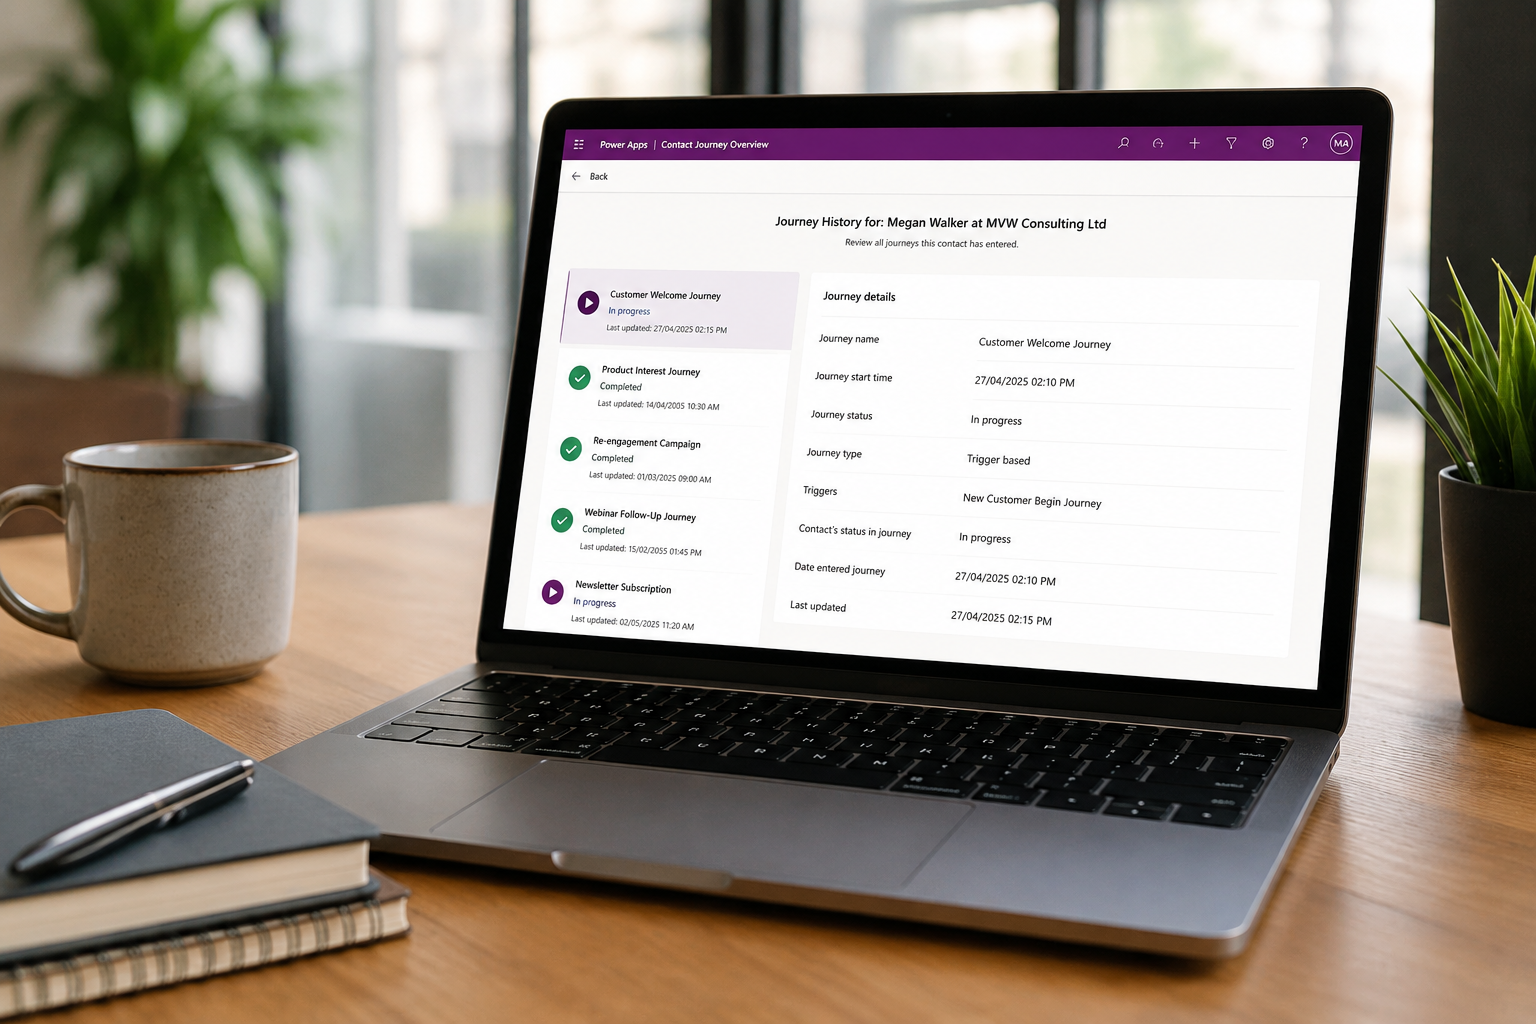
One of the things I enjoy most about custom pages is the ability to surface information from multiple tables in a way that makes sense to users. I built a Contact Journey Overview custom page that provides a complete view of a contact’s participation in Customer Insights – Journeys. By opening the page directly from a Contact record, users can see which journeys a contact has entered, whether those journeys are still active or have completed, and the triggers associated with them, all without leaving the Contact context. In this post, I’ll walk through how the custom page works, how data is loaded and displayed, and some of the techniques used to create a responsive and user-friendly experience.
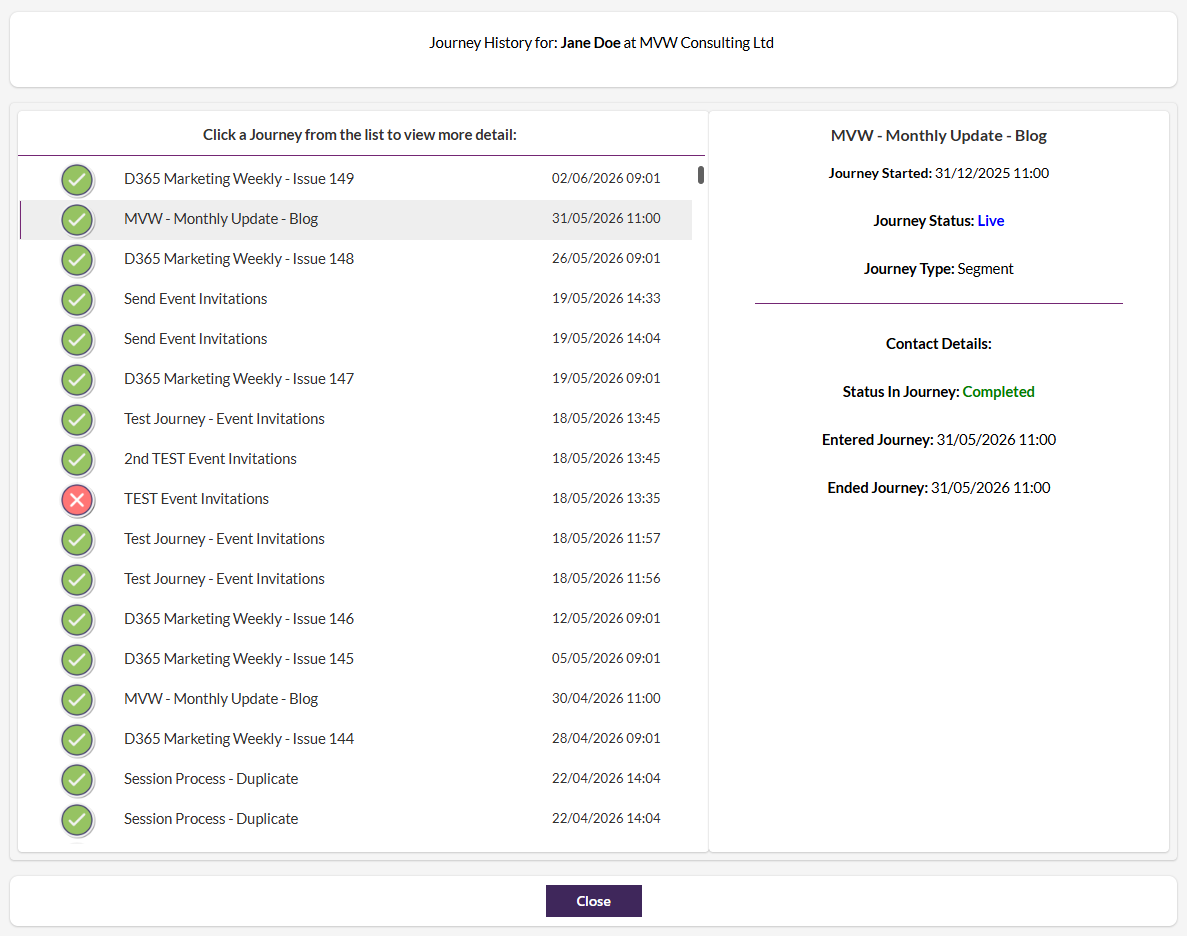
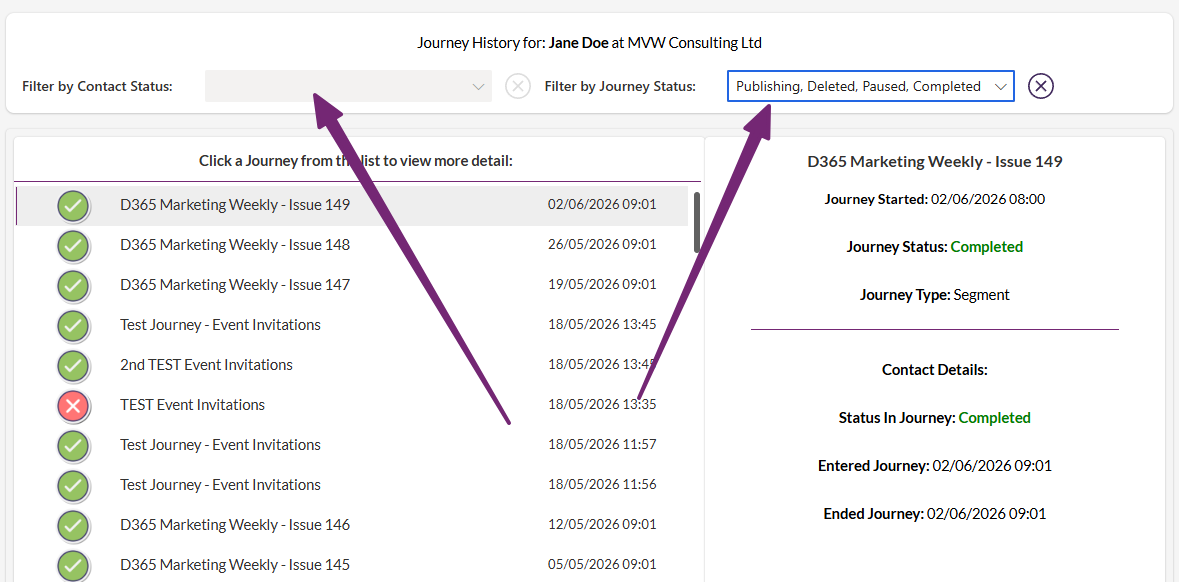
First, why build a custom page? Well it’s frustrating, but the information about Journeys a contact has gone through or currently a part of does not exist currently from a Contact (or Lead) record. If a user wanted to understand quickly what journeys they have been added to, they would have to go through a convoluted approach of reviewing email insights and individual journeys and it would take ages. Even then, it would be really difficult to see which of those journeys are complete vs those that are in progress. Below you can see the finished custom page I am working towards. A list of all journeys from most recent to oldest with an indicator of completed, in progress or any errors within a journey. Clicking on a journey from the list will show when the journey itself started, the journey status and if it was for a segment or from a trigger. Then the details about the contact and their status within the journey, when they entered it and when they ended or exited.
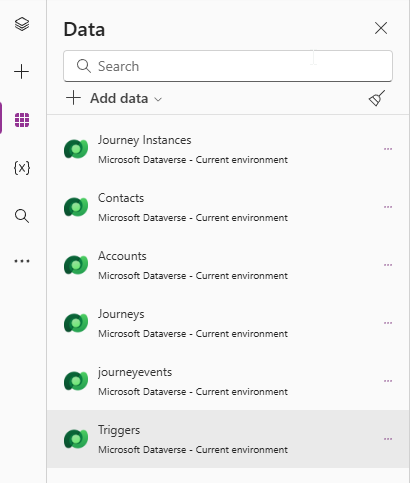
If you’ve never built a custom page, start by checking out previous blogs in the Custom Pages category, that should help you with some basics. The custom page begins with making sure the correct tables are in there. My page is linked to Contacts, but you could easily make a version for Leads if you wanted to. We need the Journeys, Journey Instances, journeyevents and Triggers table. I am including the Accounts table along with the Contacts table mainly so I can display the Company Name when the page opens, but definitely not something you need in there.
Once you have the tables in there, we can get started with loading in the data when the page opens. The OnStart will first check for a recordId, which would be passed through when opened from a Contact record using a button on the command bar (ribbon). If no recordId is passed. which will be the case when you are building and testing the page, we can hard code a specific Contact GUID instead, so get one from your environment you know has gone through some Journeys to use in your set up. Then we look up the Contact and set as the varSelectedRecord which is the Contact the page is then focused on.
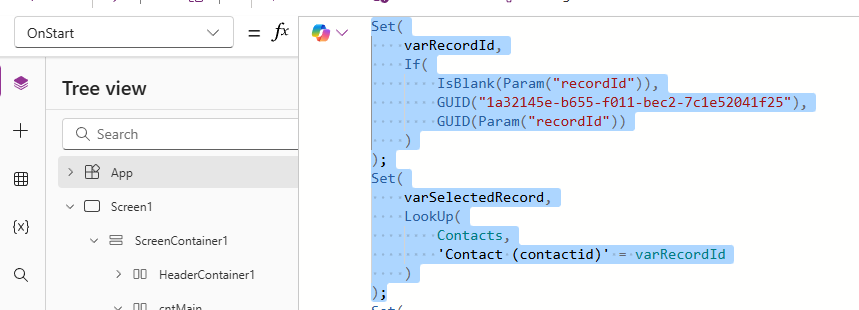
Set(
    varRecordId,
    If(
        IsBlank(Param("recordId")),
        GUID("1a32145e-b655-f011-bec2-7c1e52041f25"),
        GUID(Param("recordId"))
    )
);
Set(
    varSelectedRecord,
    LookUp(
        Contacts,
        'Contact (contactid)' = varRecordId
    )
);
Next I am checking to see if the Contact is linked to an Account, and if so, setting that in a varAccount variable. Again, I am just using this to show in the header of the page, not required. But if you did, you can show something like: Journey History for: Megan Walker at MVW Consulting Ltd
Set(
    varAccount,
    If(IsType(varSelectedRecord.'Company Name',Accounts),
    AsType(varSelectedRecord.'Company Name', Accounts)
)
);
This next part is where we pull in the Journey history for the Contact. It looks in Journey Instances where the Target Id matches the Contact ID. Then it sorts them by most recently modified first. Then it adds an extra column called JourneyRecord, which looks up the actual Journey definition from the Journeys table. That extra lookup is what allows the page to show the Journey name, status, start time, and other journey-level details.
ClearCollect(
    ContactJourneys,

        AddColumns(
            SortByColumns(
                Filter(
                    'Journey Instances',
                    'Target Id' = Text(varSelectedRecord.'Contact (contactid)')
                ),
                "modifiedon",
                SortOrder.Descending
            ),

            JourneyRecord,
            LookUp(
                'Journeys',
                Text(Journey) = 'Journey Definition Id'
            )
        )
);
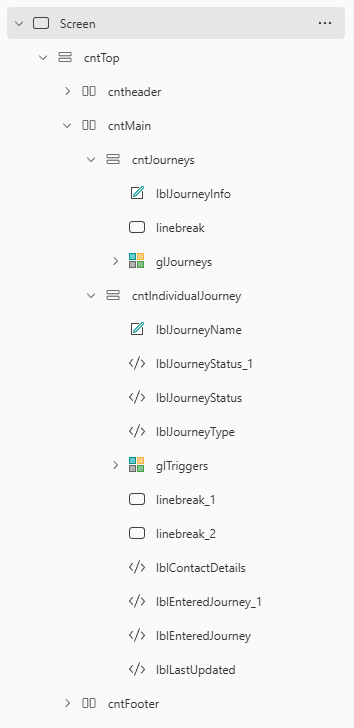
How you structure the data in the page is up to you, but this is what mine looks like. I have a header, then a main section with two containers that shows the list of the journeys on the left and the details of the selected journey on the right.
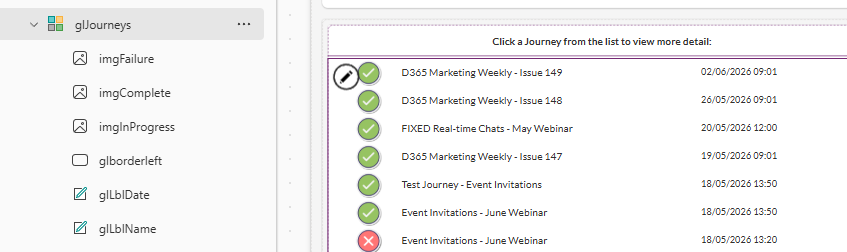
The left container has a gallery that uses the ContactJourneys collection created from the OnStart logic. Each row shows the Journey name, Modified date and an icon depending on whether the journey is completed, in progress or had some kind of failure or cancellation.
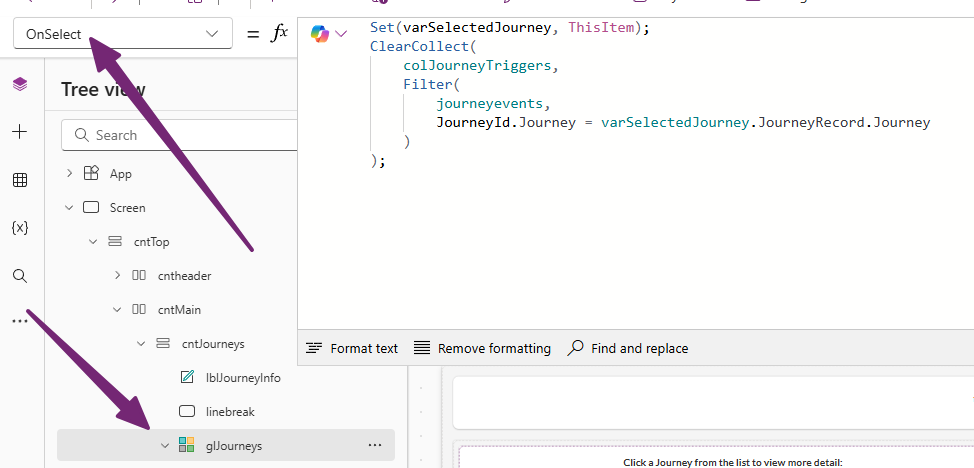
When you select a journey, it stores that selected item which is done with OnSelect on the gallery showing the Journeys. At the same time, it also collects details of any triggers used in the journey so that if the journey selected was started by a trigger, we can show which ones.
The right container has all of the details about the selected journey. It shows Journey name, Journey start time, Journey status, Journey type: Trigger or Segment, Trigger names if it is a trigger-based journey. Then the Contact’s status in the journey, Date entered into the journey, Last updated date, or ended journey date if completed.
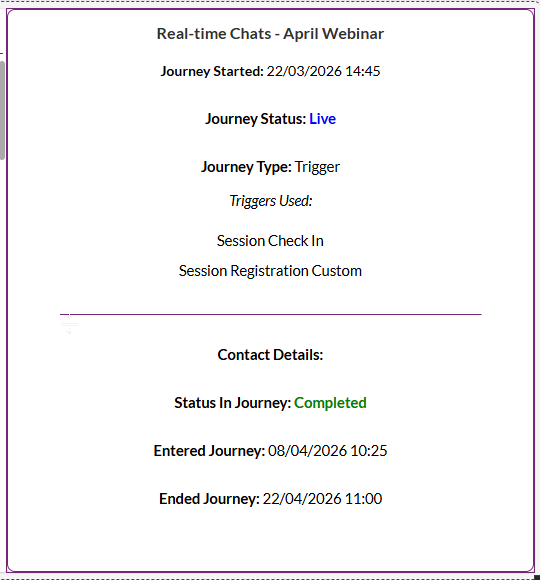
We can use an HTMLText component to show different colours for the status in journey for the contact (see below) and the status of the journey for quick visibility and understanding of the current situation.
"<center><b>Status In Journey:  <span style='color:" &
Switch(
    glJourneys.Selected.'Journey Instance State',
    'Journey Instance State (Journey Instances)'.Completed, "green",
    'Journey Instance State (Journey Instances)'.Inprogress, "blue",
    "red"
) &
"'>" &
glJourneys.Selected.'Journey Instance State' &
"</span></center>"
Finally, we can add filtering based on the status of the Contact in the journeys, or the status of the Journey itself. Disabling each drop down if the other is selected, and giving a clear icon to remove all selected values to get back to all of the Journeys again. Lots of options once you get started! What do you think? Can you see a use for building this in your own environment or for your clients?






Leave a Reply