*** NOTE: ALL INFORMATION IS ACCURATE AT DATE OF PUBLISHING ***
In the series of posts on Custom Pages, I’ve shown how to add buttons to open a page from the command bar, including providing a script you can use over and over again to make life a bit easier. That works great to open a custom page on a single record, but what if you want to select multiple records from a View, or from a SubGrid on a related record? Well that needs slightly different logic in both the script used to open it and within the custom page itself. In this post I will use the example of selecting multiple people to then create an event invitation record for them (based on this custom functionality shown in a previous post). We can use one script to add to the main grid or subgrid command bar. Lets jump in!
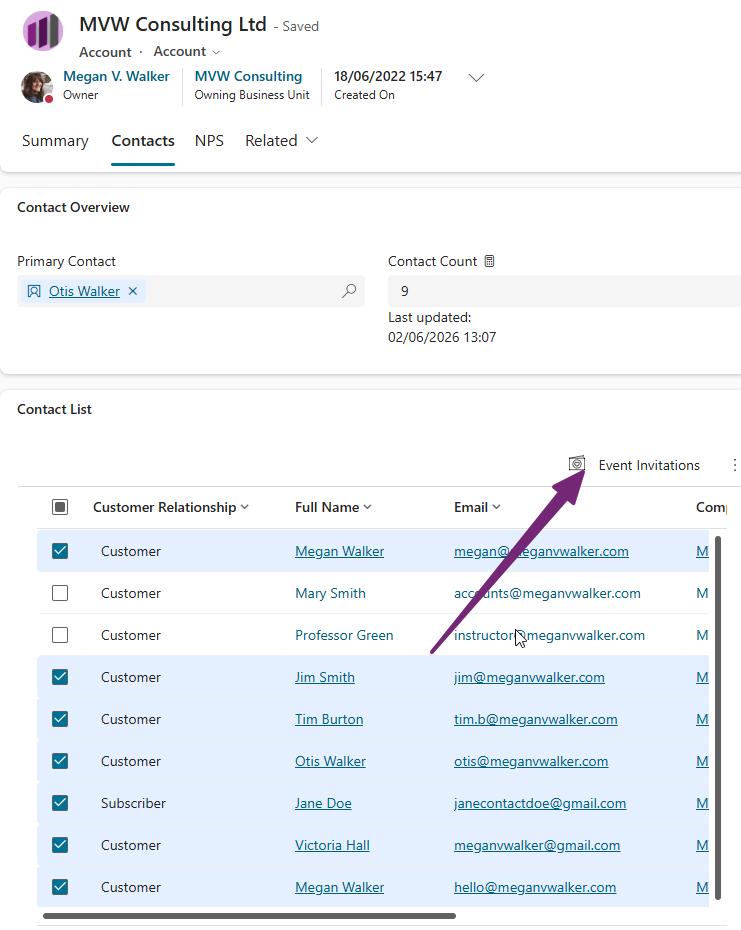
First, this is what I am referring to. I can select multiple records, in this case Contacts, from a grid, then use a button which will open my custom page. I can do the same from a View. But how can we do that?
First, lets look at the script that we will use to open the custom page, because this then ties in to the logic of the custom page. The bits that relate to the records selected are in the first line where we are passing a parameter of SelectedItems, then the idString which joins all of the Ids from the selected Contacts in to one comma separated list, then finally in the pageInput variable, we are passing the idString through as the recordId to the custom page. In plain English, we select the records, gather the Contact GUIDS, then push them in to the custom page we are opening so that we can do something with those records. We will come back to this later on.
function showDynamicCustomPageFromGrid(selectedItems, varCustomPage, varTitle, varTarget, varPosition, varHeight, varWidth, varError) {
    // selectedItems contains the GUIDs of all selected rows
    var idString = selectedItems.join(",");

    var pageInput = {
        pageType: "custom",
        name: varCustomPage,
        recordId: idString // Pass the list of IDs here
    };
   var navigationOptions = {
      title: varTitle,
      target: varTarget || 2,
      position: varPosition || 1,
      width: varWidth || 470,
      height: varHeight || 600
   };

   Xrm.Navigation.navigateTo(pageInput, navigationOptions)
      .then(function() {
         // Refresh parent form when dialog closes
         formContext.data.refresh();
      })
      .catch(function(error) {
         console.error(varError || "Custom page failed to open:", error);
      });
}
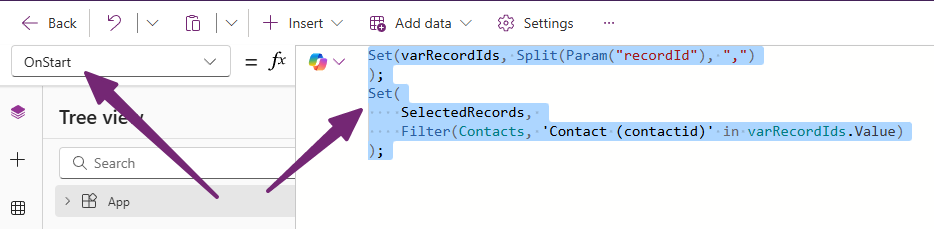
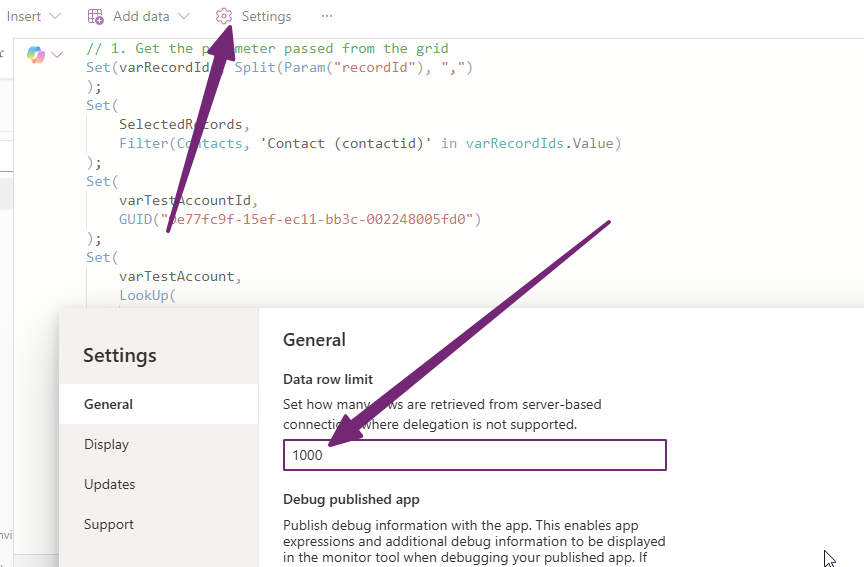
OK, lets start with the custom page. Mine has several tables added to it including Contacts, Events, Event Registrations and Event Invitations. We need to set some logic in the OnStart of the custom page so that when it is open, it can get the selected Contacts. So the first line takes the parameter called recordId that was passed from the script above when we selected the Contacts from a view, then splits it wherever there’s a comma, and stores the result in a variable called varRecordIds. Then the second part looks at the Contacts table and filters it down to only the records where the Contact ID matches one of those values in varRecordIds.
Set(varRecordIds, Split(Param("recordId"), ",")
);
Set(
    SelectedRecords,
    Filter(Contacts, 'Contact (contactid)' in varRecordIds.Value)
);
The next part is added in so that you can actually test out your custom page while building it. Obviously when you are in the designer and then review the page, you have no way to select multiple. So for this I am adding in the exact id from my example account in D365 so that I can use it when testing.
Set(
    varTestAccountId,
    GUID("0e77fc9f-15ef-ec11-bb3c-002248005fd0")
);
Set(
    varTestAccount,
    LookUp(
        Accounts,
        Account = varTestAccountId
    )
);
Ok now we can do a check to see if we need to use the test account, or we have real data because records were selected from a view or subgrid. So our first part checks to see if we have any records at all being passed via the recordId parameter or if the first record is empty. If so, we know that the custom page is not being used within D365 itself so we need to use the test account. I am then creating a collection of all Contacts linked to the test account and where the Contact status is Active. If we DO have some records in the recordId parameter that have been stored in the SelectedRecords parameter, we can get all of the Active Contacts found. Notice that in both instances, we are creating a collection called colActiveContacts so we can use that collection in the rest of the custom page regardless of if its in test (designer) mode, or live.
If(
    CountRows(varRecordIds) = 0 ||
    IsBlank(First(varRecordIds).Value),

    // 🔹 TEST MODE
      ClearCollect(
        colActiveContacts,
        Filter(
            Contacts,
            'Company Name' = varTestAccount And Status = 'Status (Contacts)'.Active
        )
    ),

    // 🔹 LIVE MODE (when opened from grid)
ClearCollect(
    colActiveContacts,
    Filter(
        SelectedRecords,
        Status = 0
    )
);
Once you have that sorted, you can add in any other functionality you need and build your custom page. In the example below, 9 is the number of records that ended up being added to the colActiveContacts collection because out of all of the ones selected from a view by the user, 9 of them were active and met the criteria. My page goes a step further based on the requirement to allow the selection of an Event from a combo box, then out of those selected, it shows how many can be invited to the Event vs how may have already been invited or registered so will not be invited again.

For the Patch, you will loop through all of the records in your collection. Notice mine is now a different collection from my initial colActiveContacts collection so that I only create a record for the Contacts who have not previously been invited or registered. This Patch statement is very simple and just creates an Event Invitation record by adding a Contact and the Event selected from the combo box (drop down). After the records are created, the Back() closes the custom page for the user.
ForAll(
   colNotInvitedContacts As contact,
    Patch(
        'Event Invitations',
        Defaults('Event Invitations'),
        {
            Contact: LookUp(Contacts, 'Contact (contactid)' = contact.'Contact (contactid)'),
            Event: drpEvents.Selected
        }
    )
);
Back();
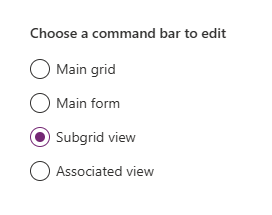
So, you have your script AND you have the logic to use in the Custom page. Now you need to combine the two. If you’ve not added a custom page to the command bar yet, go and check out this page here. Add the script provided at the start as a web resource then make sure you edit either the main grid of the subgrid view command bar.
Add your new command.
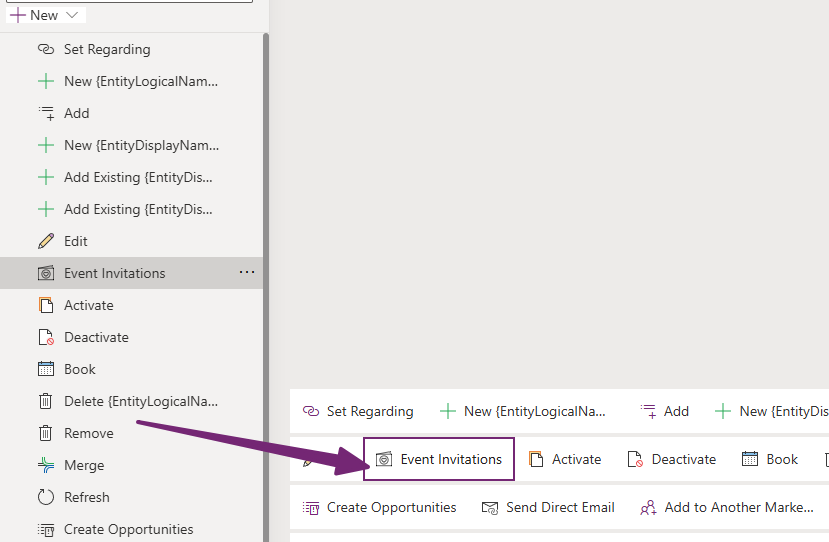
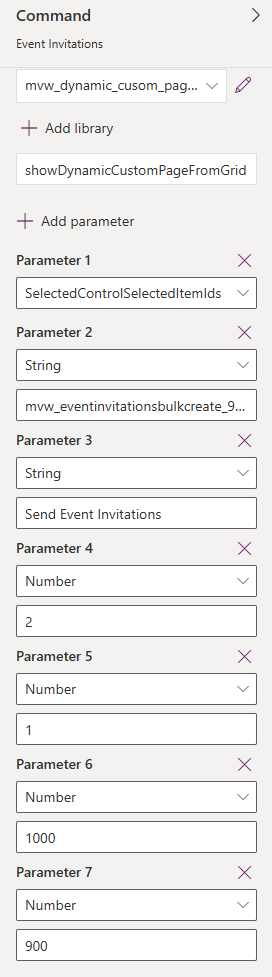
Then (using the blog above I just linked to) make sure you add the web resource that includes the script from the library, then the function. Then add in your parameters. Rather than PrimaryControl being the first one, you will need the SelectedControlSelectedItemIds option to be Parameter 1. Then follow on with the name of your custom page, the title, target, position, height and width.
For the visibility of the button, we can make sure that at least 1 record is selected before it even shows. For this you can use the following:
CountRows(Self.Selected.AllItems) > 0

One last thing… ideally common sense prevails and you do some filtering on a view or subgrid before selecting them all and using a custom page. However, one thing to note, you can select up to 1,000 records in D365 to Edit or do something with at one time. If you really have a need for this, make sure you update the settings on the custom page to increase the data row limit to match and also be 1,000 as it is 500 by default.
Check out the latest post:
Use Custom Event Registration Questions To Branch Your Journeys In Customer Insights
Considering Custom Pages?
Thinking about using Custom Pages but unsure where they fit best?
I help organisations design model-driven experiences that are intuitive, scalable, and built for real users, not just technical possibility.
This is just 1 of 603 articles. You can browse through all of them by going to the main blog page, or navigate through different categories to find more content you are interested in. You can also subscribe and get new blog posts emailed to you directly.