*** NOTE: ALL INFORMATION IS ACCURATE AT DATE OF PUBLISHING ***
I had a question the other day where someone asked if Conditional Content was possible in a Content Block. I assumed yes, but figured I should check just in case. Phew, I was right, you can! This is in Real-time Marketing only. This one is pretty straightforward to do, so a quick post. Let’s take a look at creating a Content Block to display a hero image in an email and change it based on a relationship type field on the Contact record.
First, navigate to the Real-time Marketing area and then Content Blocks. Start by adding your content block and giving it a name. In this case, we have an image added and that’s it.

Click on the ellipsis (3 dots) and then click on Enable conditional content.

Now we can see that on the right side panel we have a variations section. The image we added is the Default one, so if a Contact doesn’t meet any of our conditions, that’s the image that would be used. Click on New condition.

Here is a condition that checks to see if the Customer Relationship field on the Contact record equals Subscriber. Make sure you give the condition a logical name, then Save it. Add any other conditions you might need in the Content Block. Try to only use logic from the Contact, or record types that are directly linked to the Contact rather than anything with filtering or from triggers. That way the Content Block can be used in any email.

Once you have your conditions set up, you will see a block for each one. Click on one of the conditions and you should see a pink border around it. This shows the variation of the conditional content block that is currently being edited. Click on the properties tab.

This is where you can change the image for that specific condition. Update the image for each condition you created.

Now we can see each variation of this block has a different image. Once finished, save the Content Block and make it live so it can be used.

Now you can add your content block to an email. When you do, you will notice that the conditions are added on the Personalize tab.

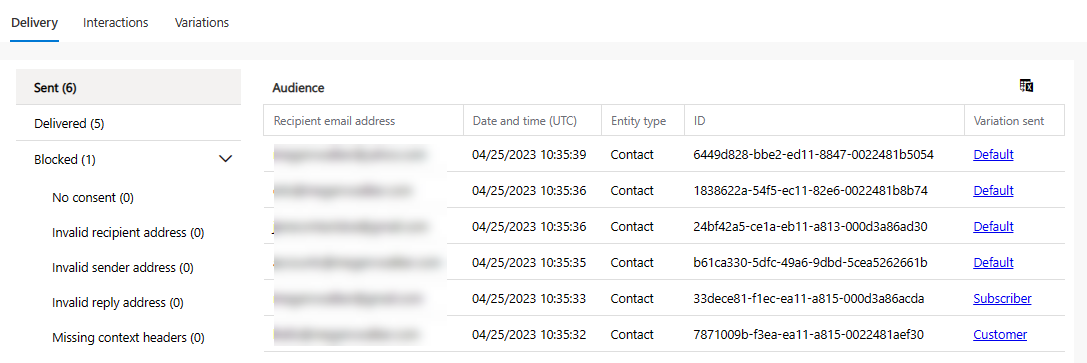
Once the Journey starts and email are being sent out, you can look at the analytics of the email message. Clicking on the Delivery tab you can see all of the Audience members, and on the far right you will see the name of the variation of the email that person received.
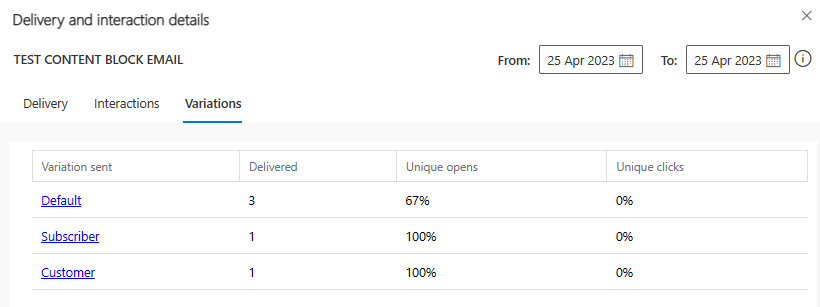
If you click on the Variations tab, you can see each variation along with the number of emails of that type delivered, percentage of unique opens and unique clicks.
I hope this helps!
Check out the latest post:
Use Custom Event Registration Questions To Branch Your Journeys In Customer Insights
This is just 1 of 603 articles. You can browse through all of them by going to the main blog page, or navigate through different categories to find more content you are interested in. You can also subscribe and get new blog posts emailed to you directly.