*** NOTE: ALL INFORMATION IS ACCURATE AT DATE OF PUBLISHING ***
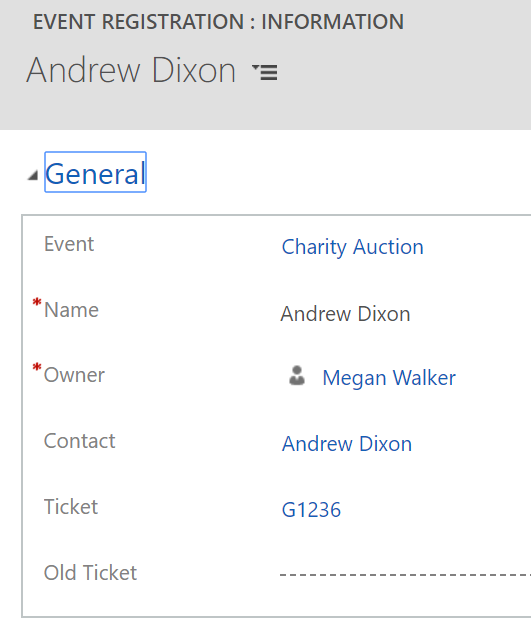
I couldn’t figure out a good title for this one, so let me explain what I mean. Let’s say you have an entity with a lookup field to link it to another entity. I’ll use the example of an Event record. Someone wants to register for the event, so you create an Even Registration record. There are so many tickets for the event, and each ticket is numbered for a specific seat or section, so you have a Ticket record. From the Event Registration record you have a lookup to tickets that are ‘available’. Once you have selected a ticket, we can create a workflow that will update the status of that ticket to ‘booked’.
That’s great! Easy way to track the number of available tickets left. However, what if someone who has already booked a ticket calls back and asks if something better is available, or wants to change the session they have booked? We need to remove the link to the previously booked ticket, and select a new one. The workflow then needs to update the status of the new ticket selected to being booked, but also needs to go back to the de-selected ticket and update that to being available again. Here’s how we can accomplish that.
The first thing to do is add an identical lookup field to the entity where you wish to update the status. So, in this example, on the Event Registration entity there is a Ticket field which is a Lookup field to the Ticket entity. Then we have an Old Ticket field which is also a Lookup field to the Ticket entity. The second ‘old’ field will only be used if the first field gets changed by a user. Display it while you are setting all of this up so you can test it, but ultimately this will not be displayed on the form to the end user.

Next we are going to create two workflows, one of them a child workflow. When creating them I would suggest creating the Child Workflow first, then it’s simple to pull it in to run from the Parent Workflow. However, to better explain them, I will start with the Parent.
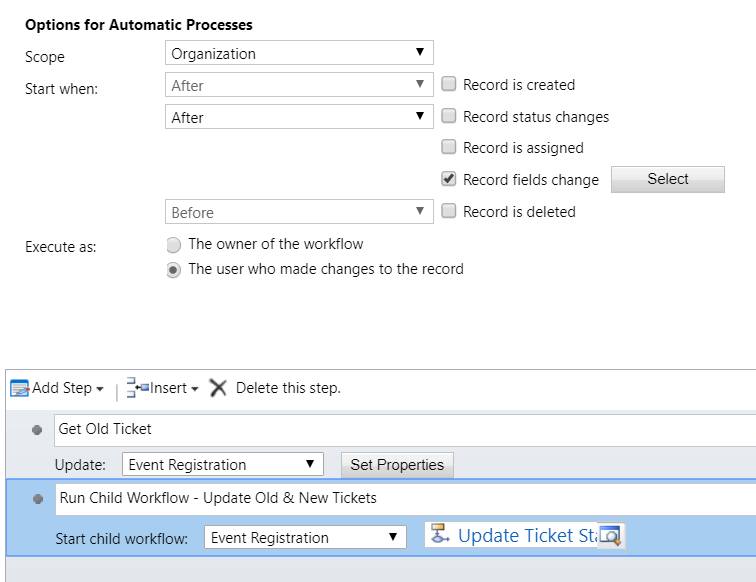
This workflow needs to run before the record saves so that we can get what the ticket number WAS before the user changed it. Untick the box next to ‘Run this workflow in the background’.

This will then give us the option to start it after the ticket field is changed. We will then get the ticket and move it in to the Old Ticket field we created so we can store it to use in the Child workflow. The second step of the workflow is to run the Child workflow.

Here we can see how to update the Event Registration record in the first step of the workflow above. We will set the Old Ticket field to the Ticket field.

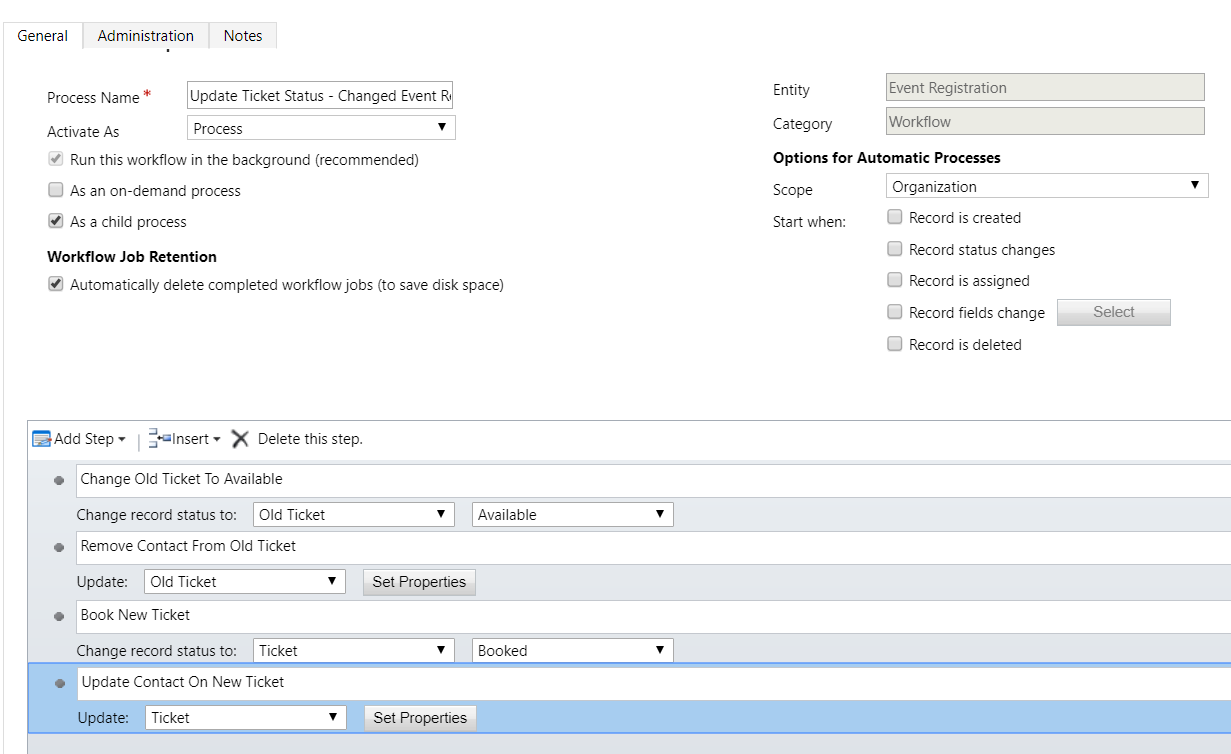
The child workflow can be set to run in the background rather than making the user wait. I usually name the workflow the same as the parent but with the word CHILD at the end. We’ve got four steps in this one (you might only need 2 depending on what you want to achieve). The first one is to change the status of the Old Ticket to Available. The second one removes the Contact that’s on a field on the ticket entity. The third step will change the status of the new Ticket that was selected on the Event Participation record and change it to Booked. The fourth will update the Contact field on the ticket with the Contact from the Event Participation record.

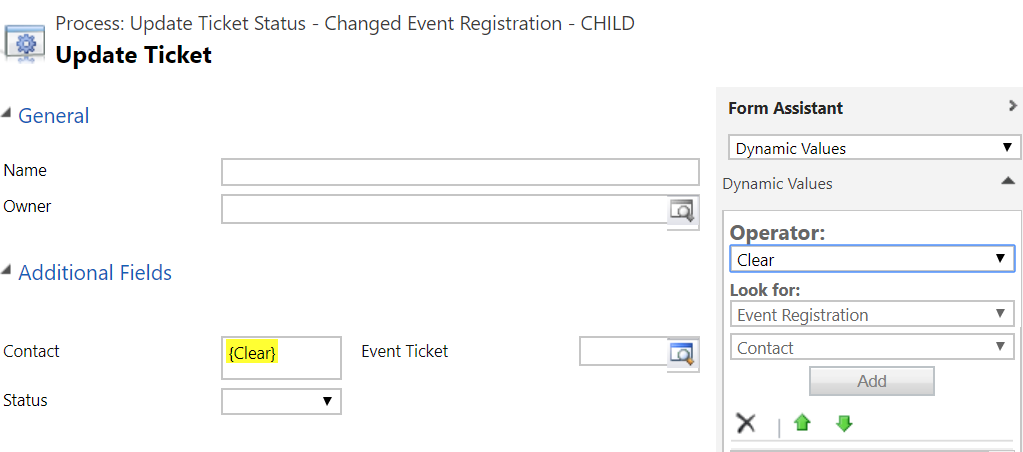
Just in case you aren’t sure about removing the Contact from the Old Ticket (I don’t use it that often, and it’s not that ‘clear’ how to do it 🙂 ) – use the Operator and pick Clear from the dropdown, then add it to the field you wish to clear out.

Make sure you activate both workflows, then go and test it out. Once you know it’s working, you can hide the ‘old’ field from the form. That will now keep the records up to date so you know which tickets (or whatever record you need to update) are available.
Check out the latest post:
Set A Business Process Flow Stage With Custom Page
This is just 1 of 572 articles. You can browse through all of them by going to the main blog page, or navigate through different categories to find more content you are interested in. You can also subscribe and get new blog posts emailed to you directly.
