*** NOTE: ALL INFORMATION IS ACCURATE AT DATE OF PUBLISHING ***
My good friend Jeroen Scheper wrote about the new column security profile experience that has been introduced with Wave 2 for Dynamics 365. When reviewing that, I noticed the new secured masking rules that could be added to your solution so I wanted to dig further in to how it all works. It took a bit of head scratching and searching online leading to a few blogs that also referred to attribute masking rules (not needed for this) too from back in March 2024. This process is currently in preview, so keep that in mind, but this post should show you how it works so you have a true understanding before you jump in feet first and try and use it for yourself!
First of all, you need to have a real purpose for adding a masking rule to a field. Masking a field masks it for everyone, and in the preview, it’s a bit fiddly to then actually review the unmasked version of the field. The feature is currently only available on certain field types. I went through them all just to see which ones it could be used on:
- Boolean (Yes/No) – NOT AVAILABLE
- Choice – NOT AVAILABLE
- Choices – NOT AVAILABLE
- Currency – NOT AVAILBLE
- Date – NOT AVAILABLE
- File/Image – NOT AVAILABLE
- Lookup – NOT AVAILABLE
- Multi-line Text – AVAILABLE
- Number – AVAILABLE
- Single-line Text – AVAILABLE
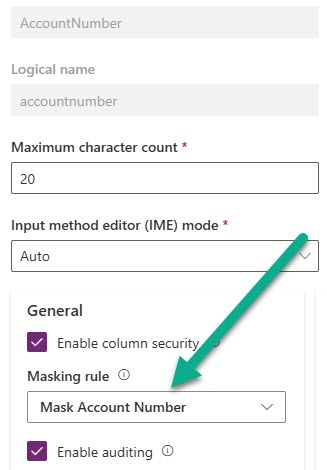
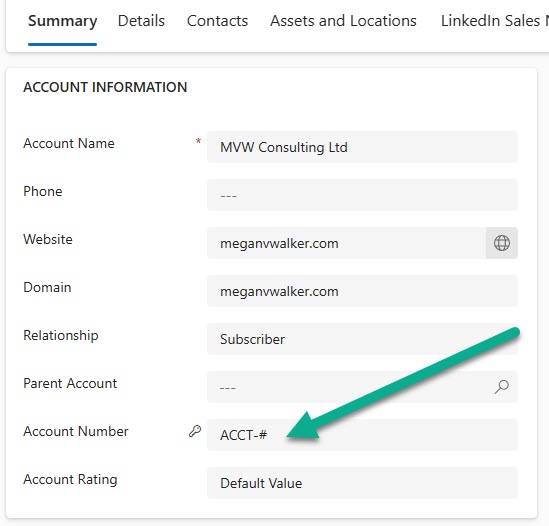
In my example I am using the account number field which is a single-line text field. Click the enable column security to make sure the field has an extra layer of security applied to it.
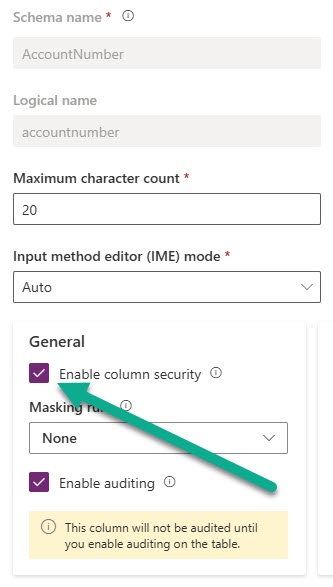
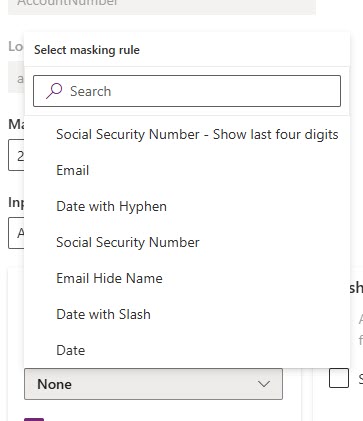
If the Masking rule field is locked, make sure you are sure the field is one of the types actually available for masking rules. If you can add one, you will see a few rules already out there. Interesting that there are three for dates…. BUT it won’t work on a date field (believe me, I tried). However, this means you have some you can get started with.
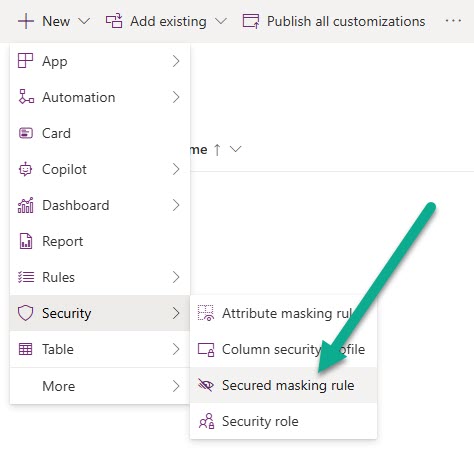
Instead of using an existing one, I am going to add a new Secured masking rule from within a solution in make.powerapps.com.
This then opens up a screen in a model driven app for you to add a new one. The name not contain any spaces, so use the underscore if you want to add more than one word. I have seen in documentation that it must have a prefix of CLS or New. I didn’t try without that, so who knows, it might work without using either of those (CLS being Column Level Security). Your display name is what will show up back in the dropdown when adding to your field, and the description is helpful for anyone else reviewing the rule later on. You are on your own with your regular expression 😜 that isn’t what this post is about. For me, I am masking everything after ACCT- in the account number field.
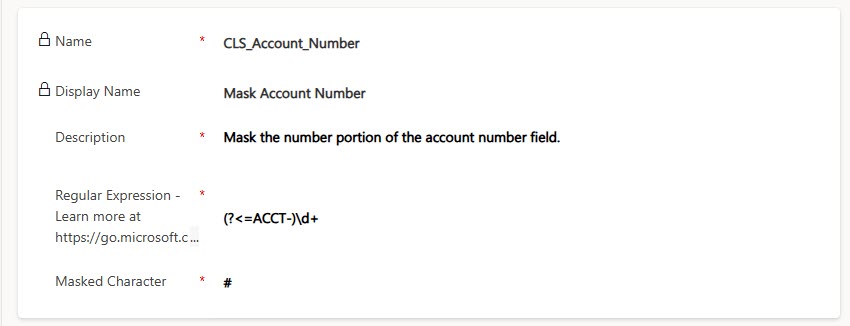
You’ll also have a panel on the right where you can add an example of what the data will look like, so you can confirm how the masking will be seen. Save the record and then go back to the field you want to add the masking rule to.
Now you should see your new rule in the last so add it and save the field to update it.
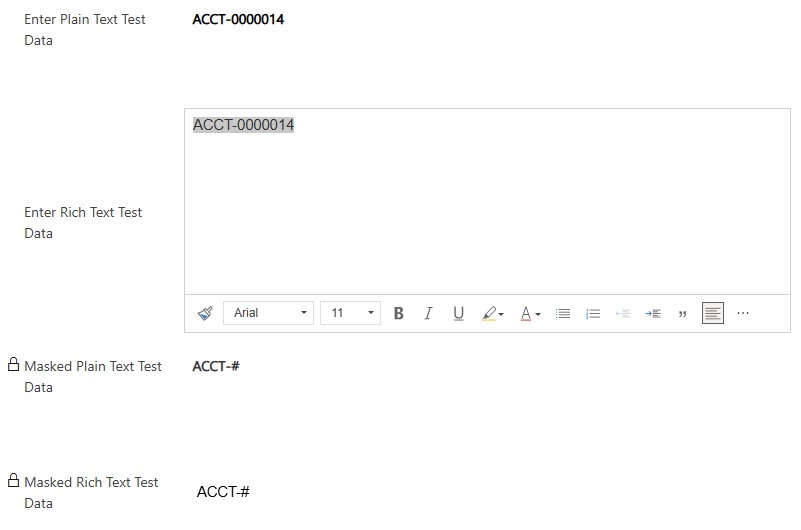
So how does that appear to users? If a user has no access to it at all, it will show like it always has when field (or column) level security has been applied. There will be a padlock next to the field and just stars (asterisks) will be displayed.
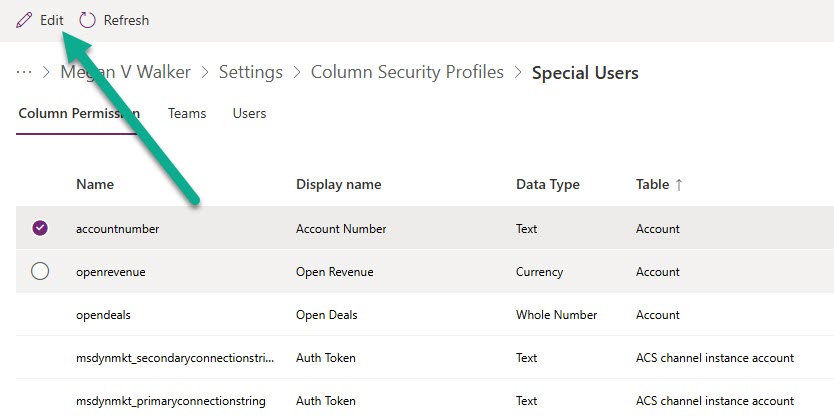
Do how do we deal with the masking now? Well as per the post from Jeroen Scheper at the start, you will need to have a Column Security Profile and currently access it from your environment settings area or by using the Power Platform Environment Settings model-driven app from the system>security menu. Open the profile, find your field and click on the Edit button.
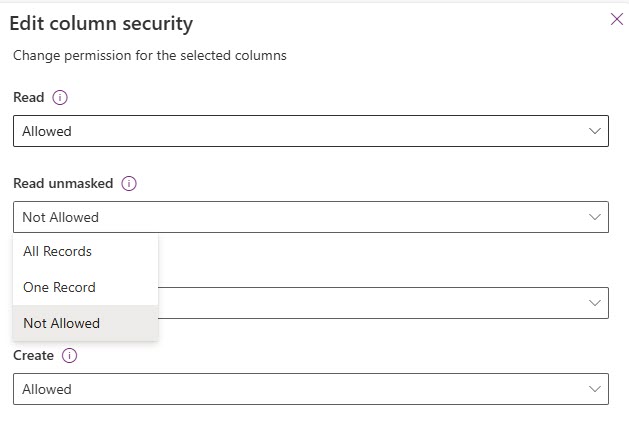
You can now see the Read unmasked dropdown with three options. Here is what Microsoft has listed about each of them. Don’t worry, I will show you more on each option further on in this post.
Not Allowed – When Read is allowed and Read unmasked isn’t allowed, masked values are shown.
One Record – Users are allowed to read unmasked values. Unmasked values are only returned when you request one record at a time. These values should be allowed for users who manage and maintain secured columns.
All records – Users are allowed to retrieve and read multiple records with unmasked values. This setting is highly privileged. Read unmasked should only be allowed for backend services that require unmasked values for backend processing.
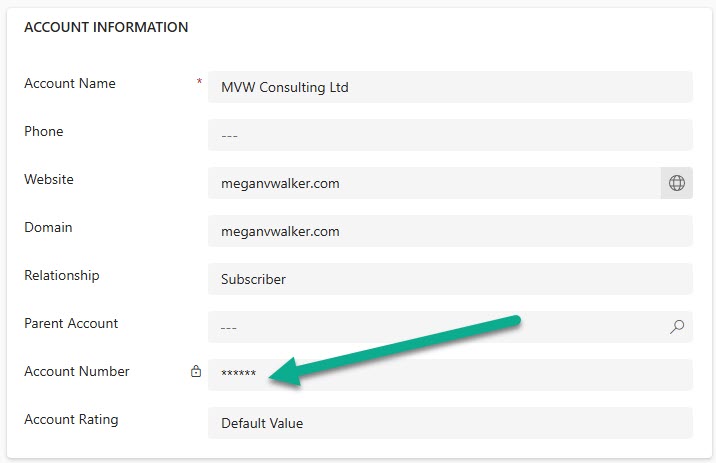
Let’s go with Not Allowed first. This is what it will look like for a user who has Read access allowed on the field. They will see the field as a masked value like this.
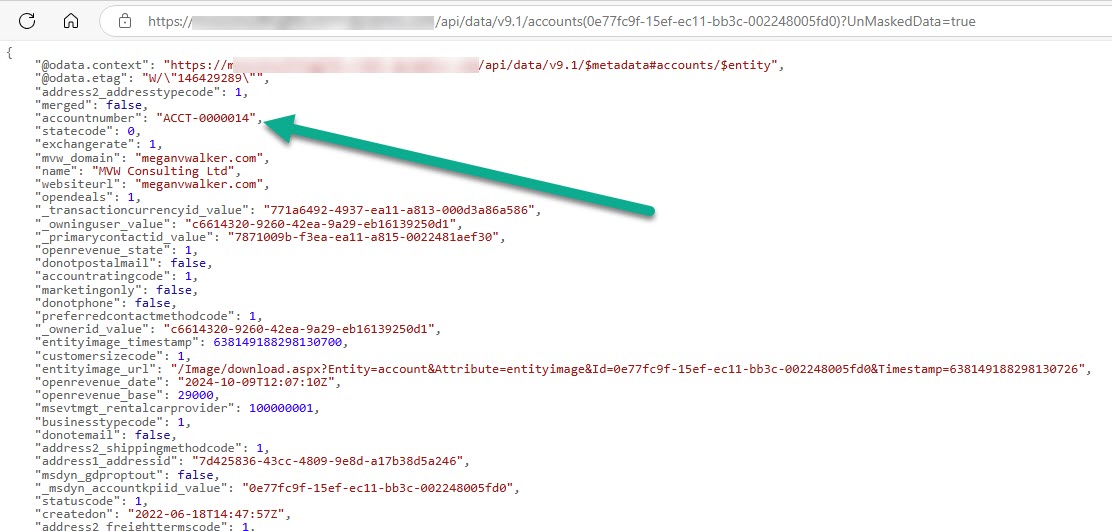
Now if we go with the One record option, my assumption was that I would be able to go back to that one record and then SEE the value on the form. It took me while but after going back and forth on the documentation, I finally figured it out after reviewing the options for viewing masked fields. You need to know the database table name, but the ‘plural’ name for it, and the guid of the record you want to see. So in my case, I wanted to review a specific account, which is accounts, then adding in the GUID of the record I wanted to see.
https://YOUR-URL/api/data/v9.1/accounts(ACCOUNT-GUID)?UnMaskedData=true
This then showed all of the fields, including the value that is masked on the account record for the Account Number field.
If I just wanted to see the account number field that can be done by adjusting the URL string slightly and including the database name of the field like we see below for accountnumber.
https://YOUR-URL/api/data/v9.1/accounts(ACCOUNT-GUID)?$select=accountnumber&UnMaskedData=true
This then reduces the data displayed, including only account guid and field you are trying to display.

What if someone gets the link and tries to see the data when they don’t access to it at all? They get a null value and it’s not possible to see the unmasked value at all.

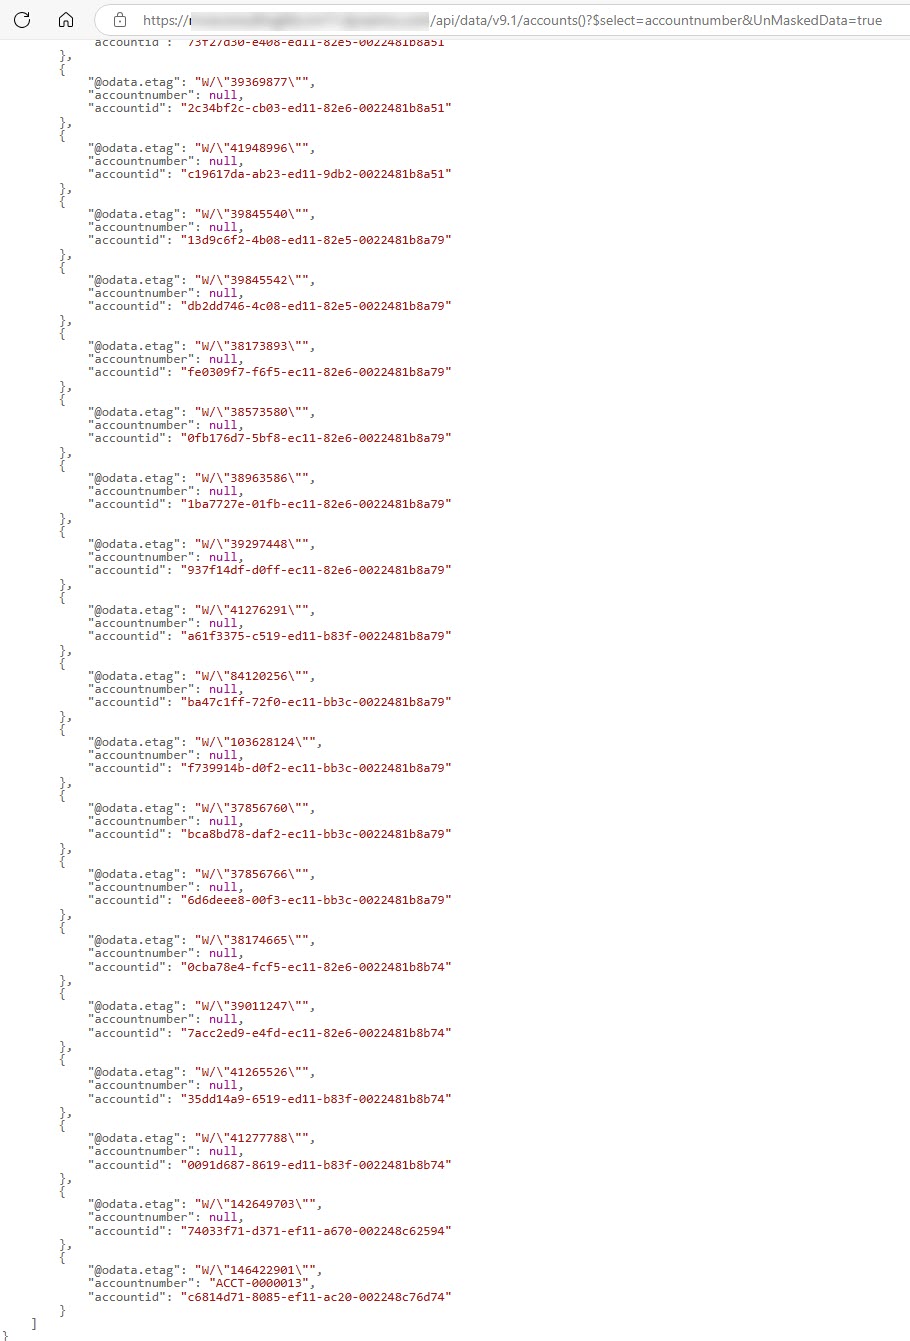
The last option on the Read unmasked setting on the column level security profile is All Records. As per Microsoft’s documentation, they consider this a high privilege so shouldn’t really be used unless by services or other back end processes that would need access to the data. For this, we would simply remove the ACCOUNT-GUID from the string so it shows all records.
https://YOUR-URL/api/data/v9.1/accounts()?$select=accountnumber&UnMaskedData=true
Currently there are some known limitations (which you can review here), so proceed with caution! And of course, it is (at the time of this post being published) in preview. One thing they have stated is: In future releases, there should be a button to allow users who have the Read unmasked permission to read the unmasked values.
Is this something you can see using in your own organisation or any projects?
Check out the latest post:
Use Custom Event Registration Questions To Branch Your Journeys In Customer Insights
This is just 1 of 603 articles. You can browse through all of them by going to the main blog page, or navigate through different categories to find more content you are interested in.