*** NOTE: ALL INFORMATION IS ACCURATE AT DATE OF PUBLISHING ***
I’ve written about creating your Lead Scoring models in Customer Insights – Journeys, and also explained how the Lead Scoring Qualification functionality works. I’m not really keen on the Qualification process as it’s not the right approach for everyone and it doesn’t assign Leads to people based on them reaching a specific score. However, if you have D365 Sales Premium, D365 Sales Enterprise or Microsoft Relationship Sales licenses, you can assign leads to specific teams or users when their score gets to a specified threshold. This post will show you how to achieve that.
First, make sure you’ve set up your Entity (Lead) scoring model using the link above, then come back here. Next you will need to go in to the Sales Hub app to create your assignment rules to determine when and who gets Leads assigned to them. From the app, use the menu at the bottom and go in to the Sales Insights settings. From there, click on Work assignment and make sure the Record type selected is Leads.
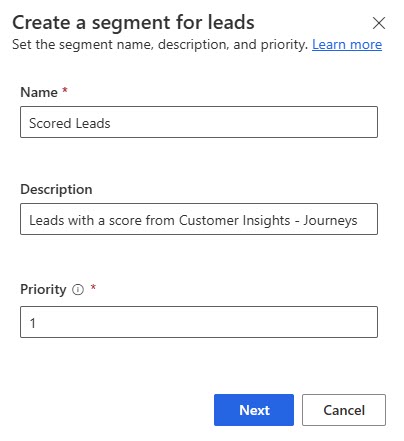
Next, click on New segment. We are going to create a Segment (different from our segments in the Marketing App) that will be used to determine which Leads will get re-assigned. Give it a name and a description and set the priority. The priority is used for records that meet the criteria for multiple segments, and they will be assigned to the one with the higher priority so good to keep in mind if you have multiple segments for Leads. Click the Next button to continue.
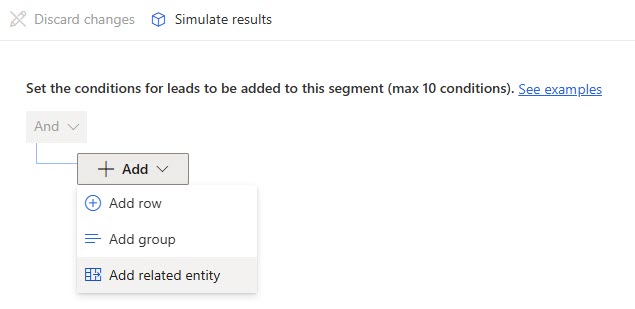
Next we will build out the criteria for making sure we find the right Leads. In this case, I want to make sure I find Leads that have a Lead scores record linked to them so I want to add a related entity.
Now we can see that I want Leads that have a Lead score record where the score is greater than or equal to 50, and that Lead score record related Entity scoring model is Active. That last part is important because you have have an Inactive Entity scoring model record with Active Lead score records so make sure you add it in! Note that you may also see the Lead scoring model available as a related entity. Although you can currently use this, as of June 2025 that option will no longer be updated so best to use Entity scoring model so you don’t end up having a broken segment later on.
You can also add rows to check values on the Lead table directly. In my example I only want to try and reassign Leads with a status of Open and where the Owner equals the Marketing Team. I don’t want to try and reassign a Lead already owned by a User. Once you are finished with your criteria, click the Save button.
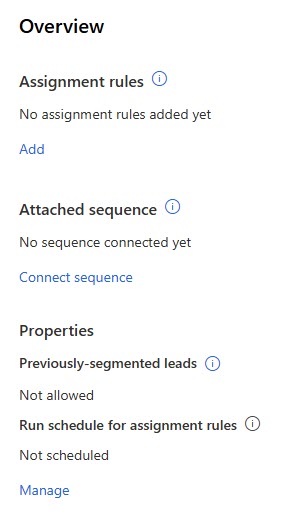
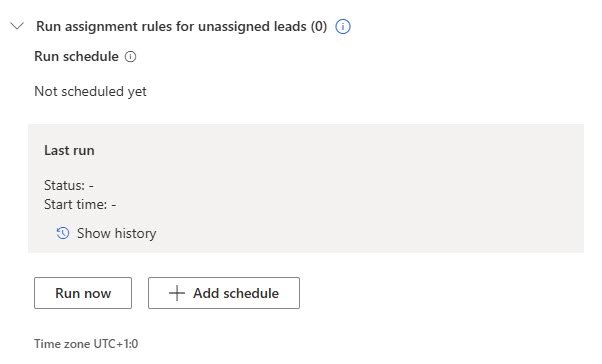
Once you have saved it, you will notice the overview on the right panel that shows no assignment rules or sequences connected and no schedule for running your assignment rules. Let’s change that! First, click the Add link for the Assignment rules.
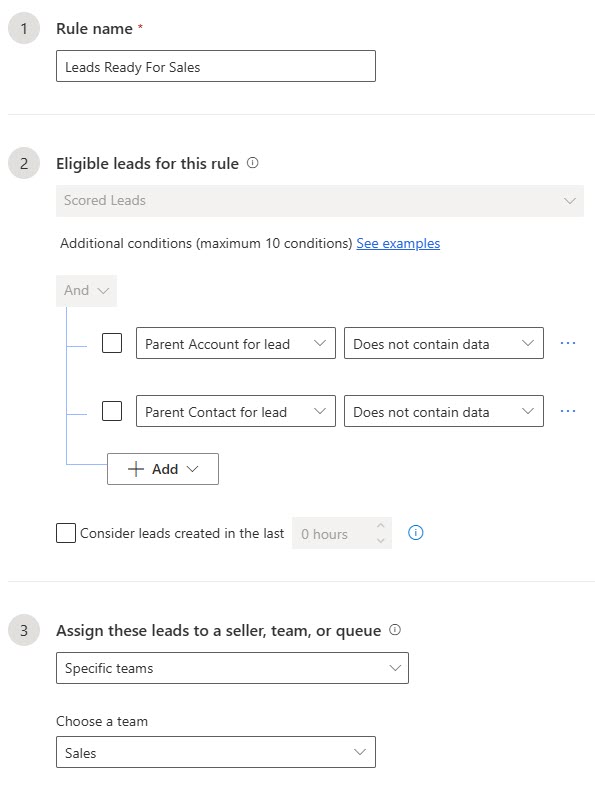
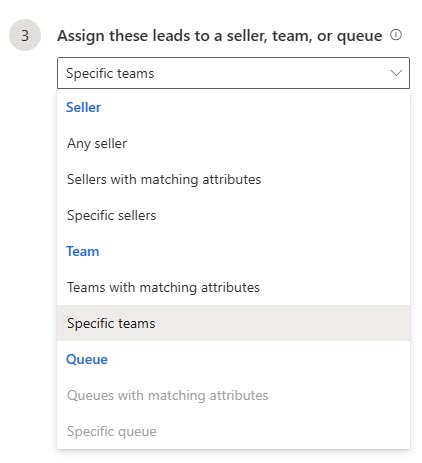
Create a new rule and give it a name. You can add additional conditions here if you need to so that even if a lead falls in to the Segment based on the initial filtering, you can still check to make sure you only assign the right records. Here I am making sure the Lead doesn’t already have a related Account and Contact linked. I am then stating that the Leads should be assigned to the Sales team.
There are many options for assigning the Lead. For more information on settings for assigning records, check out this post from my friend Jeroen Scheper where he digs in to other options in more detail. You can add multiple rules to the segment should you need to.
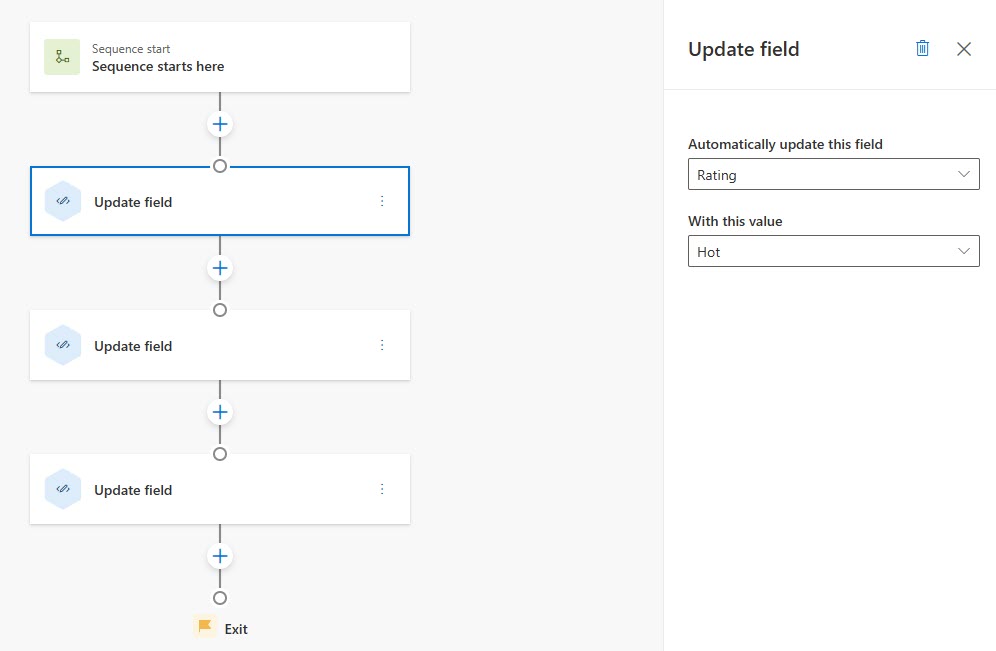
Next, should you wish, you can attach a sequence. You can add an existing one, or create a brand new one just for this segment. Creating the sequence is very similar to building out a journey in Customer Insights – Journeys so should feel familiar to you. There are various options available such as sending emails, creating phone calls or tasks, but I am a big fan of the command option to update a field. This means we can not only assign a Lead, but also set several fields on the Lead if needed. In my example I am going to update the Lead Rating to Hot, flag a custom field of Marketing Lead to Yes, and set the Sales ready field to Yes (more about this in the post I shared earlier on the Qualification functionality). Make sure you Activate the Sequence and then Connect it back to your Segment.
Finally, go back to the Properties of your Segment and click Manage. The first thing is to allow previously-segmented leads to fall in to this segment and go through your sequence (if you’ve created and connected one to your segment). Without this, Leads that have already gone through or are connected to another segment will not be run through your new one. Also tick the box to run the assignment rules when leads move in to the segment.
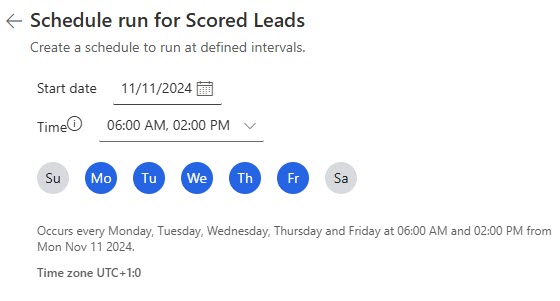
This last part allows you to set up a schedule of how often Leads brought in to the Segment will be assigned out to your Sales Team (or Users if you’ve used that approach). You will want to do this rather than having to Run manually.
This means you can make sure Leads are only assigned on certain days and times and stagger it throughout the day.
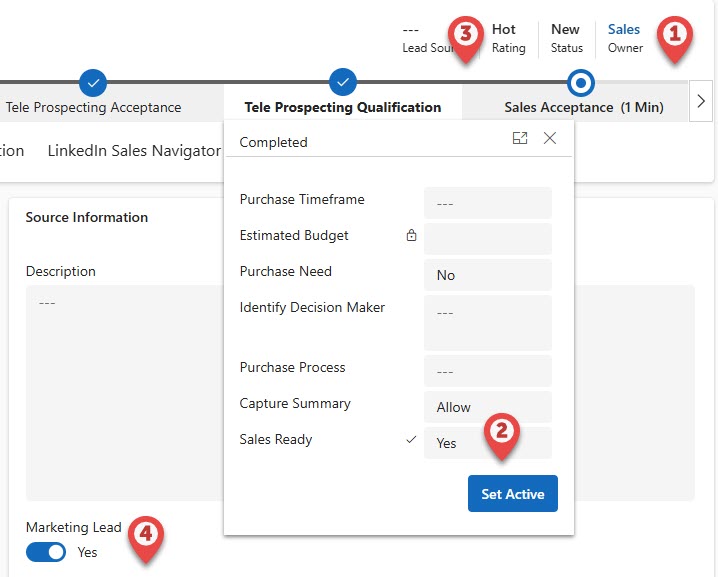
Now when a Lead falls in to the new segment based on their Lead Score and meets all other requirements the Assignment Rule kicks in to assign to my Sales Team (1), then the sequence runs and sets the Sales Ready field to Yes (2), the Rating field to Hot (3) and the Marketing Lead field to Yes (4).
Check out the latest post:
Create A Simple Event Session Registration Trigger
This is just 1 of 492 articles. You can browse through all of them by going to the main blog page, or navigate through different categories to find more content you are interested in. You can also subscribe and get new blog posts emailed to you directly.





Yesterday, I was looking at the lead score records and how they are related to the ‘lead scoring models’ in OBM and the ‘scoring models’ in RTM. On the lead score record there is a lookup to both of these tables( (msdyncrm_leadscoremodel and msdynmkt_entityscoringmodelid).
My assumption was that, for the lead score records created from the RTM scoring model, only the lookup msdynmkt_entityscoringmodelid would be filled. However, this article prompted me to verify this because you’re using the “Lead scoring model” related table to create the segment definition and yes, there is (also) a value in the msdyncrm_leadscoremodel lookup.
Both lookups contain the same GUID but they are in fact in different tables. I assume that they do this do be able to show both OBM and RTM lead score models in the same views/ reports.
Do you know if it is still safe to use the msdyncrm_leadscoremodel lookup/relationship for building/configuring new stuff or should we move to the msdynmkt_entityscoringmodelid ? I am not sure if and when the old field will stop working (or even be removed after the deprecation of OBM next year).
All good questions Twan! The msdyncrm_leadscore_v2 table is the one used for the actual Lead scores, and on that one it has the lookup to the msdyncrm_leadscoremodel field. When you click on the lookup it takes you to the msdynmkt_entityscoringmodel table/record. You’re right that things can be used for Lead scoring in both OBM and RTM (at the moment), and I hadn’t thought about the fact that this approach might not work once the change occurs in June 2025 and RTM is no longer a thing. I will double check on this one with Microsoft and update the post accordingly once I know for certain.
Twan, more information for you on this, and I have updated the blog to reflect this. After June 2025, the Lead scoring model field will still be there BUT it will include the word Deprecated next to it, and it will no longer be updated. SO, you are right to raise this as a question!!! Should definitely be using the Entity scoring model option here, and also on any segments you might build for Lead scores.