*** NOTE: ALL INFORMATION IS ACCURATE AT DATE OF PUBLISHING ***
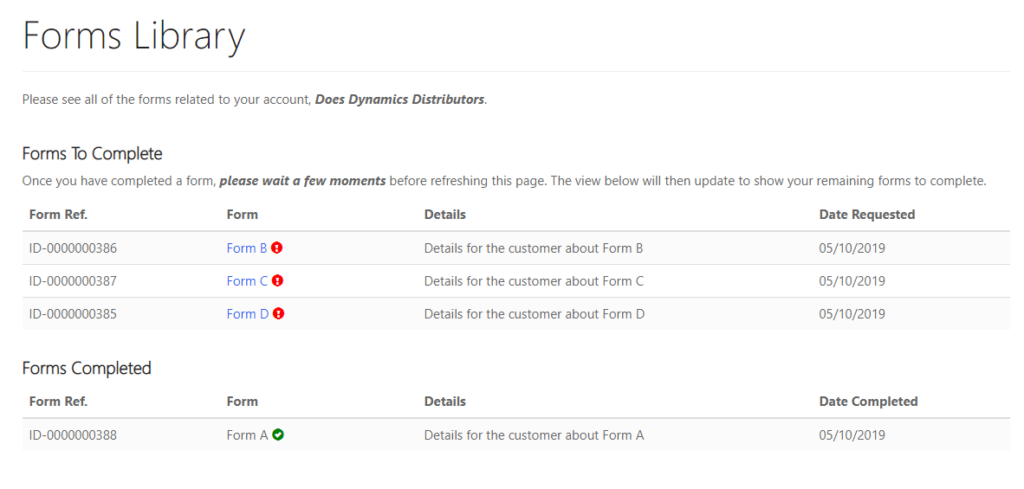
If you have been reading my blog for a while you will know there are several things I love to write about (and no, not Emojis 😉 ) – that’s Forms Pro and Portals. So I think it is about time I combine the two and walk through how I created a Forms Library for clients to be able to complete needed forms during an ‘onboarding’ process (see the screenshot below). Of course, this concept could be used for so many business use cases. There is a LOT to cover so it’s being split up in to three posts. This one will cover the set up needed in your portal in order to allow the user to log in and access the portal. Post Two will cover a Microsoft Flow needed to generate the forms, and Post Three will cover the final Microsoft Flow needed to mark the form complete and update the records in the portal. This is not going to show you how to set up a portal, and assumes you have some level of portal and flow knowledge. Shall we begin?

First things first, we need a new entity. You might think we would display the Survey Invite entity in the portal. It’s a good idea, but we can’t actually do anything to edit any of the Forms Pro surveys which means we would struggle to make it work with that one. A new entity is the way to go for this. I have called it a Form Request. When you add the entity, make sure you set the Enable change tracking for Flow option. Caching in the portal used to be an issue with views and record updates not showing immediately (or even at all) for the user. This setting will make sure when a record is updated it will be updated in the portal.
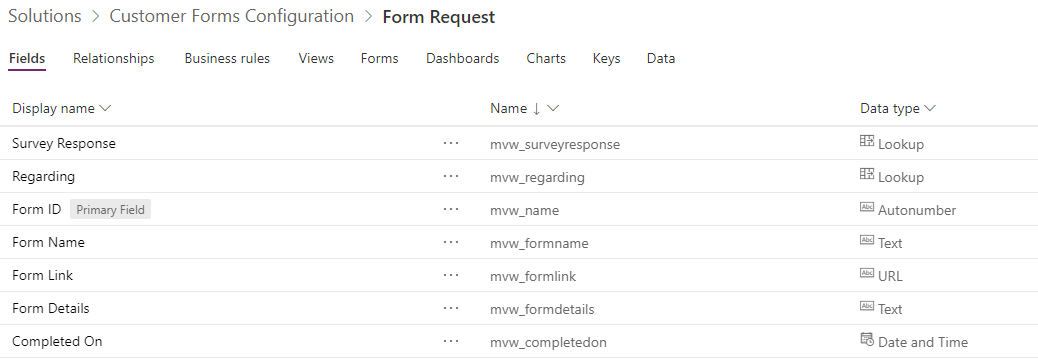
Here are all of the fields added to the custom entity along with their data type. We are going to show the Form ID (Form Ref), Form Name, Form Details and Completed On fields. The Form Link will be used to open up the Forms Pro Survey. This will be combined with the Form Name to create a ‘pretty link’ rather than the full long string of the survey. I have added a lookup to the Survey Response field, so when the form is completed we can always quickly get back to it from within CDS. For the Form ID I used an awesome tool from my friend 🙂 Jonas Rapp. He created Auto Number Manager which is available in the XrmToolBox. This lets us create a new id for each new form request we create. It helps keep everything consistent and gives the customer and users a handy reference number for each individual form.
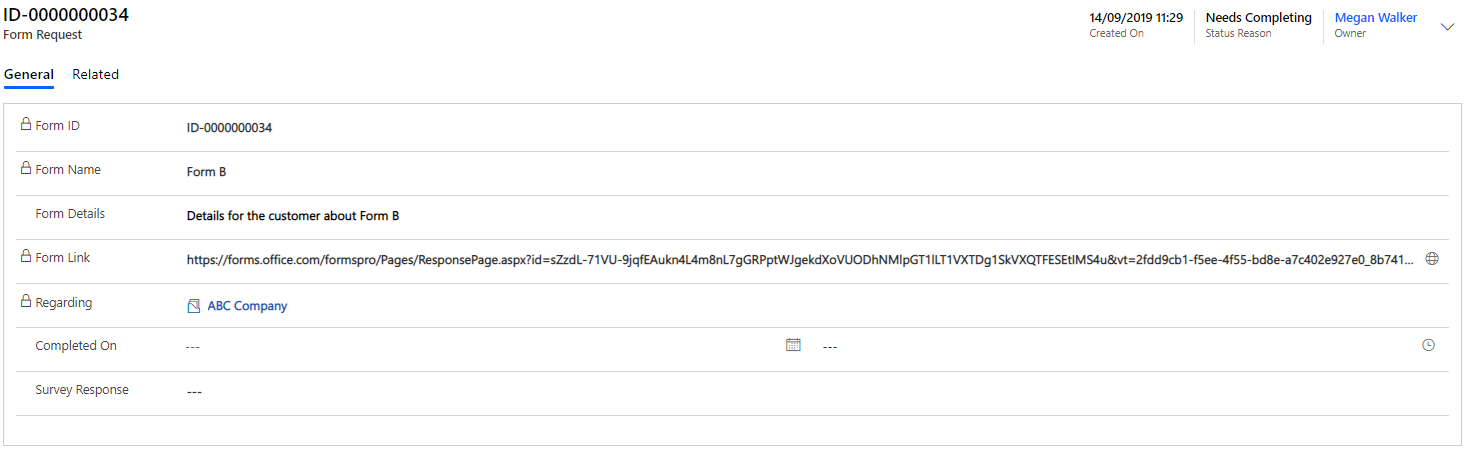
Here is how I have laid out the form. We have the Form ID, Form Name, Form Details, Form Link, Regarding, Completed On and Survey Response field.
Now we need to review a few items for the portal itself. The first is to add an Entity Permission record for the Form Request entity. The scope is going to be Account with the relationship being against the regarding field. For the privileges we will only give Read access as there is going to be no interaction with this record other than using it to provide a link to click on to get to the survey.

To display the Form Request records in the portal, you could use Entity Lists. However, I wanted full control over how the lists looked, plus I wanted to make the Form Name the hyperlink to the survey. None of this could be done with a standard Entity List so I began looking for another way and was directed to this fantastic post from another person I am lucky enough to know, Nick Doelman. Nick explains how you can create a custom web template using HTML, FetchXML and Liquid to achieve what I wanted, to show two lists for the Form Requests. One would show those the customer still needs to submit, and the other would show those completed. I could never explain it quite so well, so if you want to know and understand how to create your web template, please do yourself a favour and read his post. It was based on the clarity of the post that I created the following. The first thing I did was created five Content Snippets to use in the headers of the list of the form requests.

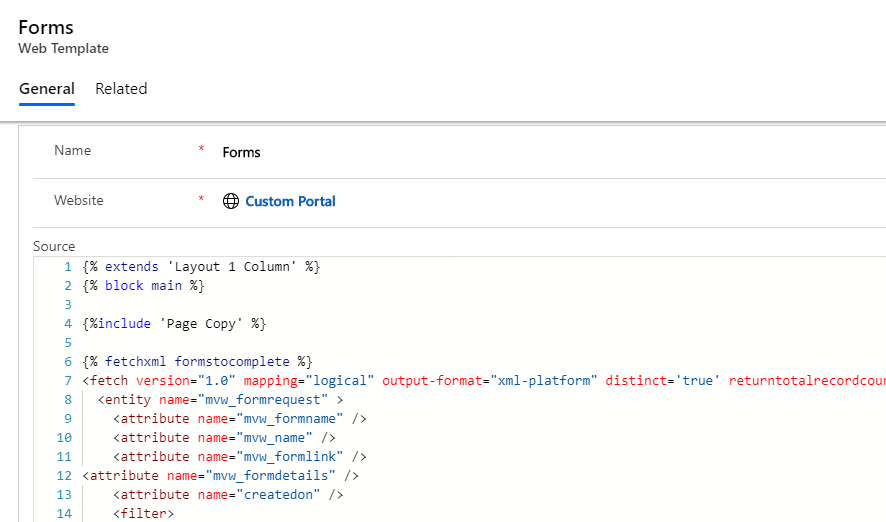
I then created a Web Template to display the Form Request records. The full code I created can be found in GitHub which you can access here. Keep in mind you will need to change the prefix of the attributes to match your own. Unless of course you also use mvw as your publisher prefix ???? You can see below part of what the web template source code looks like.
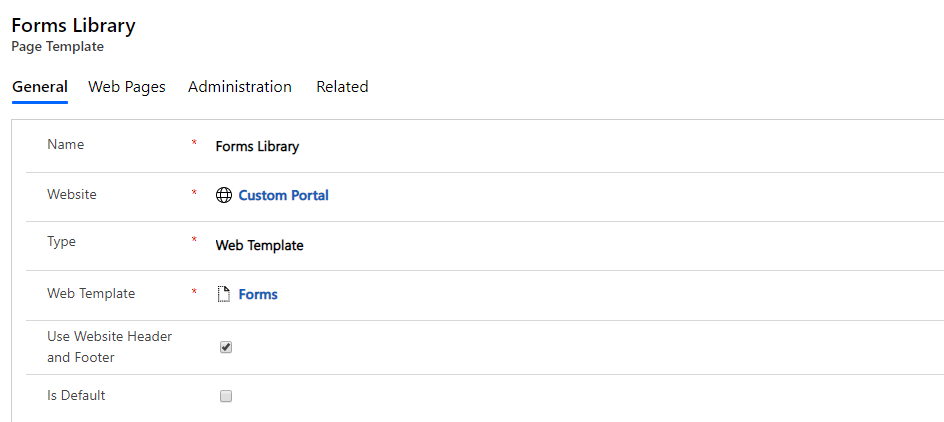
I then created a Forms Library Page Template with the Forms Web Template created above linked accordingly.
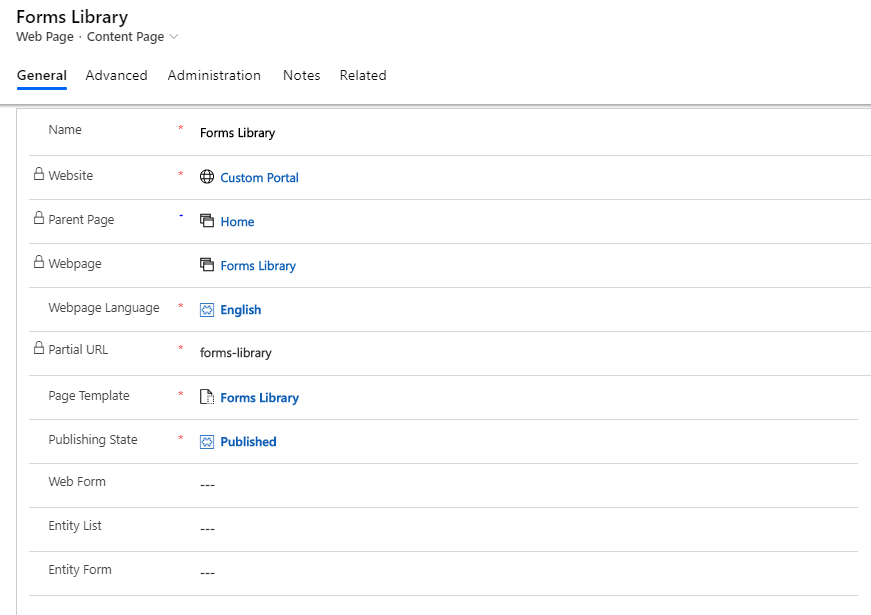
Then I created my Web Page for the Forms Library.
For the copy on the page I am using a bit more Liquid. This will show a message to the user including their account name for a bit of personalisation. If you want to do the same, copy the code below and paste it in to the Copy section on your Web Page.

{% if user %}{% assign accountdetails = entities['account'][user.parentcustomerid.id] %}Please see all of the forms related to your account, {{ user.parentcustomerid.name}}.{% endif %}That’s the end of Part One. You’ve set up everything you need in Dynamics 365 Customer Engagement to make this work. Next we will look at creating a Microsoft Flow to generate the Form Requests for an Account and have them displayed in your Dynamics Portal.
Want to just watch how to do this? Check out the video below:
Check out the latest post:
Add Information Buttons To Provide Additional Details For Custom Page Users
This is just 1 of 580 articles. You can browse through all of them by going to the main blog page, or navigate through different categories to find more content you are interested in. You can also subscribe and get new blog posts emailed to you directly.
If you customise the entity using the maker portal as in your screenshot, I guess you can use out of the box customisation experience to set up the auto number for Form ID and you may not need the XrmToolBox.
Hi Linn! At this point, XrmToolBox would be my preferred method for doing an auto number. It’s simple, quick and easy. Plus, I LOVE the tool that Jonas Rapp created!