*** NOTE: ALL INFORMATION IS ACCURATE AT DATE OF PUBLISHING ***
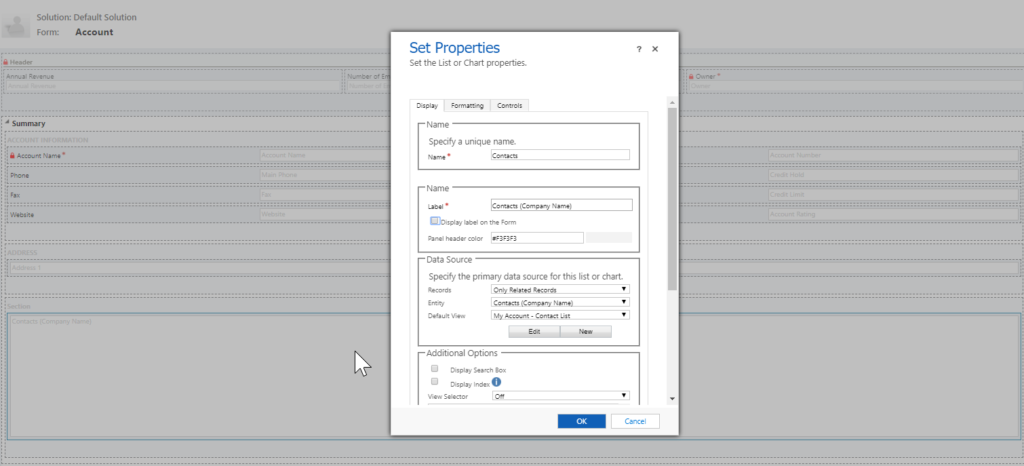
Portal pages are often made from Entity Forms or Entity Lists. However, on an Entity Form, you can display lists using subgrids on regular forms in D365. If you think about adding a subgrid to a form, you can set the columns on the grid, but you can’t change the name displayed on each column, unless you change the display name on each field itself. That’s not practical, so we need a way to be able to change the display of each column just for the portal. That’s where Entity Form Metadata comes in. First, we have our form we’ve created by customising the solution.

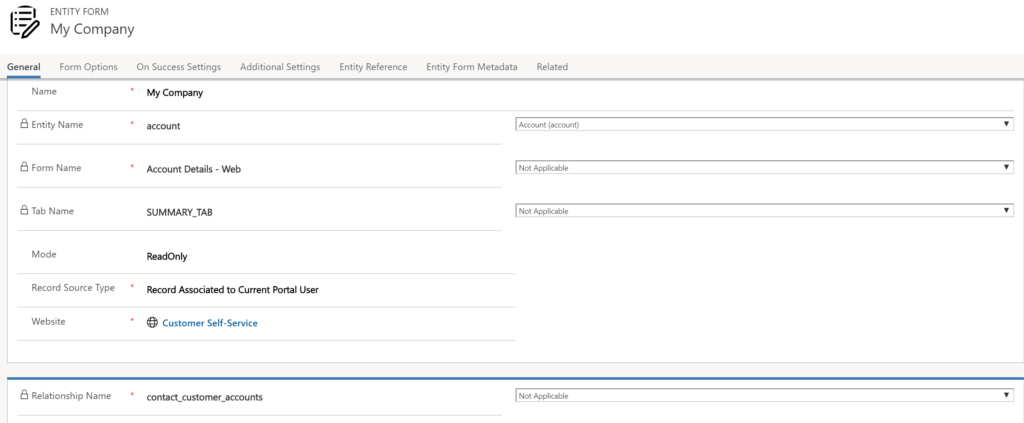
Next, we add our Entity Form. Select the Entity you are working with (in this example it’s going to be Account). Once you’ve selected the Entity you can select the form from a filtered list of all the Account forms. Once the form is selected, you can either leave the next field blank, or select which tab should be displayed on the portal. It’s being made Read Only, and the Record Source Type is ‘Record Associated to Current Portal User. Once you select this option, set the Relationship from the portal user to the Account entity.

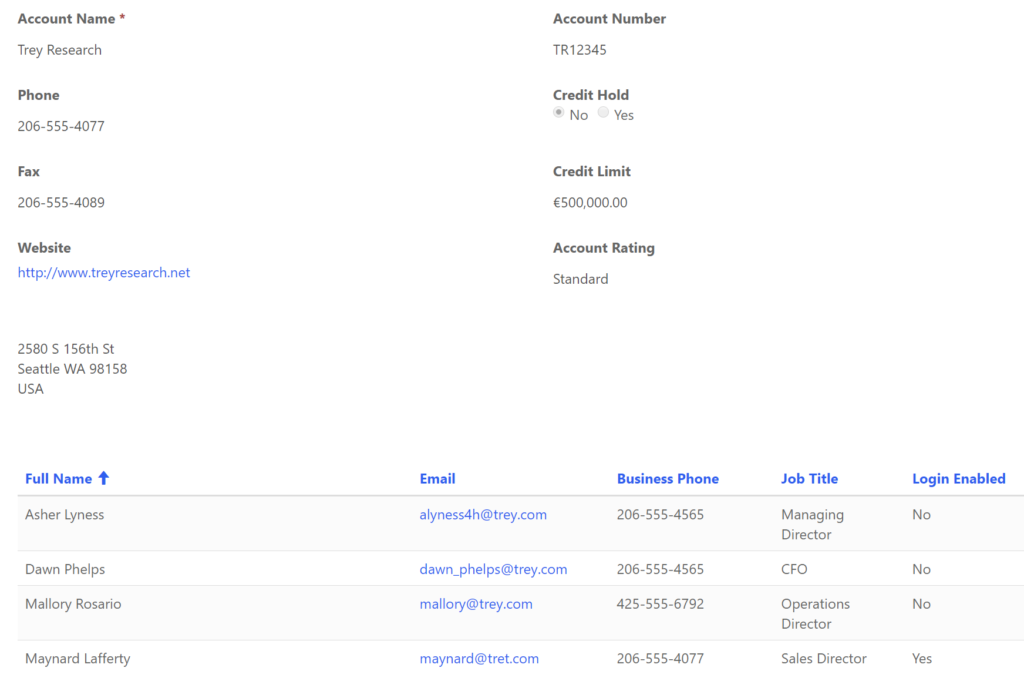
Now you can add the Entity Form to a new page in the portal. We can see the page displaying the form below, including the subgrid of any contacts working for the Account. If you want it to look a little nicer, the column widths and display name could be changed.

Go back to the Entity Form, and click on the Entity Form Metadata section, then click Add New Entity Form Metadata from the top of the grid.

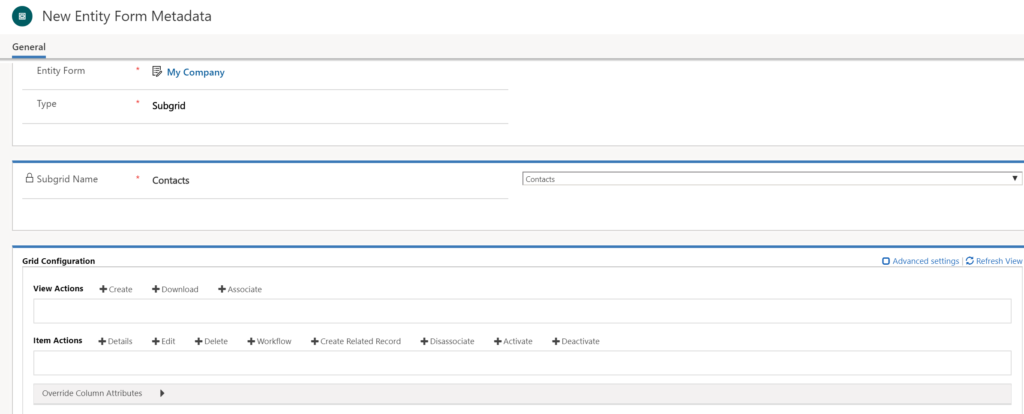
We select the type of Subgrid, then pick which subgrid from the form we wish to modify. Finally, scroll down to the section to ‘Override Column Attributes’.

Add in each of the columns from the subgrid. We can then adjust the display name to use in the portal, and set the width for each one.

There is a grid column width style field to select from either pixels or percent which can be found by clicking on the Advanced settings from the top of the Grid Configuration area.

Now go and check out the subgrid on the page in your portal again. It might need refreshing a few times before you see the changes made, but be patient. You can always restart the portal if needed, but it shouldn’t need that level of rebooting. That’s it! Pretty simple and easy to change the subgrids to make them look cleaner and more relevant to your customers.

Want to just see how to do this? Check out the video below:
Check out the latest post:
Set A Business Process Flow Stage With Custom Page
This is just 1 of 572 articles. You can browse through all of them by going to the main blog page, or navigate through different categories to find more content you are interested in. You can also subscribe and get new blog posts emailed to you directly.

Great video! Helpful and thorough enough:)
Thanks so much for watching and commenting! Really appreciate the support. Glad you liked it!
It’s good article,just recently came across a strange situation where we are using Multilanguage enabled portal.. so how can we achieve it for that? As here we don’t have options for Multilanguage s?
Would appreciate your help.
Hi Siddhesh, thanks so much for taking the time to make a comment. Can you give me a little more detail (you can always email me at hello@meganvwalker.com) so I understand what you are trying to achieve? Are you saying you don’t have the option to determine what the column headers say in different languages?
Hi Megan,
I mean that if I have Multilanguage s enabled in portal then how can we achieve display names of columns in both languages? As here we only get option for English name.. so we won’t b able to change d name for another language right?
Ok, thanks for clarifying, I thought that’s what you meant. I will see if I can figure out a way to do it. It might be a few weeks, I’ve got other articles to work on related to portals, but will take a look at this challenge and let you know what I find out.