*** NOTE: ALL INFORMATION IS ACCURATE AT DATE OF PUBLISHING ***
If you have an Account Management program within your organisation, you know how important it is to have meetings and visit your customers to find out the issues and pain points they have. Meeting with them in person is the best approach, although not always feasible from a logistics perspective. If your Account Managers can visit your clients, fantastic, let’s then send out a survey request to gather their feedback.
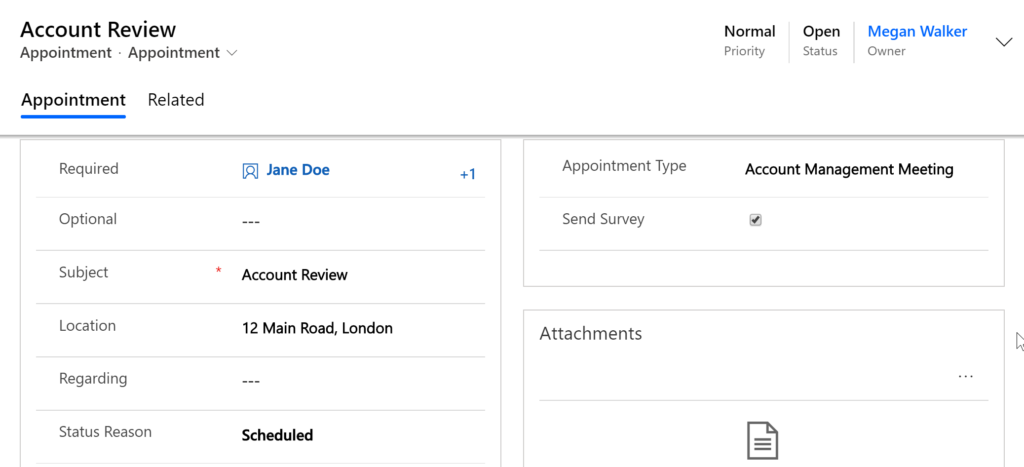
On the Appointment entity we have an Appointment Type field with a value added for ‘Account Management Meeting’. We then have a Yes/No field called ‘Send Survey’. We will use these two fields as part of our condition to check if the survey request should be sent. We will only send out the request to those who were required attendees for the meeting.
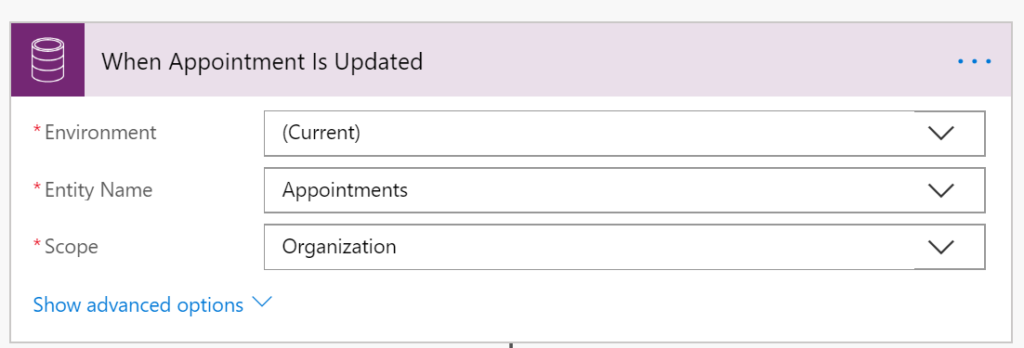
Using Microsoft Flow, our first trigger step will be when an Appointment is Updated.
Next we will add an action called ‘Initialize variable’. We are going to add 10 seconds to the current date and time. This will then be used a little later on in our Flow to delay the processing and allow everything to catch up. More on this later.
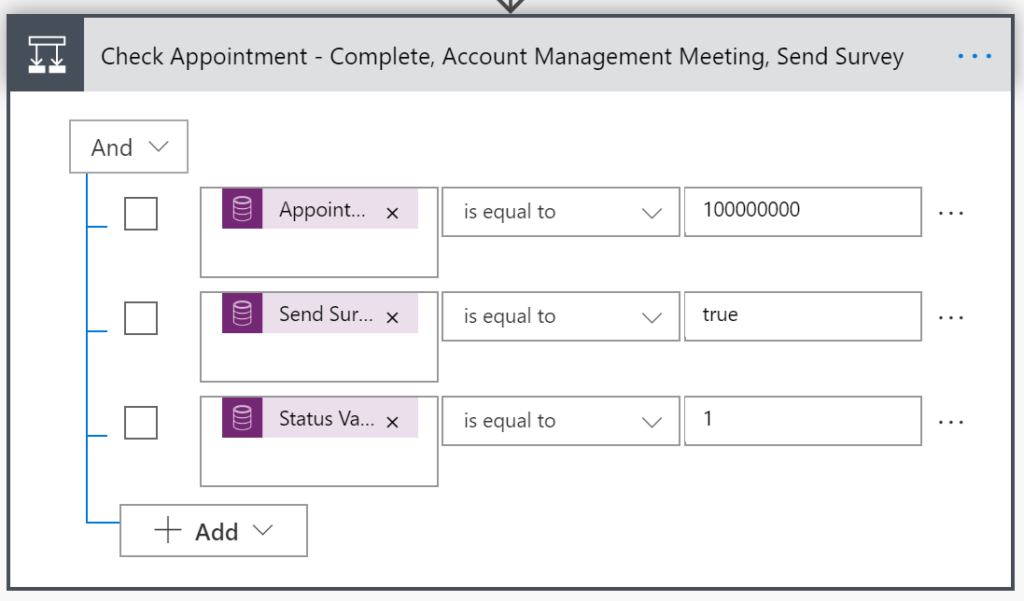
Next, our condition will check to make sure that the Appointment Type value is equal to that of Account Management Meeting, the Send Survey field is ticked (true/Yes), and the Status Value is 1 which makes it a completed Appointment.
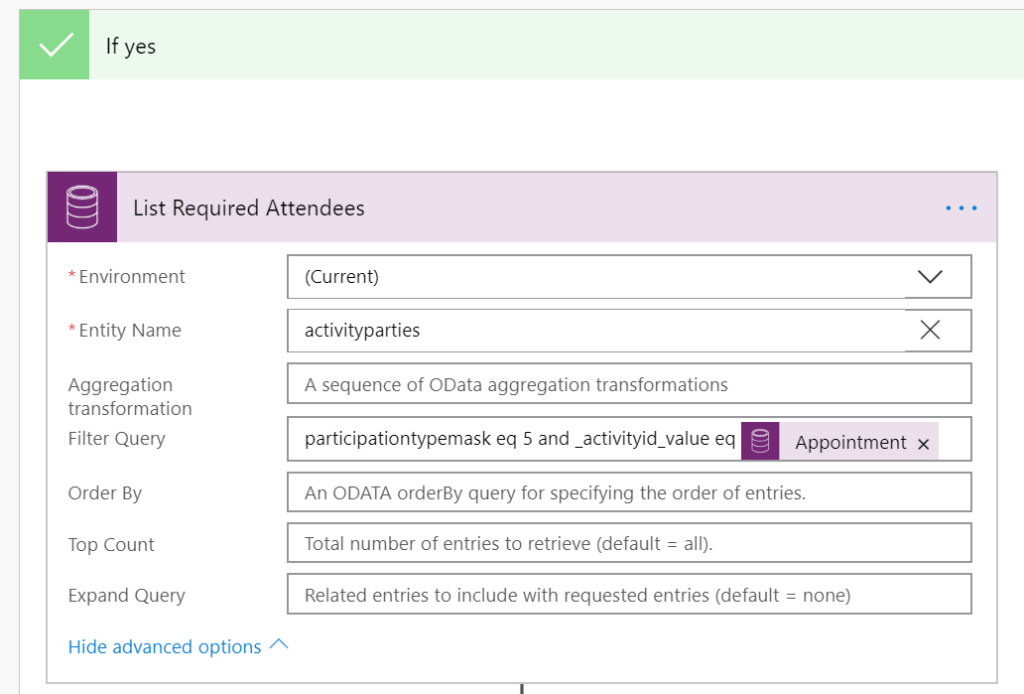
If not true, we don’t send out the survey invite email. If it is, we are going to list all of the Required Attendees on the Appointment record. To do this, we use the following Filter Query. The participationtypemask of 5 is equal to the required attendees. Then we only want those linked to the Appointment that was closed in the initial trigger step. NOTE: The activityparties entity is not in the list. Instead, scroll to the bottom of your list of entities and select Enter custom value, then type in activityparties.
participationtypemask eq 5 and _activityid_value eq @{triggerBody()?['activityid']}Now use the Party id as the item identifier in a Get record step to get the Contact for each of the required attendees. As soon as you do this, the Apply to each step will appear. Then add in another Get record step to get the Contacts Account using the Company Name as the item identifier.
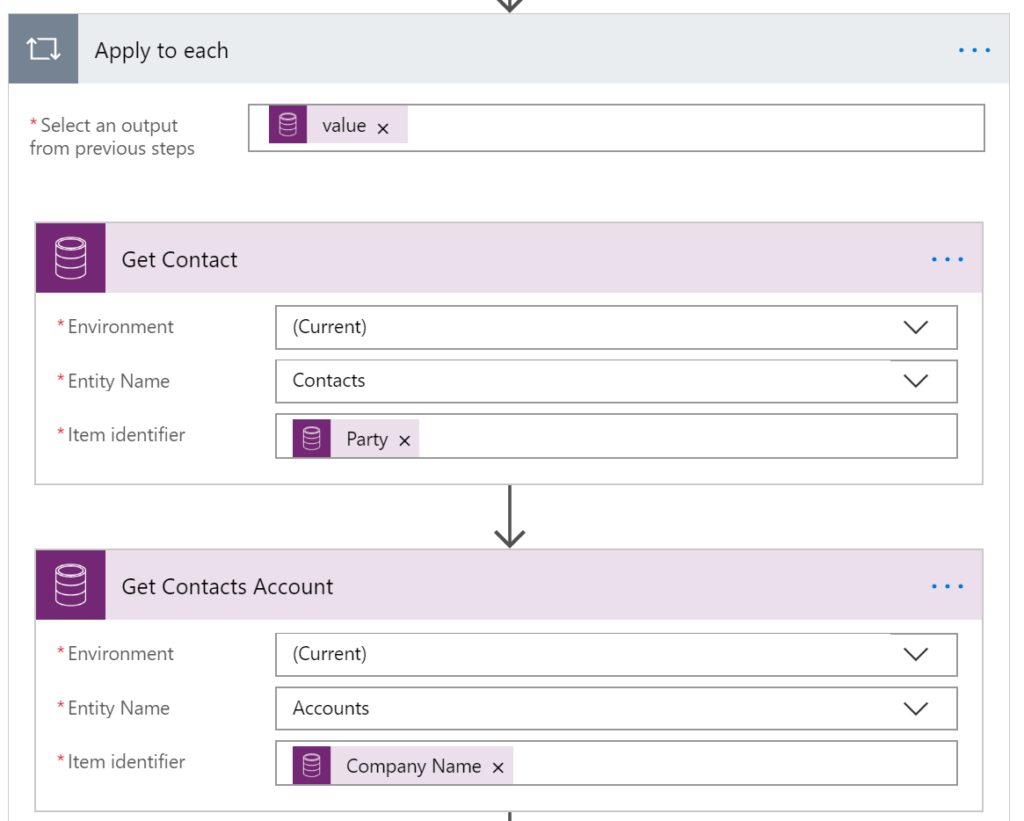
We want to use the Account Owner in the survey to pass through as piped variables. So use another Get record step to get Users and use the Owner of the account as the item identifier.
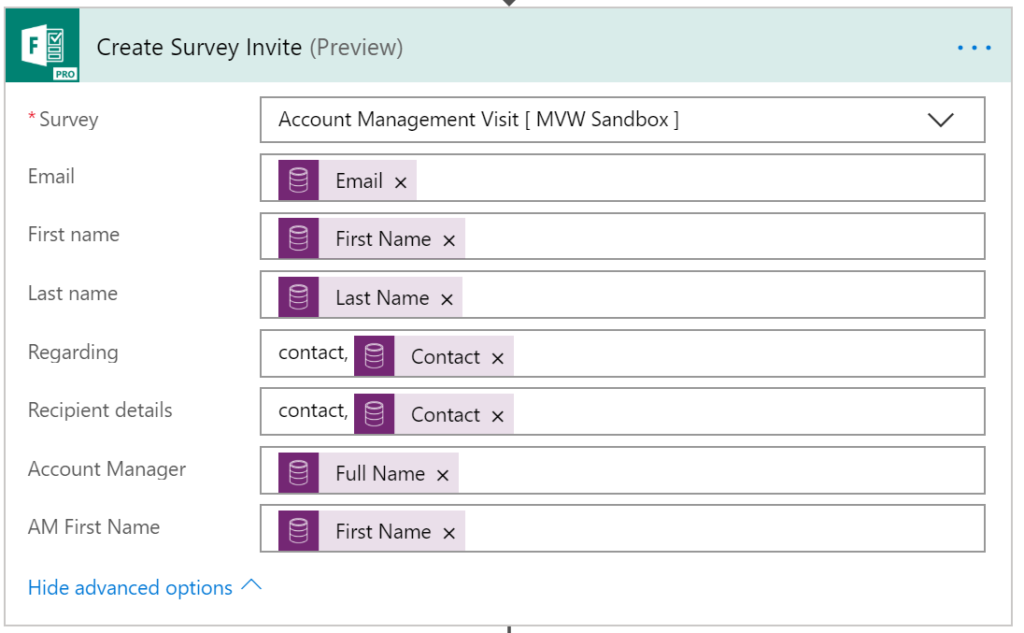
Now we create the survey invite using the Email, First Name and Last Name from the Get Contact step, and the Full Name and First Name from the Get Account Owner step. Populate the regarding and recipient details values using contact, then the Contact id.
Now remember that initialize variable step at the beginning? Here is where we want to wait a few seconds before continuing on. There could be a ton of recipients who attended the appointment. In testing, sometimes the flow ran successfully, but sometimes it failed on one or more of the recipients, so only some people received their email. This just adds in a precautionary measure to make sure all of them get their email. Use the Delay until action and add your WaitCondition variable.
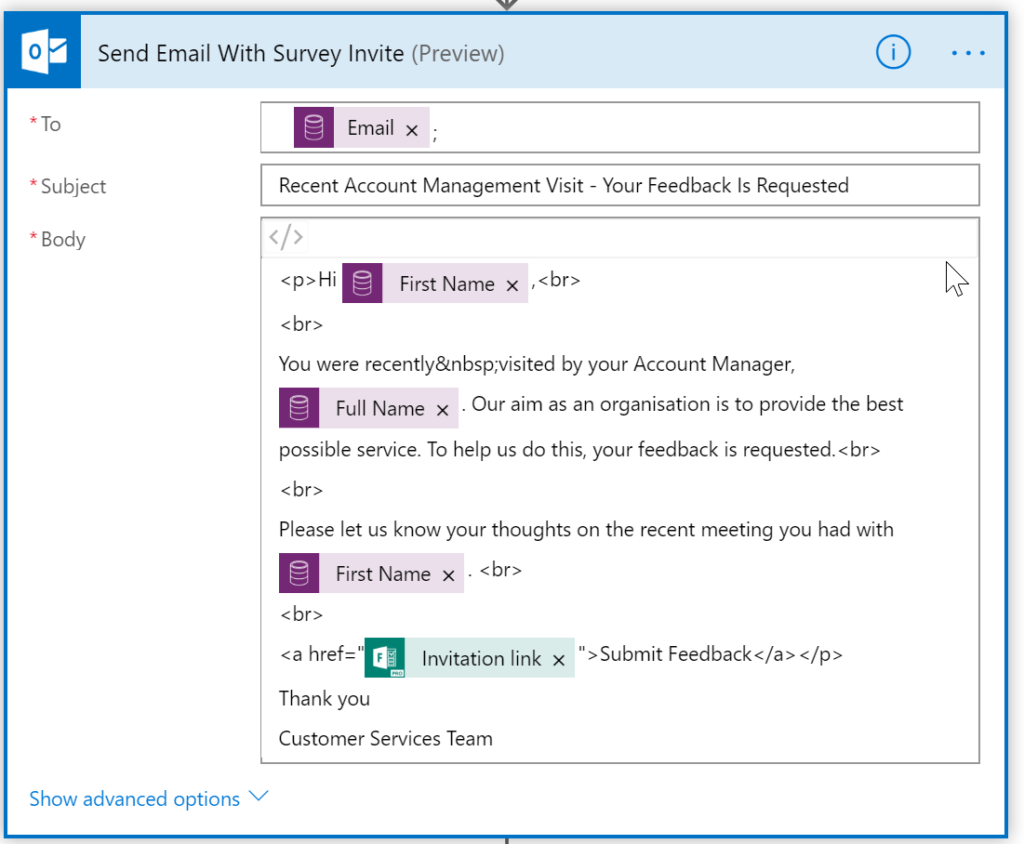
Now we create the email to send out to each Contact who was a required attendee. You can use whatever information you want from the various records you have retrieved, and then bring in the Invitation link from the create survey invitation step.
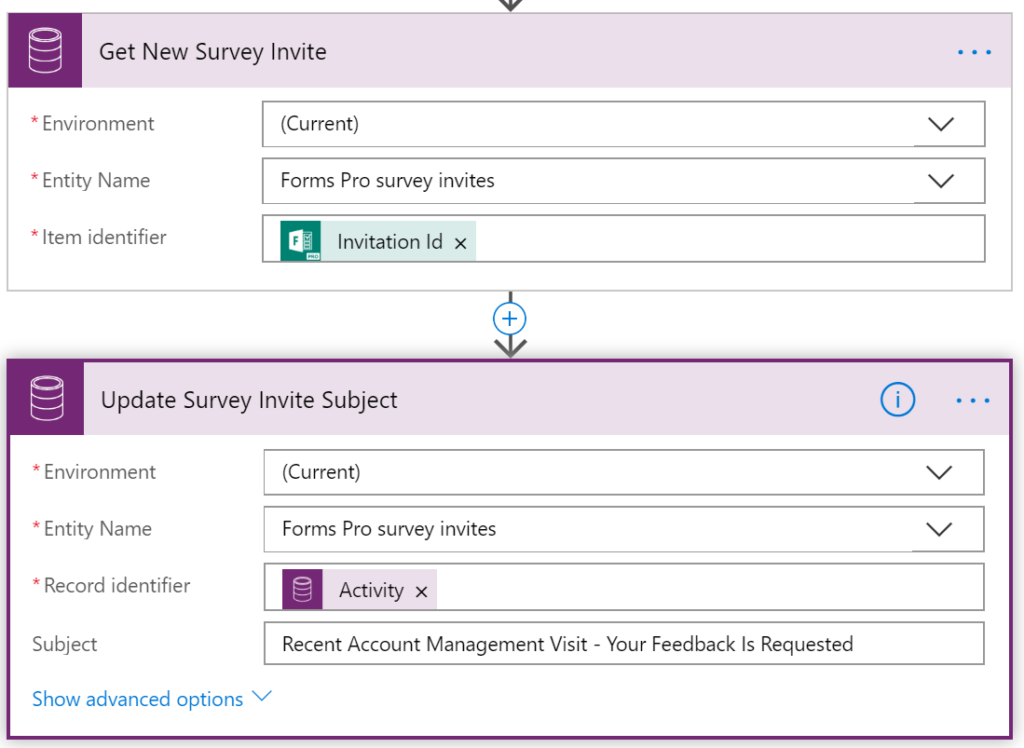
The last thing is just to clean up the survey invite we created. You can view this full blog more about it, but we are essentially just using the Get record step to get the survey invite we created and use the invitation id as the item identifier. Then we use an update record step to update the subject on the survey invite, using the activity id as the record identifier.
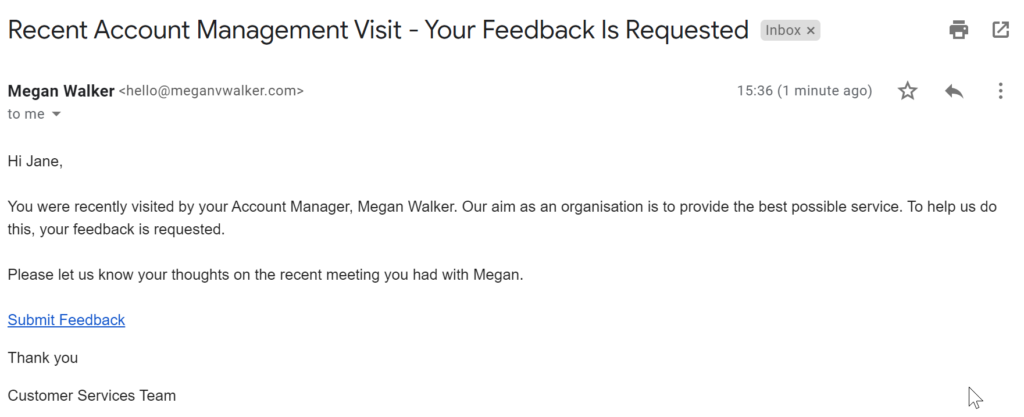
Here is the email that the contact will receive when the Appointment is marked as complete.
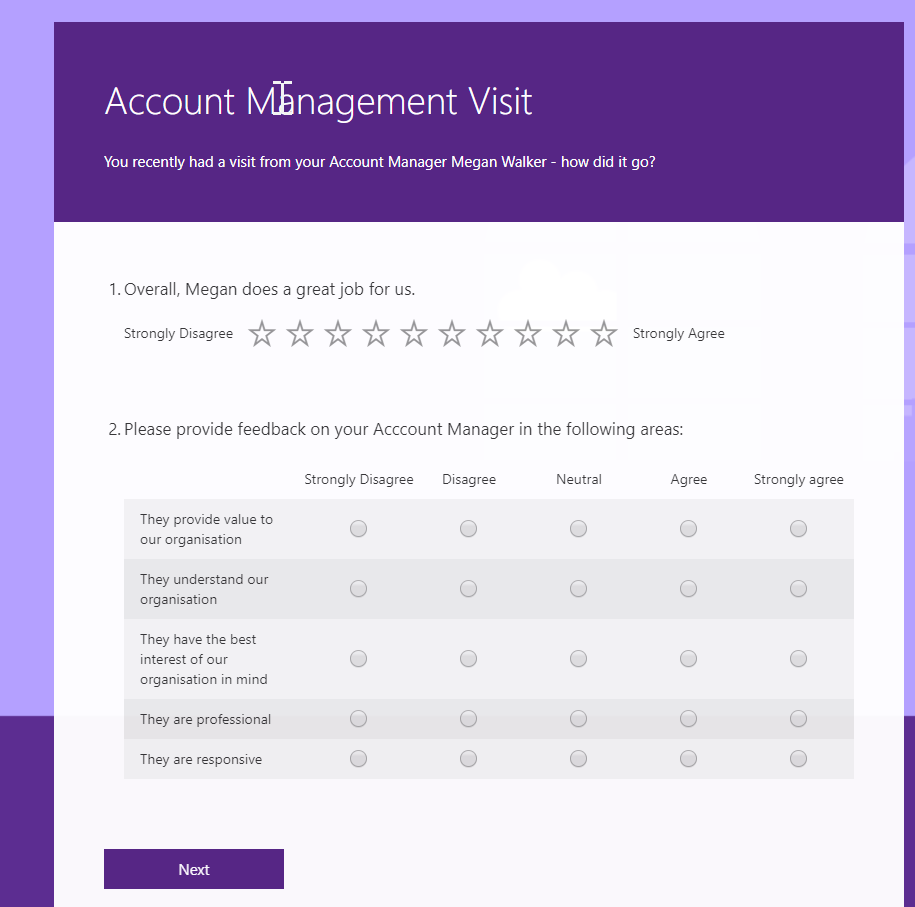
Clicking on the link will take them to a personalised survey showing the name of their account manager.
And finally, we see the survey invites in D365CE with the subject populated with the same value as on the email received by the Contact. Nice and neat!
Want to just watch how to do this? Check out the video below:
Check out the latest post:
Assign Records To A User Or A Team From Your Custom Page
This is just 1 of 571 articles. You can browse through all of them by going to the main blog page, or navigate through different categories to find more content you are interested in. You can also subscribe and get new blog posts emailed to you directly.





One thought on “Send Survey Request To Appointment Required Attendees”
Comments are closed for this post.