*** NOTE: ALL INFORMATION IS ACCURATE AT DATE OF PUBLISHING ***
I had been using CRM for a few years before I realised you could add a photograph to a Contact record by simply clicking on the mystery person image. Uploading an image to identify your contacts, vendors and partners can make quite a difference to the users, giving simple visual indicators. However, how do you get those photos? And it’s a bit of a pain to then manually go through and add them all. What if there was a way to get their photo from social media, and then use something like the Twitter Flow connector to update the Contact record? Well, you are in luck!

To get started, you can go to https://flow.microsoft.com and log in. I’m not going to go in to pricing or licencing in this blog (or any of them in the future!) but if you have a D365 license, you will have access to Flow. To get started, go to My flows, then New, then Create from blank.
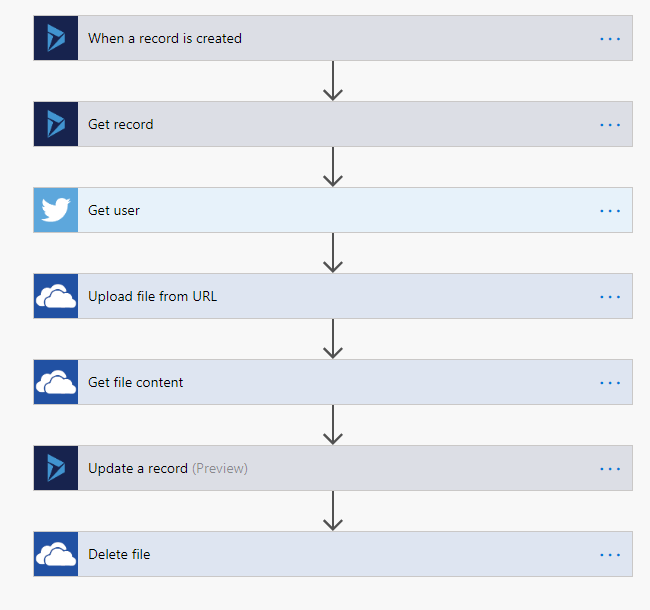
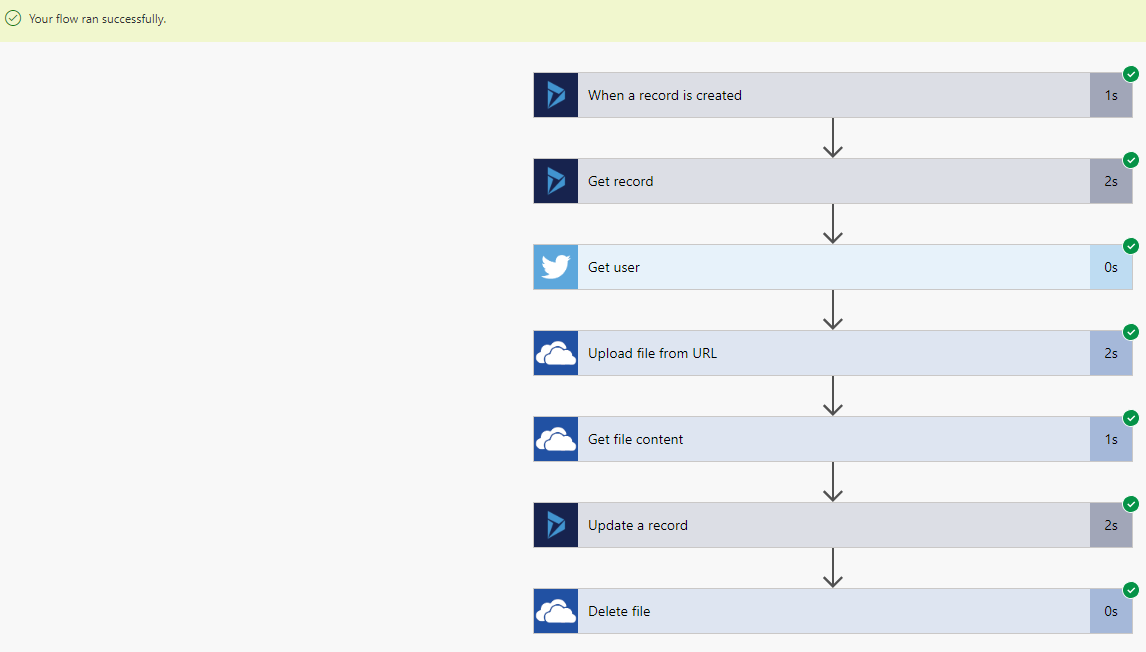
The whole flow is shown below, but I will go in to each step in detail. In a nutshell, when a new Contact record is created in D365 CE (CRM), we will take the Twitter username from a field, pull the public profile image from Twitter, add that image to OneDrive, then use that to populate the entity image field on the Contact that was created. This flow assumes that you are getting the Twitter handle at the time the Contact is created, but keep in mind you might need another similar Flow to run when a Contact record is updated and check to see if there is date in the Twitter field. This flow ALSO assumes you have a field to actually store the Twitter handle, so if you don’t already, go ahead and create one.
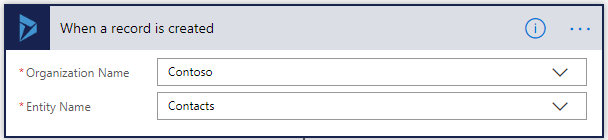
So, the first step is the trigger – what is going to cause the Flow to run. When you add the trigger you will select the Dynamics 365 connector and will be prompted to log in. Then select the ‘When a record is created’ option. Select the Organisation, then pick the Contacts entity.
Now we add a new action by clicking on the plus sign underneath the trigger (hover your mouse over that area if you don’t immediately see it). Search for the Dynamics 365 connector again, and this time select Get record.
*NOTE* After reviewing again, this next step isn’t actually needed. Doesn’t hurt anything having it in the FLOW, but you could go straight from the Trigger above to the Twitter Get user step instead.
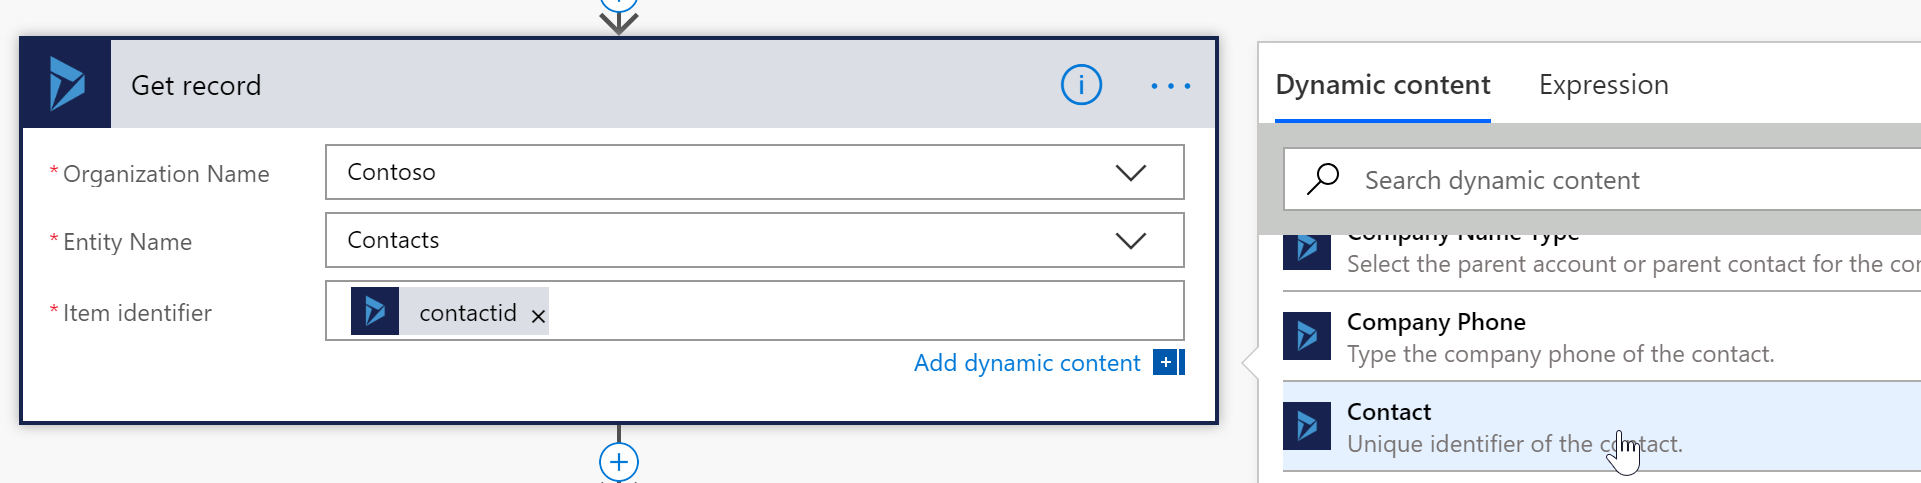
Connect to your Organisation, then to the Contacts entity. For the Item identifier, we need to use the Contact ID. When you click in to that field, you will see a box open on the right hand side where you can search for Dynamic content. You should see this populate with each step of the flow, and then see all of the fields linked to that particular step. You can either type in Contact, or scroll down till you find the Contact field. Clicking on it will add it to the Item identifier section within your flow.
The next step involves the Twitter connector. Search for it, then log in to your Twitter account. Select the ‘Get user’ action. In the User name field, add in your Twitter field from your Dynamic content (see step above) that you will find from the Get record step.

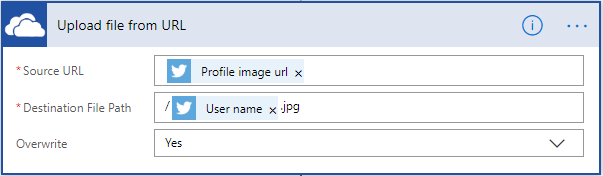
Now we need to do something to get the image from the Contacts Twitter profile. These are public facing images, so we are able to do that using the profile image url from the Twitter connector. Add a step and select the OneDrive connector. Once connected, select the ‘Upload filed from URL’ step. The Source URL is the ‘Profile image url’ value from the ‘Get user’ step above. The Destination File Path can be whatever you chose, but in my example I am adding it to the root folder, and using the user name from the ‘Get user’ step, and adding it as a jpg file. I am selecting to Overwrite the file but in reality it doesn’t really matter, because I have a step to delete the file at the end. If you aren’t going to delete the file, and are going to run the Flow each time the Twitter field is updated, you would want to make sure you have Overwrite set to Yes to avoid lots of duplicate files.
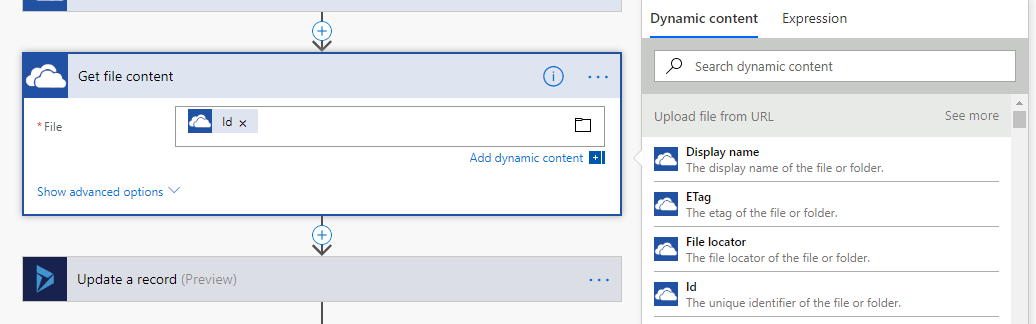
Next, we are going to use the OneDrive connector again, and this time chose the ‘Get file content’ option. You will need to add the Id field from the ‘Upload file from URL’ step of the flow.
Next, we are going to update the original Contact record from the first step, and add the image from OneDrive in to the entity image field. So, add your action step, and connect to your Dynamics 365 organisation, and the Contacts entity. The record identifier should be the Contact id from the second step of the flow. Click ‘Show advanced options’ to see a list of all the fields on the Contact record.

We now need to scroll to the Entity Image field, and then add an expression. It’s hard to see all of the contents added to this field, so here it is pasted below. We need to convert the image in to a format that the entity image file can read and understand to be an image. Special thanks to Jonas Wauters for helping out with the correct format. It’s a lot of trial and error sometimes figuring these things out!
base64ToBinary(body('Get_file_content')['$content'])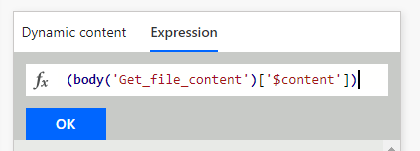
Once you have added the Expression (and clicked OK) you will see it added to the Entity Image field like you see below. You won’t see the full expression.

Finally, add one last step using the OneDrive connector. Add the Id field from the ‘Upload file from URL’ step in your flow. This will make sure your OneDrive folder doesn’t get full of unnecessary files.

Now, go ahead and add a new Contact in your D365 environment, and make sure you add in a Twitter handle. When the Flow runs, you can see if it has run successfully, and will see a green tick next to each step. If it fails, you will see a red cross and be able to see which step specifically caused the failure.
Now go and check your Contact. You should see a lovely photo/image next to their name on the form.

Want to just see how to do this? Check out the video below.
Check out the latest post:
Set A Business Process Flow Stage With Custom Page
This is just 1 of 572 articles. You can browse through all of them by going to the main blog page, or navigate through different categories to find more content you are interested in. You can also subscribe and get new blog posts emailed to you directly.
Hi Megan,
Great post.
Have you tried updating an Entity Image based on an Entity Image from another entity in CDS? E.g. use the Entity Image from Contact on a custom entity when a new record is created.
I tried the easy way of just referring to the Entity Image using the Dynamic Content in Flow but that doesn’t do the job – even though the Flow runs successfully. I also tried using the Base64ToBinary – but that didn’t do the job either.
base64ToBinary(body(‘Get_related_Contact’)?[‘entityimage’])
I’ll try to see if I can extract the image using your method – and then re-upload it to the custom entity. However, I haven’t found a way to do that yet.
Hi Niels, hmmm, no I haven’t tried that! Would be interested to know if you get it to work though!