*** NOTE: ALL INFORMATION IS ACCURATE AT DATE OF PUBLISHING ***
OK so Easter happened a few weeks back now, but let’s just pretend for a moment it didn’t, and this post is topical in terms of my imagery ????????????. If an organisation is planning out their marketing emails and using Dynamics 365 for Marketing, they might want to prepare campaigns that use different images based on fields related to the Contact they are emailing. We can achieve this by using that field in the source link for an image and use a different image based on the value in the field. Let’s look at how to achieve this.
First, we are going to use three different images, one for each value we have on a custom Account Plan field on an Account record. We have Gold, Silver and Bronze account plans, and each plan is offered a different discount in an Easter sale. Each image must be named the exact same thing as the values in your field. So we have a Gold.jpg, a Silver.jpg and a Bronze.jpg file. We then need to upload the images somewhere on a server where the images will be accessible to the outside world. So if they were to go to the direct link for the image, could they open it. For this example, I have the three images stored at https://meganvwalker.com/marketing/images

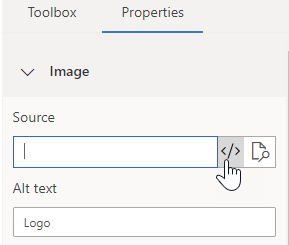
On our marketing email we can add in an image from the Basic elements in the Toolbox.

We then click on the Properties tab for the image. Click on the assist edit button in the Source field.
From here, select the Contact record, then Company Name (Contact) – > Account for the related Account record. Finally, pick the field you want to use. Do not click on the Insert button.
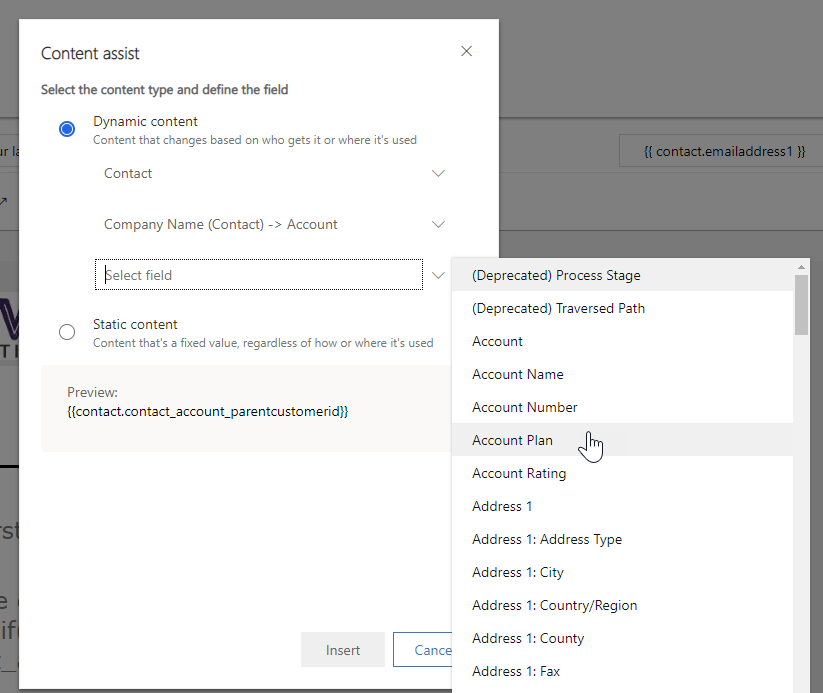
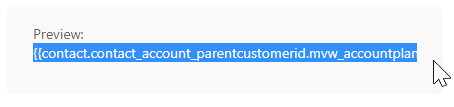
The field with the relationship from the Account back to the Contact will be displayed in the Preview at the bottom. You should be able to copy this and add it to Notepad or some other editor. You’ll need that next. Cancel out of the screen.
Now combine the link to the folder where you have added your images online. Then add the field name, and finally add in the extension for the image (jpg, png, gif etc.). So your end result will be something like:
http://yourdomain.com/folder/imagefolder/{{your field name}}.jpg
Use that and paste it in to the Source field. The image should then show a little </> on it to indicate there is code to determine the image, rather than pointing to one specific image. One thing to note, when I did this, the image was hidden and I could no longer access it or any of the properties.

When I clicked on the Preview tab I could see that there was an element there. Once I saved, went out of the email and back in, I could then see the image element in the Designer tab again. So just check that before you try adding the image over and over again!

Once you send out the email, you should see the correct image pulled in based on the field value on the Account record the Contact is linked to. A couple of things…. make sure you have a default value in that field, OR make sure your Segment uses that as a filter and excludes Contacts where that field is empty. Also, as mentioned above, make sure you name your images the exact same name as the values on your fields.

Check out the latest post:
Setting Up reCAPTCHA v2 For Your Realtime Marketing Forms
This is just 1 of 571 articles. You can browse through all of them by going to the main blog page, or navigate through different categories to find more content you are interested in. You can also subscribe and get new blog posts emailed to you directly.