*** NOTE: ALL INFORMATION IS ACCURATE AT DATE OF PUBLISHING ***
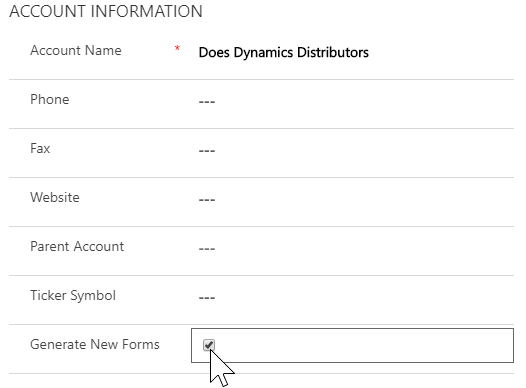
Following on from the first part of Creating A Forms Library, let’s now look at creating a Microsoft Flow to generate the Form Requests for an Account and have them displayed in your Dynamics Portal. The first thing we need is a trigger of some kind. To keep things simple I have a Yes/No field to indicate if forms should be generated for an Account.
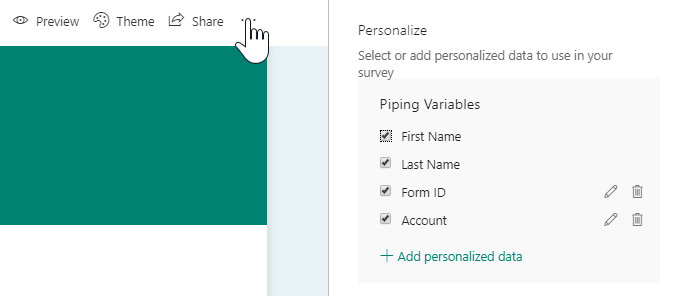
The next thing we need are the forms, or the surveys that your client will complete. For each survey you create in Forms Pro, make sure you personalise it and add in some variables. Click the ellipsis at the top of the survey and select the Personalize option. Add in two new variables, Form ID and Account. We are going to use these in the Flow to pass through some context in the survey invitations.
In Microsoft Flow create a new flow with a trigger from the Common Data Service connector when a record is updated. We only want it to run if our new field is changed, so add in the field as an attribute filters item. After that, add a condition to check and make sure the field is equal to true (or Yes).

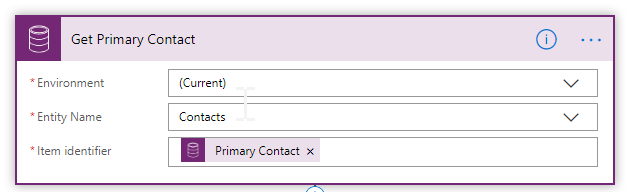
In order to generate the individual survey invitations for an Account, we need to still link it to a Contact record. To do this we will add in a Get record step and get the Primary Contact from the Account record in the original trigger step.
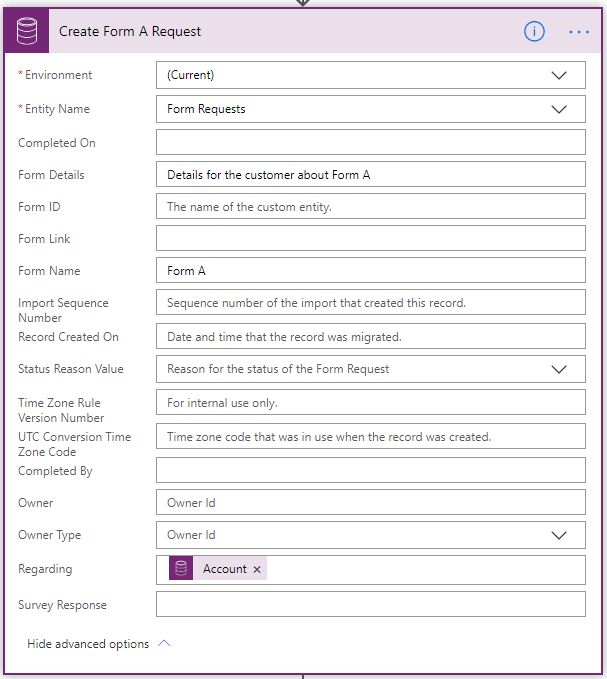
Now that we have that, we will create our first Form Request record. Fill out the Form Details to explain to the customer what the form is for. Add in the Form Name. Also, add the Account id in the Regarding field.
Next we will use the Forms Pro trigger step to create a survey invitation. We aren’t going to use this invitation in the usual sense which might be to send it in an email. Instead, we need to generate this so that we can get the URL for the survey and add it to the portal. Fill out all of the fields using the Primary Contact info on the Email, First Name, Last Name and recipient details. Add the Account in the regarding, and the Account Name in the Account field pulled from the trigger step. Finally, add in the Form ID from the Create Form Request step. We are sending this through in the survey invitation URL so that once the survey response has been received we can tie it back to the correct Form Request.

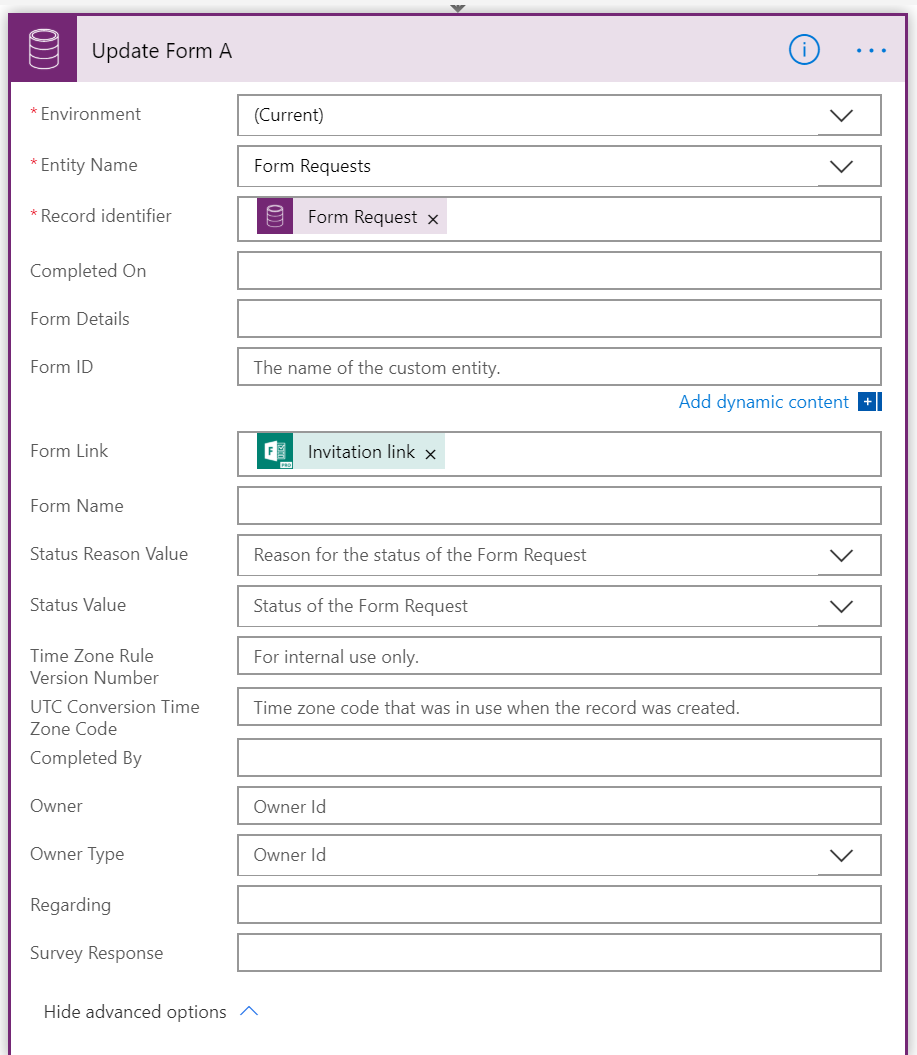
Finally, update the Form Request you created earlier using the Form Request id as the Record identifier. Add the invitation link you just created to the Form Link field.
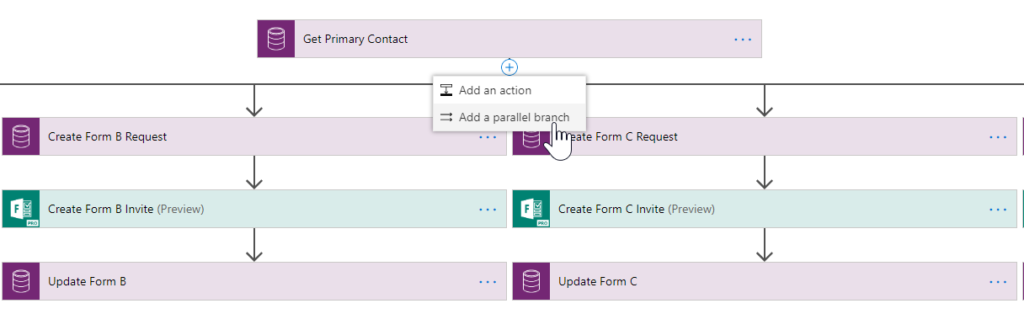
Now for each of the forms you need to create add a parallel branch and add in the same exact steps for each one. You can also add in each Form one underneath each other rather than a parallel branch, and a lot of this would depend on how many forms you need to create.
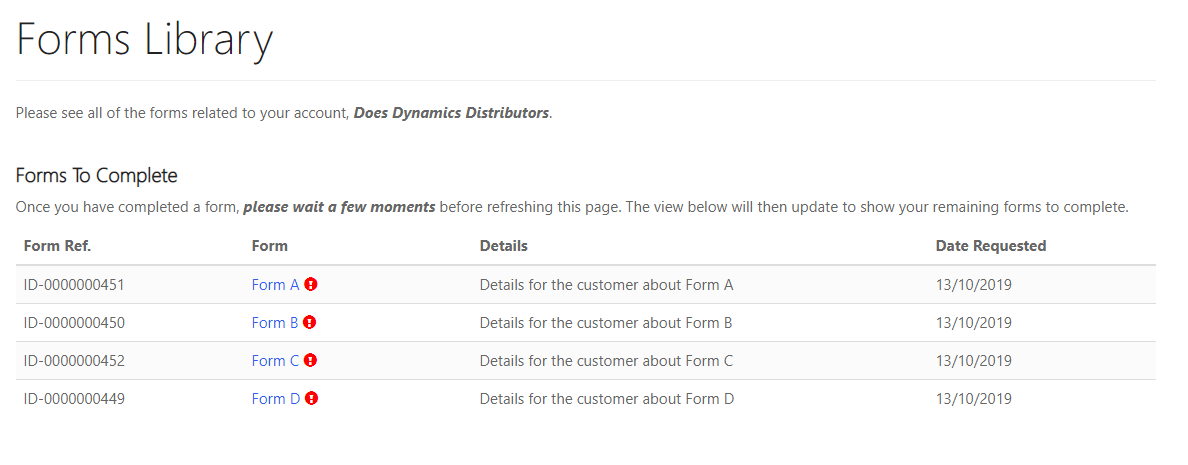
Go ahead and test your Flow by setting off your trigger on a test Account record. Even though you have used the Primary Contact when triggering the survey invitations, you’ve set the Entity Permissions in the Portal to allow any Contact at this Account to see the Forms that need to be completed. If you need just specific people to see the Forms Library add in a new Web Role to accommodate this requirement. Here is what a Contact will see when the new Forms have been generated. They can click on the hyperlink for a Form which will then open up the survey in a new tab in their browser.
That’s it for this part. The next and final post in this series will walk through another Microsoft Flow, this one used to update everything when a Contact completes one of the forms.
Want to just watch how to do this? Check out the video below:
Check out the latest post:
Show Loading Screen In Your Custom Page While Your Collection Is Created
This is just 1 of 574 articles. You can browse through all of them by going to the main blog page, or navigate through different categories to find more content you are interested in. You can also subscribe and get new blog posts emailed to you directly.
One thought on “Creating A Forms Library – Flow One”
Comments are closed for this post.