*** NOTE: ALL INFORMATION IS ACCURATE AT DATE OF PUBLISHING ***
Unless your full-time job is a digital marketer and you are paid to manage and review website traffic, chances are you won’t have time to check your website statistics every single day. Perhaps you make it a weekly activity to review in-depth, but there are likely one or two things you want to know about as soon as they happen. For this, we can create custom alerts in Google Analytics, so we get emailed for specific events. In this post, we will walk through how to set up these alerts, be it for positive or potentially negative scenarios.
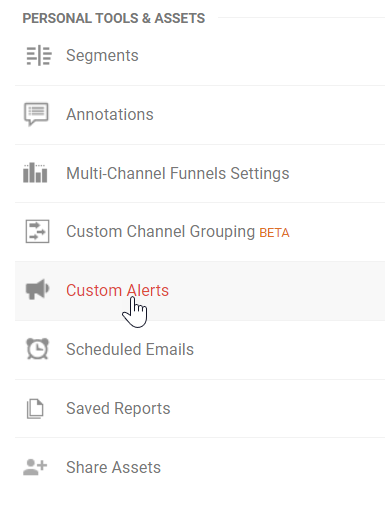
Start by going to the Admin Area, then the View you wish to add the alert to. In the Personal Tools & Assets menu, click on Custom Alerts.
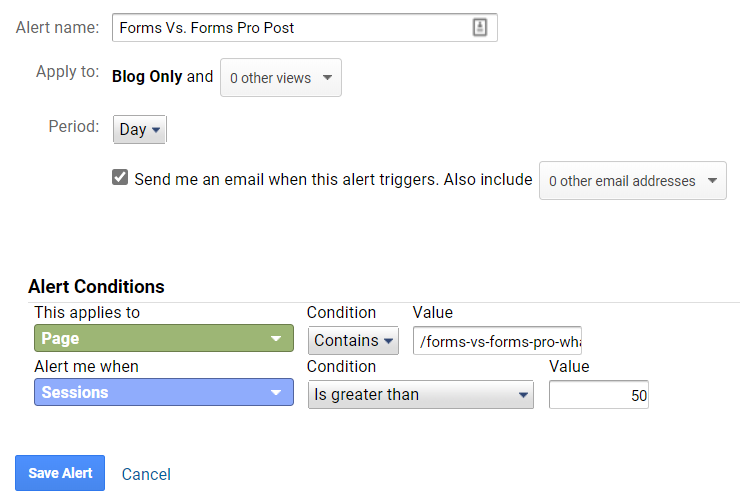
First, we give the alert a name. In this alert, I want to know if a specific post gets more than a certain number of sessions on a regular basis. So the time period is Day, and I want to get an email when the alert is triggered. The Alert Conditions are set to apply when a page contains the substring URL from the page (the portion after the domain), and the alert is when the sessions is greater than 50. The alert can be saved.
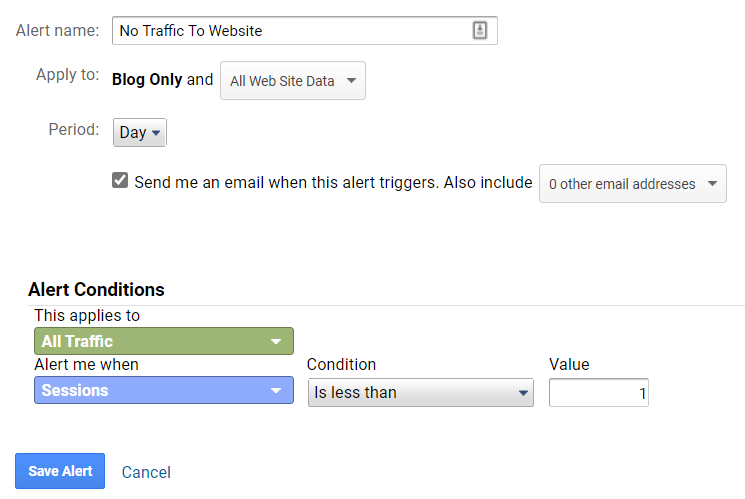
Next, how about an alert to let us know if there is no traffic to the website at all? OK, if you are just starting out, it’s possible a day could go by without any visitors…. but think long term. Once your site is established, not getting any visitors could be strange, so we can use this alert to indicate something might be wrong with our website. I want to know this as soon as possible, so we can set this alert for all traffic when the sessions is less than 1.
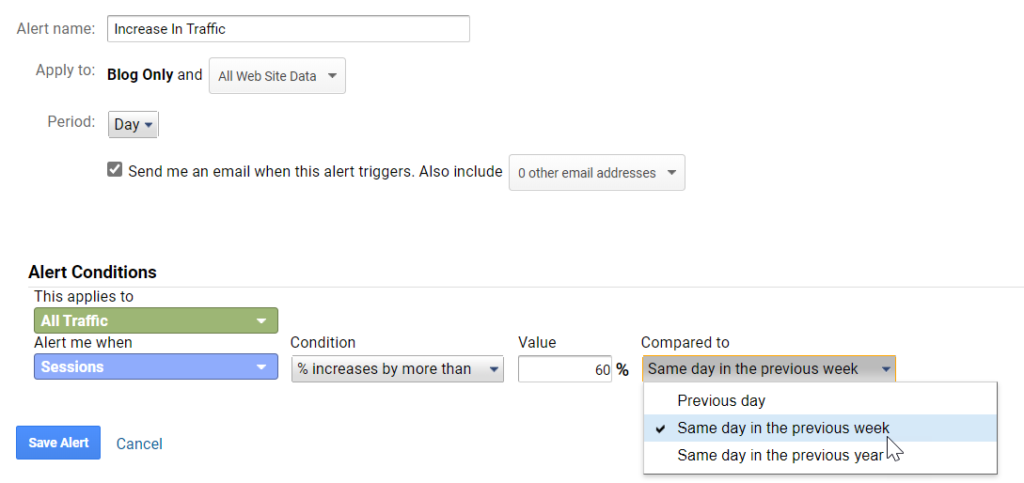
What about knowing if there is an increase in the traffic to your website? That could indicate someone shared a link to one of your posts, or maybe you did a presentation at an event and people are searching for your site afterwards to see more of your content. So in this one we can have an alert that triggers on all traffic when the sessions increase by a specific percentage from the same day in the previous week.
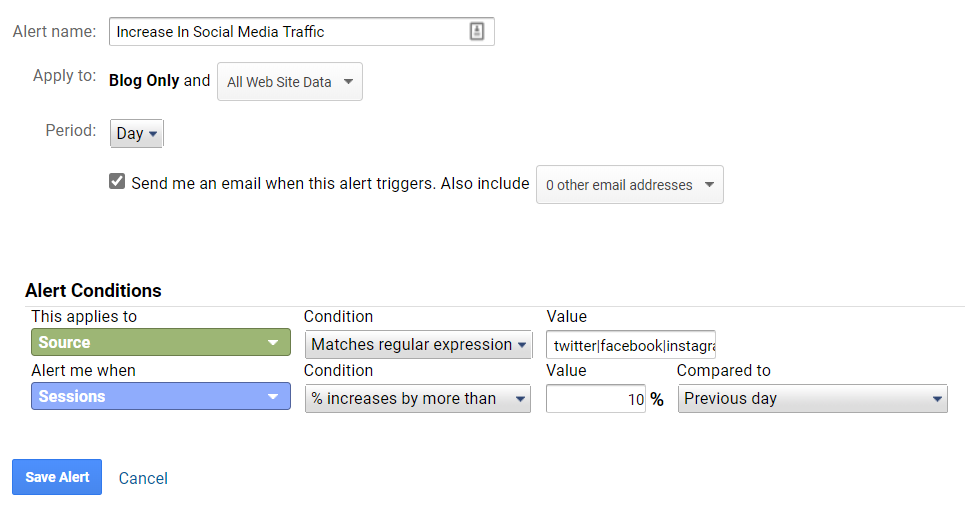
We can also set up a trigger to let us know when there has been an increase in social media traffic. For this one we will apply it to the source, with a regular expression that when matched and the sessions have increased by more than 10% from the previous day, we will be notified. For the expression you can string the various sites together like this: twitter|facebook|instagram|linkedin
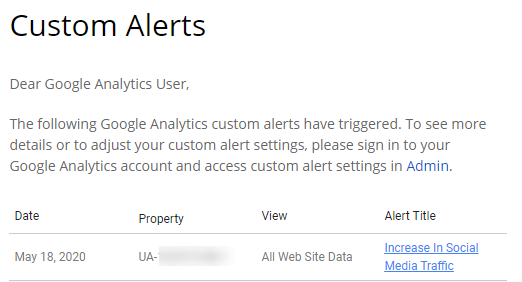
Once an alert has been triggered, you will receive an email like this letting you know (assuming you checked the option to send be sent an email).
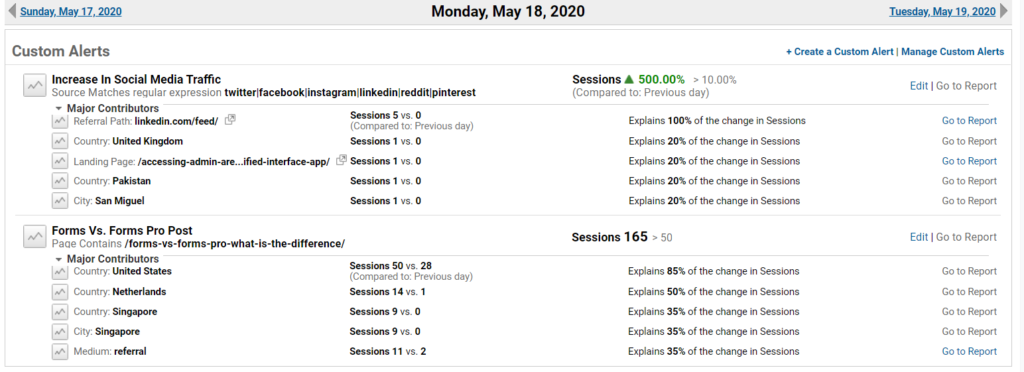
Clicking on the link will take you to the alert so you can review and see what some of the major contributors were in causing the alert to be triggered.
If you want to go back through your alerts, you will be able to access them from the Customization section in the navigation, then click on Custom Alerts. From here you can view details, and make changes to the alerts if necessary.
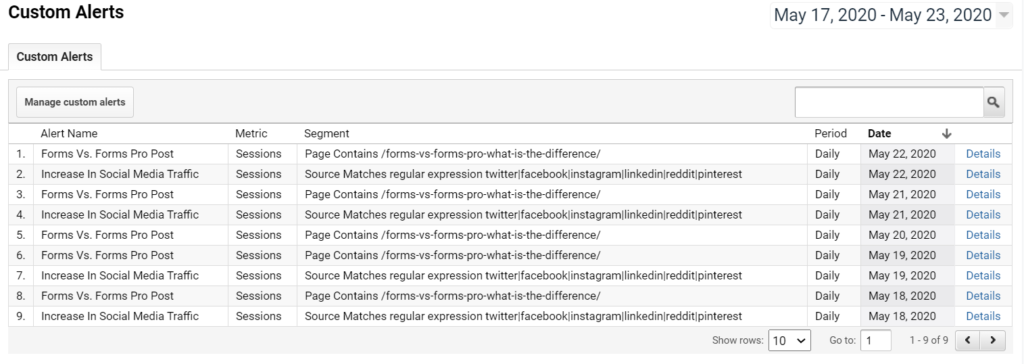
There are so many options available to create your alerts. This has shown just a few examples. Also keep an eye on your alerts and if you are getting one every day, it’s time to think about the criteria and either increase or decrease the values used in the conditions so that your alerts are more meaningful.
Want to just watch how to do this? Check out the video: https://youtu.be/Bg1gtgDa1vY
Check out the latest post:
Setting Up reCAPTCHA v2 For Your Realtime Marketing Forms
This is just 1 of 571 articles. You can browse through all of them by going to the main blog page, or navigate through different categories to find more content you are interested in. You can also subscribe and get new blog posts emailed to you directly.

