*** NOTE: ALL INFORMATION IS ACCURATE AT DATE OF PUBLISHING ***
Search on Google for a specific movie, or a topic current in the news and the results displayed to you may show times for films, or links to articles relevant to your keywords. Ever wondered how those results look slightly different to others? Their websites have been set up using structured data and letting Google know that their site contains Articles, Events, Films or Reviews (lots of other options too). If you are lucky enough to have your own webmaster, you might already have this set up for your own website. If not, it’s really straightforward to set up.
Using Data Highlighter Can Change Your Sites Search Appearance
First, make sure you have the Google Webmasters Search Console set up. It’s a must have for anyone wanting to review broken links for their site, or see search terms being used to find your site. It should become your new friend. 🙂
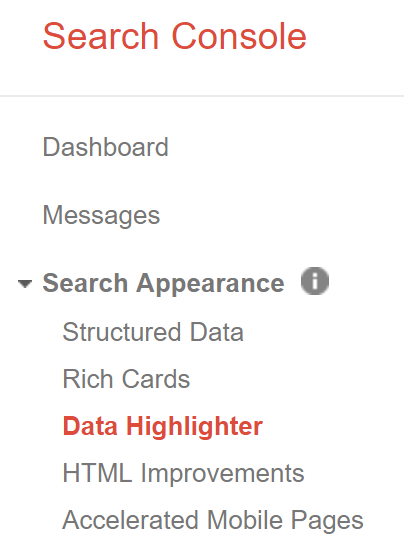
Once that’s set up click on Search Appearance, then Data Highlighter:
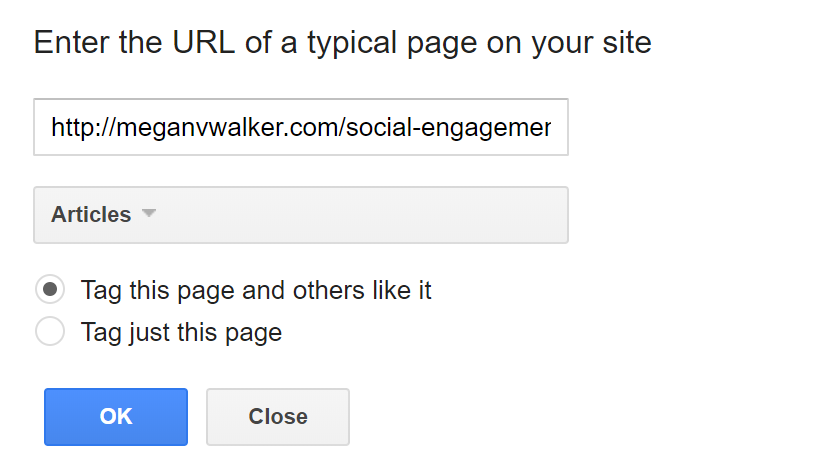
From the overview tab, click on Start Highlighting. Next, enter in a URL for one of the pages on your site. I have added a link to one of my blog posts, and want to have them displayed as Articles. This works great for a news site. You can also tag Book Reviews, Events, Films, Local Businesses, Products, Restaurants, Software Applications and TV Episodes. Click OK to go to the next step.
Tag Your Fields In The Data Highlighter
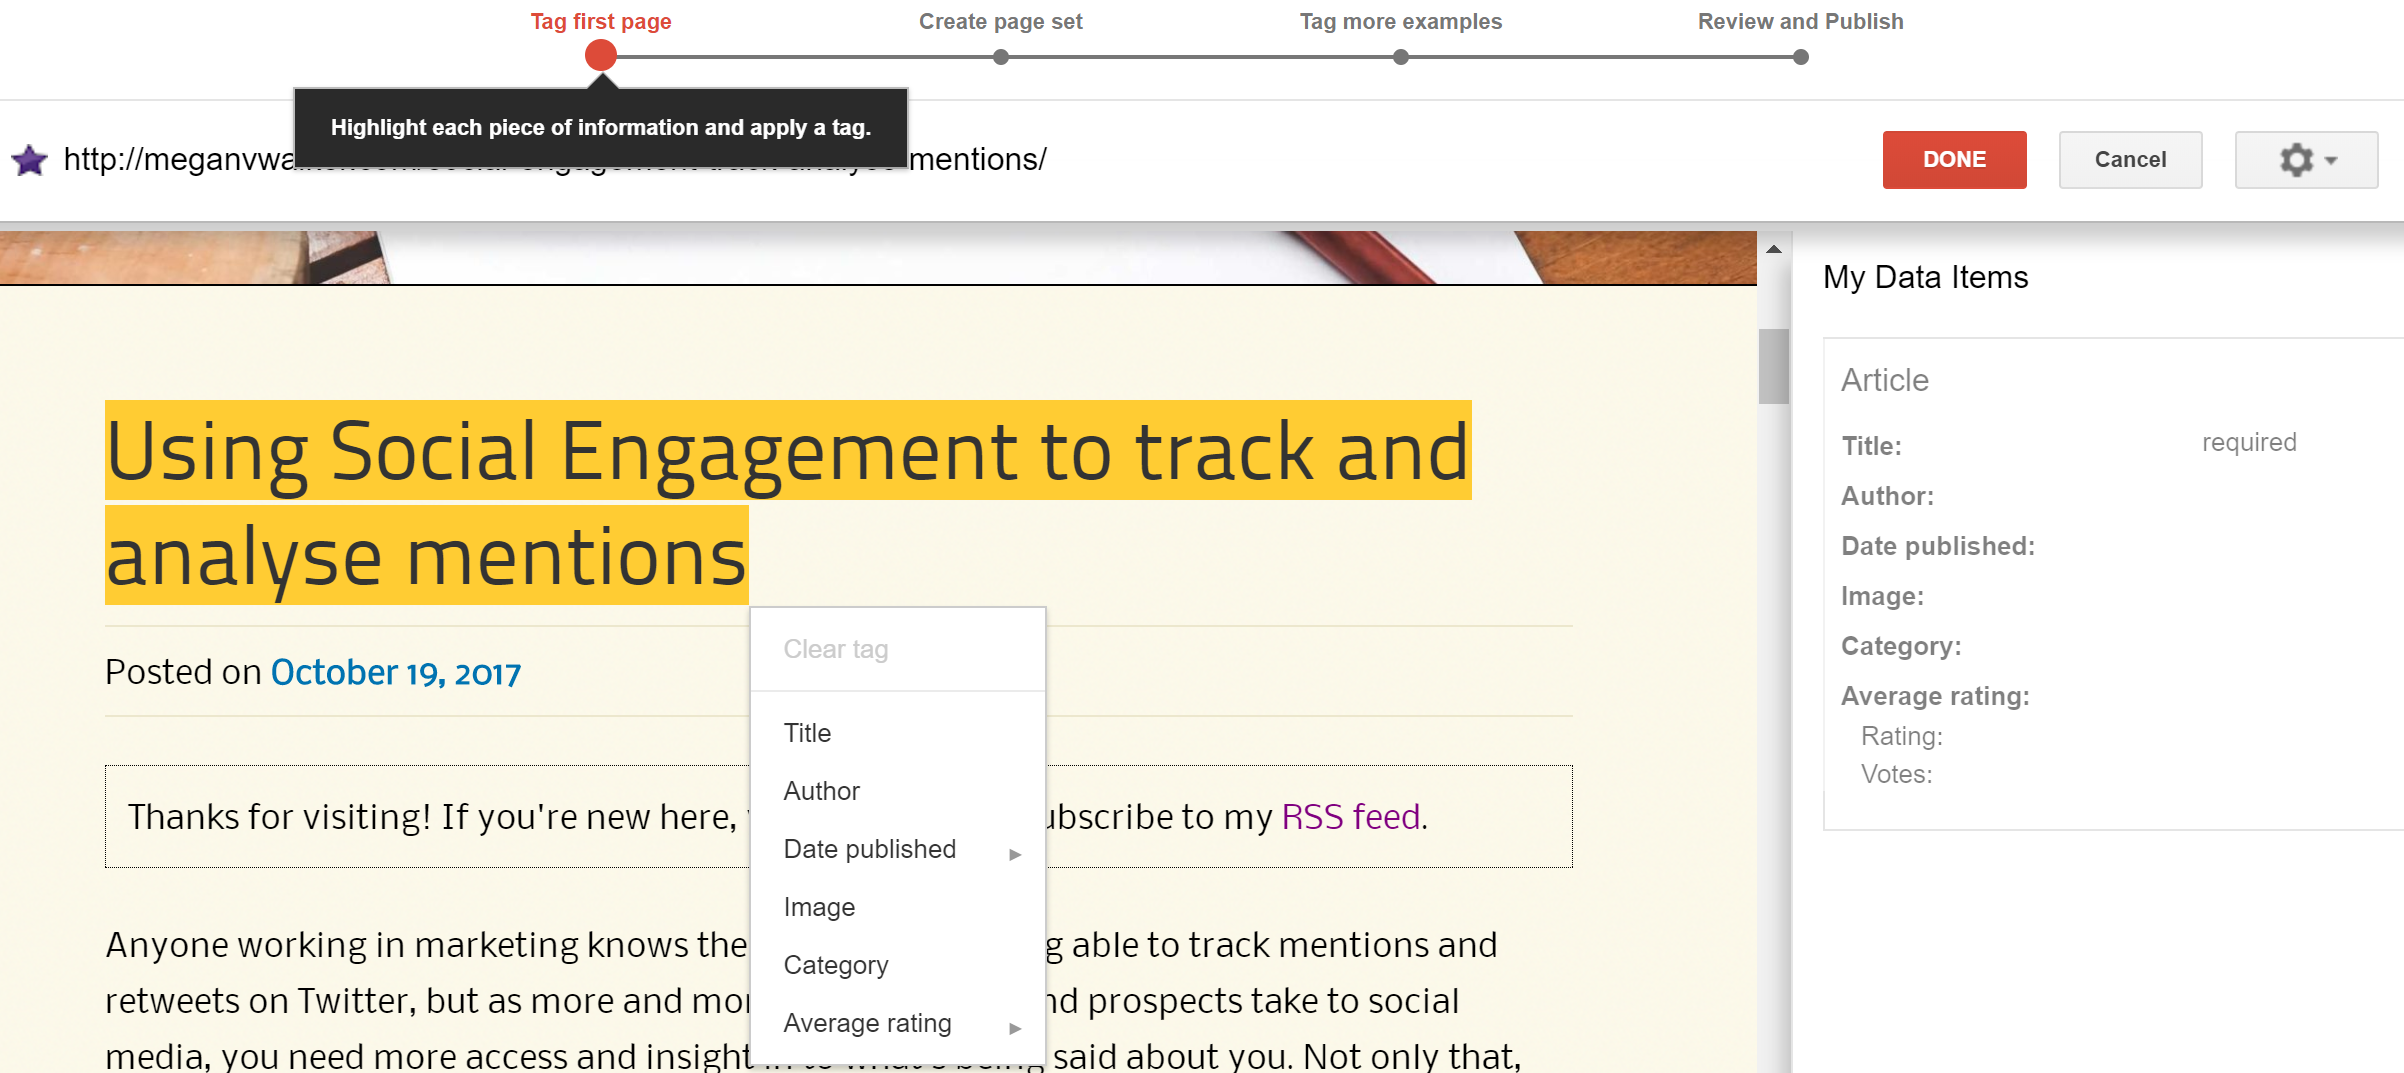
This is the easy part. Your content will be displayed on the page you added to the URL field above. Simply use your mouse to highlight a section of content, then pick the tag from the list that makes the most sense. Here I have highlighted the title of the blog post and then select Title. I can do the same for the Posted on Date, Author, any images, the Category and a rating if applicable. Click DONE to continue.
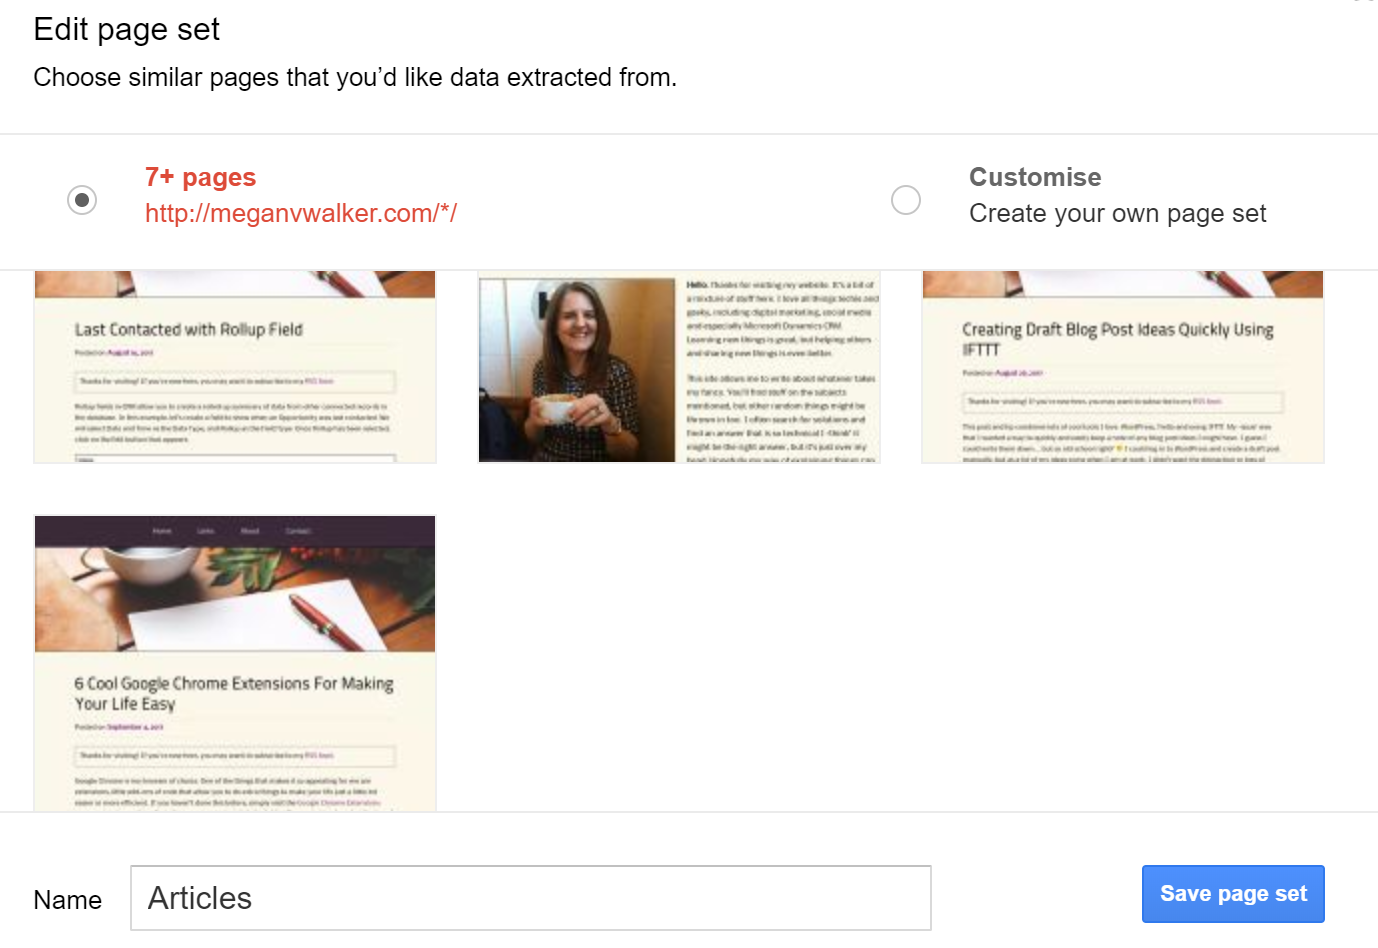
You will then be shown other pages that Google has found that it thinks are similar. You can change the URL structure it’s created. Your blog might sit in a structure such as http://yourdomain.com/blog/. Don’t worry if it has shown some pages that don’t fit in your page set, you can remove them in a few moments. Click Save Page Set to continue.
You will then go through each page Google has found and review the tags it’s found. These should be accurate if you have highlighted the correct information in the first step. If not, you can change them if needed. You can also Remove a page if it shouldn’t be included in the page set (if it’s found something that isn’t actually an Article or Event etc.).

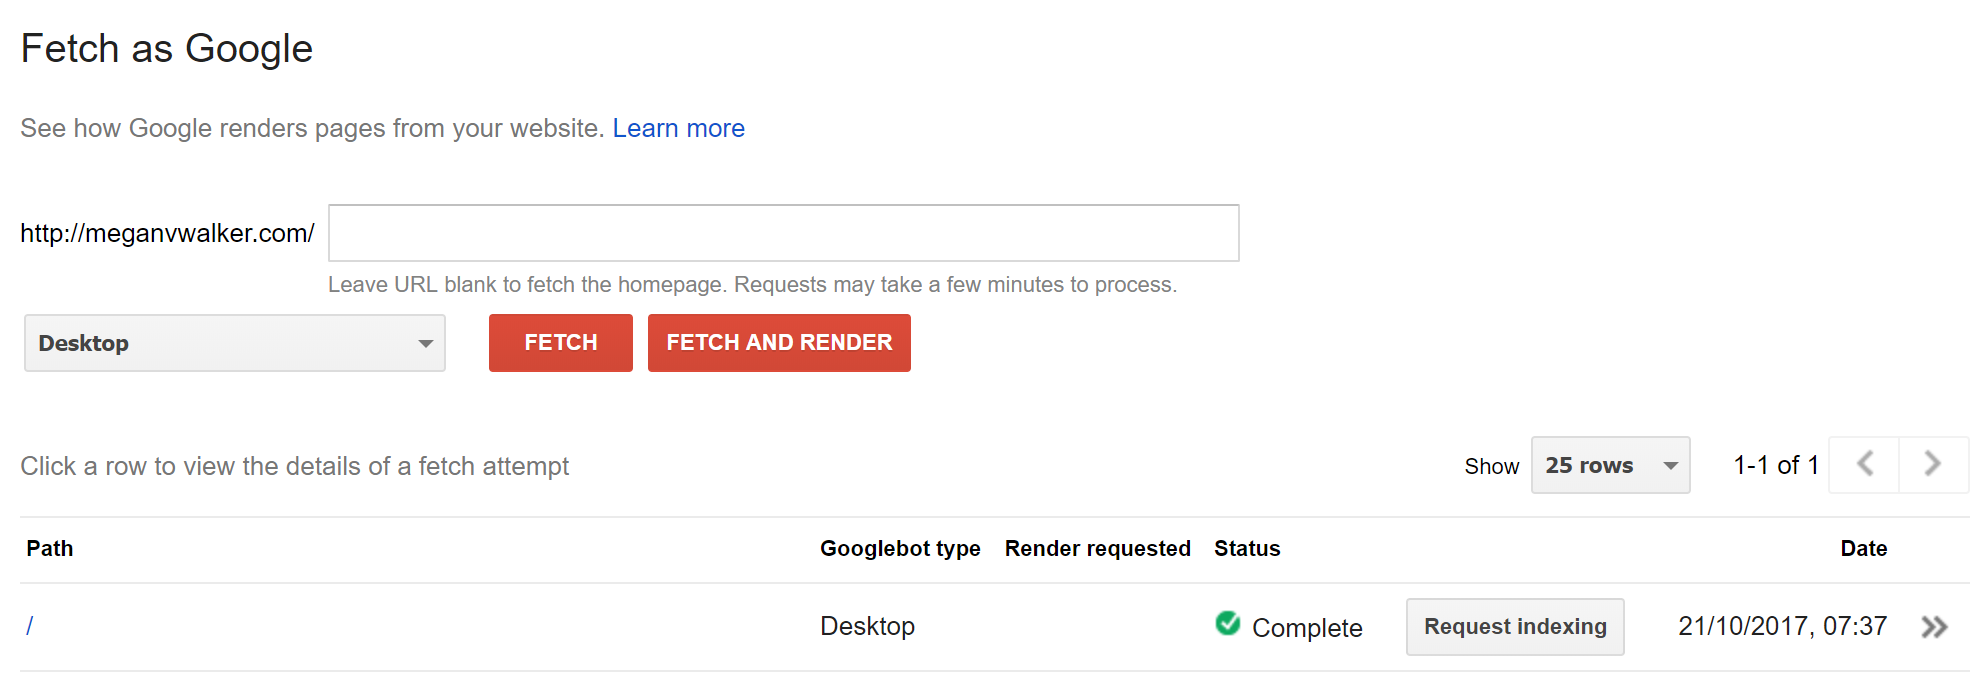
Once you are done, you will be prompted to Publish the page set. That’s it! Google will ‘hopefully’ start displaying your content in a new attractive way once your site has been re-indexed. No guarantees but no harm in setting this up. If you are impatient and don’t want to wait for Google to do that in it’s own sweet time, you can submit a request for indexing. From the Search Console menu, click on Crawl, then Fetch as Google. Click Fetch, then once the row appears below, click Request indexing. How do you think you might use this for your own website? Let me know in the comments below!
Check out the latest post:
Set A Business Process Flow Stage With Custom Page
This is just 1 of 572 articles. You can browse through all of them by going to the main blog page, or navigate through different categories to find more content you are interested in. You can also subscribe and get new blog posts emailed to you directly.
