*** NOTE: ALL INFORMATION IS ACCURATE AT DATE OF PUBLISHING ***
I’ve written previously about a great solution from Bruce Sithole, and Using 365 Notify For Instant Notifications. That’s great for users to get push notifications that they set up, but what if you want to trigger an email notification to go to people on an ad hock basis. Let’s say on a case for example if we want to notify specific people for internal awareness. This post shows how we can send internal notifications using a temporary team.
Before we get started, note that this method might not work for everyone and a lot depends on the size of your organisation. This process would work best for smaller organisations (for reasons which you will see why as you read further). First, we are going to add some new Yes/No fields to the Case entity. We’ve got the option to notify several people about this case, the Support Manager, Account Manager, Finance and Management. Then we have a field to trigger a workflow to Send the notification email. This can be left like this, or you can follow steps similar to those in this article and add a button to the ribbon workbench and then hide this field (cleaner, neater and cooler!).

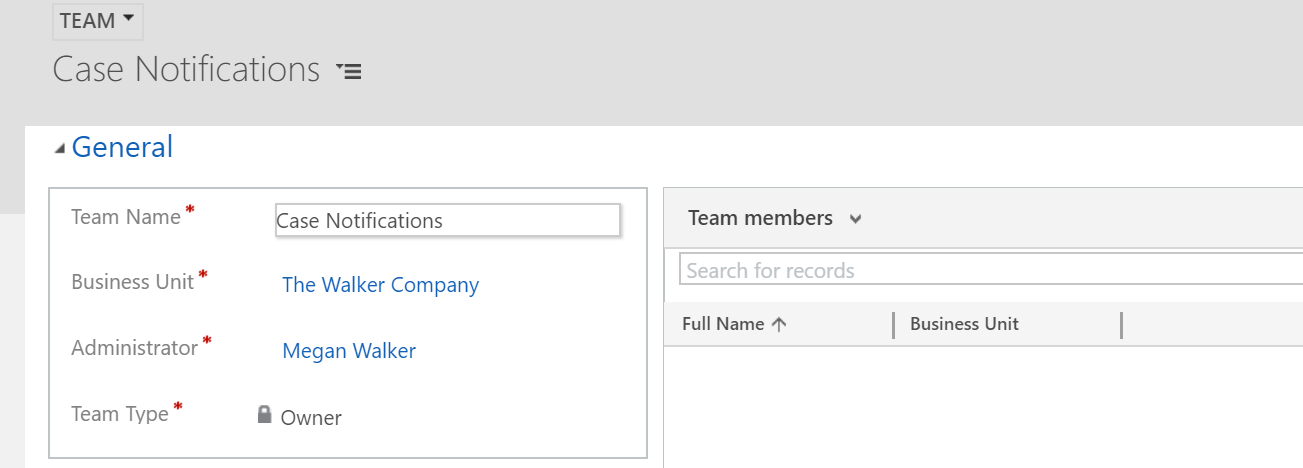
Next, we are going to create a new Team. The team won’t have any members, but it’s purpose will be to move members in and out of it and then send an email to the Team when we want to send out a notification.

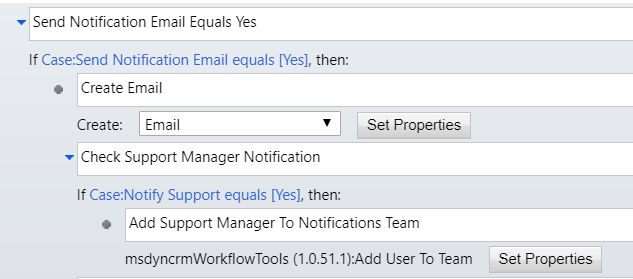
Now we will create a workflow that runs on the Case entity, and runs on change of the Send Email Notification field. The first condition is to check that the Send Email Notification field is Yes. If it is, we are going to Create Record, and then pick Email. Don’t select the Send Email option because we need to do some further checks before we do. Set up the body of your email with the details of the case that you want to send. Set your From email parameter, but leave the To field blank.
Now we are going to set up four sections, one for each of the Notification check boxes we created for the case entity. You can see the example below for the Support Manager Notification. If it’s set to Yes, then we are going to add the Support Manger (the user that has that role within the organisation) to our temporary case notifications team.

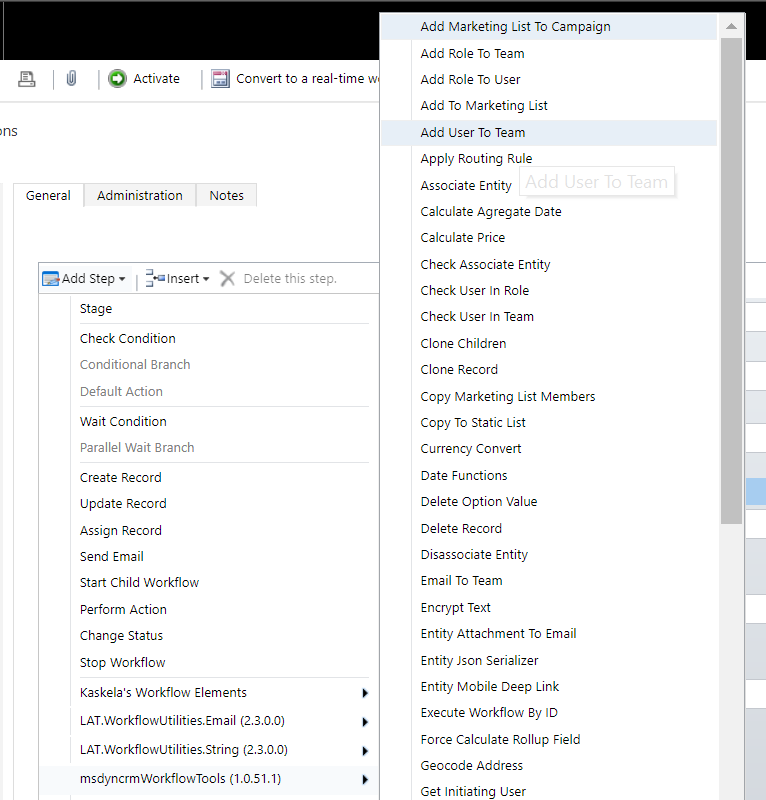
To do this, you will need to download and install the awesome Workflow Tools solution from Demian Rasko. This will give the option you see below to Add User To Team.

The two parameters to set are the User and the Team in which to add them to.

We then do the same again and add conditions for the other check boxes. For the Account Manger notification, add in a condition and a line to check for each Account Manager. This is where you should see that this process could be very labour intensive to set up for a larger organisation.

Once you have added all of the condition checks, use the Email To Team option, then use the email message from the Create Email step at the beginning, and pick the Case Notifications team you created.

Next pick the Send Email option. The email will go to all members of the team. So anyone you added based on which tick boxes had been selected. The last steps are to now remove all of the users from the team. Add a new line for each person that could potentially have been added to the Notifications Team. You could also add in the logic to update the case and reset all of the notification tick boxes to No in case a second email is needed later on for the same case.

Check out the latest post:
Set A Business Process Flow Stage With Custom Page
This is just 1 of 572 articles. You can browse through all of them by going to the main blog page, or navigate through different categories to find more content you are interested in. You can also subscribe and get new blog posts emailed to you directly.
