*** NOTE: ALL INFORMATION IS ACCURATE AT DATE OF PUBLISHING ***
In Part 26 of this Google Analytics Series, we reviewed how to add an A/B test to your website using Google Optimize. Then in Part 27 we looked at the reporting and analytics for Google Optimize. Another experience we can create is one that’s personalised and shows a version of a web page to specific targeted visitors. Let’s review how to set this up.
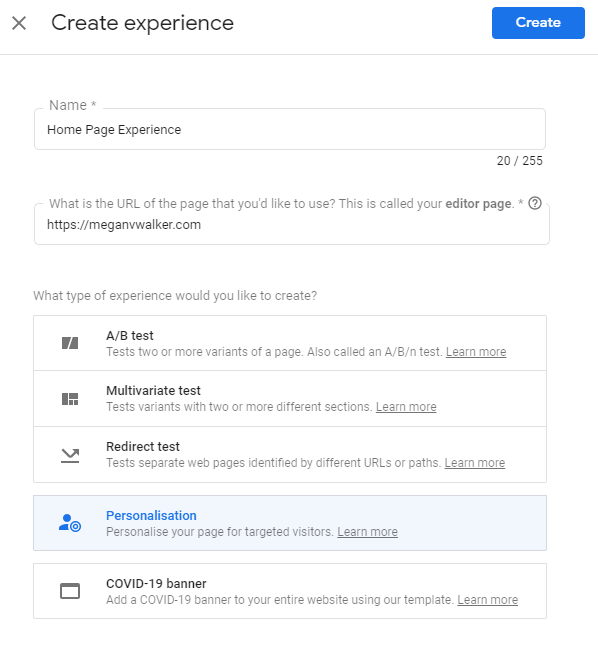
Logging back in to Google Optimize, click to create a new experience. Here, I am going to create one experience for returning users, and another for new users to the home page of my website. I’ve selected the Personalisation option for the experience.
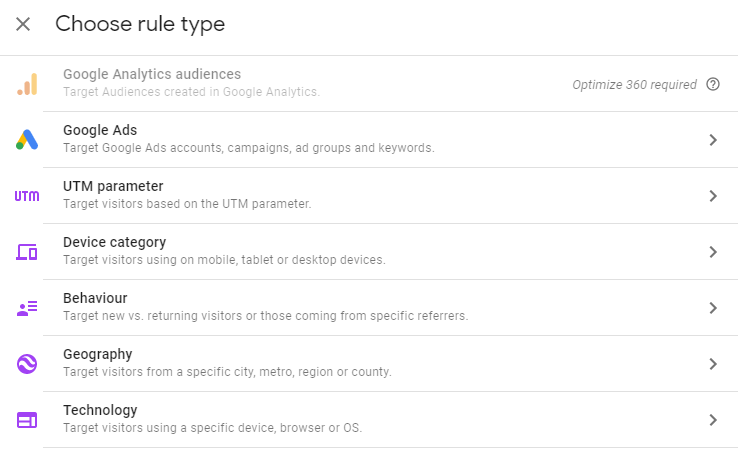
The audience targeting is important to determine who the audience actually is. Here we can see all of the rule types. So, you could use a specific UTM parameter, which could be helpful if you are using the Campaign URL Builder reviewed in Part 19 of this series. Or, you could target visitors based on the device they are using. Perhaps one version of a page to those on a desktop, and another to those on their mobile. Geography can be used to select a specific audience and can be set based on a specific city, metro area, region or country.
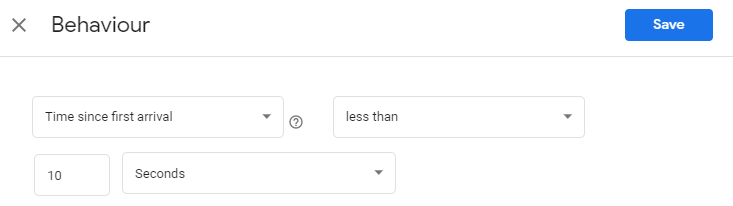
For this experience, I am going to choose Behaviour, then sent it to be that the Time since first arrival is less than 10 seconds. This will then kick in for people without a cookie added to their browser for the website, therefore they are likely a new visitor.
You can keep on adding more targets as required.

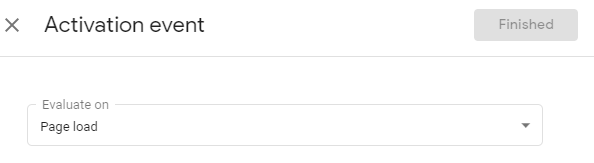
We also want to set that this will be activated on the load of the page.
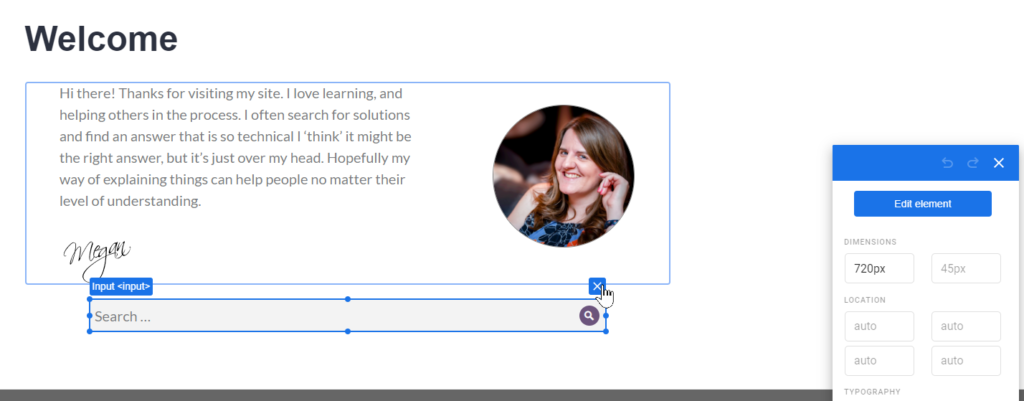
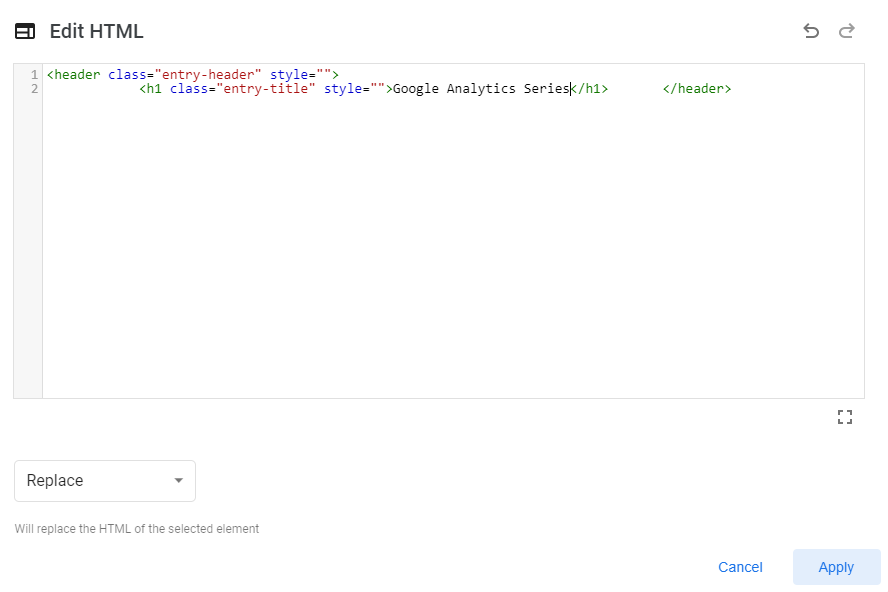
Now we can edit the experience. When a new visitor comes to my site, I want to show a different section at the top of the page, letting them know about the Google Analytics Series I’ve been sharing. I can click on an element on the page, then click on Edit element. For the search box, I can delete this element. For the Welcome text, I can click on that element and Edit the HTML.
Here we can change it from Welcome to Google Analytics Series. We can then Apply the change.
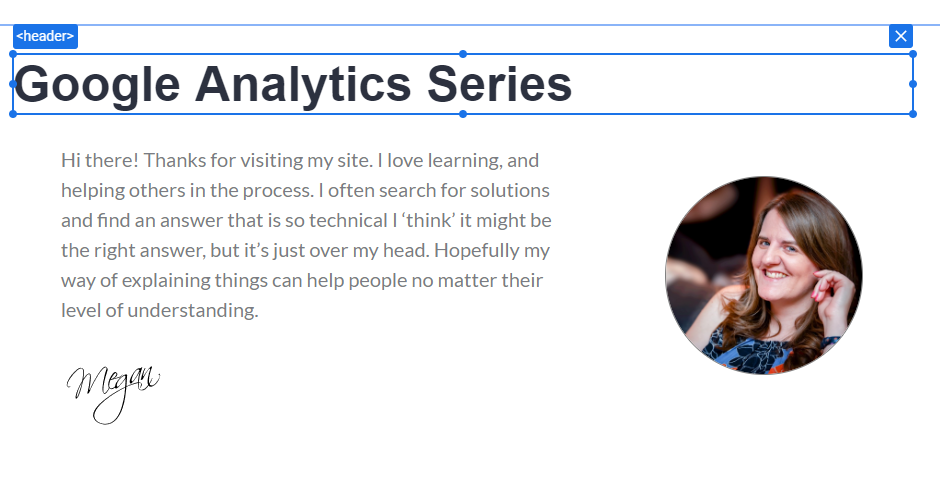
Remember, we are setting what should be displayed to a new user, but we are not actually changing the information on the website itself. If you make a change and it’s not what you wanted, you can just roll back and start again. We can then change the rest of the text to create a new experience.
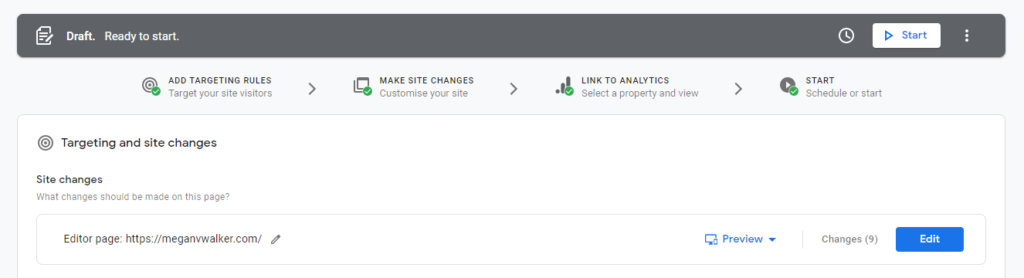
Once finished, we can then click Start to begin the experience.
So here is the final version of what any new visitors to the home page of my website would see. Any returning visitors see the original version. I kept this running for most of the month of June to let people know and give them a direct link to be able to register.
Want to just watch how to do this? Check out the video: https://youtu.be/lsnlgXq1yYg
Check out the latest post:
Setting Up reCAPTCHA v2 For Your Realtime Marketing Forms
This is just 1 of 571 articles. You can browse through all of them by going to the main blog page, or navigate through different categories to find more content you are interested in. You can also subscribe and get new blog posts emailed to you directly.