*** NOTE: ALL INFORMATION IS ACCURATE AT DATE OF PUBLISHING ***
Triggers in the Marketing App (Customer Insights – Journeys) are pretty awesome. They can be used to create what can be a very manually arduous task and turn it in to something automated that can just run on it’s own with you needing to step in and set stuff up. Even better, there are quite a few out of the box triggers that can be used to help with that. One of them runs when a Marketing Form is Submitted. I wrote about how you could create a custom trigger for Outbound Forms in Realtime Journeys previously, but in this post, we will use the out of the box trigger to send an email to someone when they submit a form but ONLY if it’s for an asset related form (Case Study, Whitepaper, eBook etc.).
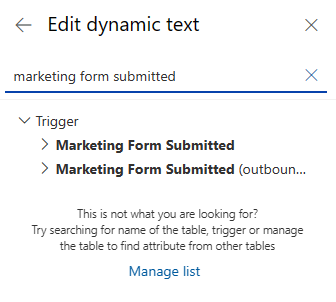
First, let’s look at the standard trigger. When on an email, we can choose to add personalisation. Instead of pulling from the Contact or Lead, we can use the Marketing Form Submitted trigger. Pick the first one, not the one with (outbound) after it.
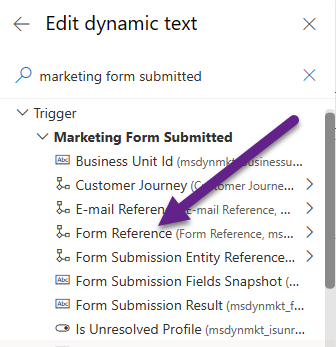
From there, you can get access to all of the fields on the form submission. The one to look for is actually a look up using the form reference, and goes to the marketing form table.
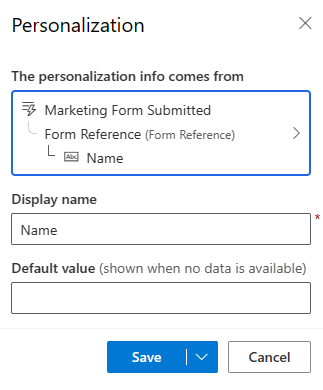
From here we could pick the name of the form and show it on the email that we send back to the Lead or Contact and share a link to our gated content. However, how often is the name you give the form the same thing you would want the external person to see? And what about also sharing a brief description of the content, and also a link for them to download it from the email?
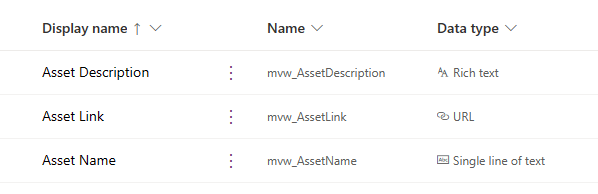
So that we can do WITHOUT needing to do a custom trigger. Have your system administrator add some new fields to the Form table (msdynmkt_marketingform). I have added a Rich text field for the Asset Description, a URL for the Asset Link and just a single line of text field for the Asset Name.
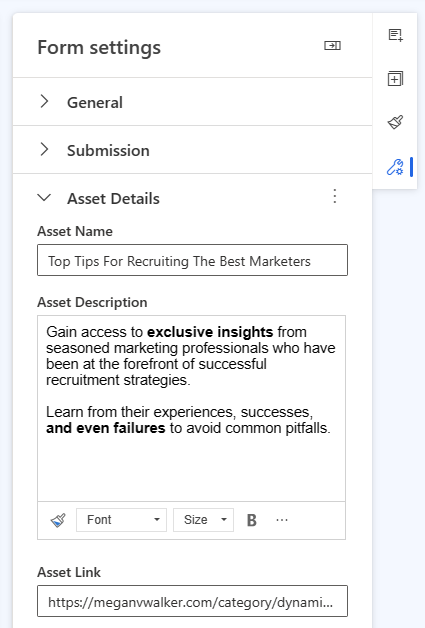
Once those have been added, there are two forms that need adjusting to include these. First is the Form Settings form. You can add a new section like I have below, specifically for the asset details.

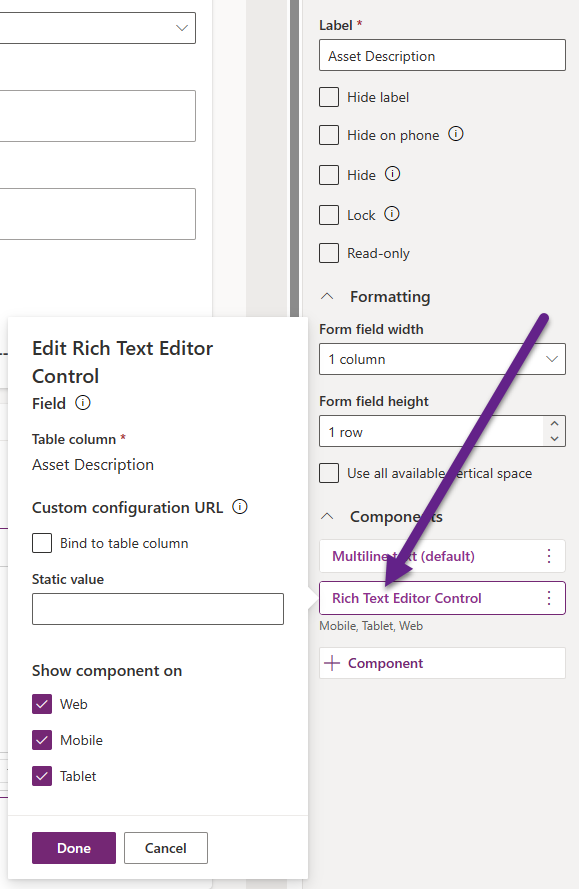
Click on the Asset Description. If you have added the field as Rich Text you can add the Rich Text Editor control. This will then mean you can do some formatting on the text that you add to the field later on.
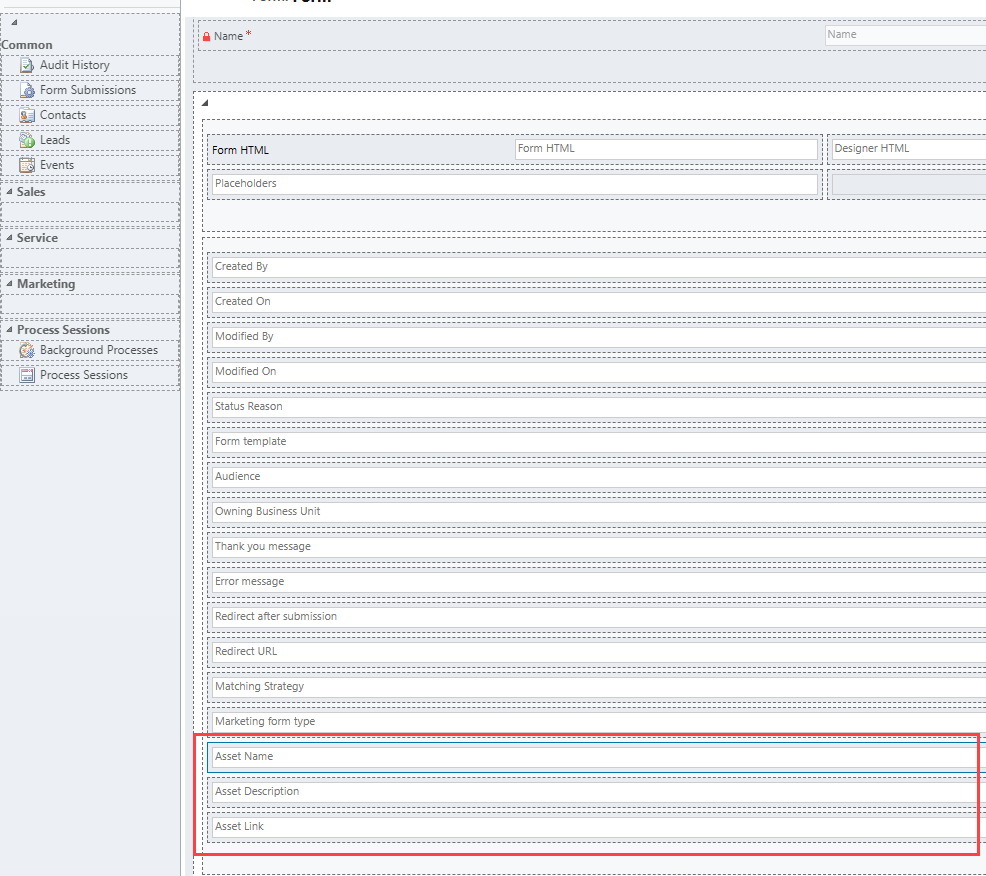
The other form that needs editing is the main Information form. However, for this one, you can ONLY edit it successfully in classic. So make sure you either open it ‘the old way’, or once you’ve opened it in the editor like this, click the three dots (ellipsis) and then click on Switch to classic.

Add your three fields, then hide the label on each, and untick the box for being visible. Then save and publish the form.
Now if you go to one of your forms, make sure you refresh the page a few times and you should see your new section on the form settings. The new section will be minimised, so you will need to expand it to then add the details for the form. Now I can add the name of the asset that I want to be included on the responder email. The description field can have font changes and a few other adjustments (bold, italic etc). If you click on the three dots you can find all kinds of controls to edit the text! Then finally, add in the link to where the asset is stored online.
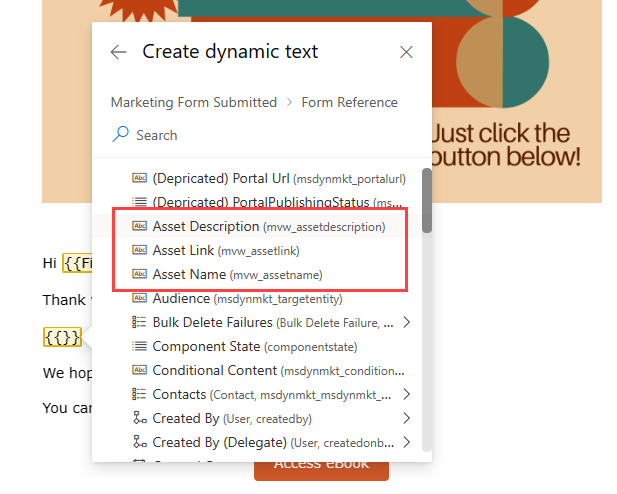
Now going back to the email you were working on, you can use the same out of the box Marketing Form Submitted trigger, then go through the Form Reference and now you have three new fields to use in the customisation of your email! Use the name and description in the main body of the email. You can even use the name in the email subject too. Make sure you add a button and then dynamically set the Asset Link so someone clicking on it can get to your gated content.
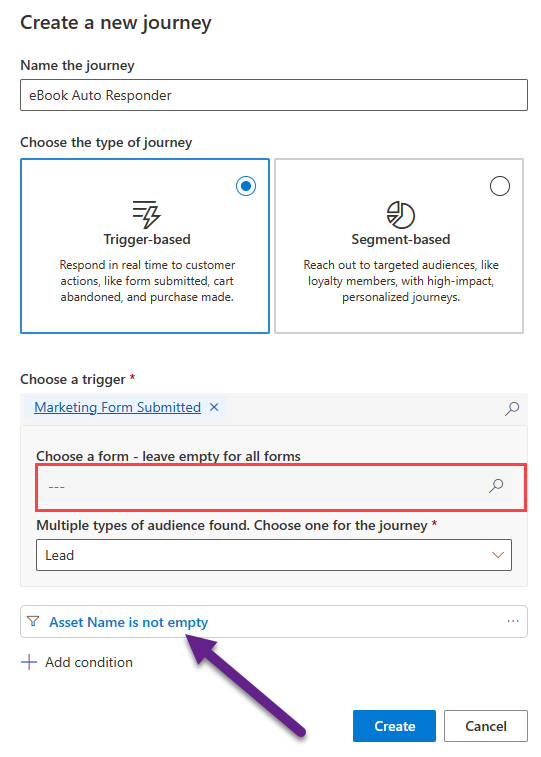
After publishing your email, all that is left is to set up the Journey. Use the Marketing Form Submitted trigger. You can set it for a specific form if you wish, or leave it empty but add another condition so that emails are only sent when the Asset Name field contains some data. That way you can have one Journey that runs, and you don’t need a new Journey for every single eBook, Whitepaper or Case Study form you add to your website!
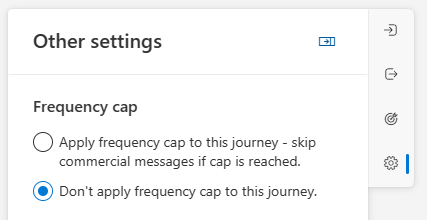
Add the email to your Journey, then just check the settings tab and set to not apply frequency capping on the journey. You want to make sure that if you are using quiet times on Journeys, that is ignored too. You want to make sure the email gets through to the person right after they submit the form.
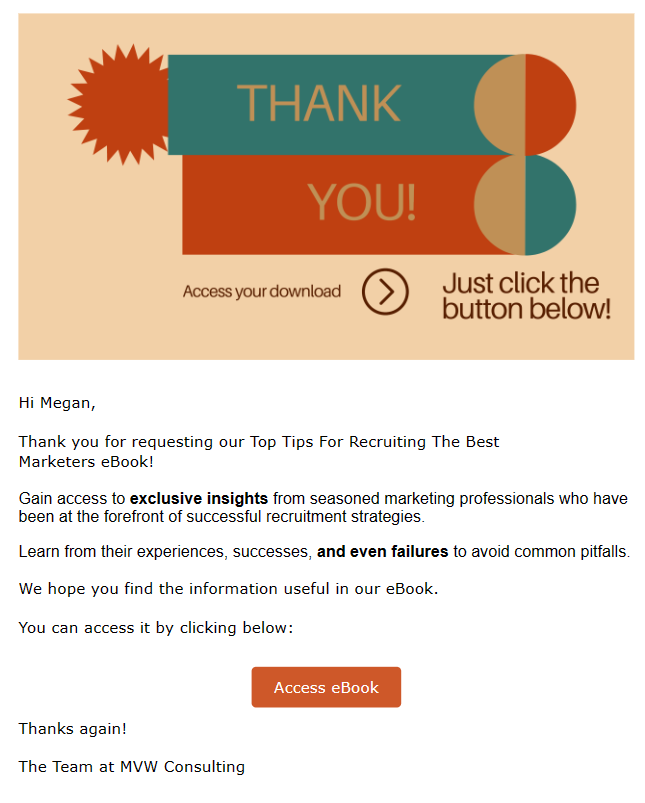
Now fill out your form! You should get a lovely customised email like this. Perfect! One thing to keep in mind, if you have forms for Contacts AND Leads, you will need to create two emails, (unless you don’t customise with their first name) and two Journeys so that you can set the audience type for each one.
Check out the latest post:
Use Custom Event Registration Questions To Branch Your Journeys In Customer Insights
This is just 1 of 603 articles. You can browse through all of them by going to the main blog page, or navigate through different categories to find more content you are interested in. You can also subscribe and get new blog posts emailed to you directly.
Hello Megan! I’m curious how this works when Double Opt-In is part of the process. Is there a way for the DOI button in the DOI confirmation email to both complete the DOI submission and redirect the contact to the gated content afterward?
Hi Patrick, you can do a redirect to an external page BUT that is at the Compliance Profile level. However, when someone fills out a form, (that has Double Opt In), it would still allow you to take the to a thank you page. It just means you might give someone the gated content on the redirect page but the person never opts in. It would then mean that the person filling out the form would still be able to get that content even if they never opt in so an email can’t be sent to them.