*** NOTE: ALL INFORMATION IS ACCURATE AT DATE OF PUBLISHING ***
This post is about using a combination of D365 Marketing (Customer Insights – Journeys), Microsoft Clarity, Google Tag Manager and GA4 (Google Analytics) and tracking visitors to your website from the email sent out in your Journeys. Using these tools, we can review recordings and heatmaps for visitors that have come to our website specifically because they clicked on a link in one of your emails. This will leverage the UTM tracking functionality in Realtime marketing. So let’s get started!
First, if you aren’t sure what Clarity is, go check out some of the blogs from this series. It’s a free tool and well worth setting up for getting in depth insight in to how people are navigating through and interacting with your website. Also, if you aren’t sure about GA4, this might not be the right post for you. You need to be using Google Tag Manager in conjunction with Google Analytics. Assuming you are using all of these tools, let’s proceed!
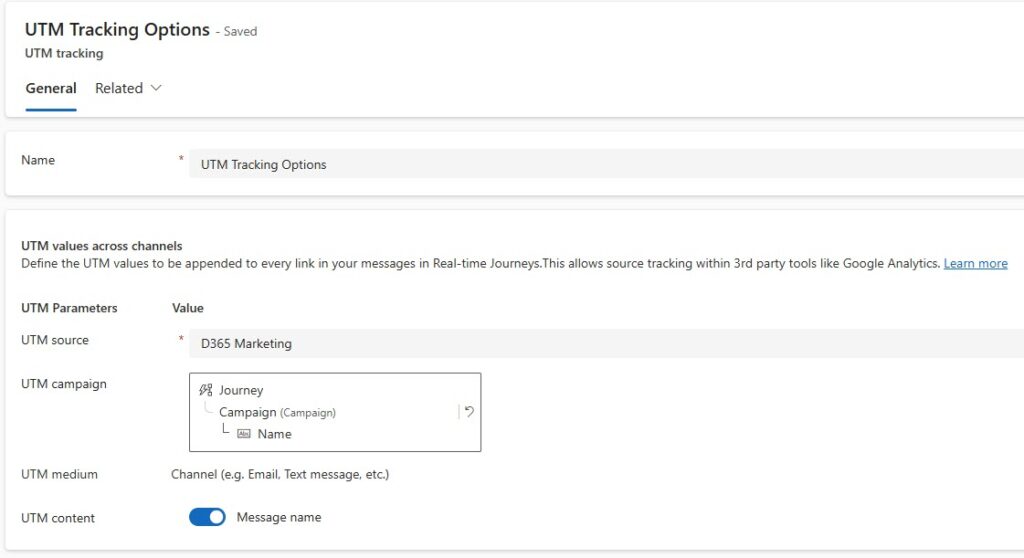
Now let’s make sure you know what UTM Source you are passing through in to your Journeys in the Marketing App. There is a feature switch that needs to be turned on first, and by default, the UTM Source that will be passed through in to the links in your emails will be the unnecessarily long “Dynamics 365 Customer Insights – Journeys”. However, you can create your own custom record for your UTM tracking options, so here we will set it as D365 Marketing. It’s important you know what this is for a script later on.
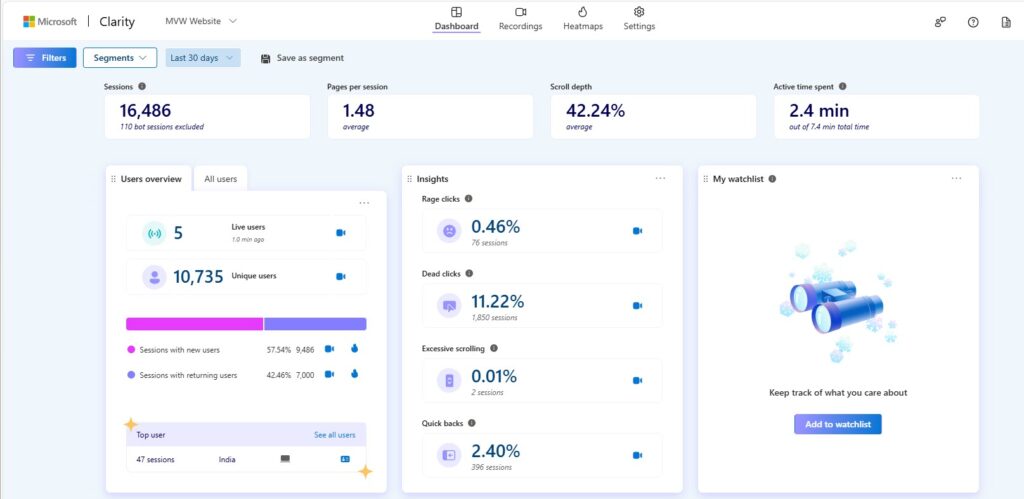
Next, make sure you have your Microsoft Clarity account set up and ideally that you installed it using Google Tag Manager. You can find more on that here on installing Microsoft Clarity.
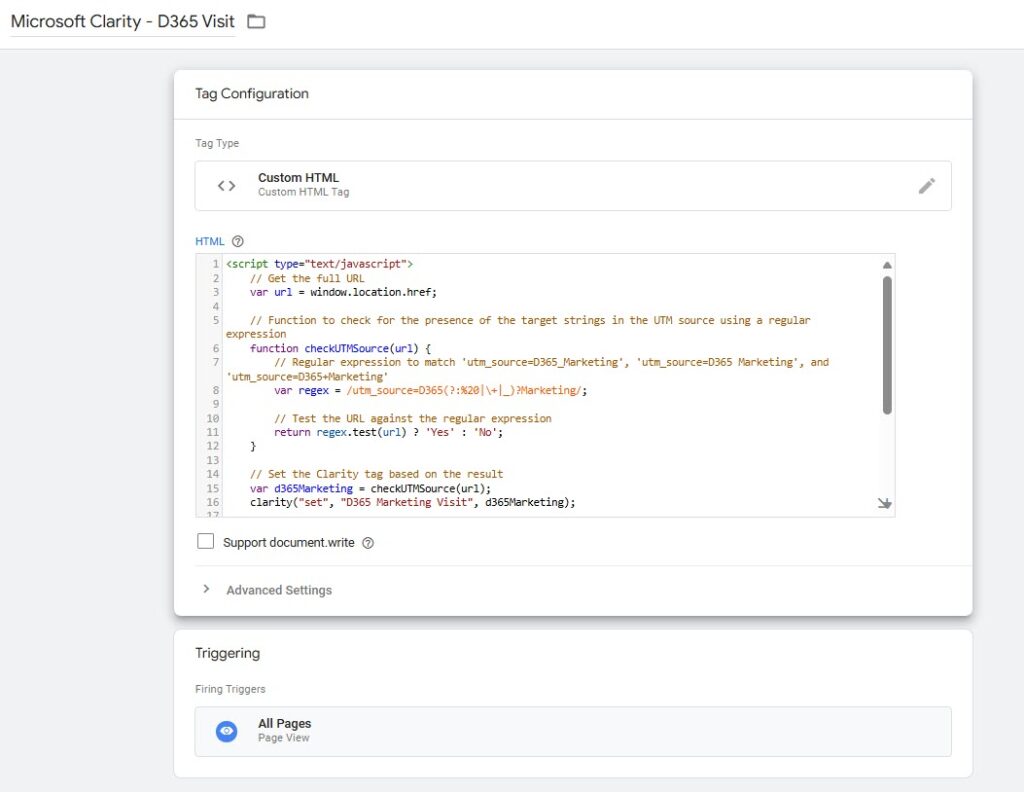
Now we need to add a little script in to Google Tag Manager. This will run on All Pages and check the URL to see if it includes our UTM Source from the Marketing emails. This means the visit can only have come from someone clicking on a link from one of the emails sent out via a Journey. This needs to be added as a tag using the Custom HTML type and just pasting in a script.
Here is the script I used that you might want to modify slightly depending on your needs. I noticed in testing that sometimes the UTM Source of D365 Marketing keeps the space, but most times it would have an underscore in-between the two words. Also when testing in Google Tag Manager, a plus symbol was added. So I am using a regular expression check to see if there is a UTM source in the URL and to see if it matches any of those combinations. If it does, I am setting a value to Yes, otherwise to No. Then I am setting a tag in Microsoft Clarity and calling it D365 Marketing Visit. This will allow me to filter my recordings and heatmaps specifically based on people who visited from one of my emails or those that found it by other means. I am also pushing information into the data layer so that I can see the information easily when testing in Google Tag Manager AND pass that through as an event in to GA4.
<script type="text/javascript">
    // Get the full URL
    var url = window.location.href;

    // Function to check for the presence of the target strings in the UTM source using a regular expression
    function checkUTMSource(url) {
        // Regular expression to match 'utm_source=D365_Marketing', 'utm_source=D365 Marketing', and 'utm_source=D365+Marketing'
        var regex = /utm_source=D365(?:%20|\+|_)?Marketing/;

        // Test the URL against the regular expression
        return regex.test(url) ? 'Yes' : 'No';
    }

    // Set the Clarity tag based on the result
    var d365Marketing = checkUTMSource(url);
    clarity("set", "D365 Marketing Visit", d365Marketing);

    // Check if dataLayer exists, if not, create it
    window.dataLayer = window.dataLayer || [];

    // Push the result to the data layer
    window.dataLayer.push({
        'event': 'D365_Marketing_Visit',
        'd365Marketing': d365Marketing
    });
</script>
These are the bits that you might want to change. I would suggest keeping everything else the same.
- var regex – you will need to make sure the expression is checking your specific UTM Source to account for spaces and underscores etc.
- set the Clarity tag – replace D365 Marketing Visit with whatever you want to show in Clarity as your custom filter tag
- window.dataLayer.push – replace D365_Marketing_Visit if you want it to show differently when testing in GTM
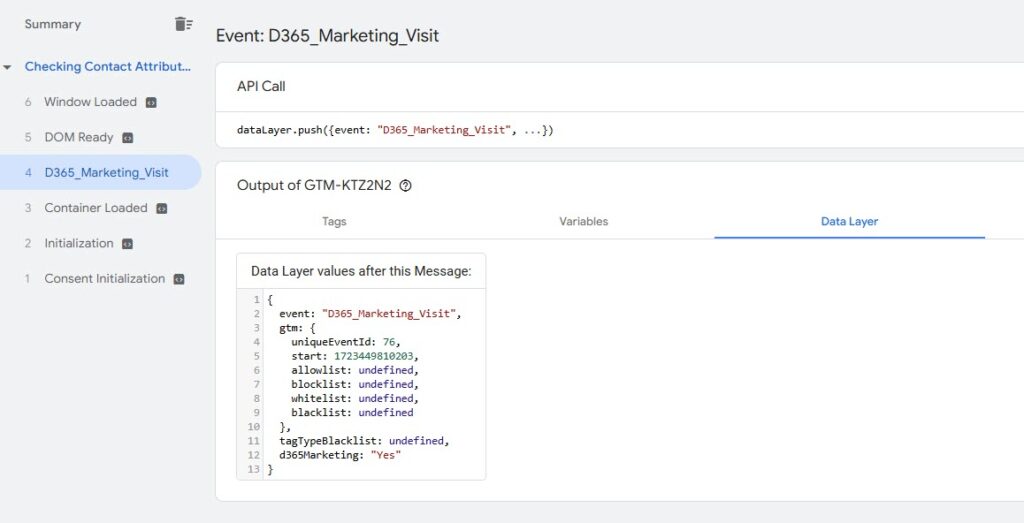
Once you’ve added your new tag, make sure you have a link to test with that includes your UTM Source. Assuming you are pushing the result to the data layer, you should be able to see it when in preview mode in GTM like this below. Here we can see the d365Marketing result is Yes, meaning the UTM Source was present in the URL.
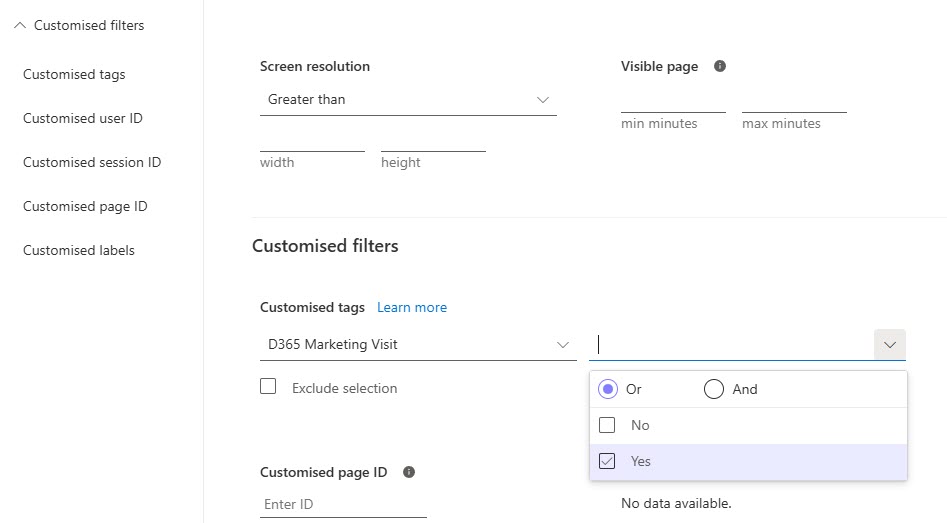
Once you’ve done that, wait a while (a few hours typically) and you should be able to see your new custom filter in Microsoft Clarity.
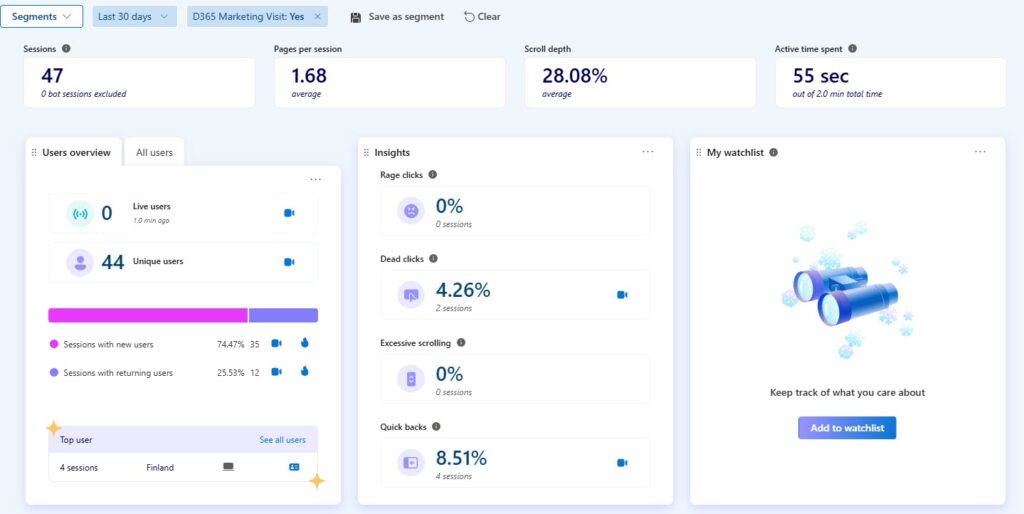
Here we can see the recordings and heatmaps are filtered to show visits in the last 30 days that were D365 Marketing Visits equals Yes.
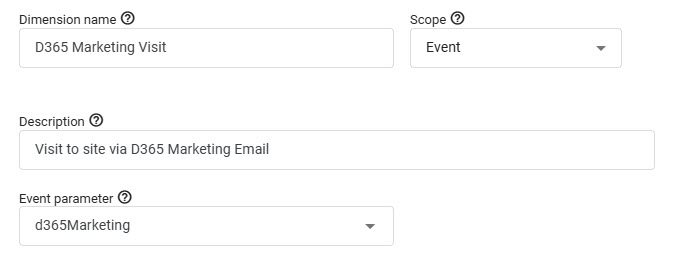
Finally, if you want to see the traffic and filter by the ‘Event’ where visitors came from your emails, you could add a custom dimension using the same Event parameter of d365Marketing (the value we passed through in the script for Yes or No) and start filtering traffic that way in GA4. This isn’t needed, and you can always filter based on utm source specifically, but this could be assigned as a key event or used in other ways within GA4.
Check out the latest post:
Assign Records To A User Or A Team From Your Custom Page
This is just 1 of 571 articles. You can browse through all of them by going to the main blog page, or navigate through different categories to find more content you are interested in. You can also subscribe and get new blog posts emailed to you directly.

