*** NOTE: ALL INFORMATION IS ACCURATE AT DATE OF PUBLISHING ***
Have you ever wanted to add a Countdown Timer to your marketing emails? I WISH this feature existed in Customer Insights – Journeys, maybe one day we will get it. For now, you CAN still do this using a really cool 3rd party bit of functionality that I found thanks to a wonderful person I worked with on a project a few years ago. We can add timers to emails to count up or down to dates, and pull in those dates dynamically, perfect for birthdays, anniversaries or upcoming events. So if you are curious, take a look. Note that this post is not in any way affiliated with the 3rd party, I just think it’s really cool so wanted to share.
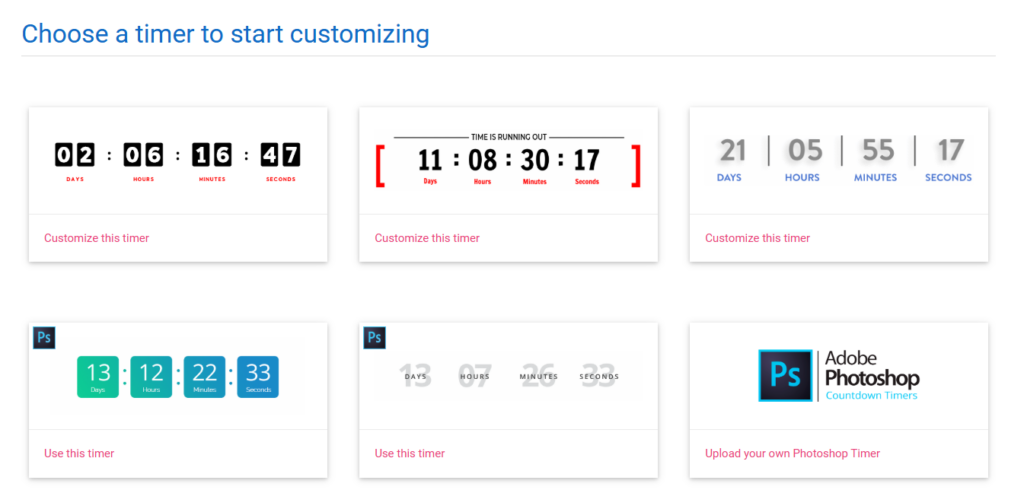
First, you will need an account with Nifty Images. You can find out more about them and check out their pricing, but you can also start with a trial and do quite a bit of testing before you will need to start paying anything. Once you have your account set up, click the button to Create Image, Timer or Data Source from your dashboard, then select Countdown Timer. From here, pick your starting point. and can even customise using your own Photoshop Timer.
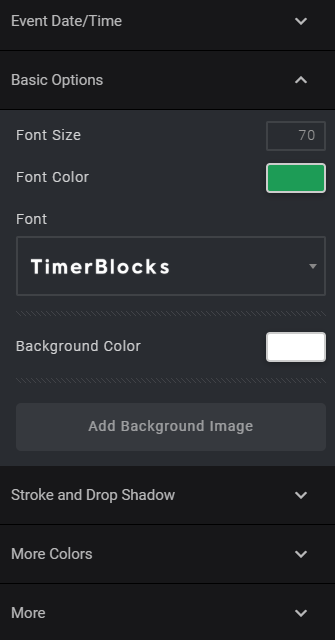
After picking your starting point, you can change fonts, colours and other aspects of the timer. You will also pick a date/time to use for your timer as you edit it.
Here I’ve modified a countdown timer to Christmas, so made it a little festive with the colours.
Once you Save the timer, you will get a link that you can then use in Customer Insights – Journeys in one of your emails (well, you can use it anywhere you like!).
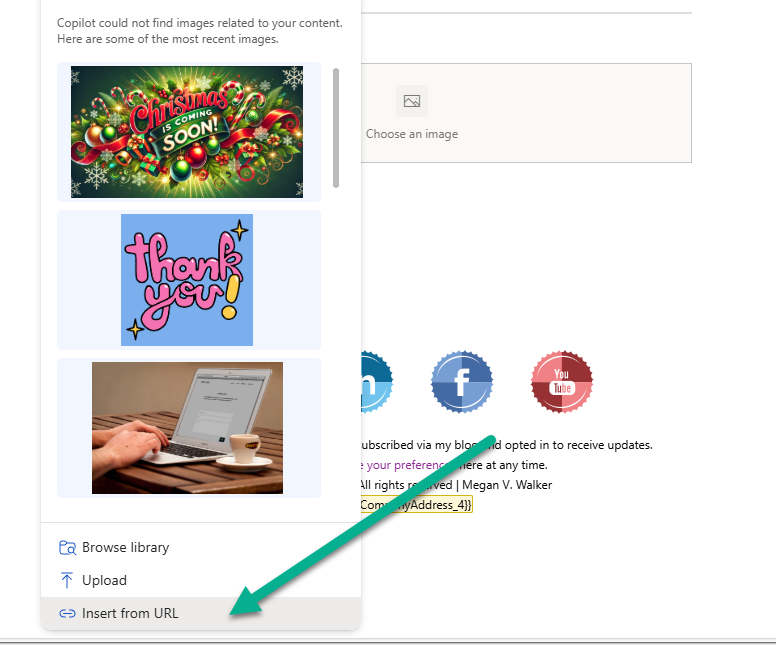
So how do we add the countdown to a marketing email? Add an image to your Realtime email, then click on Insert from URL rather than uploading to the image library.
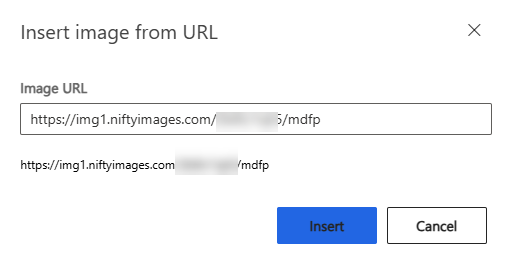
Then we can just paste in the URL. This will pull in the countdown timer image from Nifty Images for you.
Check out the email below where you can see the timer counting down to Christmas! 🎄❄️🎄
So what about a dynamic countdown timer that counts down to a different date for each Lead or Contact? Well here is a different timer using a different colour scheme that I will use to display how long it is until a birthday.
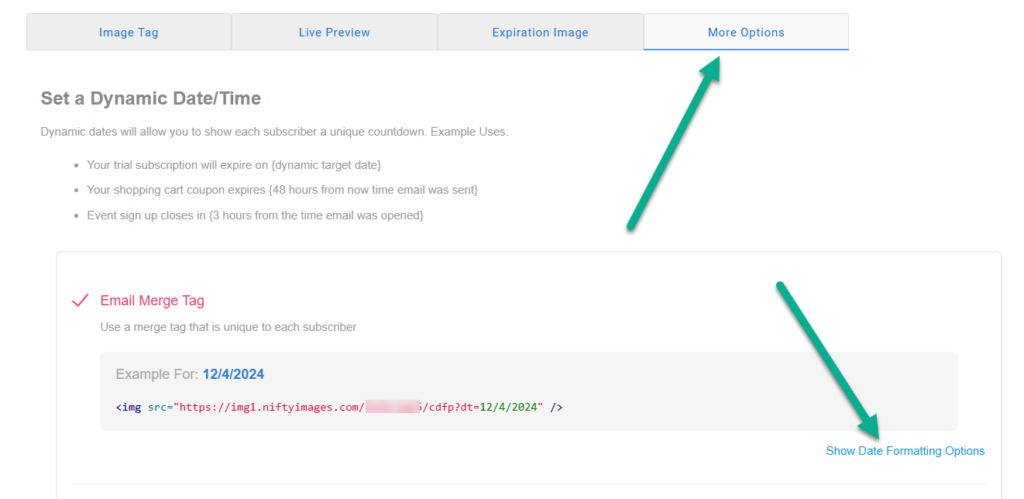
After saving the timer in Nifty Images, click on Mor Options, then select to use an Email Merge Tag. Click on Show Date Formatting Options so you can see what you can do.
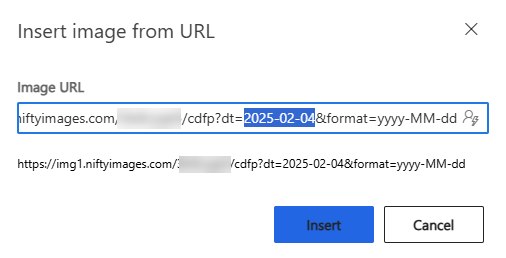
Your link will look something like this with a date already added to it as an example. What we need to do is remove that date, and then set the date part dynamically using the personalisation icon at the end of the Image URL field below.
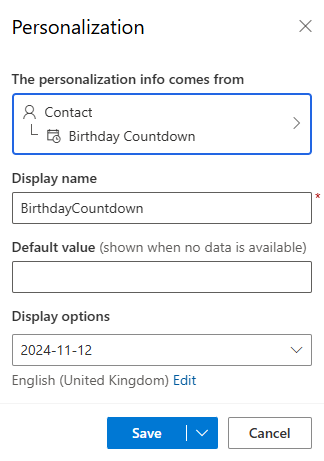
In this example, I will use a Birthday Countdown date. No good in trying to count down to an actual birthdate field as the year will always be in the past and never work. So you might need to set up some kind of custom field that always sets when their next birthday will be for the current or next year. Use the display options to set the format to the same format you chose from Nifty Images then save it.
Now you can preview it and edit the personalisation and pick a Contact (or Lead) that has a date field populated. See below where the countdown timer changes when I add in a Contact to use as the preview. How cool is that? 🎂🎈🎂
What do you think? Is this a service you think you would find useful? Again, this isn’t just something to use in your marketing emails, it can be used on email signatures and internal communications too. Let me know what you think in the comments below.
Check out the latest post:
Setting Up reCAPTCHA v2 For Your Realtime Marketing Forms
This is just 1 of 571 articles. You can browse through all of them by going to the main blog page, or navigate through different categories to find more content you are interested in. You can also subscribe and get new blog posts emailed to you directly.

