*** NOTE: ALL INFORMATION IS ACCURATE AT DATE OF PUBLISHING ***
For the majority of organisations, people work in departments. They report to a manager, and as a manager you need an easy way to see what’s going on with your team. In D365/CRM there are many ways to separate the data for reporting but two of the easiest things to use are the manager field, and teams. So let’s look at using teams & managers to manage records.
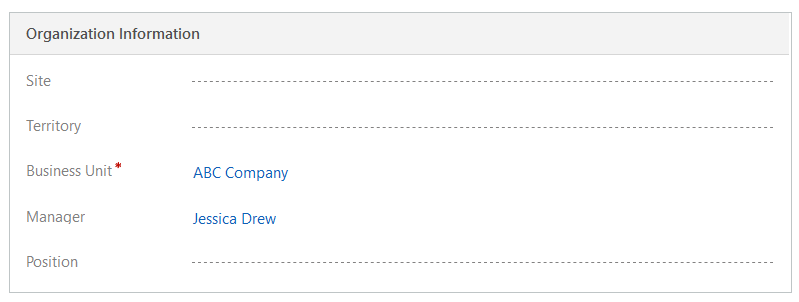
First, navigate to a user record and to the organisation information section. If you don’t already have the manager field displayed, you can simply add it to the form (or ask your system administrator to do this for you). You can use the manager lookup field to find any of the other users set up in CRM. Simply add the person that this user reports to and save the record.
You can also do this to multiple user records at one time by selecting them from your list of users, then click on Change Manager from menu. Pick the user to update the records all at once.
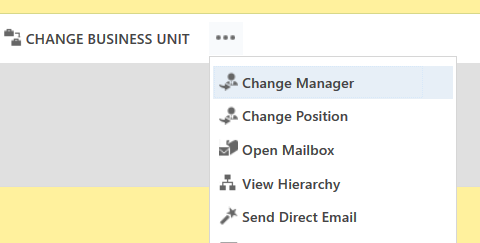
You will also notice the View Hierarchy option in the menu, or the icon that appears next to the users name when viewing them in a list. Clicking on this will take you to an overview of the hierarchy for all users.
![]()
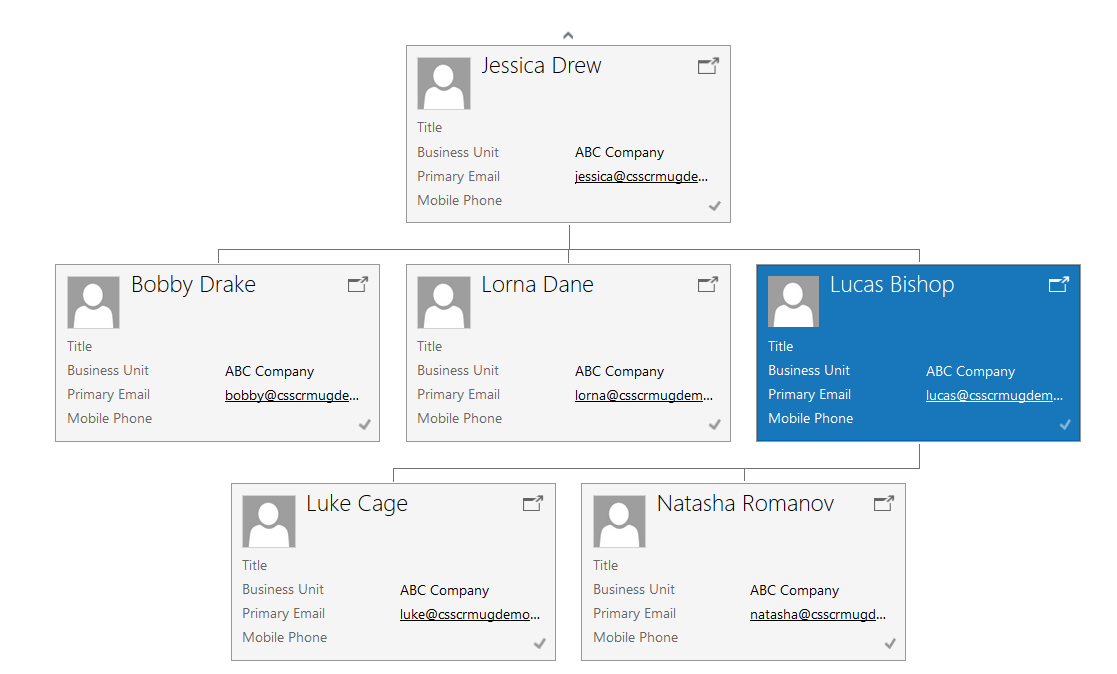
Here we can see where Lucas Bishop fits in the hierarchy structure of all users in the system.

We also get an easy to read visual from which we can jump directly to any of the user records listed, and scroll up or down through the tree.
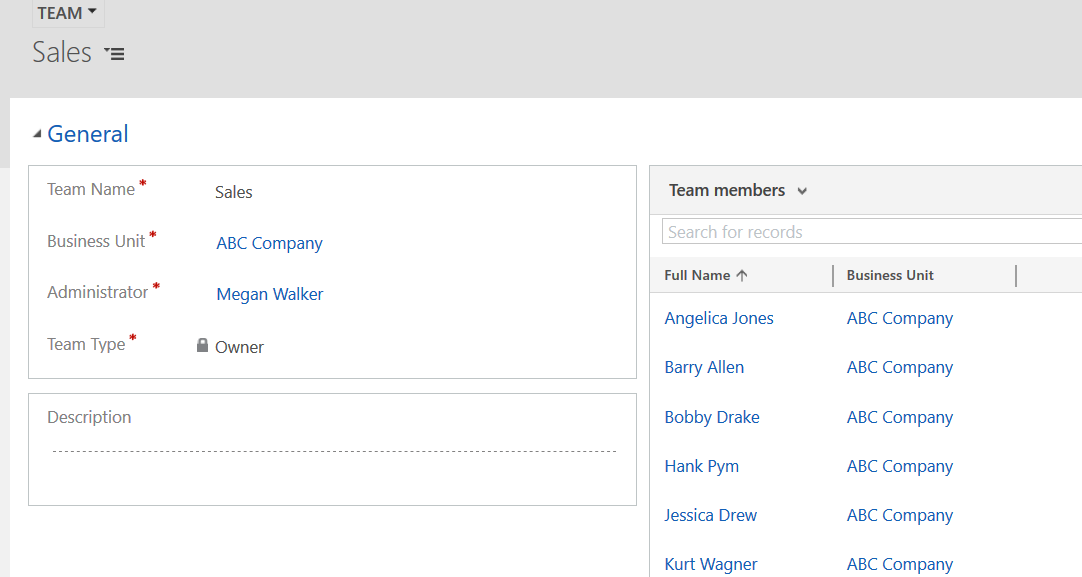
The next thing we want to do is add a team (or as many as you need). Here we have a team in which we have added all members of the sales department.
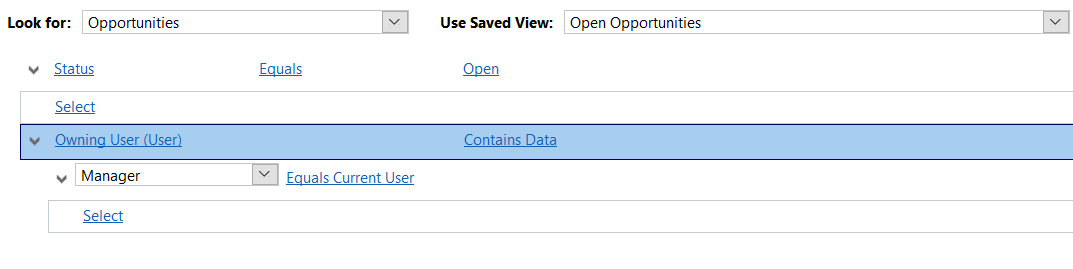
So how can we use the Manager field and the Teams? For the Manager, when creating views we can now drill down to find the Manager of any users who own specific records. In the example below we are looking for Open Opportunities. We can then add the Owning User (User) relationship to the criteria, then pick the Manager field. Here you could chose Equals Current User to allow the user logged in to see all open opportunities for those that report directly to them, or Equals and pick a specific user as needed.
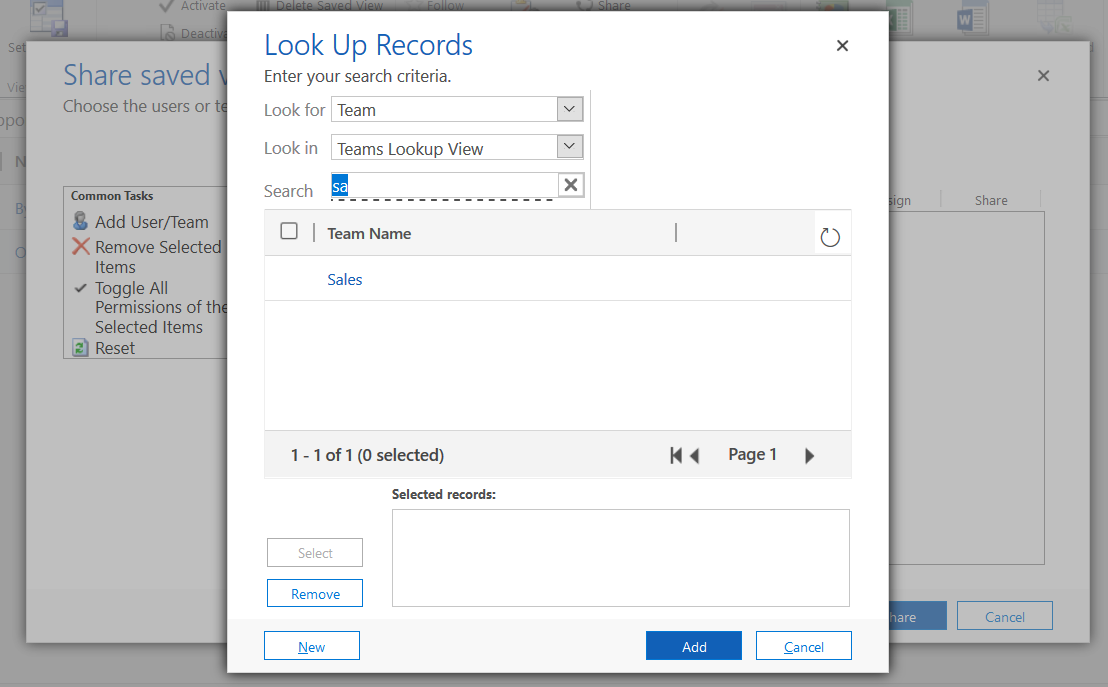
For the teams, this has now added a quick and easy way to share out views, charts and dashboards. How many times have you created a view and then picked each person individually to share it with them? With a team, we can now select the view, then click on the Share option.

Instead of looking for a User, we can now Look for a Team. Pick the team, then provide the permissions and share. Sharing by Team means any new users can just be added to the right Team and get all of the right views, charts and dashboards that they need. Also great if someone switches and moves in to a different department. You won’t have to spend time removing their access to the previous items. Much easier and faster to manage!
Check out the latest post:
Create A Segment For People Searching On Your Website
This is just 1 of 602 articles. You can browse through all of them by going to the main blog page, or navigate through different categories to find more content you are interested in. You can also subscribe and get new blog posts emailed to you directly.