*** NOTE: ALL INFORMATION IS ACCURATE AT DATE OF PUBLISHING ***
In a previous post, we reviewed how to create Azure Blob Storage to use with your Dynamics 365 Marketing data. We can set it up and then use with Power BI which is awesome…. but surely if we have access to the data we can then do other things, like access CDS data related to the marketing data? As mentioned in the other post, the D365 for Marketing app stores the data in Microsoft Azure services rather than in CDS. Power Automate has a connector for Azure Blob storage, so I wondered if we could combine the two so we could take action on the related Contact records based on Email Clicks and Opens. Good news, we can.
First things, I opened up the Azure Storage Explorer and navigated through the folder structures then to the EmailClicked data. I was then able to open up one of the records.
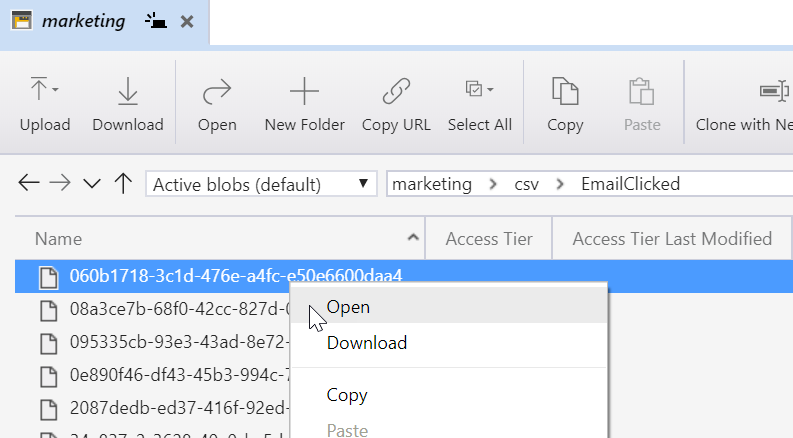
It’s a bit hard to see (click on the image to enlarge) but the ContactId that clicked on the Email is stored in the file. We can see them highlighted below. There are two rows, one is the header, and the other shows all of the data for the marketing interaction. The data is stored in a Blob container file but can be opened with Notepad…. which means we can also adjust it to a CSV file.

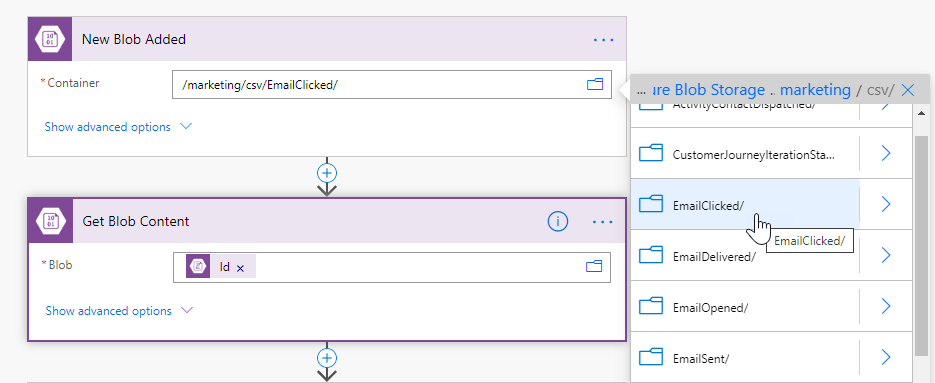
So the first step in our flow is the trigger using the Azure Blob Storage connector when a New Blob is added. You will need to give the connection a name and have your Azure Storage Account name, and your Azure Storage Account Access Key. Once connected navigate through the container until you find the Email Clicked folder, then select it. The next step is an action to get the blob content, using the ID from the blob in the trigger.
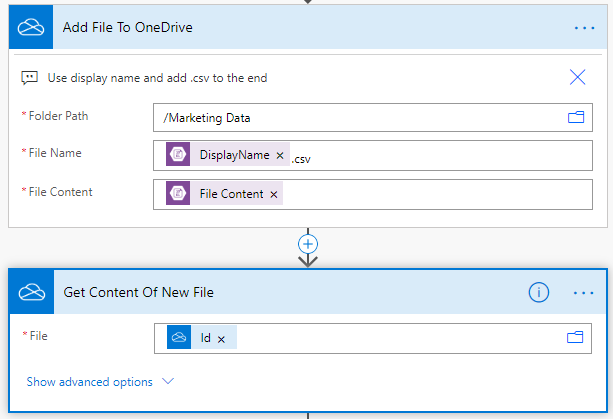
Next, we can take the blob content and add it to OneDrive using the OneDrive for Business connector. Use the Display Name from the trigger, and the File Content from the Get Blob Content step above. Type in .csv after the display name to create it as a CSV file. We then need to add a step to get the content of the new file using the Id from the previous step.
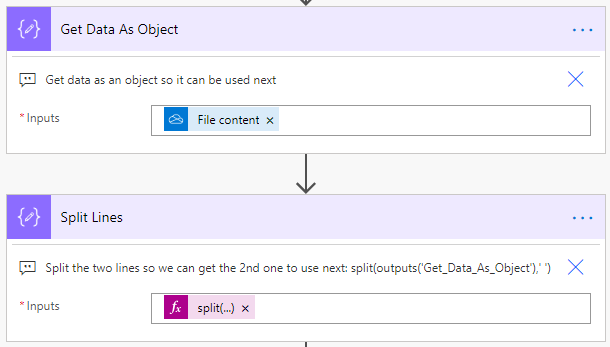
These next steps were a bit of a head scratcher. I knew that I needed to parse the CSV file to extract the second value from the second line of the CSV file. So, thanks to a chat with my good friend Ryan Maclean, he came up with the following steps, so thanks Ryan! The next four are Compose actions. First, we use the File content value from the previous action to get the content of the file. Then we add in a compose step to split out the two rows from the CSV file. This is the expression used:
split(outputs('Get_Data_As_Object'),'
')
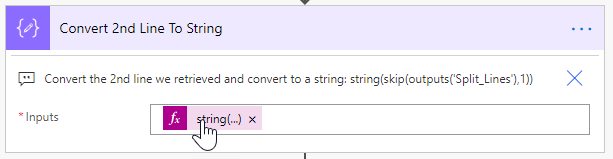
In this next step, we are converting the second row and converting it to a string using the following expression. We are telling it to skip one line (the header) so that we convert just the second line to the string.
string(skip(outputs('Split_Lines'),1))
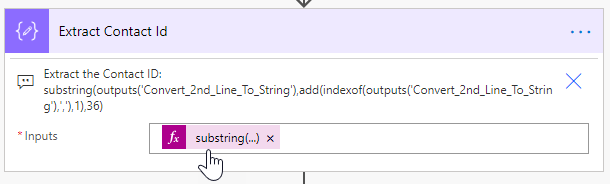
Now we are going to get the Contact ID from the 2nd row. To do this, we need to extract the second value which comes after the first comma. So we find the comma, then go one character after the comma (which is the start of the Contact ID, then get the next 36 characters (which is the length of a Contact ID value).
substring(outputs('Convert_2nd_Line_To_String'),add(indexof(outputs('Convert_2nd_Line_To_String'),','),1),36)
If you want to use Email Opens to trigger actions on CDS data, the Contact ID is first in the blob container file. So, for that, you can use the following expression. When extracting the values, there is a quote character first on the row, so we need to go to the first quote, then start one character after that, and count 36 characters to get the Contact ID value.
substring(outputs('Convert_2nd_Line_To_String'),add(indexof(outputs('Convert_2nd_Line_To_String'),'"'),1),36)
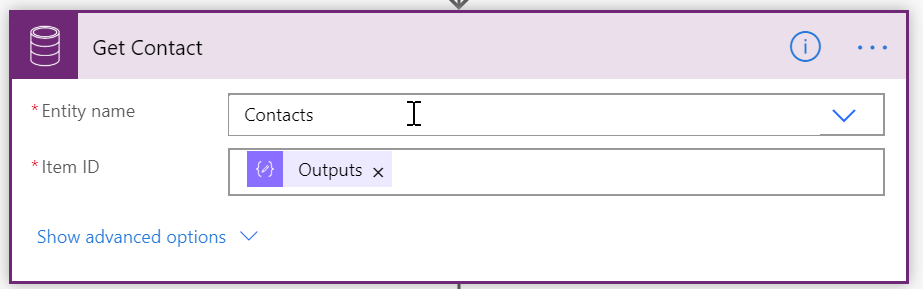
Now we can use the CDS connector and use the Output from the step above to get the Contact it’s related to.
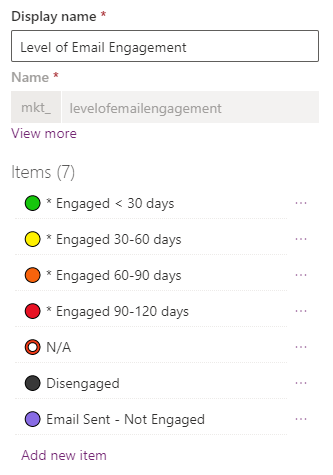
From there we can do whatever we need to update the record, or take some kind of action on it. I worked with a client where we used the process to update a field to show the Level of Email Engagement for a Contact. So if someone had clicked on or opened up an email, the level would be set to Engaged < 30 days. Another flow could then run to change the level of engagement as time goes on.
At the end of the flow make sure you delete the file you created, there is no need to keep them.

Check out the latest post:
Use Custom Event Registration Questions To Branch Your Journeys In Customer Insights
This is just 1 of 603 articles. You can browse through all of them by going to the main blog page, or navigate through different categories to find more content you are interested in. You can also subscribe and get new blog posts emailed to you directly.