*** NOTE: ALL INFORMATION IS ACCURATE AT DATE OF PUBLISHING ***
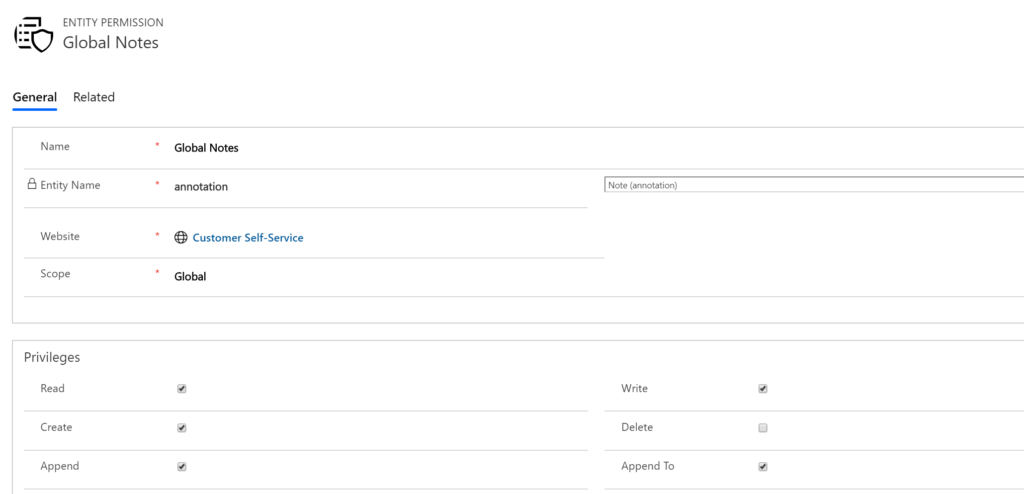
In Part One of this series, we looked at what we wanted to achieve in the portal for the user experience, with the ability for them to upload and see their own image. We also looked at the CSS needed, and the forms required. Now we’ll at the Entity Permissions needed. First, we need to make sure there is a Global scope permission set up. This allows the user the ability to read, create, append, write and append to the Notes entity. When the user uploads their form, they will do it via a Portal comment record, but their image will be added using a Note. They will then need to be able to see all of their previously added images, which will be on Notes. So without this entity permission, they will get permission errors.
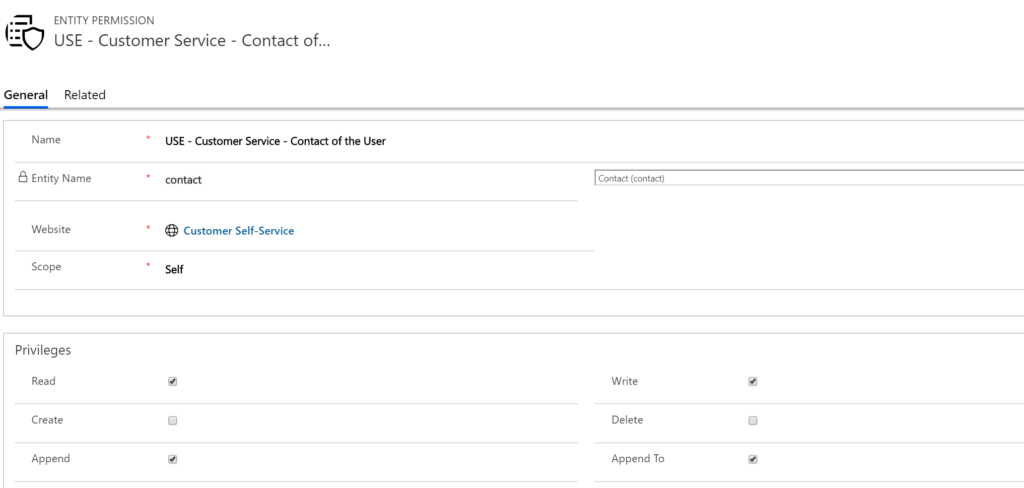
Next, we are going to set up an Entity Permission record for Portal Comments. The scope is going to be Parent, which means we need to have the Parent Entity Permission set up to link to. For the Portal comment the user needs to be able to read, create, append, write and append to. First, make sure you have an Entity Permission set up with the Scope of Self on the Contact entity like you see below. This should already exist as part of the standard set up of a portal. If not, go ahead and create one like this.
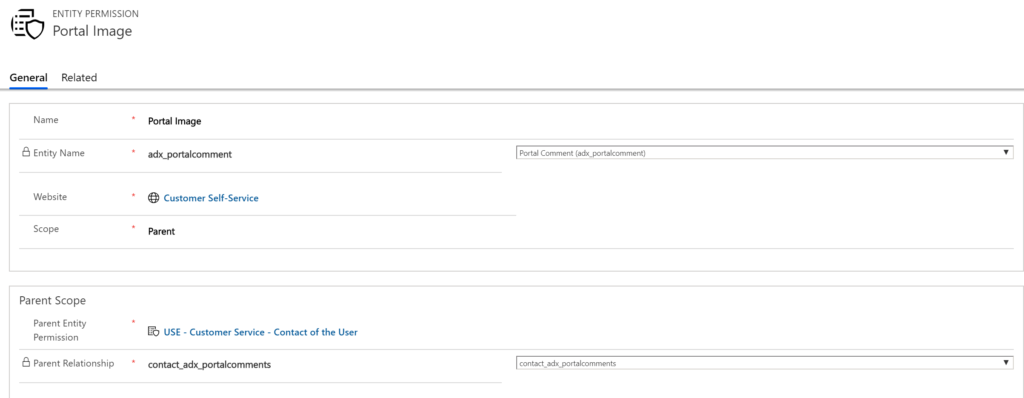
Now for the Portal Comment one, select the Entity, and the Scope as Parent. When you do this, you will now be prompted to select the Parent Entity Permission, which is the one we just reviewed above. The Parent relationship is contact_adx_portalcomments.
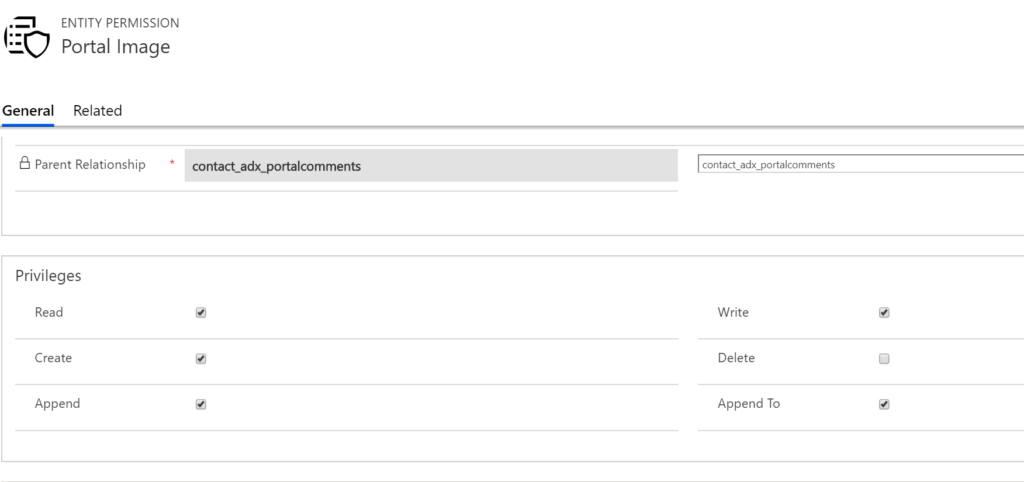
Set the privileges to read, create, append, write and append to.
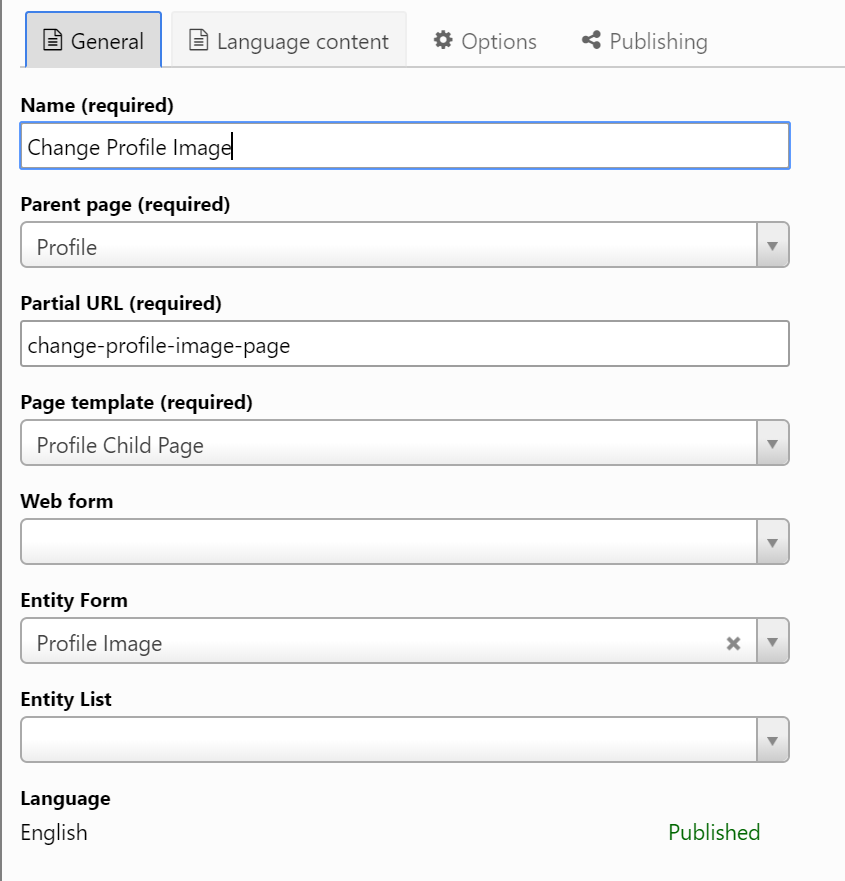
Now let’s look at the new Web Pages you will need. The first one is a Change Profile Image page. I always find it easier to add the pages directly from within the portal, logged in as a user with the Administrator Web Role.
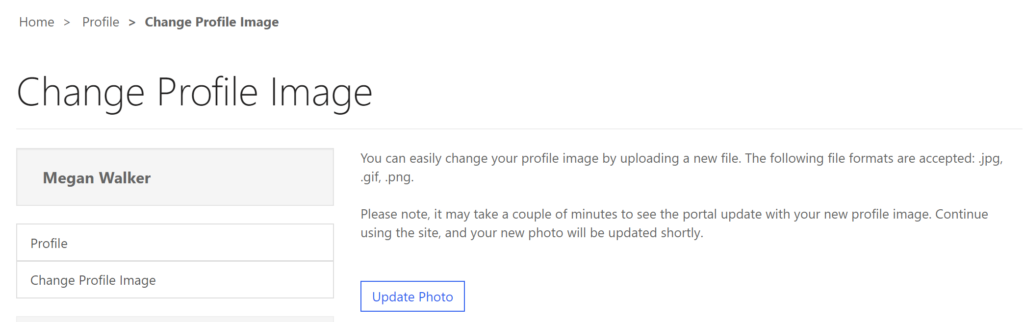
For the new page, add it from the Profile page, so it makes it a child of this page. You can see the Parent gets listed automatically. Set the page template as the Profile Child Page. This means it will display all of the same navigation that the main Profile page has and will fit in to the Profile area as a nice experience for the user. For the Entity form, you will need to come back and fill this out later (or skip ahead, add the Entity Forms, then come back and add the Web Pages). Edit the navigation on the left of the page and add the Change Profile Image page in as a link.
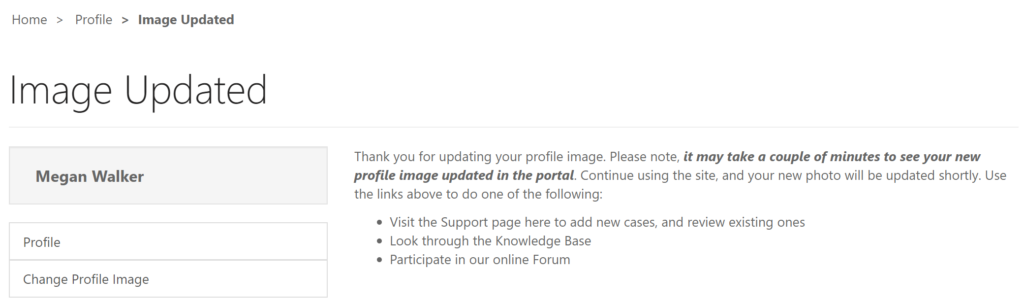
Add another new Web Page called Image Updated, without an Entity Form. The parent page should be Profile, and the Page template should be the Profile Child Page again. This page will not be added to the navigation on the Profile page, but instead will be used as a hidden page to redirect the user to when they have uploaded their photo.
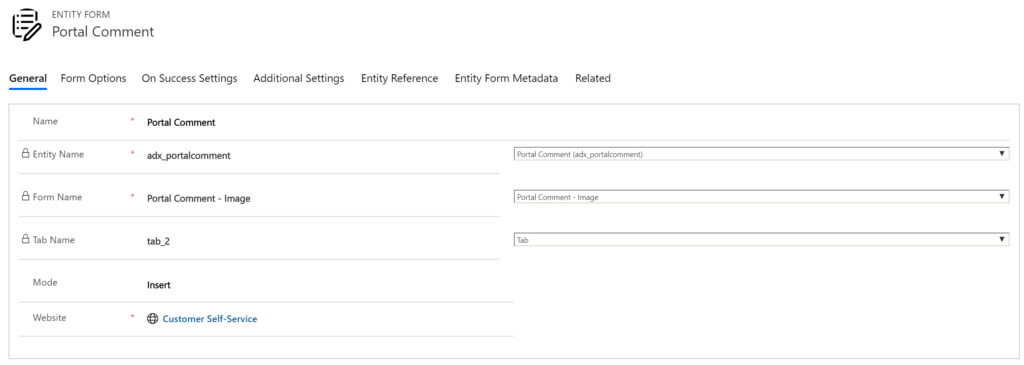
Next we have our Entity Forms. The first one is for creating a Portal Comment. We set the Entity Name as Portal Comment, and pick the Portal Comment form we created in Part One, making sure we select the correct tab and select the Mode as Insert. This form is going to pop up when we click a button on the Change Profile Image page, and the submission of the form is going to create a new Portal Comment linked to the Contact (portal user).
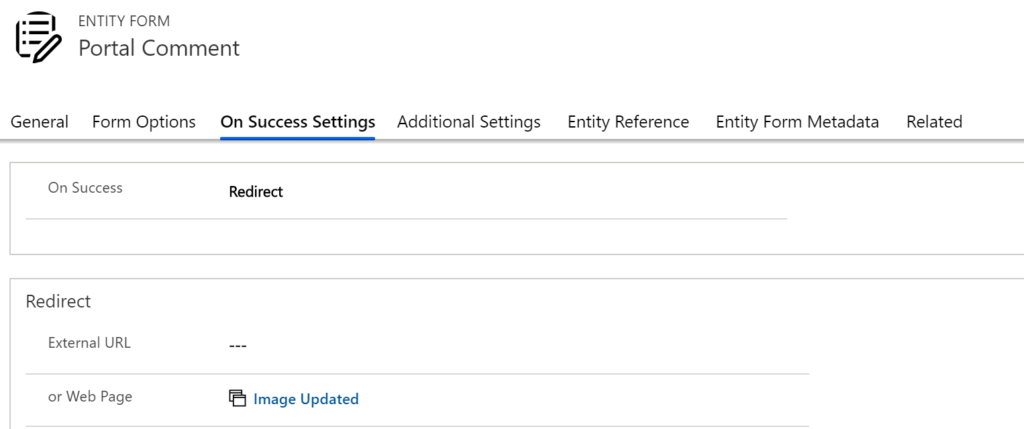
Moving on to the On Success Settings tab, we are going to set a Redirect when the form is submitted and redirect the user to the Image Updated web page that we created.
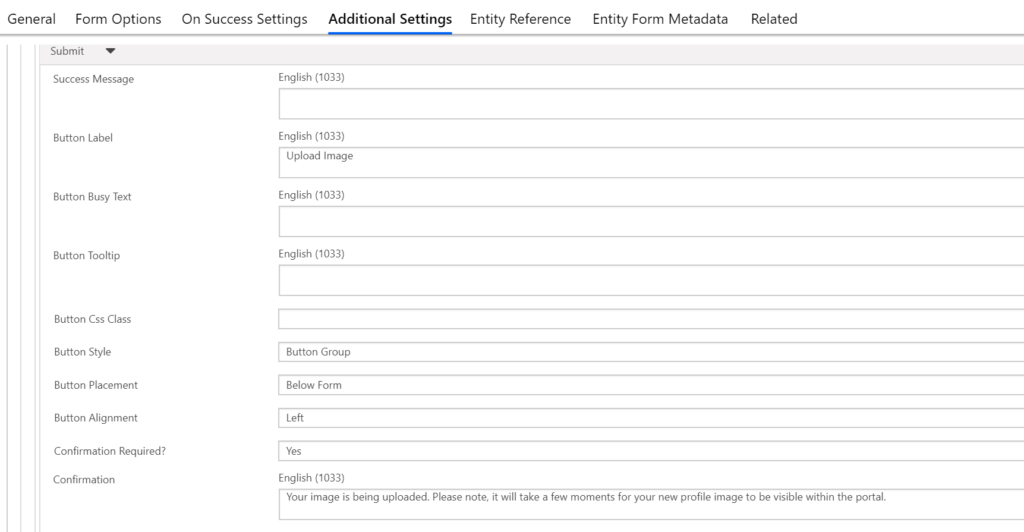
On the Additional Settings page we are going to set the name of the button to show at the bottom of the page for the user to submit their new profile image. We can determine the alignment of the image, and also set the Confirmation Required option to Yes. This will provide more clarification to the user when they click the Upload Image button on the form. You can then set the confirmation message to display.
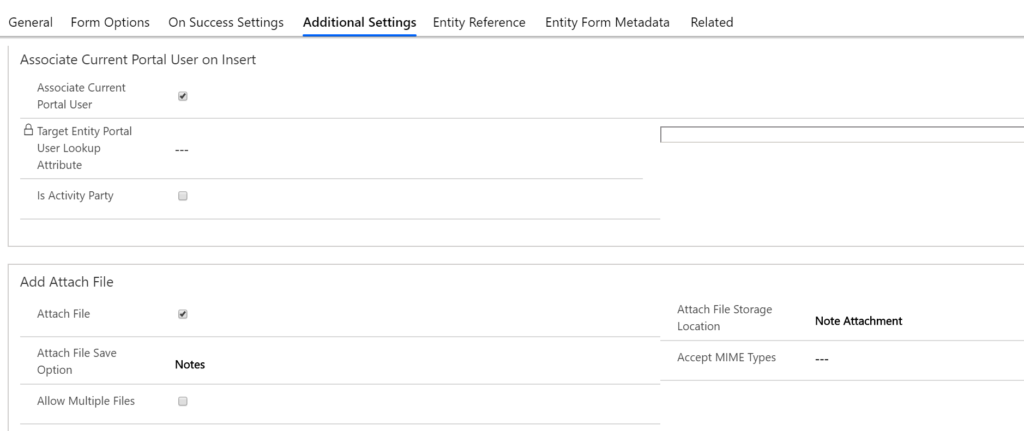
Further down on the Additional Settings tab we want to make sure the box is ticked to associate the current portal user. Finally, in the Add Attach File section, tick the box to Attach File, and set the file storage location as a note attachment, and the attache file save option to Notes.
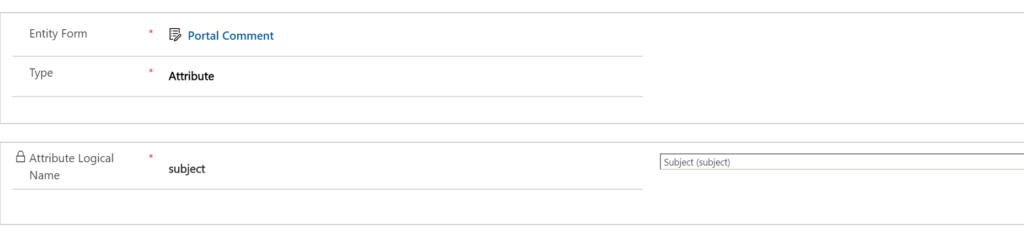
Moving along to the Entity Form Metadata section, we will add one record here.

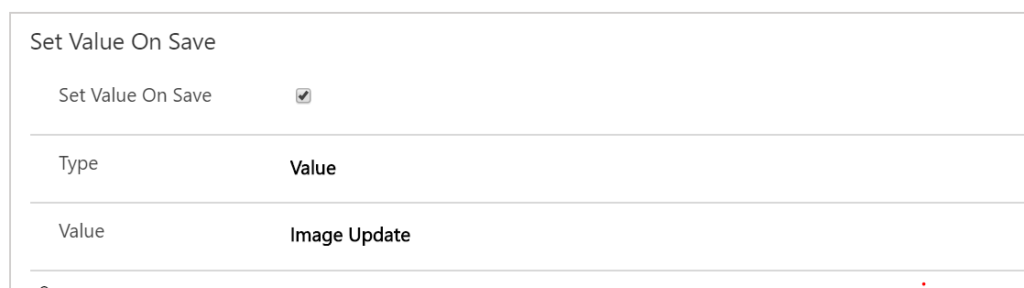
Set the type as Attribute and select the Subject field.
You might be wondering why we are going to the trouble of having the user create a Portal Comment record, rather than just a Note. Well, what we need to do is have a trigger than can be checked in Power Automate (formerly Microsoft Flow) when the user uploads a photo. We want to make sure it runs when it’s a new profile image that’s being uploaded. When a user creates a note in the portal, we can’t adjust the subject of the note so we can’t get an accurate trigger to use. However, we CAN set the subject on a Portal Comment. So on this Entity Form Metadata record, we are going to use the Set Value On Save option, and select the type as Value, and then set the value of the Portal Comment subject to be ‘Image Update’ – or whatever you want it to be.
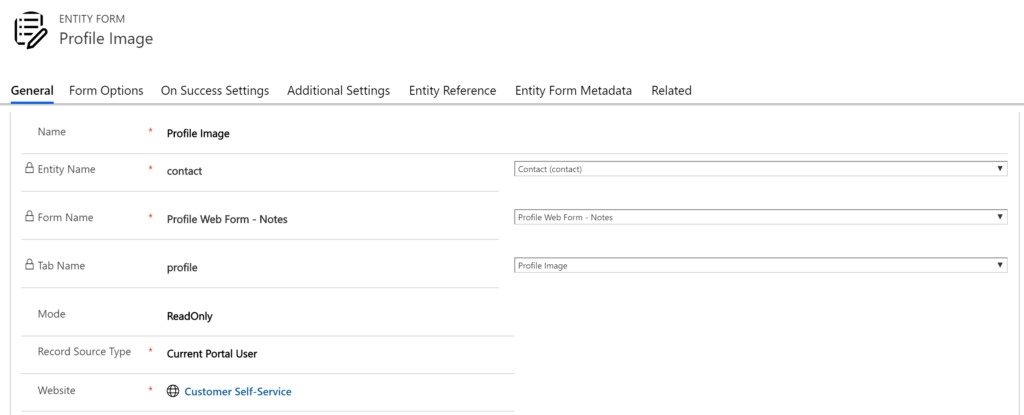
The second Entity Form is where we will use our new Contact form we created that only shows a timeline. Set the Mode as Read Only, and the Record Source Type as the Current Portal User.
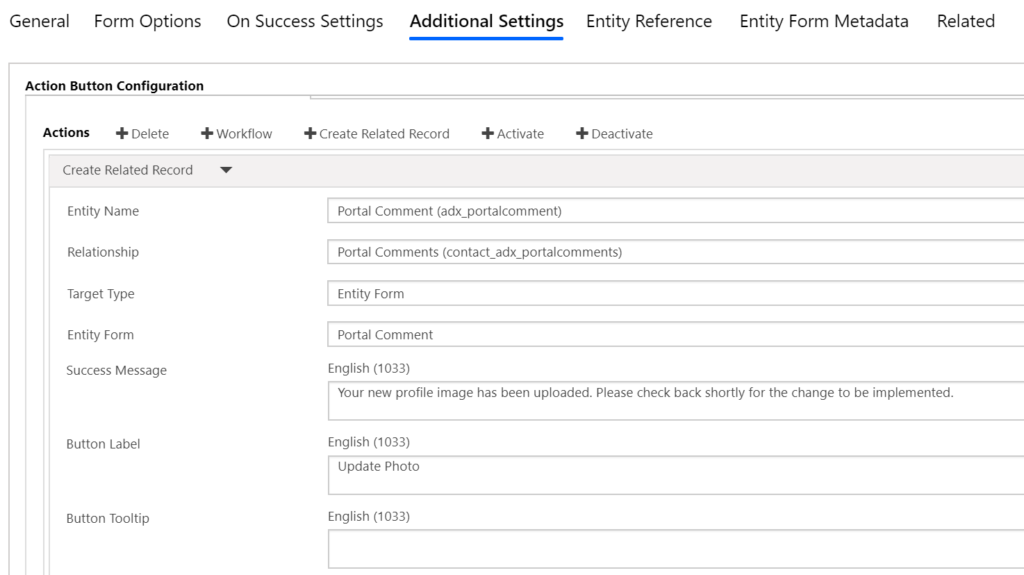
Staying on the same Entity Form, click on the Additional Settings tab. We need to add an Action allowing us to create new Portal Comments from the Change Profile Image page that will be using this Entity Form. So, we are going to add a Create Action, selecting the Entity Name of Portal Comment, the relationship as Portal Comments, Target Type as Entity Form, and then picking the new Portal Comment Entity Form we just added.
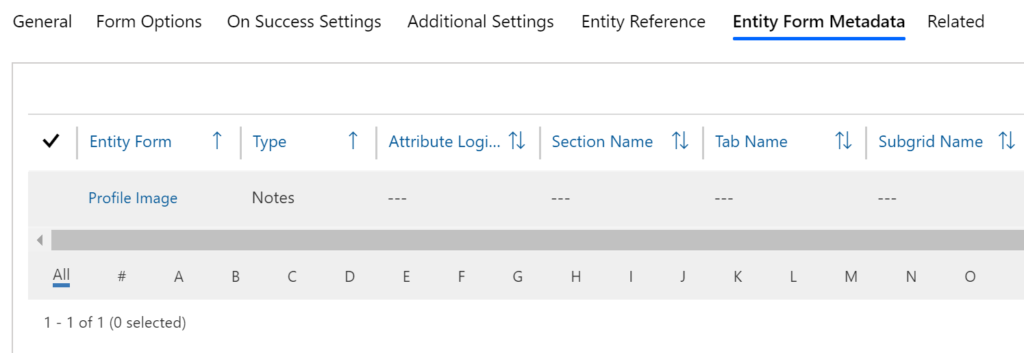
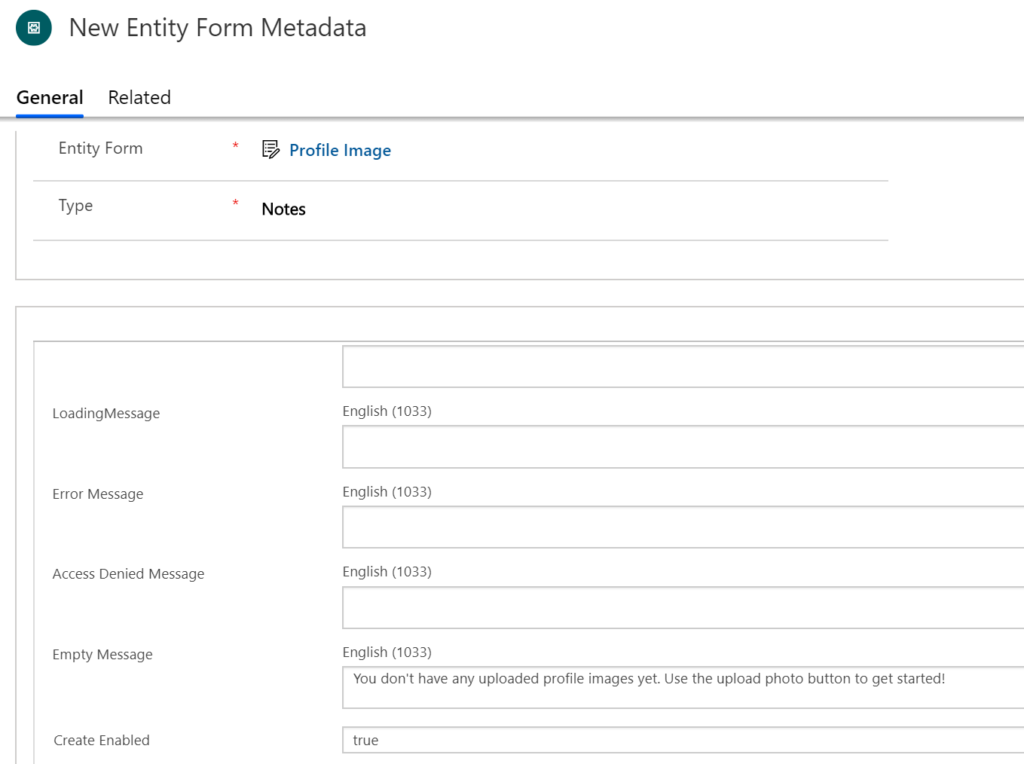
We need one Entity Form Metadata record for the Notes element.
We are going to use this type of Notes to set a message that will be displayed for the user if they have yet to add an image, and the timeline is blank.
So, in Part Two, we’ve added our Entity Permission records, Web Pages and Entity Forms. If you want to see how to do this, you can watch the videos below covering each section. Then, move on to Part Three in this series for the final three steps.
Check out the latest post:
Set A Business Process Flow Stage With Custom Page
This is just 1 of 572 articles. You can browse through all of them by going to the main blog page, or navigate through different categories to find more content you are interested in. You can also subscribe and get new blog posts emailed to you directly.