*** NOTE: ALL INFORMATION IS ACCURATE AT DATE OF PUBLISHING ***
So in the last part of this post, we are going to finish off with a few simple bits of code, put together our flow using Power Automate (formerly Microsoft Flow), and then walk through to see it in action. In Part Two, we looked at adding our Entity Forms, and the Portal Comment one had a redirect to our Image Updated Web Page. Only trouble is, when we do the redirect from a form, the new page we are taken to is shown within the iframe where the form was. 🙁 That’s not a good look.

We can do something about that though, by adding a simple bit of code to the Header web page template. We are going to add a small piece of javascript which will force any redirects that happen to open the new page in the MAIN window of a browser, rather than within the iframe.
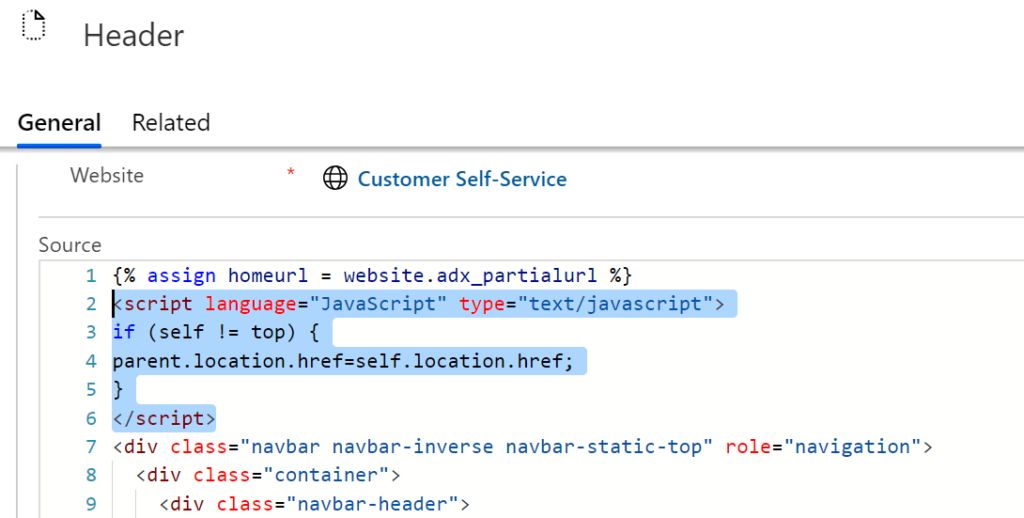
<script language="JavaScript" type="text/javascript">
if (self != top) {
parent.location.href=self.location.href;
}
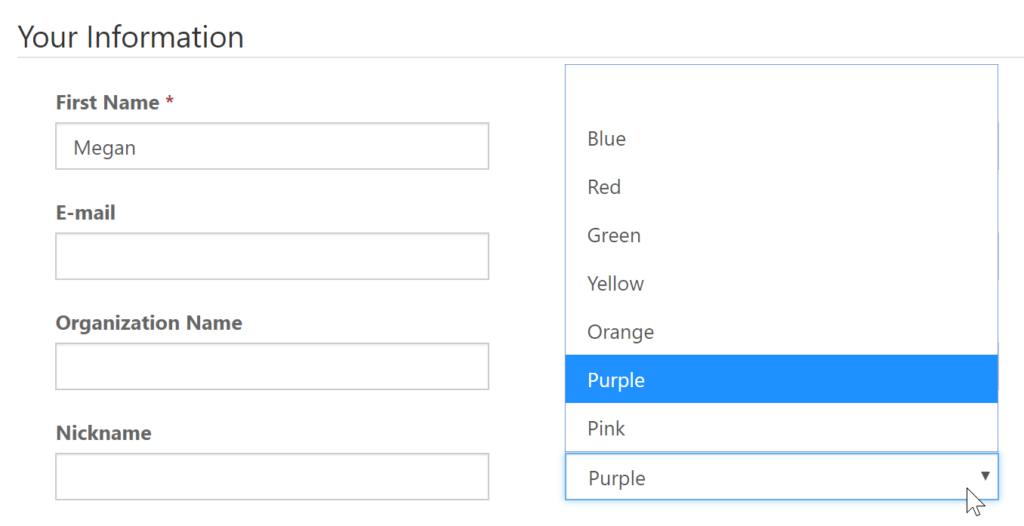
</script>The next thing we can do, is use an option set field on the contact record to determine the colour of the border that goes around the users profile photo image in the portal. In this example, this is for the Membership Level confirmed or requested by the user. Make a note of the field name you add (if you should chose to do this).
Here is where the CSS from Part One comes in. We are going to do a couple of things here. First, if there is data in the new_imageurl field (the new field we added in Part One), use that image, and make it round using the image class of profilephoto from the css we added. Also, use the label of the value selected on the colour selection optionset field (if you added it), and add it to ‘-box’ so that the portal can determine which of the css styles to use to determine which colour to use as the image border (if you aren’t sure about this, go back to Part One to refresh your memory). The alternative is if the new_imageurl field is empty, display the mystery person image instead. This image is part of the portal, so the same link should work for you too.
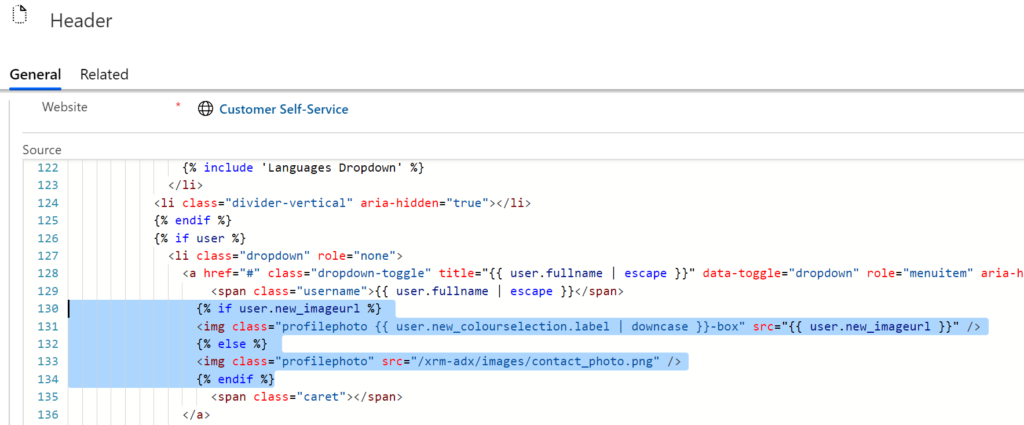
 {% if user.new_imageurl %}
 <img class="profilephoto {{ user.new_colourselection.label | downcase }}-box" src="{{ user.new_imageurl }}" />
 {% else %}
 <img class="profilephoto" src="/xrm-adx/images/contact_photo.png" />
 {% endif %}
We are in the home stretch now, the last thing to create is our flow using Power Automate. When the user uploads their image, we need a way to take that image, and add it to the new_imageurl field so that it can be used to display in the portal, and also add the same image to the Contact entity image field in D365 so the internal users can see it. To get started, go to flow.microsoft.com
Our first step is the trigger. We need to state when the flow will begin, and for this, it’s based on the creation of a new Note record. Remember, although the user is creating a Portal Comment, the image is attached to a note, so we will check on that. So, connect to your organisation, then select the Notes entity. Next we are going to add a Condition, and check that the Object Type is equal to adx_portalcomment. So we are checking to make sure that the note created is attached to a Portal Comment record.
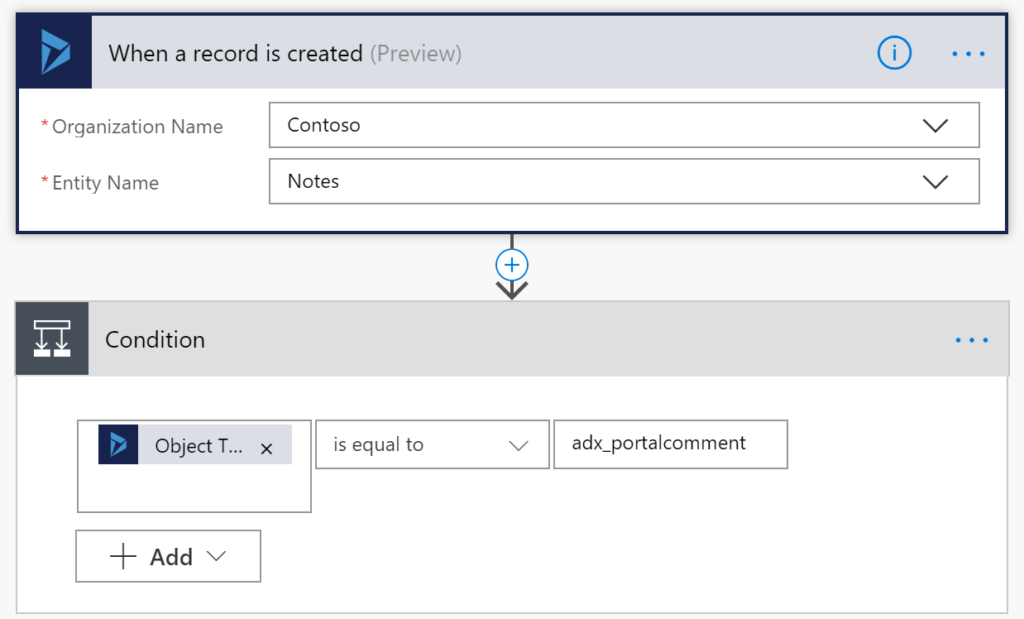
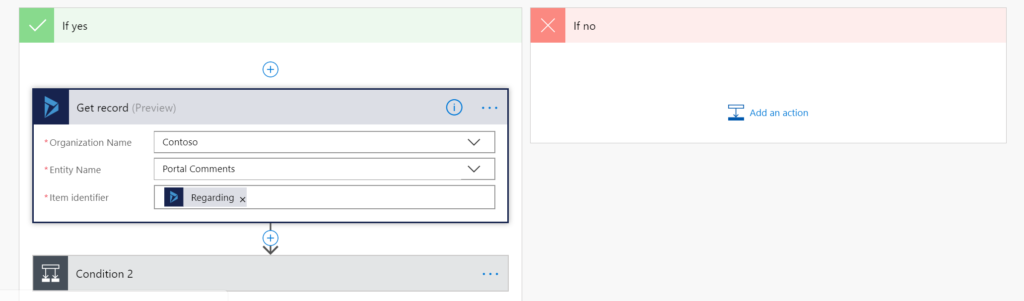
If it’s not, we won’t do anything else (the If no side of the flow) and the flow will end successfully. If yes, we need to get the Portal Comment record that the Note is regarding. There may be a way to do this the other way around, and do it based on the creation of the Portal Comment and just check if there is an associated Note, but this seemed like the easier way,
Now we need another condition. We need to check that the Subject is equal to Image Update (or whatever you set the subject to be using the Entity Form Metadata on the Portal Comment Entity Form in Part Two). and also check that the original note contains a document attached to it. For that expression, you can use the following:
equals(triggerBody()?['isdocument'], true)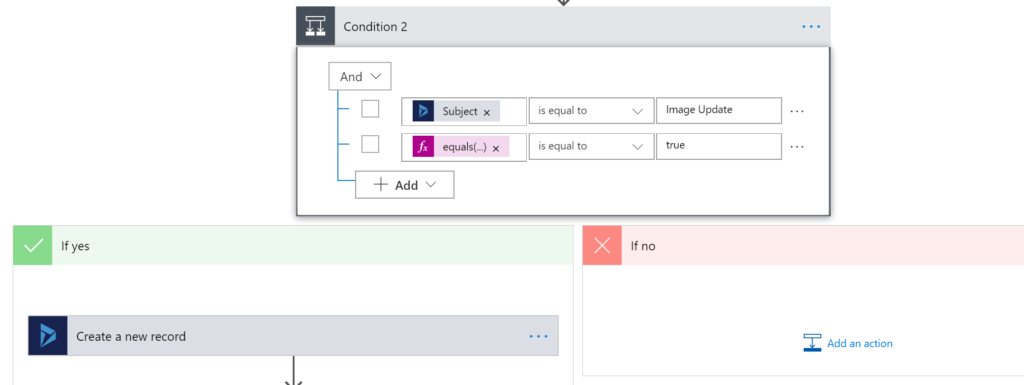
So, if the second condition is not met, we are ending the flow, so nothing will be added to the ‘If no’ path. If yes, the first thing we need to do is create a new Note record. This is so that the portal user will be able to see the image they uploaded as a note, rather than a portal comment. We set the title as Image Updated (really only for internal benefit), and use *WEB* as the description. This forces it to be displayed in the portal. Is Document set to yes, then use the following fields from the original trigger to create the new Note: Document, File Name, Mime Type, Regarding.

The next step is to move the file in to OneNote so we can then do some maneuvering so it can then be added to the Contacts entity image field in D365. We will use the Create file step and add the File Name and File Content from the Create new record step. For the File Content step, use the following expression:
@{triggerBody()['documentbody']}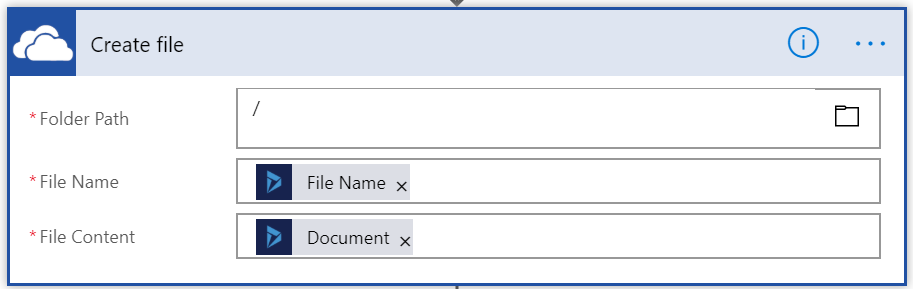
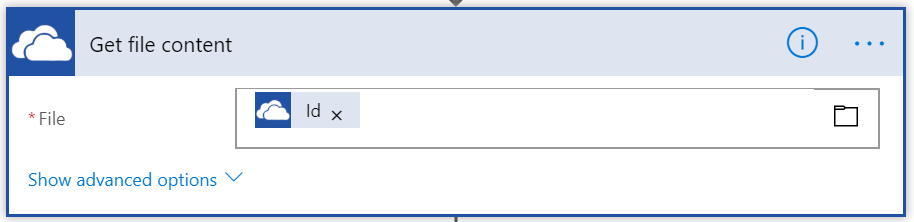
Now add another OneDrive step to ‘Get file content’ and use the Id value from the above OneDrive ‘Create file’ step.
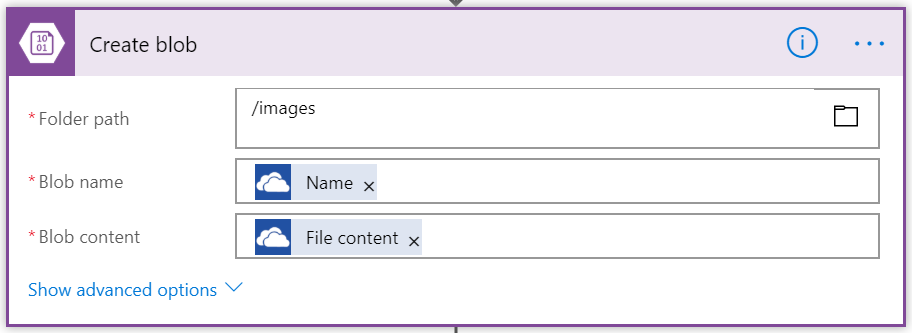
We are now going to use that file to add to Azure Blob Storage. It’s a much cheaper efficient way to store documents than within D365. The action step needed is ‘Create blob’. We need to add the image somewhere online so it’s accessible to display in the portal. Add the path to the folder where you want to store them. Then use the Name from the ‘Create file’ step and File content from the ‘Get file content’ step.
Now we are going to update the Contact record using the Regarding field from the D365 ‘Create a new record’ step.
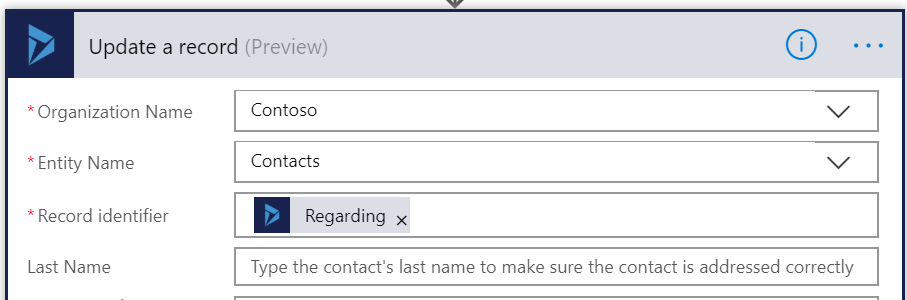
We’ve got two fields to update. The first is the Entity Image field. We are going to use the content from the ‘Get file content’ step but we need to convert the image slightly and use base64ToBinary to do this. You can use the expression below.
base64ToBinary(body('Get_file_content')['$content'])
The second field is the Image URL field you created in Part One. For this, paste in the full path to the folder where you are uploading the images to your Azure Blob Storage, then append with the File Name from your ‘Create a new record’ step. This will give it the full path to your newly uploaded image.

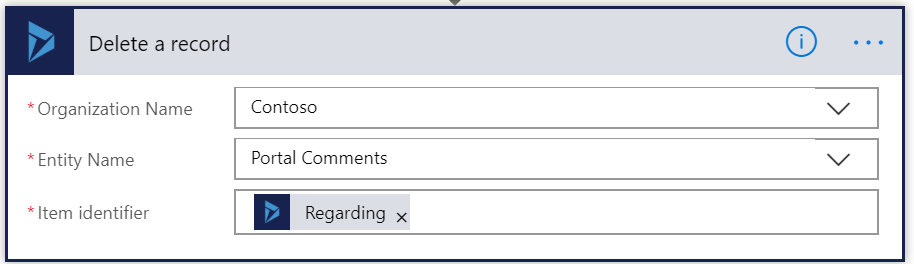
Now lets just clean some things up a bit. Add a delete step to delete the Portal Comment that was created and used as the trigger.
You can also delete the file that was uploaded to OneDrive. Do not delete the file you created in Azure Blob Storage, we need that to be accessible so that it’s displayed in the portal to the user.

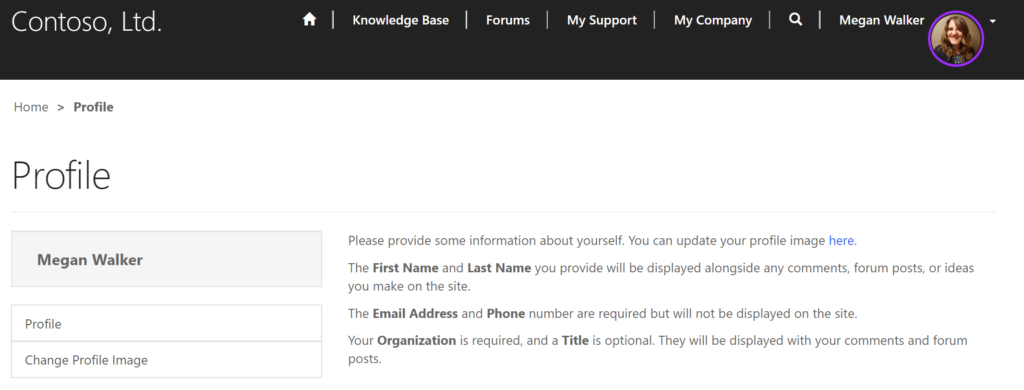
So now we see the image displayed in the portal. Watch Part Nine of the video series at the end of this post if you want to see it in action.
Part Three has rounded this up nicely with adding some javascript and liquid to our header template, creating the Power Automate flow, and doing a walk through of the process in action. If you want to see how to do this, you can watch the videos below covering each section. You can access Part One and Part Two if you’ve missed them.
Check out the latest post:
Use Custom Event Registration Questions To Branch Your Journeys In Customer Insights
This is just 1 of 603 articles. You can browse through all of them by going to the main blog page, or navigate through different categories to find more content you are interested in. You can also subscribe and get new blog posts emailed to you directly.
Hi Megan,
How can I display the contact’s profile image to the portal’s profile image?
Thank you!
Hi Priya, you can’t, which is why I put this together. You can see that in Part One I referenced this limitation: https://meganvwalker.com/adding-portal-profile-photos-using-microsoft-flow-liquid-css-js-part-one/ – this might of course change in the future, but for now, this is only possible with configuration.
Okay Megan, Thank you so much 🙂
Hi Megan,
Thank you for the awesome article. I have followed all the steps but my flow is failed to create a record condition. Any suggestions?